What Is Content Pruning?
Content pruning is the process of removing underperforming or outdated content from your website. So you can improve your search engine optimization (SEO) results to get your best content in front of your target audience.
Content pruning doesn’t always lead to deleting content. Some of your low-traffic pages could have SEO, conversion, or engagement potential.
Which is why this process can be carried out in three ways:
- Refreshing: Improving the quality, accuracy, and/or relevance of a piece of content
- Consolidating: Combining similar or duplicate content into the same page/resource
- Removing: Deleting content that doesn’t qualify for repurposing or consolidation
By identifying and resolving your underperforming pages, you make room for your best content to flourish. And make your website a better place for visitors.
Why Is Content Pruning Helpful?
Content pruning can improve your rankings (positions) in search engines. By helping you identify and update or remove any outdated or inaccurate information on your site.
After all, Google wants to display the most helpful, relevant, and up-to-**** information for users.
Some other content pruning benefits include:
- Better user experience: Providing users with the most up-to-**** and relevant information ensures they have a positive experience on your site. Which could encourage them to return.
- More organic traffic: Pruning content can prevent keyword cannibalization or duplicate content that may decrease your visibility. And that can lead to more traffic from search engines.
- More efficient use of crawl budget: Google will only crawl a limited number of pages from your website before moving on. Which means you want to spend your crawl budget on your highest-quality pages (this is most important for websites with 10,000 pages or more).
Here’s a quick content pruning case study about our own blog showing the benefits.
Over the last few years, we’ve done some pruning that includes a lot of content refreshing. And we’ve seen a substantial increase in organic traffic, which you can see in the Domain Overview tool.
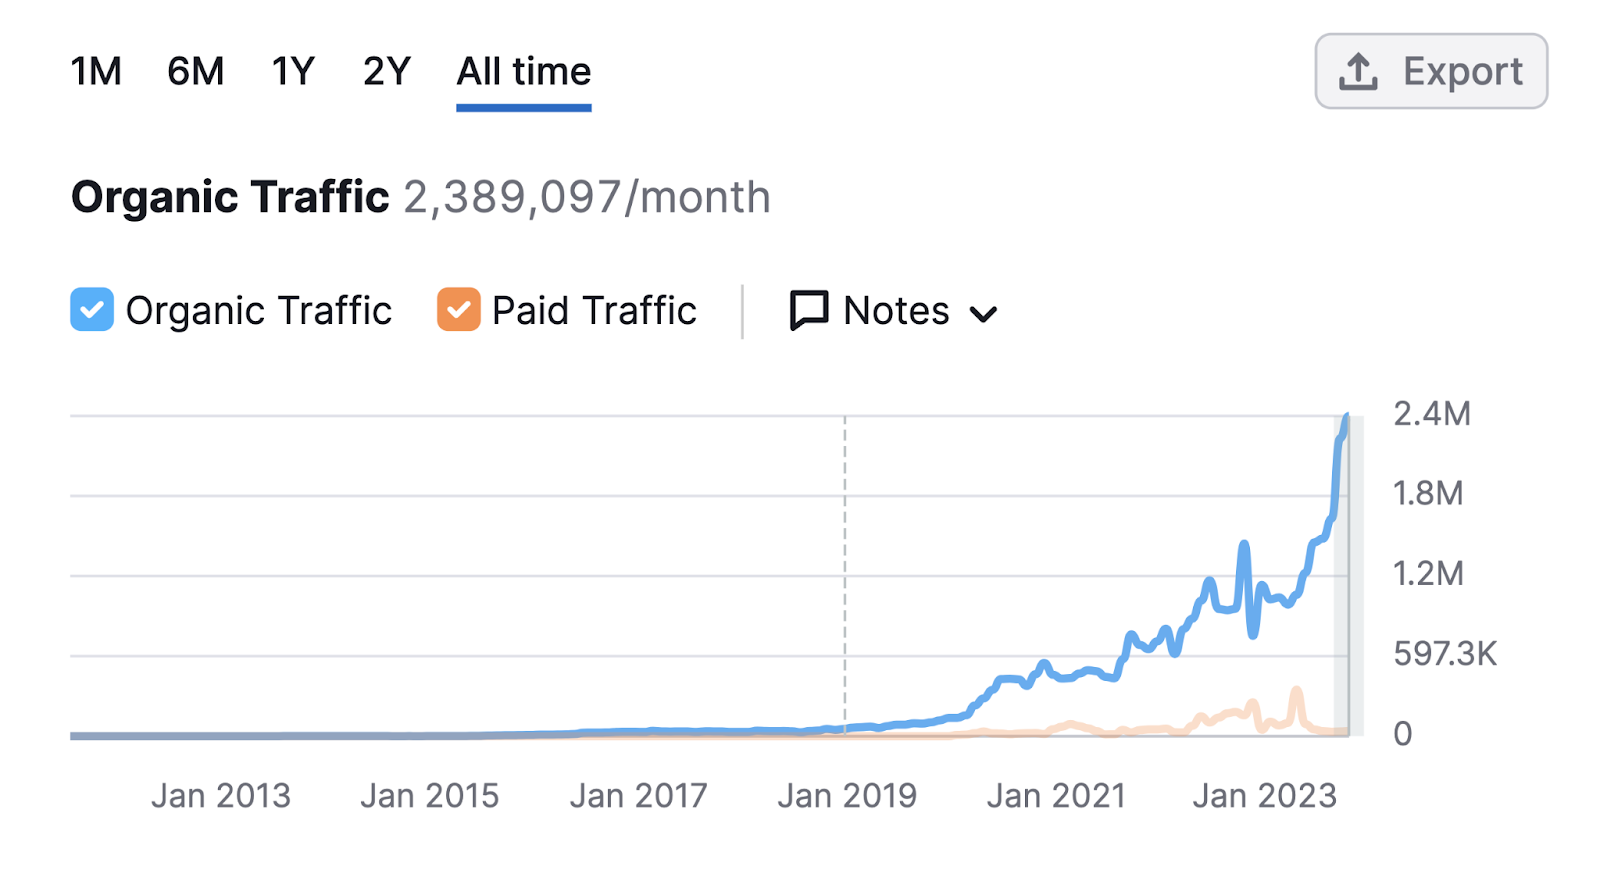
So, content pruning should be a regular part of your website maintenance. No matter your website’s size.
For larger websites (or those that publish content daily or weekly), we recommend identifying content to prune in batches every one to three months. Because it’s unlikely you can resolve all of your low-performing pages at once.
Smaller websites can limit it to once or twice per year.
The 7-Step Content Pruning Process
Content pruning involves gathering and analyzing data from various platforms. So, consider using a spreadsheet to stay organized and make it easier to analyze your pages throughout the process.
And follow these steps:
Step 1: Define the Project Scope
Determine which types of pages you want to take a closer look at. Because auditing your entire site can be a waste of time—especially if most of your content is still new or performing well.
To do this, figure out what your goal is.
If you want your conversion-focused content to rank better on Google, then audit your product pages.
But you first need to get a complete list of your pages. Which you can do when you use Site Audit.
Start by entering your domain name into the tool. Then, click “Start Audit.”

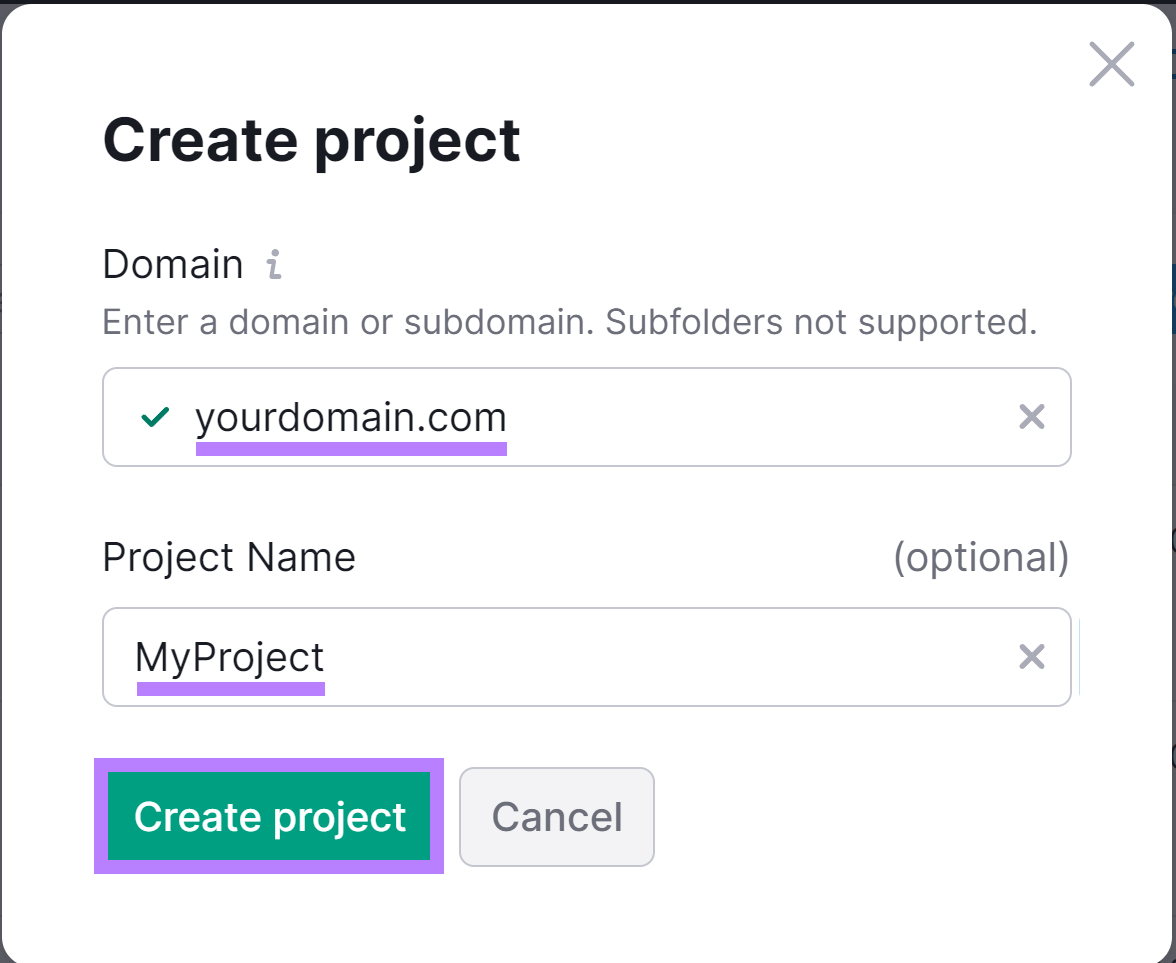
Enter your domain name again and name your project. Then, click “Create project.”
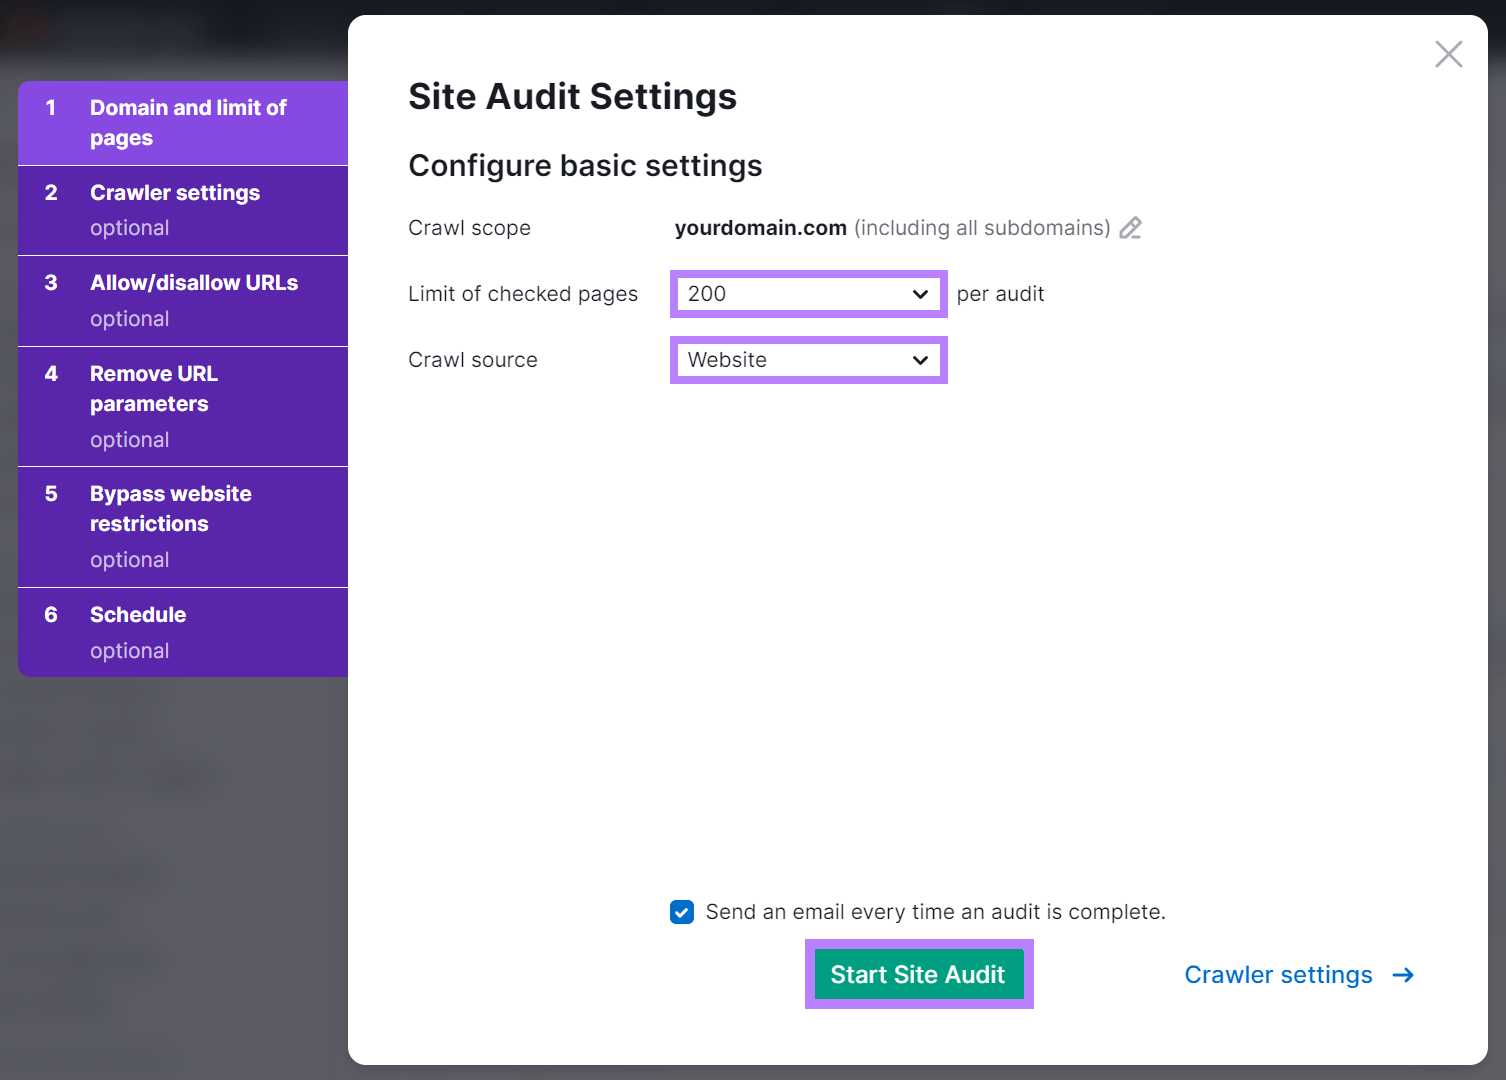
Next, select your audit settings. Including how many pages to crawl.
Let’s say you know your website has 182 pages. You’ll then want to set the limit to 200 to ensure everything is captured.
Make sure to click the checkbox beside “Send an email every time an audit is complete.” Then, click “Start Site Audit.”
The tool will take a few minutes to look through your site. And show you an overview of your site health and performance.
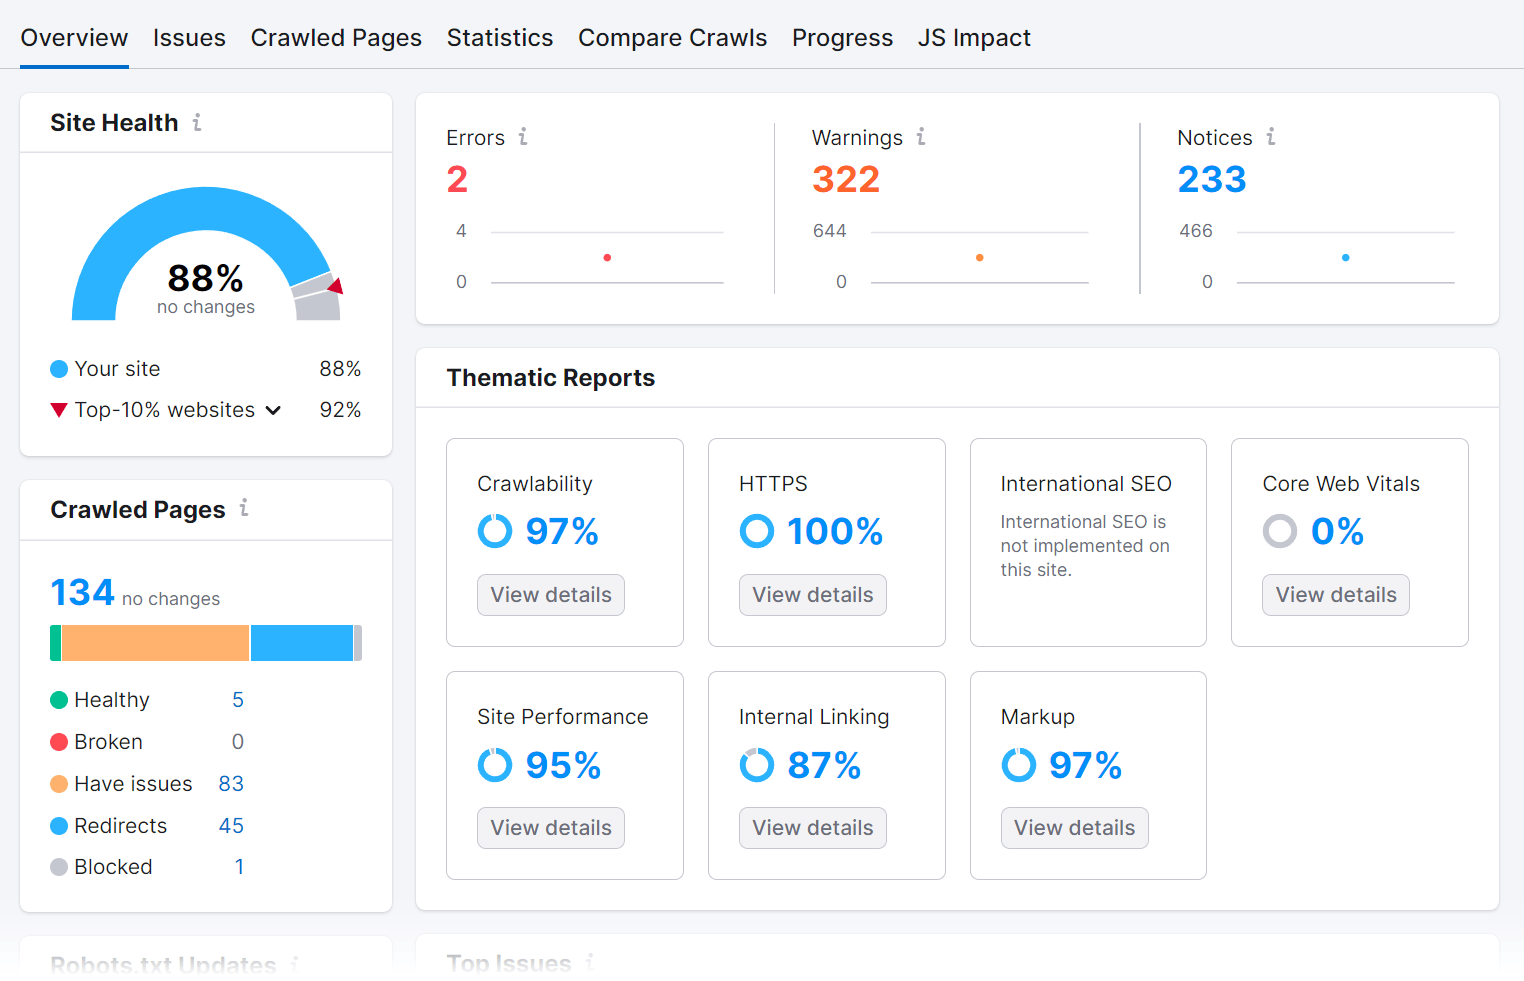
Click the “Crawled Pages” tab to view a list of your pages.
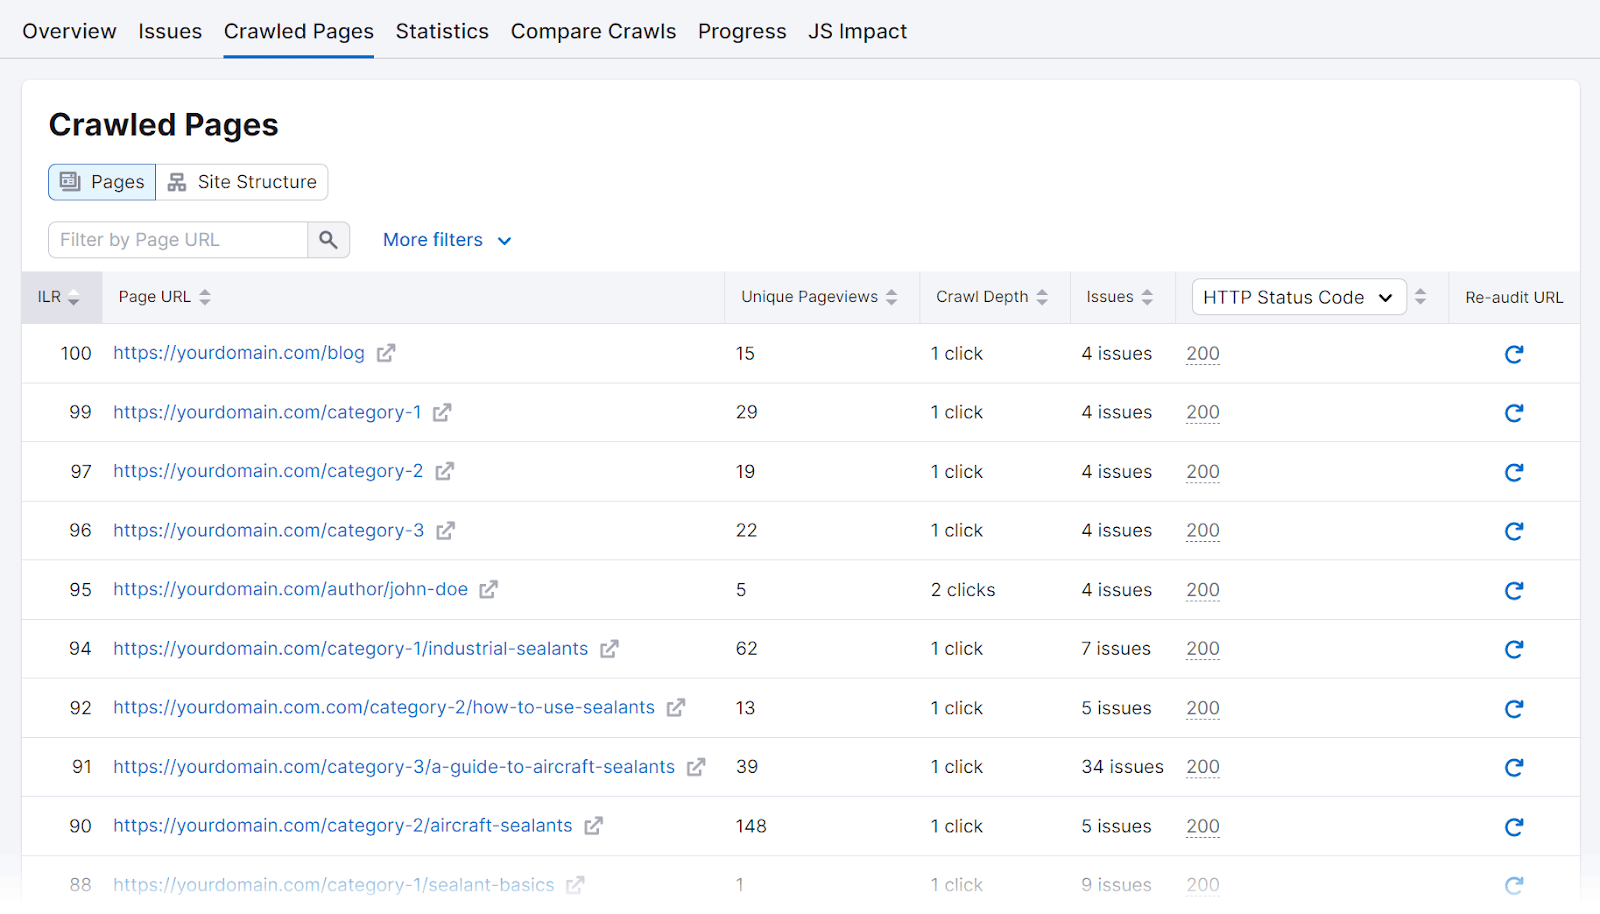
Export this report into a CSV or XLSX file. And then copy and paste all the URLs into the first column in the blank spreadsheet you’re working from.
Now, remove all the pages that you want to ignore. We’re going to focus on product pages, so we’ll remove:
- Essential pages (e.g., homepage, contact page, about page, etc.)
- Blog posts
- Landing pages
- Newly published product pages (they haven’t yet had time to garner reliable performance data)
- Knowledge base pages
- Any other pages that aren’t relevant
Step 2: Identify Low-Performing Content
Next, identify underperforming pages.
Let’s say you want to get at least 1,000 monthly organic visits (visits coming from search engines) to each of your product pages. Meaning your underperforming pages are those that get fewer than 1,000 sessions per month.
To find this information, log in to Google Analytics and select the site you’re evaluating.
Go to “Reports,” select “Acquisition,” and click “Traffic acquisition.” And set the **** range to the last full month.
Now, filter for the first page on your list by adding a “Page path and screen class” filter and pasting in the URL slug.
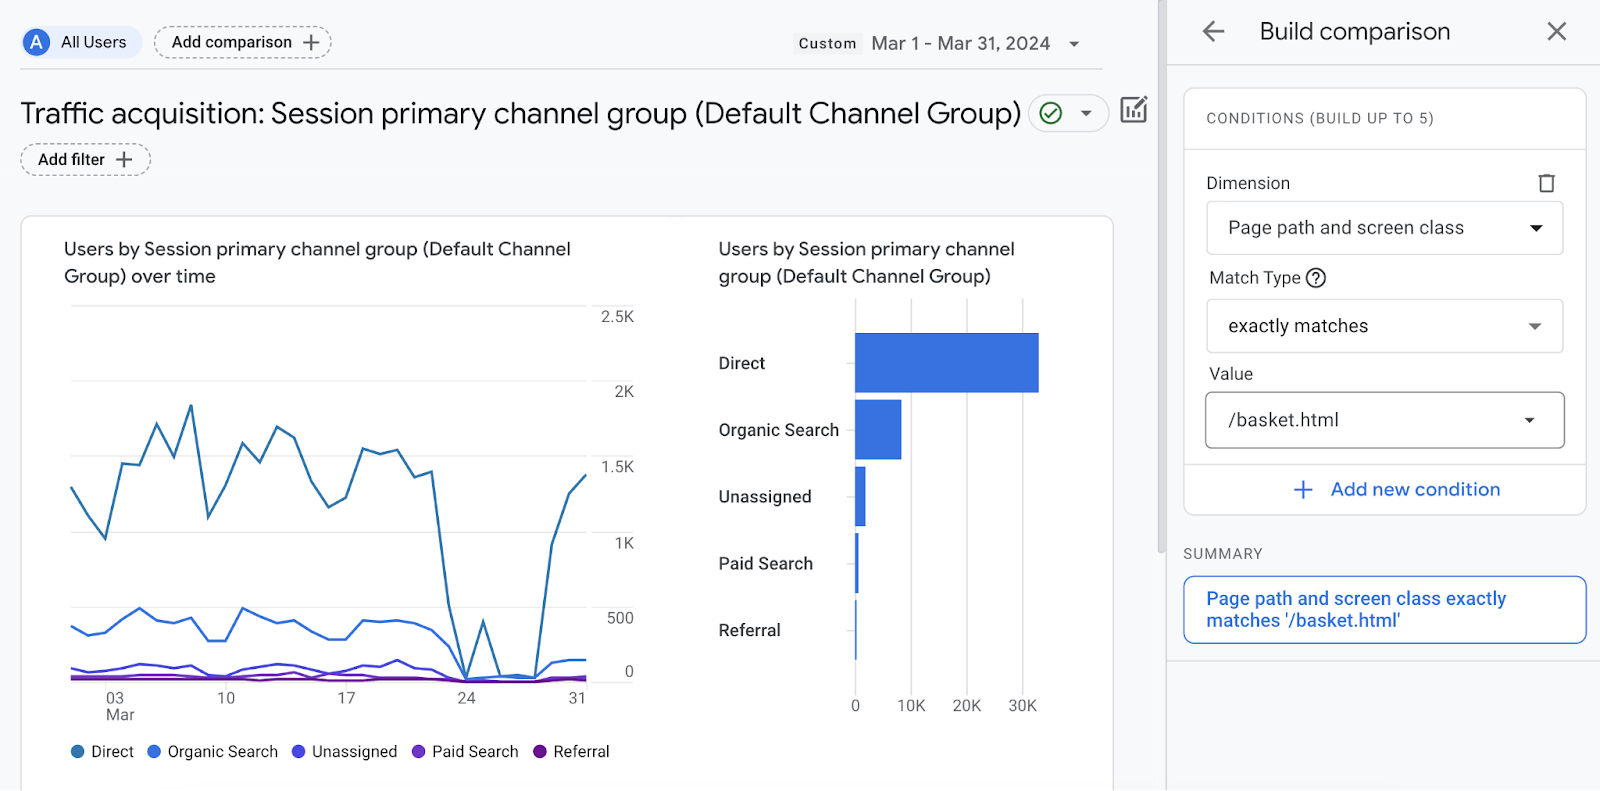
Scroll down to the table to find the number of organic sessions.
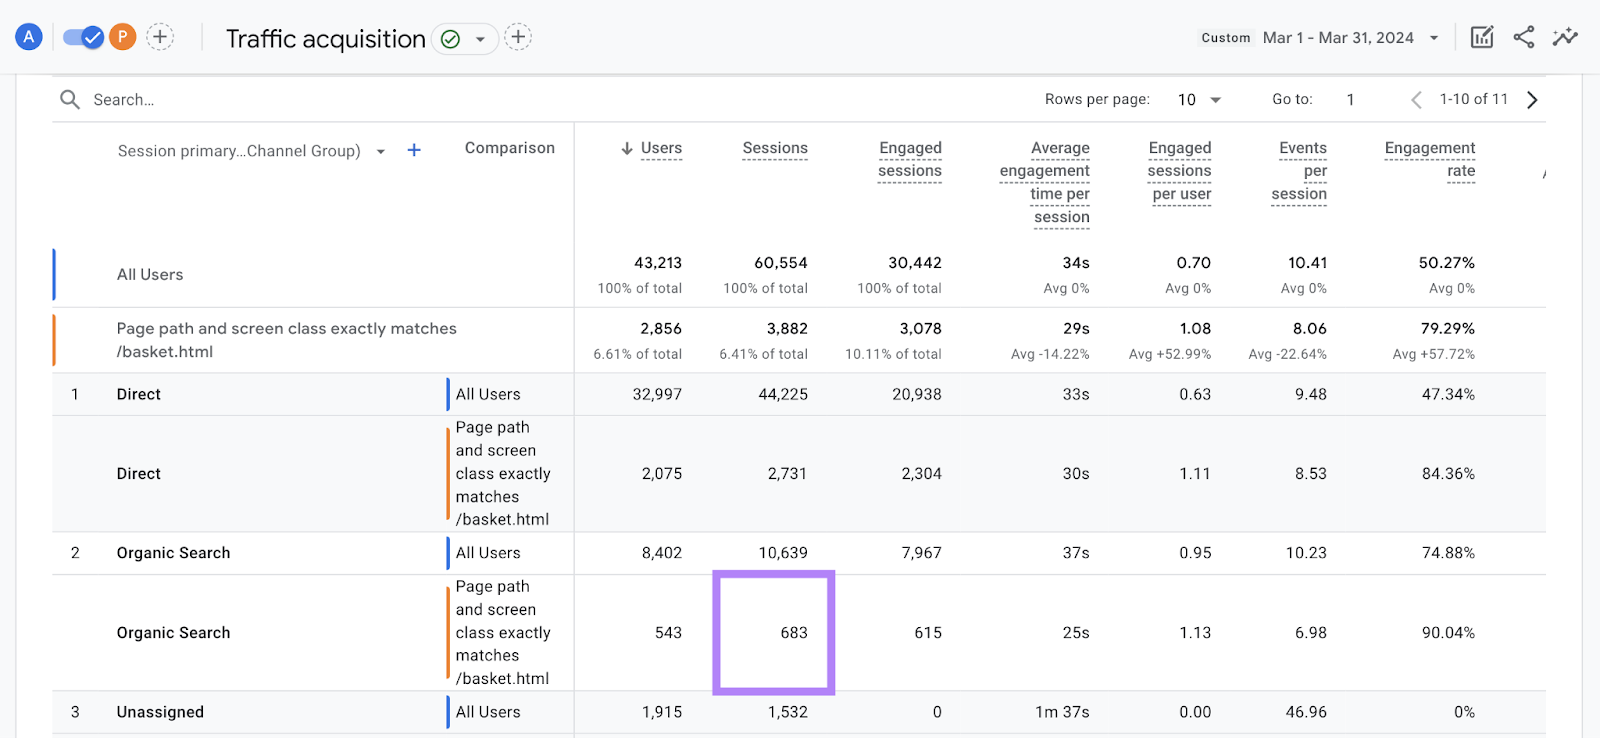
Add a column for organic sessions to your spreadsheet and log this value for the first page. And repeat this process for each page in your list.
You’ll quickly be able to see underperforming pages by spotting those with less than 1,000 sessions.
The specific metric/metrics you use to identify low-performing content will depend on your marketing goals. And can include:
- Keyword rankings
- Number and quality of backlinks
- Conversion rate
- Engagement rate
Step 3: Identify the Issues Affecting Your Pages
Doing a technical audit for your underperforming pages will show you whether there are any technical errors causing the issue. And if not, you know you’ll need to dig a bit deeper.
In your spreadsheet, create a column to list any issues on your pages. Then, go back to your “Crawled Pages” report in Site Audit.
Locate each of your underperforming pages in the table. And click on the page URL to review any identified issues.
Like this:
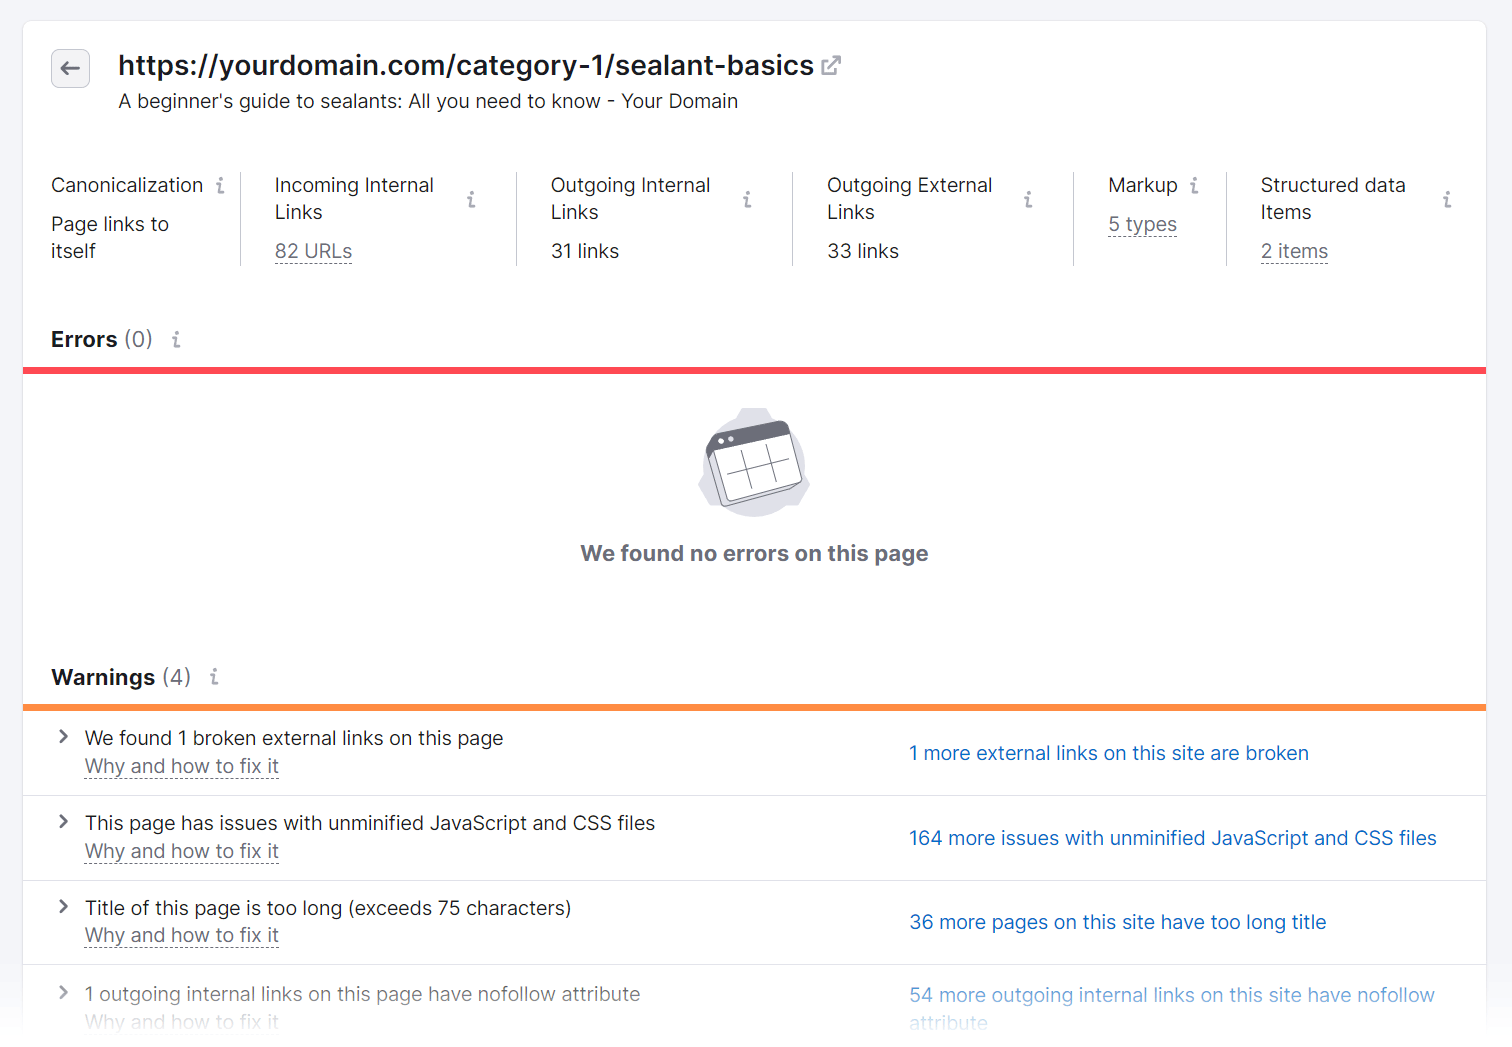
If there are technical issues, indicate that in the row that corresponds to the underperforming page in your spreadsheet.
What if you have underperforming pages without any technical issues?
Review those pages’ content. And consider your audience’s search intent (the reason behind the query) and how your content compares to your competitors.
Then, ask the following questions about your content:
- Does it meet the user’s search intent?
- Does it include the most accurate and up-to-**** information?
- Does it provide a comprehensive overview of the topic?
- Does it read like it was created with humans in mind?
- Does it provide substantial value in comparison to the top-ranking content?
- Does it use proper spelling and grammar?
- Is it unique from other content on my website?
If you answer “no” to any of those questions, indicate that as the issue next to the appropriate underperforming page in your spreadsheet.
Step 4: Review Your Backlink Data
Backlinks help your content rank better. Because Google sees backlinks as a vote of confidence from other websites.
In other words, if authoritative websites trust your content enough to link to it, then Google also sees it as reputable. Which is why you’ll want to know whether your underperforming pages have any backlinks before pruning them.
First, add a “Backlinks” column to your spreadsheet. And find out how many backlinks each of your pages has.
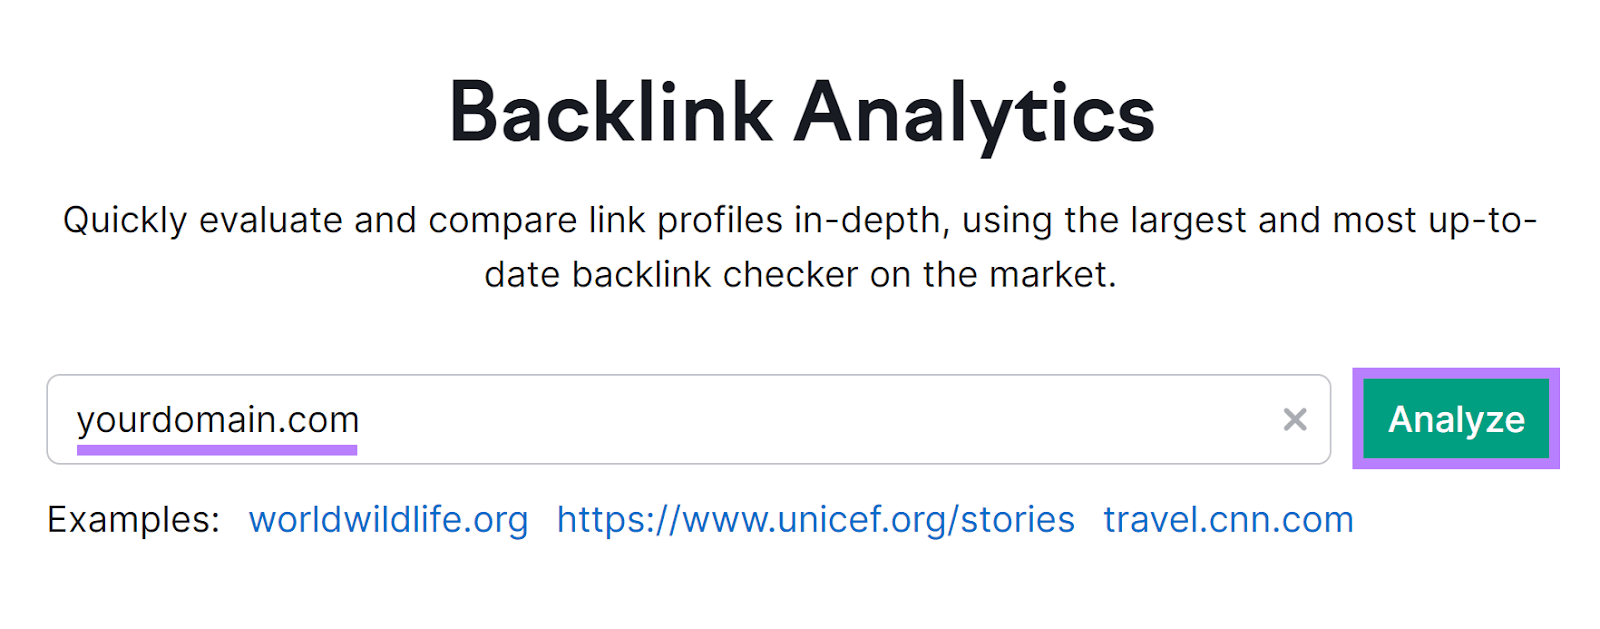
To do that, use Backlink Analytics.
Enter your domain name into the text box. Then, click “Analyze.”
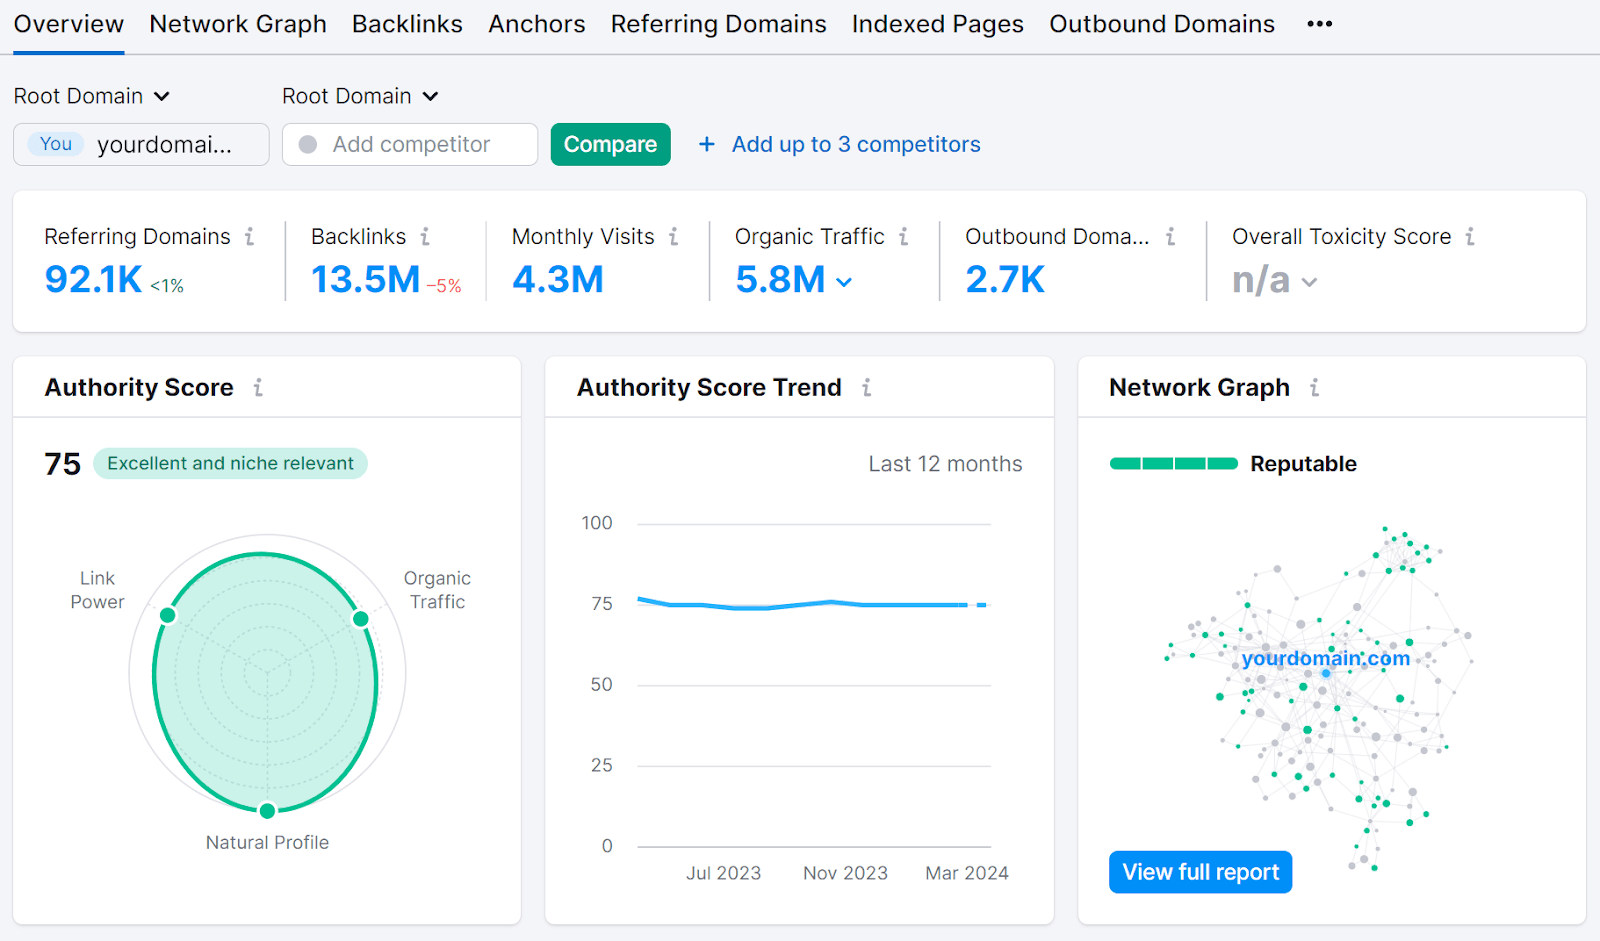
The tool will show you an overview of your backlink profile. Including information like how many websites link to your pages (i.e., referring domains), how many backlinks you have, and your Authority Score (a metric out of 100 indicating your site’s overall quality).
Next, go to the “Indexed Pages” tab to see a list of your pages. And how many backlinks each page has.
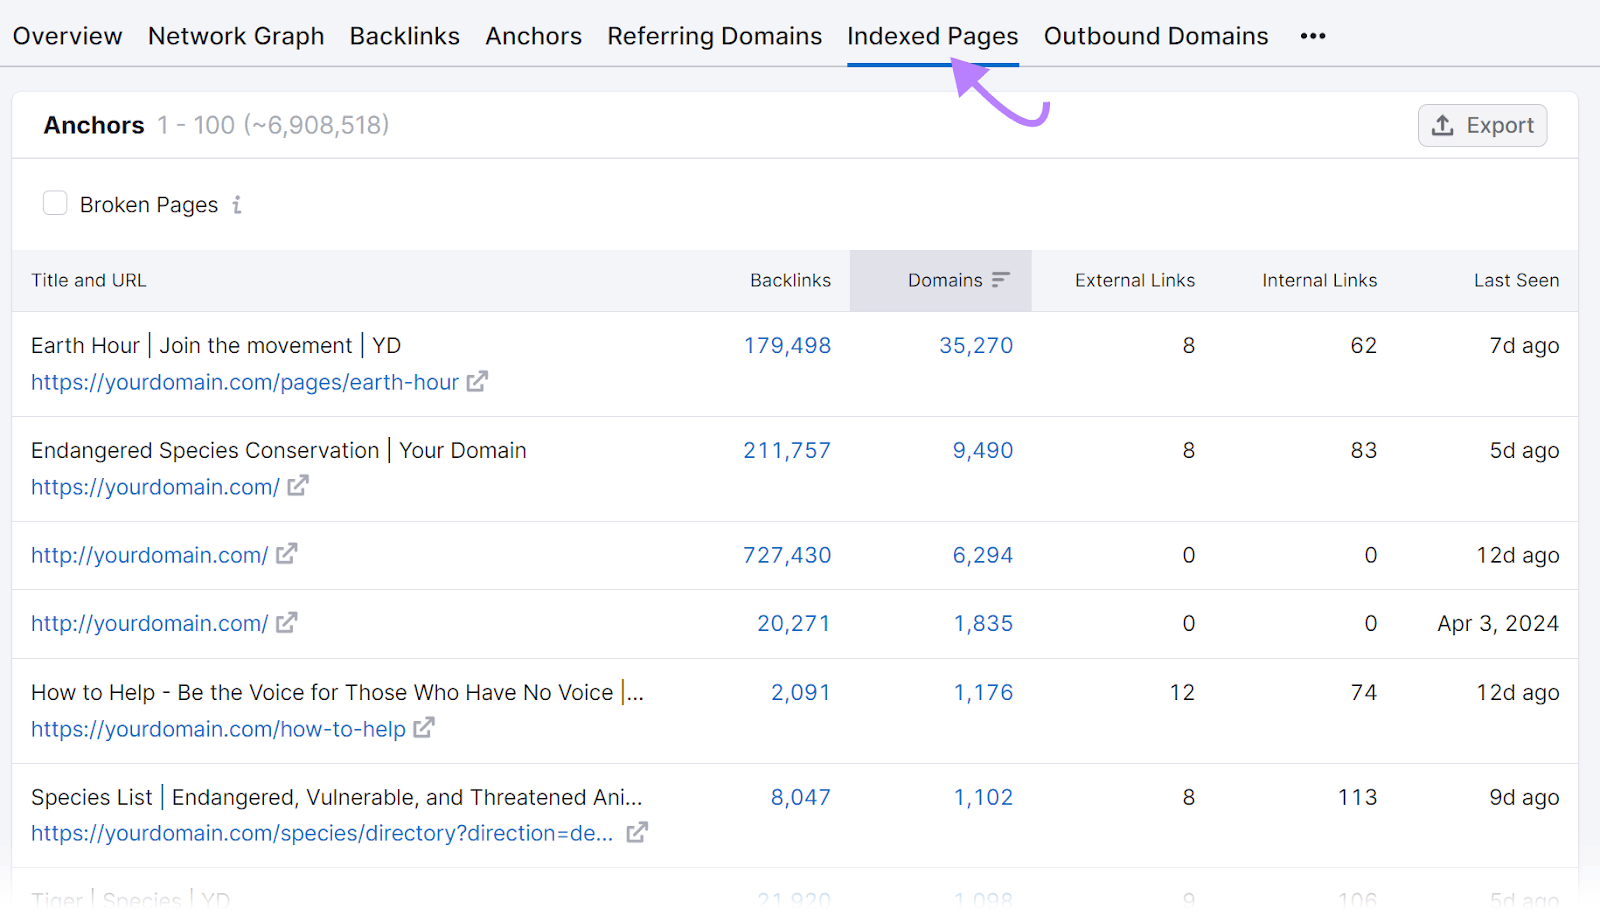
Now, look through the indexed pages for the pages on your tracking sheet. And fill out the “Backlinks” column with how many backlinks each page has.
If there are underperforming pages on your list that have a large number of backlinks, don’t prune them. Because pruning a page with lots of backlinks can negatively impact your website’s overall SEO performance.
Also, take note of pages with fewer backlinks. Because you may want to build links to those pages if you decide to keep them.
Step 5: Label Your Content
Now that you’ve gathered data, you need to organize your content. We suggest using labels that will tell you why the content is underperforming.
Add another column to your spreadsheet labeled “Problem.”
And use a logical label that summarizes the problem for each underperforming URL (you can leave it blank for pages that are performing well). Here are some examples:
- Technical issue: Pages with technical issues flagged in your site audit
- Outdated: Pages with inaccurate or outdated information
- Thin content: Low-quality pages that don’t explore a topic comprehensively
- Intent mismatch: Pages that don’t address what searchers are looking for
- Duplicate content: Pages that are exactly the same or similar to another page (you’ll find duplicate content when looking for technical issues, but it’s worth singling out in the spreadsheet)
- Needs backlinks: Pages with no backlinks or low link power
Some pages might need multiple tags. Depending on what issues you discover.
Clearly labeling your pages will help you determine the next steps for each page. So you can make strategic decisions about whether to prune them.
Step 6: Determine Next Steps
Content pruning can be performed byrefreshing, consolidating, or removing content. And you should assign one of these pruning actions to each underperforming page.
Create one last column in your spreadsheet to note the next step.
Now, let’s go over what each one entails:
Refreshing
Refreshing content involves updating your content to improve its quality, accuracy, and/or relevance.
Any pages labeled as “Intent mismatch,” “Outdated,” “Thin content,” or “Technical issue,” may be good candidates for refreshing.
To refresh these pages, do any of the following:
- Expand on thin content to make a page more helpful and comprehensive
- Replace outdated information with the most up-to-**** information
- Rewrite content to help it address search intent
- Link out to new research, case studies, or statistics
- Resolve any on-page or technical issues identified in Site Audit
- Target a more relevant or less competitive keyword
Refreshing allows you to get more out of content that you’ve already created. And can revitalize content performance in organic search.
And if your outdated content has backlinks, refreshing lets you maintain all that hard-earned link power.
Consolidating
Consolidating content involves using 301 redirects to combine similar content on your site. So you can send users (and search engine bots) to the highest-quality version of a page.
For example, the website below has two similar pages. One is performing well. The other isn’t.

To consolidate, add a 301 redirect from the second page to the first page. Then, refresh the first page (if needed) to include any key information from the second page.
Pages labeled “Duplicate content” are the best candidates for consolidation. So, identify the best version of the page and redirect the lower-quality versions of the page(s) to it.
Consolidating pages is great for when you want to remove content but you don’t want to lose the content’s link power. Because 301 redirects generally transfer link equity to the target page.
Removing
Removing content is the last option for content pruning. It prevents your audience from seeing outdated information and makes room for new pages in your crawl budget.
Pages in your spreadsheet that are labeled as “Outdated” may be good candidates for removal if they can’t be refreshed for accuracy or are no longer relevant to your audience.
But removing pages can also have negative effects. So, take note of the following before proceeding:
- Deleted pages lead to 404 error pages. If you have another resource related to the page you want to get rid of, consider using a 301 redirect instead of deleting the page.
- If you have internal links to the deleted page, you will have broken links on your website. Make sure to repair them.
- Google removes 404 pages from its index. If those pages were getting organic traffic, you’ll lose it.
Step 7: Release Changes in Stages
Content pruning should be performed incrementally and in stages. To avoid getting overwhelmed and so you can track progress as you go.
You might want to repurpose a few underperforming pages and then measure the impact in a few months.
If you see positive results in your performance metrics, move forward with other pages and deploy similar improvements.
Improve Your SEO Performance with Content Pruning
The more content on your website, the more important content pruning is to its health.
And if you have a team of marketers, developers, and content writers making changes to your website content, establishing a content pruning process is worth the effort.
It can help you avoid overlooking content that isn’t up to your standards.
Get started with Site Audit to generate a list of pages and check for technical and on-page SEO issues.
This post was updated in 2024. Excerpts from the original article by Kevin Indig may remain.
Source link : Semrush.com
