Are you looking for ways to fix the WordPress Memory Exhausted error on your WordPress site?
If you use a lot of multimedia in your WordPress site or it has huge scripts, you may encounter the following error messages when adding a new file to your WordPress site:
- Fatal error: Allowed memory size of X bytes exhausted (tried to allocate x bytes) in /path/to/script
- PHP Fatal error: Out of memory (allocated X) (tried to allocate Y bytes) in /path/to/script
The error means that your WordPress website needs additional PHP memory to execute the PHP scripts it requires to function effectively.
In this post, we’ll show you how to fix the error, why it occurs, and how to increase your website’s memory limit for better performance of your site.
1 Understanding the WordPress Memory Exhausted Error
The WordPress memory exhausted error, also known as the PHP memory limit error, occurs when your WordPress site has exceeded the PHP memory limit assigned by your server administrator.
WordPress is written in the PHP programming language. Hypertext Preprocessor (PHP) is a server-side scripting language.
When you purchase a hosting plan, your web host allocates a specified amount of server memory, which each PHP script can utilize. This prevents ineffectively written scripts from using much of the available memory space on the server.
Nevertheless, your script size increases if you add more functionality to your WordPress site. This means your site will require more memory to function correctly.
When you try to add a file to your WordPress site, say a plugin, and you don’t have enough memory, WordPress will display the PHP memory limit error informing you that you need to add more memory for the script to run.
Now that you understand what causes the WordPress memory exhausted error, let’s first learn how to check a WordPress PHP memory limit.
2 How to Check Your WordPress PHP Memory Limit
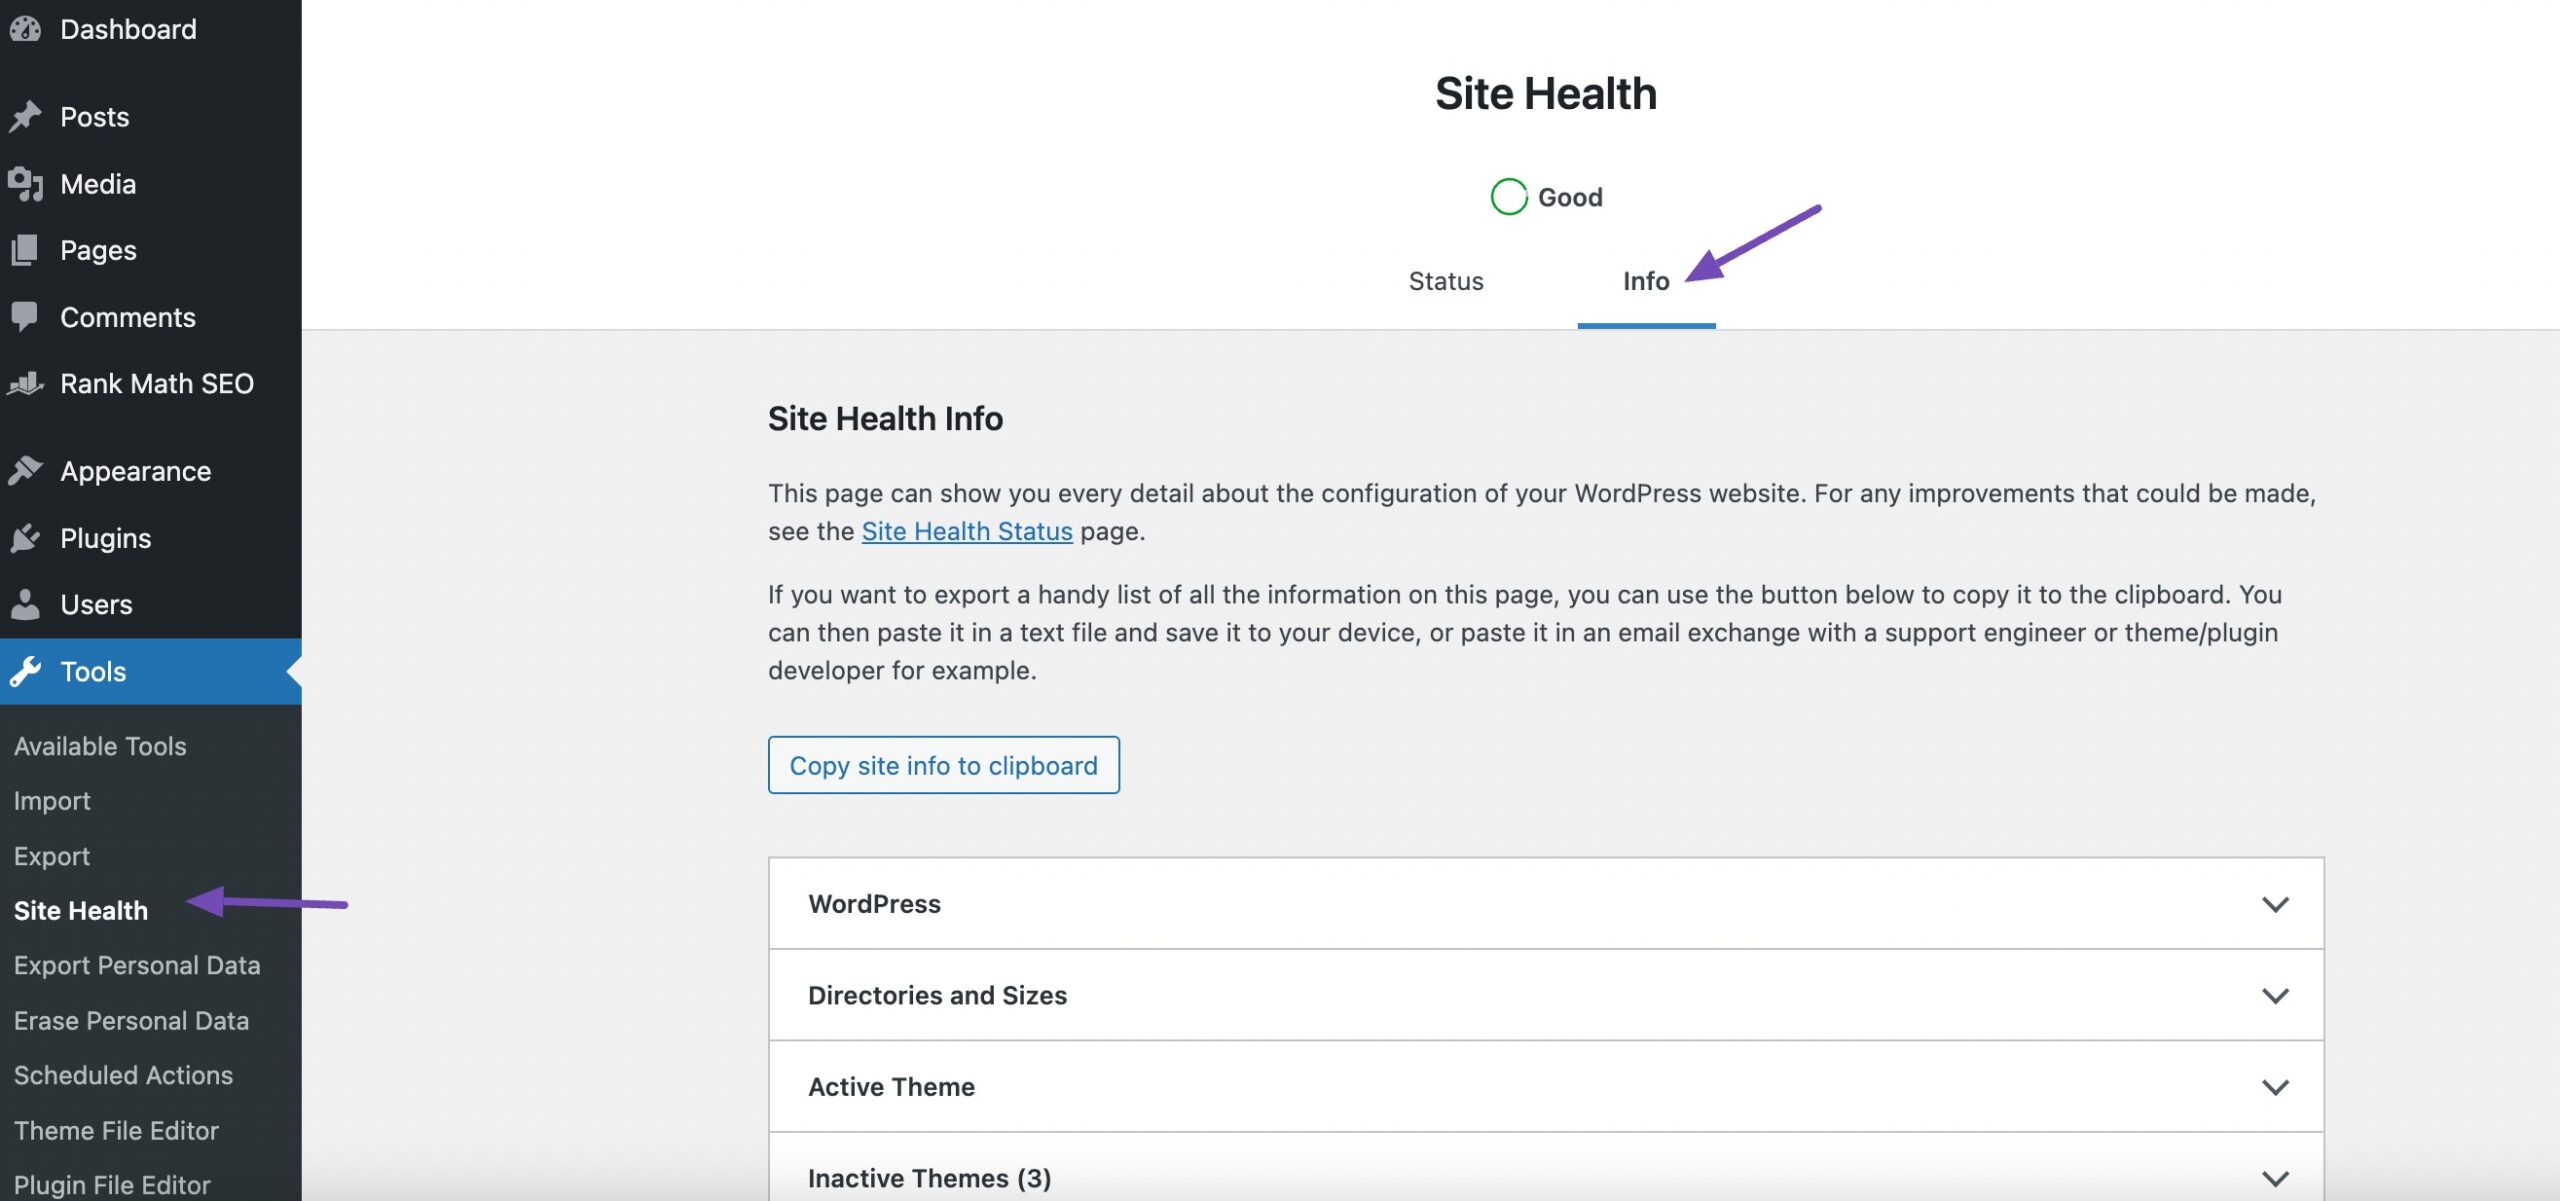
To check your WordPress site’s PHP memory limit, navigate to Tools → Site Health → Info from your WordPress dashboard.
Scroll down, navigate to the Server option, and find the PHP memory limit entry.
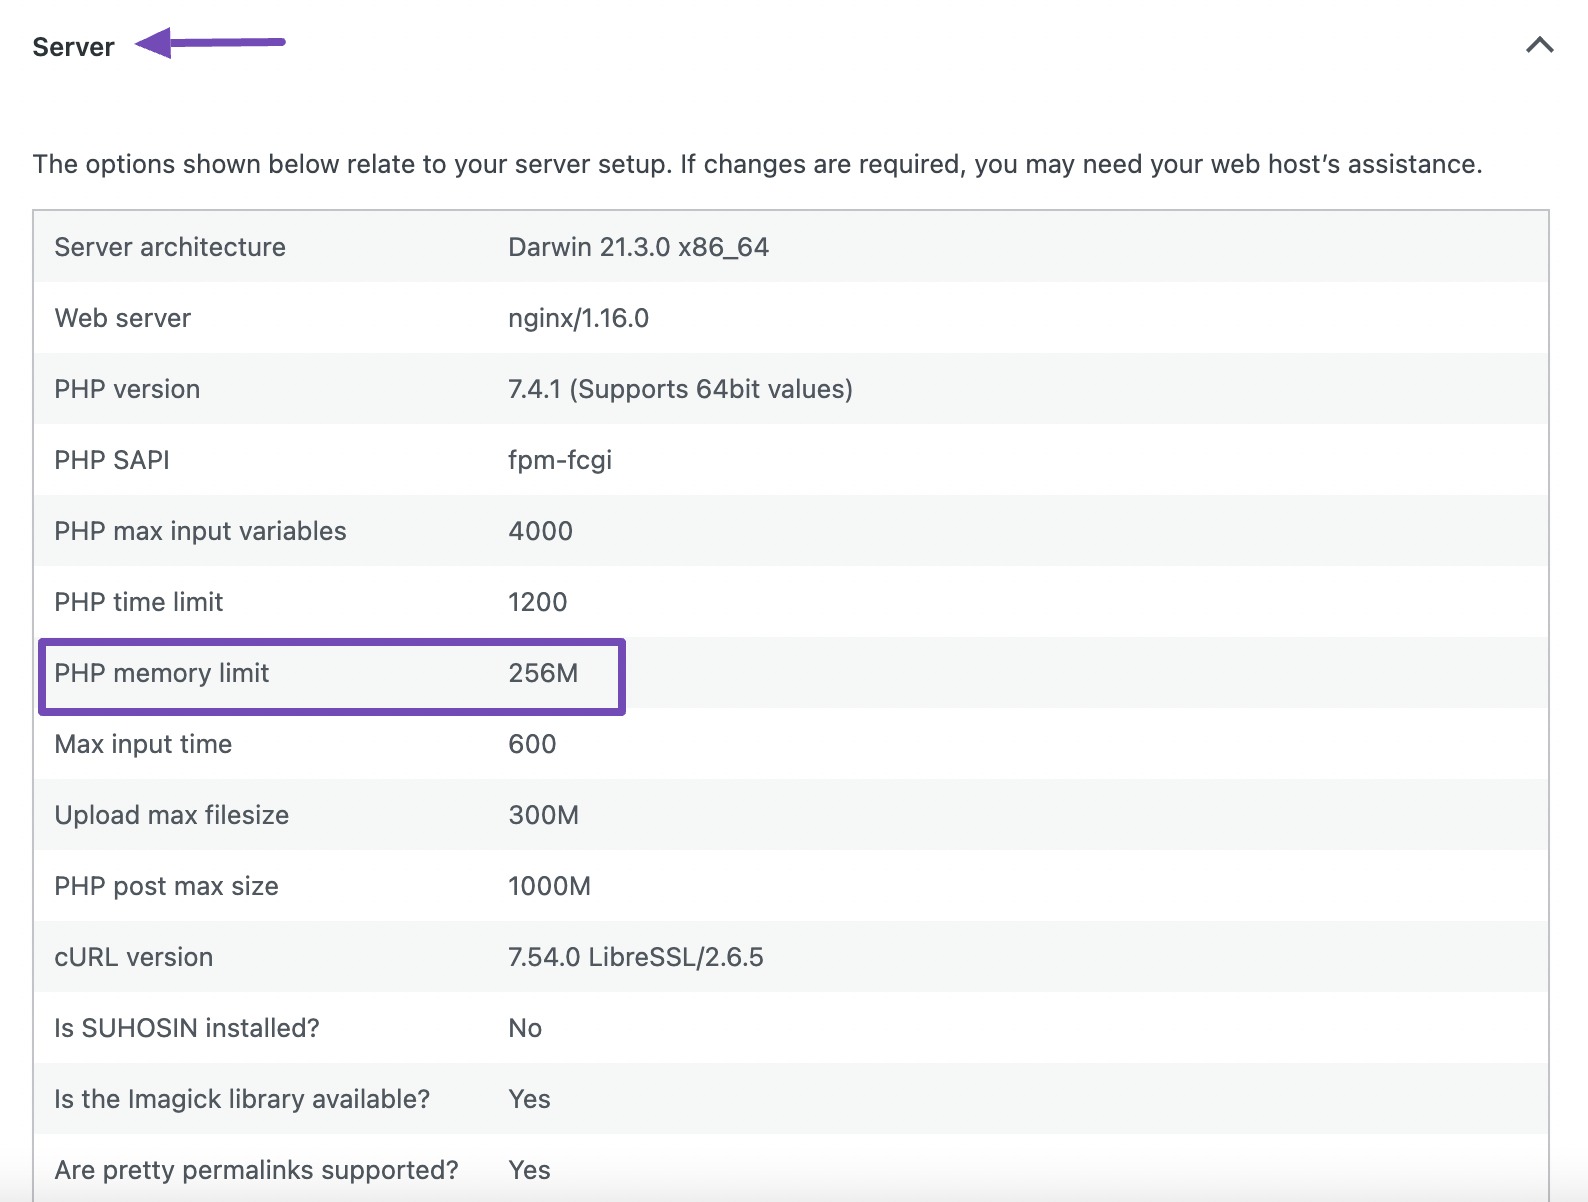
If the amount is low, there’s ultimately only one fix for this issue: you need to increase the amount of memory allocated to your site. Let us now see how you can fix this.
3 How to Fix the WordPress Memory Exhausted Error
The WordPress memory exhausted error can be intimidating, especially to new WordPress users.
That’s because WordPress doesn’t offer any information on how to fix it. Fortunately, the PHP memory limit error is one of the easiest to fix. This section will walk you through how to fix the WordPress memory exhausted error using three different methods. Let’s dive in.
3.1 Edit Your Site’s wp-config.php File
The wp-config.php file is a WordPress core file containing base configuration details for your WordPress website. It includes your WordPress site’s MySQL database settings, ABSPATH, and database table prefixes.
To fix the WordPress memory exhausted error, you need to edit your site’s wp-config.php file and increase your site’s memory limit. You can access the file by connecting to your server using an FTP client like FileZilla or via the cPanel.
We’ll show you both the ways and troubleshoot this error.
3.1.1 Using FileZilla
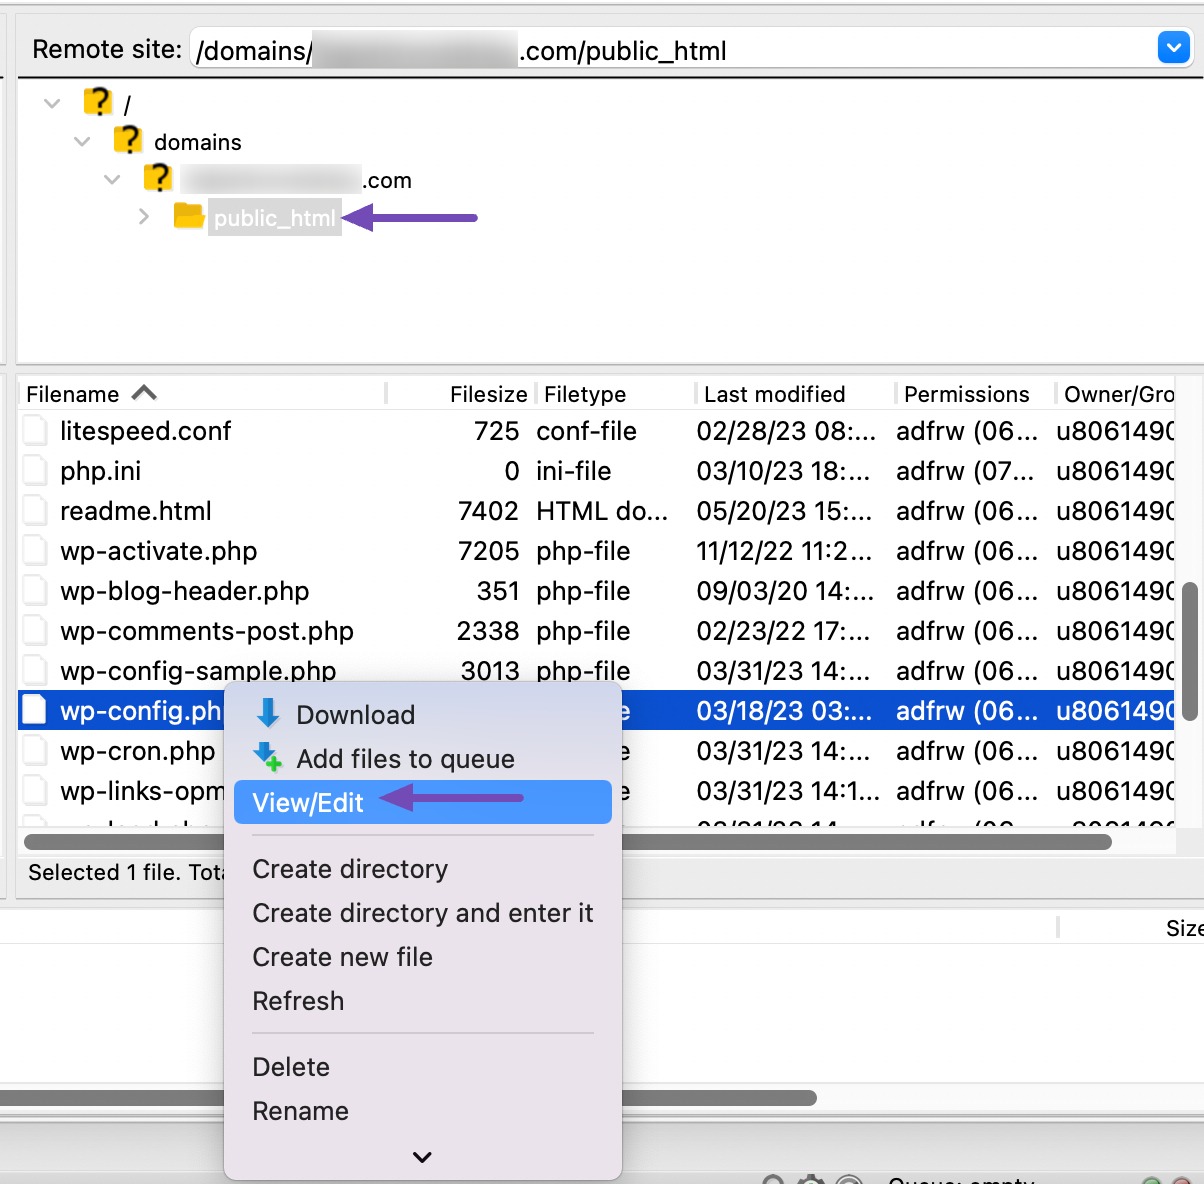
You can edit the wp-config.php file using FileZilla. To do so, connect to your website using FTP and edit the wp-config.php file. You can locate this file under the public_html folder.
Note: wp-config.php file stores critical information about your website. We recommend taking a backup before making any changes to the file.
Once you have the backup of the file, right-click on the file and click the View/Edit option to edit the file. Now locate the following line of code:
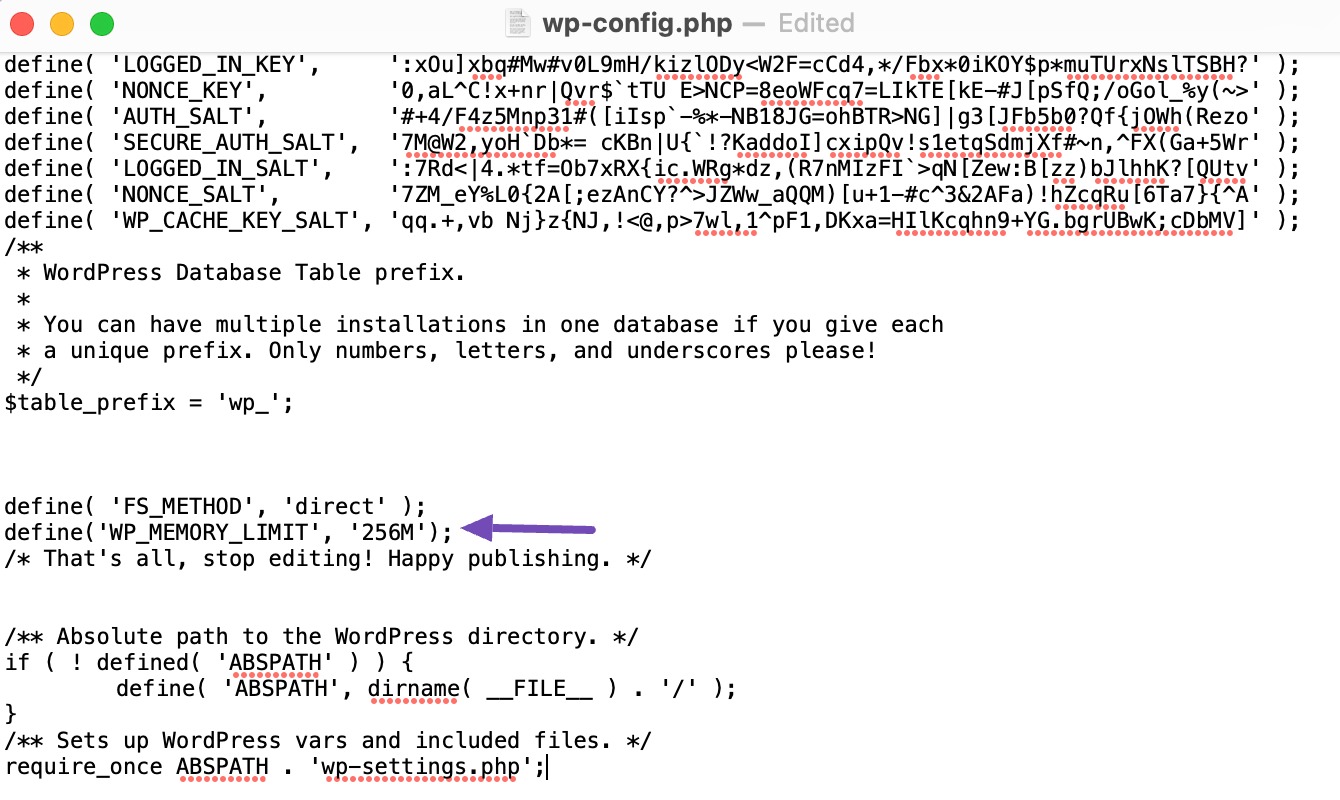
define('WP_MEMORY_LIMIT', '256M');Please note that the memory size will differ depending on the memory limit that your hosting provider has allocated. You may also not find this line at all.
If you’re able to locate the line, go ahead and increase the number it contains. In most cases, 256 MB should be sufficient. If you don’t find the line, you can paste it before the part of the file reading: “That’s all, stop editing! Happy blogging.”
3.1.2 Using cPanel
If your host provider uses cPanel, you can easily access your site’s wp-config.php file and increase your PHP memory limit.
To do so, log in to your cPanel account and navigate to Files → File Manager. Locate the public_html folder and search for the wp-config.php file.
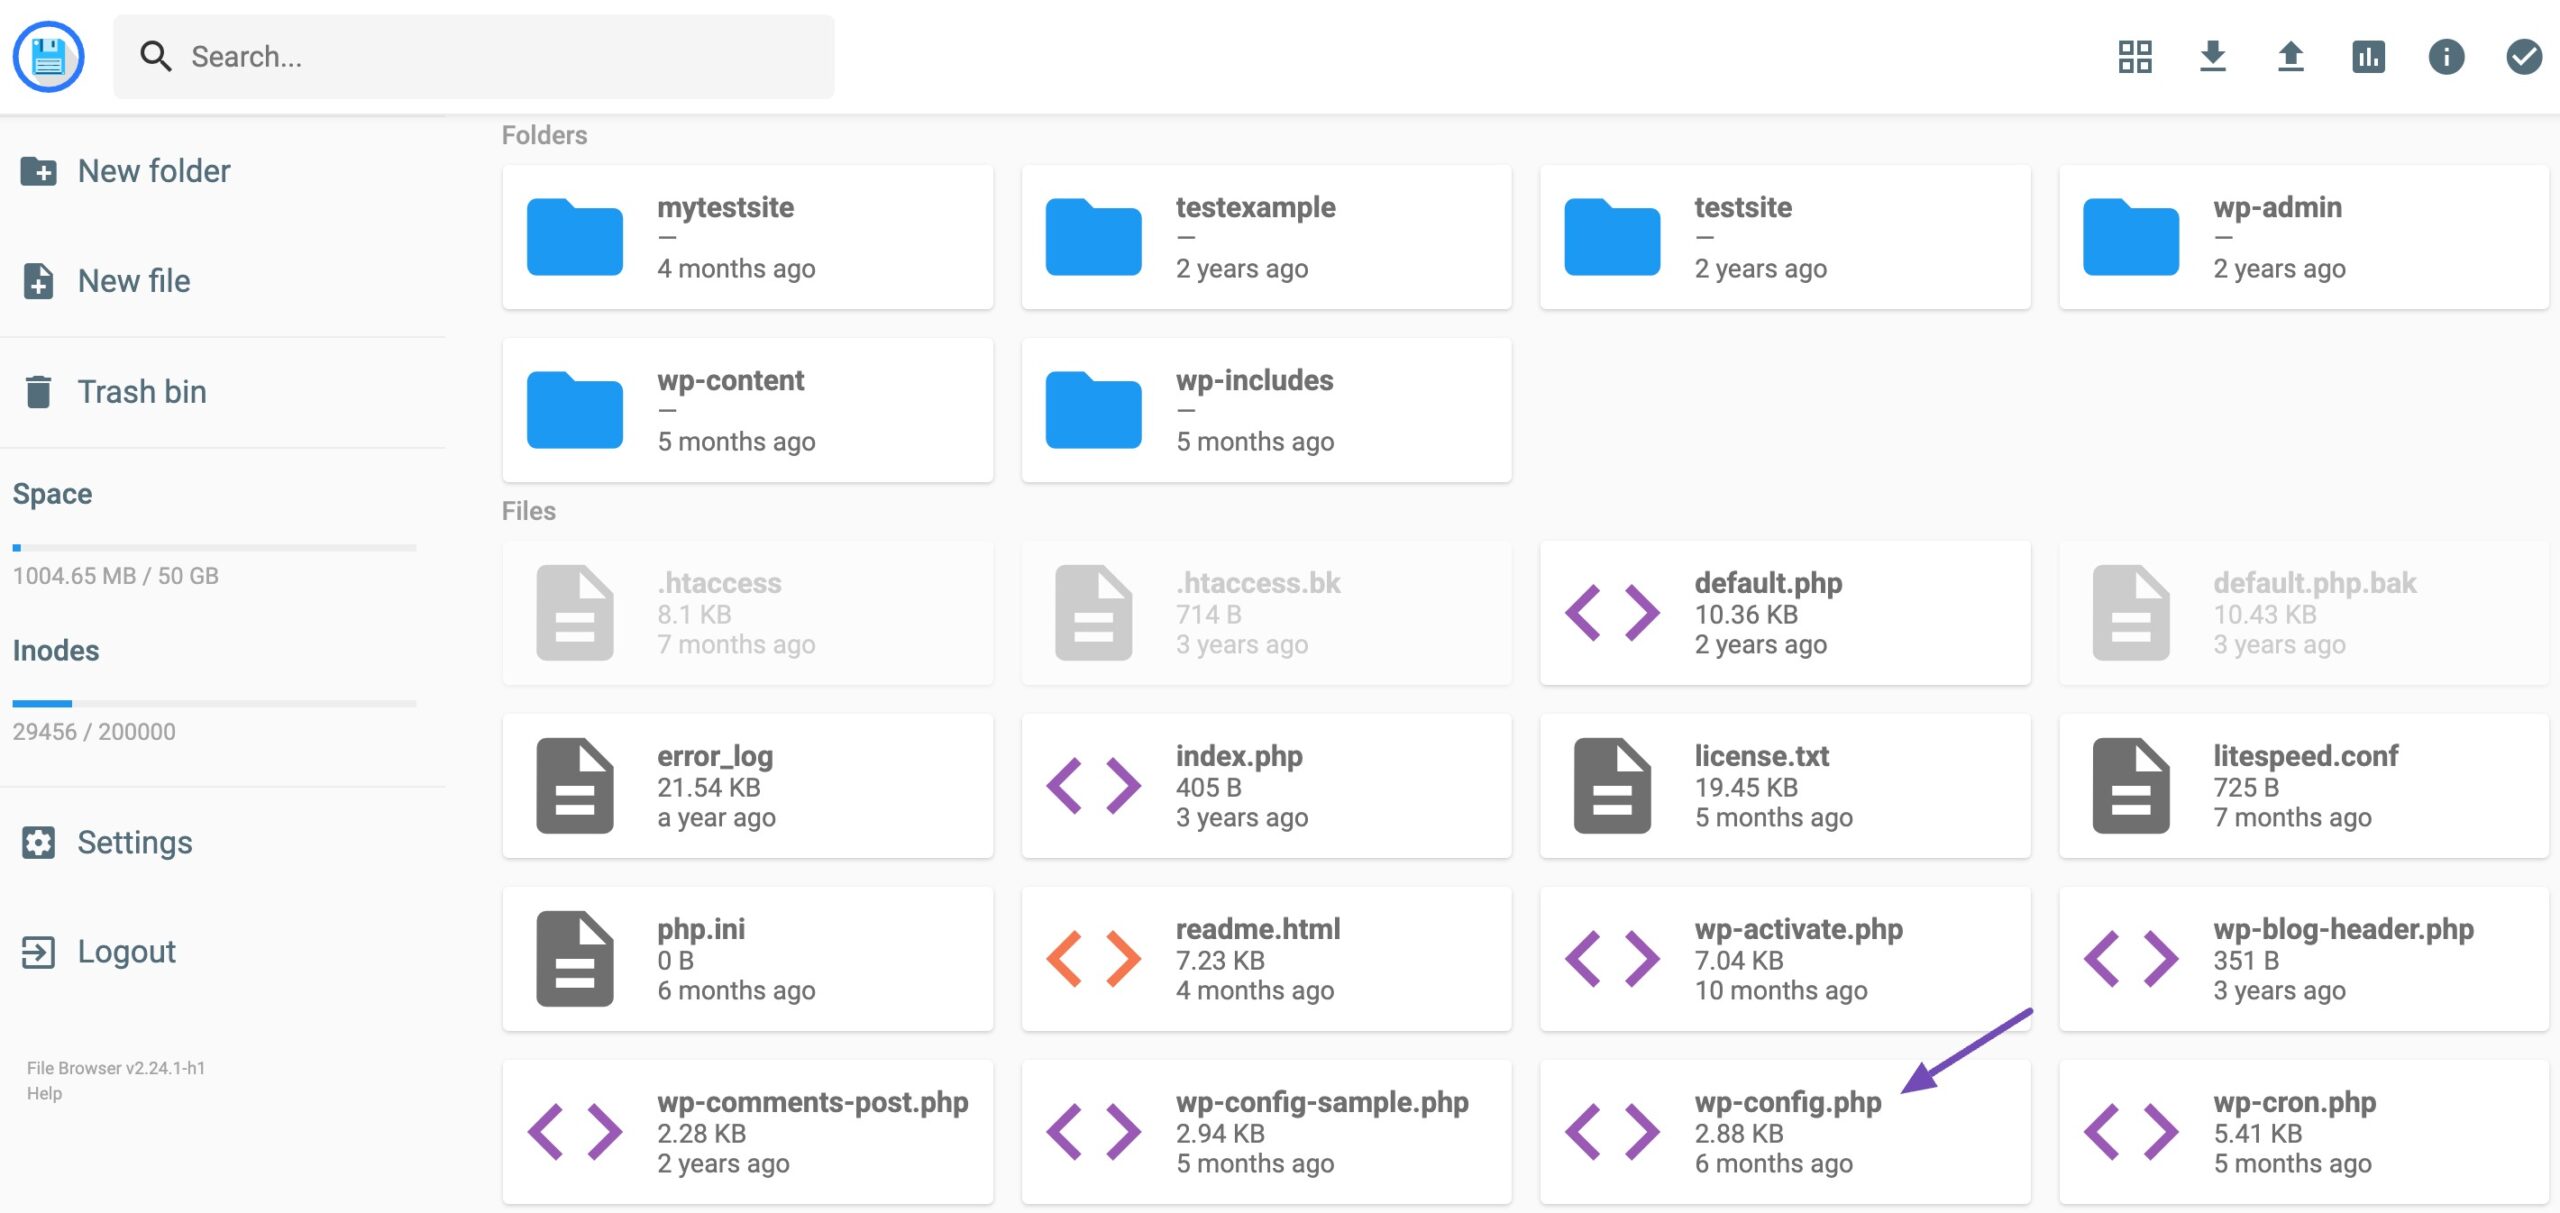
Right-click and edit the file. Now search for the define( ‘WP_MEMORY_LIMIT’, ’64M’ ) line of code. Again, if you can’t find the line code, add it to your wp-config.php file before the “That’s all, stop editing! Happy publishing.” line, as shown previously.
Increase the value of the PHP memory limit to 245M or 512M. Once done, click on the Save Changes button.
3.2 Modify Your Server Settings via php.ini
The php.ini file is a plain-text configuration file with directives that define how PHP should behave, including settings related to memory usage, file uploads, error handling, and more.
If the above method doesn’t fix the error, you can edit your php.ini file and increase your memory limit via cPanel.
Follow the below steps to fix the WordPress memory limit error by modifying your php.ini file.
Firstly, locate the php.ini file. In most cases, you’ll find the file in the root directory of your website, labeled public_html. If the file does not exist, you can create a blank php.ini file using a plain text editor like notepad, add the below code snippet, and upload it to your website.
memory_limit=256M3.3 Edit Your .htaccess File
Access your .htaccess file via cPanel by navigating to Files → File Manager → public_html. Next, locate the .htaccess file. Right-click on the file and then click on the Edit option.
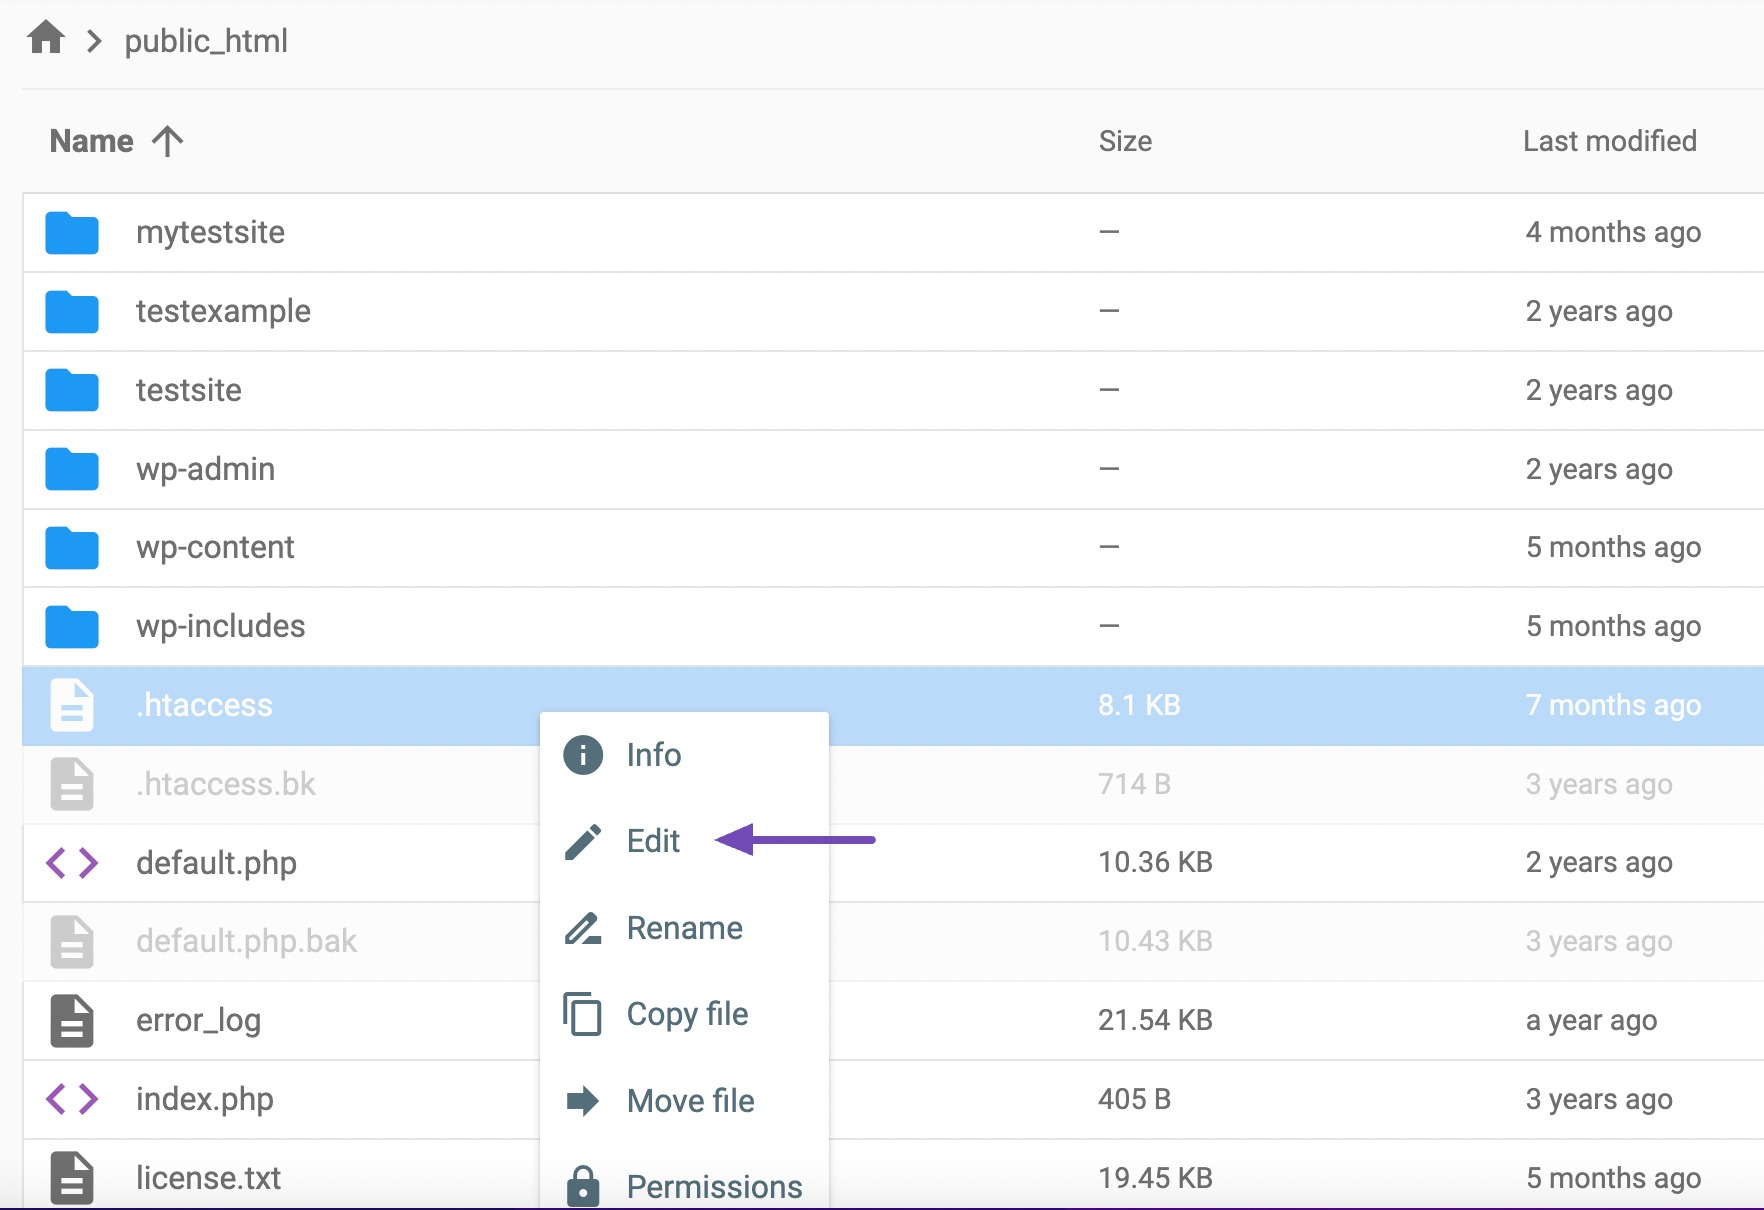
Now add the following code after the # End WordPress line.
php_value memory_limit 256M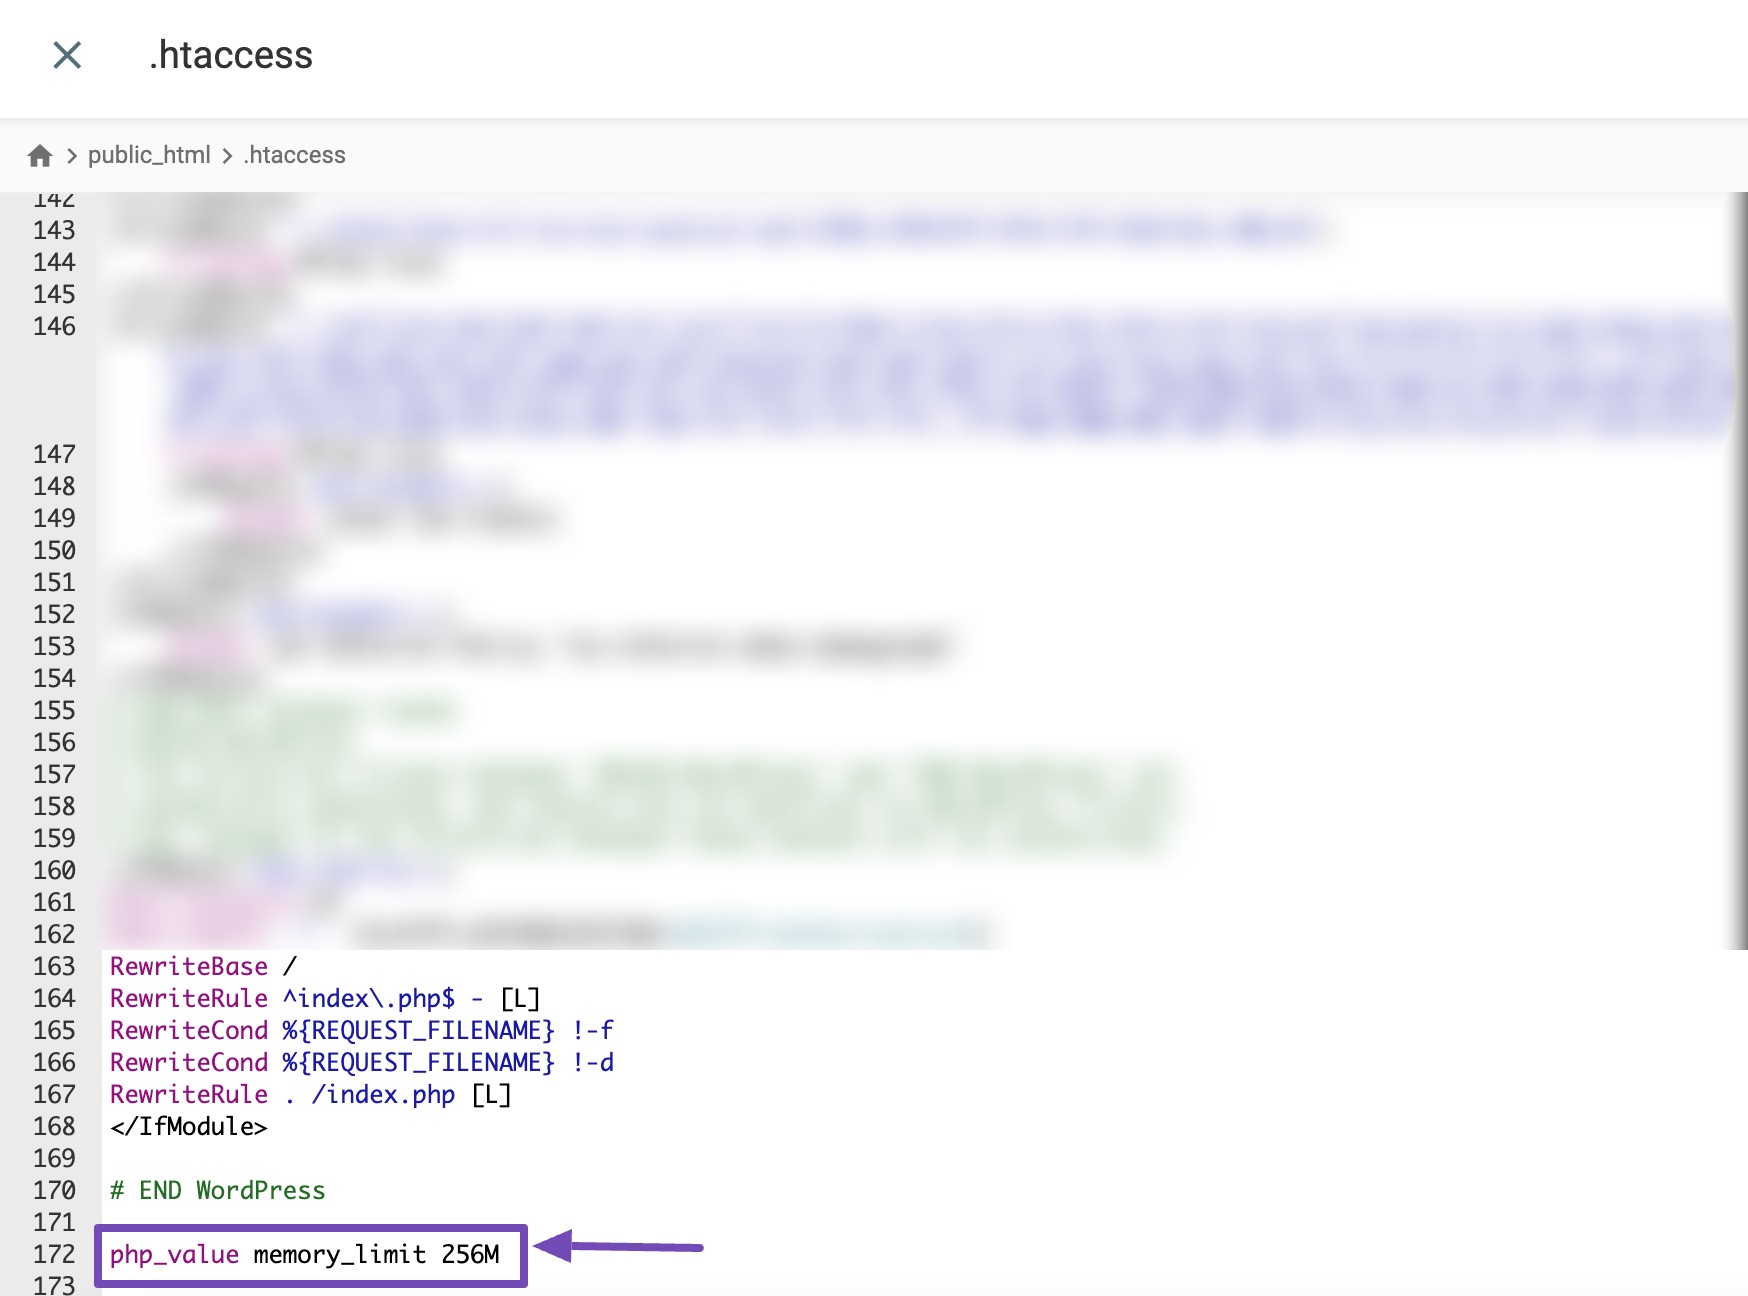
This will increase your PHP memory limit to 256M and fix the error.
3.4 Upgrade Your Hosting Plan
Each hosting plan you choose from your hosting provider comes with a predetermined amount of resources. As your site grows, it may exceed those resources.
This is especially common for websites hosted on shared hosting. And since your site is sharing infrastructure with other websites, your hosting company can limit the memory size your website has access to.
To fix the WordPress memory exhausted error, you’ll need to upgrade to a better web hosting plan. Typically, a higher hosting tier comes with more resources or a higher memory size.
For example, if you’re using a shared hosting plan, you can upgrade to a Virtual Private Server (VPS) plan or cloud hosting to get more resources.
4 Conclusion
The WordPress memory limit error can be frustrating, especially if you’re new to WordPress. The best part is that it is one of the simplest to resolve, even for less technically savvy WordPress users.
To fix the error, you need to increase your memory limit, which you can do by editing your wp-config.php file, upgrading your hosting plan, or modifying your server settings using the PHP.ini file, just as we’ve explained above.
However, we strongly advise you to back up your configuration files (wp-config.php, PHP.ini, and .htaccess) before making any changes. This allows you to easily restore your prior site settings if one of the files is edited incorrectly.
Did any of these methods help resolve your issue? Let us know by Tweeting @rankmathseo.
