Updated: March 27, 2023.
Learn how to migrate without losing traffic by applying these 11 tips & best practices.
Ah, website migrations – the rollercoaster of the SEO world. With plenty of ups and downs, they can be the make-or-break moment for many websites. As an experienced SEO consultant, I’ve seen my fair share of both successful and not-so-successful migrations.
But don’t worry because I am here to share the lessons I’ve learned through my years of experience. In this article, I’ll reveal my top 11 tips and best practices to help you navigate the website migration journey and ensure you don’t lose that precious traffic.
So, grab a cup of coffee and settle in, for it’s time to uncover the secrets to a smooth and successful website migration. Let’s dive into it!
P.S. This guide is perfect for small to medium-sized websites. In the case of a gigantic website that has millions of URLs, you will need a bit of automation to handle redirects.
How to migrate without losing traffic (TL;DR)
Believe it or not, the single most common reason why I see websites lose traffic after the migration is that they don’t implement redirects at all, implement them incorrectly, or forget to redirect… this one blog post that was getting them 95% of traffic.
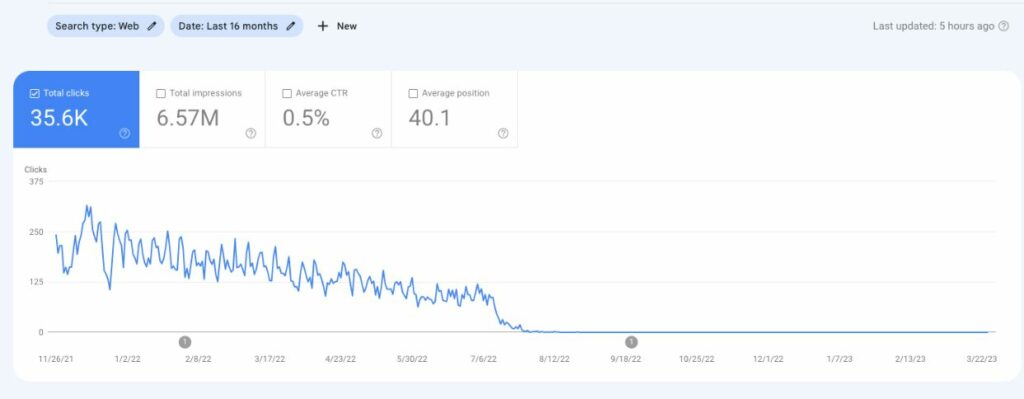
To migrate without losing traffic you need to implement 301 redirects from old URLs to new URLs.
Of course, there is way more to than that so I encourage you to read the entire article.
What is website migration?
Website migration refers to the process of transferring a website from one environment to another, which can involve changes in domain, design, structure, or platform. This process can be complex and requires careful planning to minimize the risk of losing traffic and search engine rankings.
What types of website migration are there?
There are several types of website migrations, each with unique characteristics:
- Domain migration: This type of migration involves changing the website’s domain name, such as moving from “seosly.com” to “seosly.cloud” or rebranding the entire site with a new domain.
- Design migration: A design migration focuses on updating the website’s visual elements, such as its layout, color scheme, and branding, without altering the underlying content or URL structure. This one can really mess things up if not done properly.
- Platform migration: In this migration, a website is moved from one content management system (CMS) or e-commerce platform to another, such as transitioning from WordPress to Shopify or vice versa.
- URL structure migration: This type of migration involves changing the website’s URL structure, which may include reorganizing directories, renaming URLs, or switching from HTTP to HTTPS.
- Content migration: Content migration deals with transferring and updating the website’s content, such as adding, deleting, or modifying text, images, videos, or other multimedia elements.
- Server migration: Server migration occurs when a website is moved from one hosting environment to another, often to improve site speed, performance, or security.
For example, I migrated from Bluehost to Cloudways because my website was getting lots of 5xx errors on the old host, which negatively impacted my SEO. After migrating, my site got a new life.

You need to keep in mind that each type of website migration can impact your site’s traffic and SEO, both positively and negatively.
- A well-executed migration can boost site performance, user experience, and search rankings.
- However, if you don’t plan and manage it carefully, you will end up losing traffic, hurting your search visibility, and giving users a bad experience.
- To navigate the migration process smoothly, you need to understand the unique challenges and outcomes for each migration type.
- This way, you can create a custom migration strategy that tackles potential risks and seizes opportunities to improve your website’s overall performance and SEO. You can also win a lot with the migration!
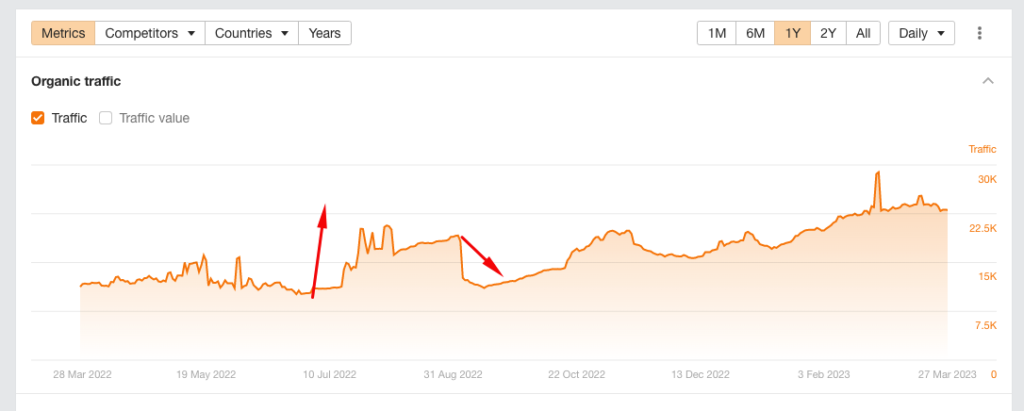
How to migrate without losing traffic in 11 simple steps
Even though each migration is a bit different and unique, the below 11 steps are in most cases necessary if you want to migrate without losing traffic.
Caveat: The only situation where you can potentially ignore all or most of these steps is if the site you are migrating has zero traffic and rankings. I have seen such sites too. LOL.
1. Crawl the current site and its XML sitemaps to extract all URLs
Use a reliable website crawling tool like JetOctopus, Screaming Frog, or Sitebulb to identify all existing URLs on your current website, including those in your XML sitemaps. This comprehensive list will serve as the foundation for your migration planning.
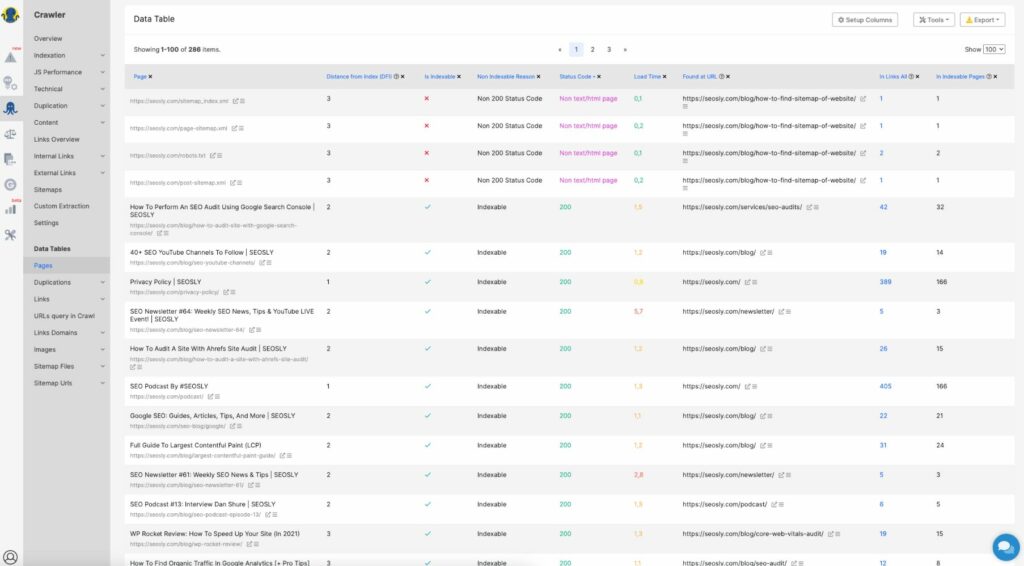
Caveat: Don’t miss any hidden URLs or orphan pages, as they might contain valuable content or backlinks that you want to preserve during the migration.
2. Analyze the site’s current visibility, traffic, backlinks, and rankings
Review your site’s performance metrics, including search visibility, organic traffic (and traffic from other sources as well), backlinks, and keyword rankings. This analysis will help you identify your site’s strengths and areas that need improvement during migration.
The tools to use here include Google Search Console and a tool like Semrush or Ahrefs.
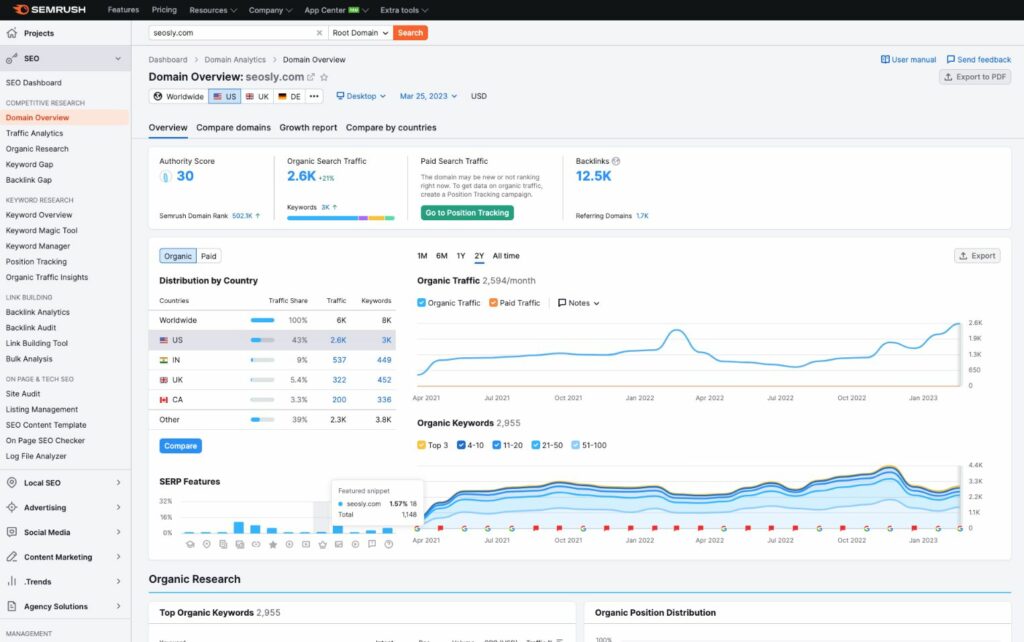
Caveat: Pay special attention to what pages are getting the most clicks in GSC (and most traffic overall in GA) and what pages have the best links and positions (Semrush).
3. Put everything into one spreadsheet
Organize all the collected data, including URLs, performance metrics, and content details, into a single spreadsheet. This centralized document will serve as your roadmap for the migration process.
What I like doing is creating one master spreadsheet with all URLs containing information about:
- The metadata of each URL
- The number of GSC each URL got in the last 90-180 days
- The overall traffic each URL got in the last 90-180 days
- The backlinks each URL has
- Top keyword positions
- Current URL and new URL
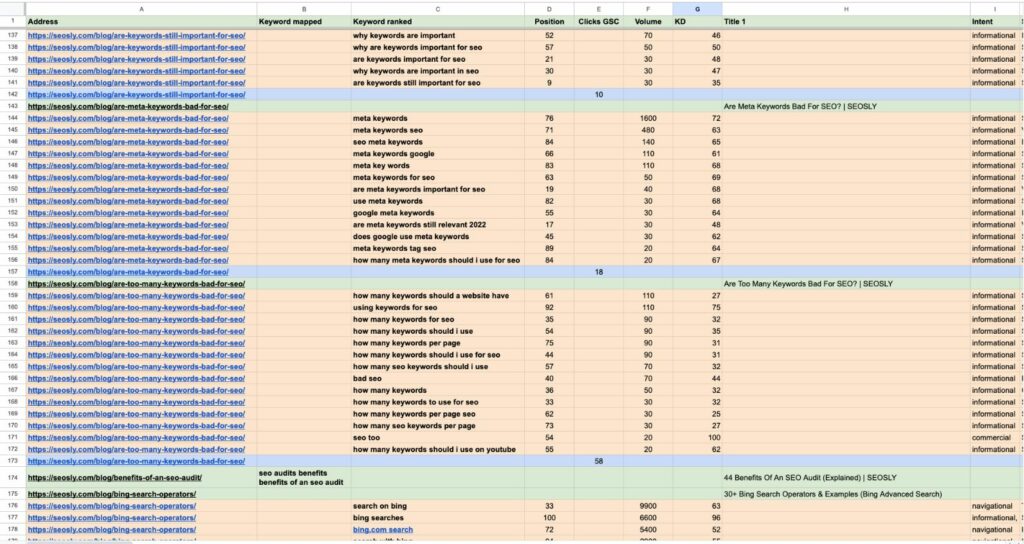
Caveat: Keep your spreadsheet up-to-**** and organized to avoid confusion and missteps during the migration.
4. Determine what URLs to keep, redirect, or remove
Evaluate each URL on your list and decide whether to keep it, set up a 301 redirect, or remove it entirely (status 404 or 410). Consider factors like content quality, relevance, backlinks, and traffic when making these decisions.
In my master spreadsheet, I add a column named “Action” where I put the desired action in the form of the desired status code of the page:
- 200 (OK) for no change
- 301 (Moved Permanently) when moving to a new URL
- 404 (Not Found) or 410 (Gone) when removing content entirely
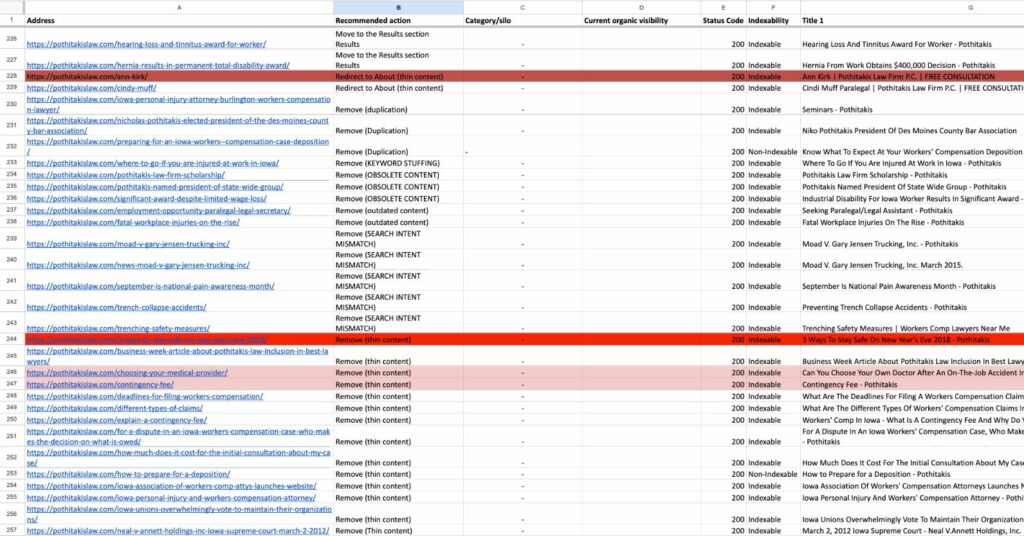
Caveat: Even though it seems like a better idea to remove entirely a thin article with no traffic, you probably want to redirect it if it has some nice backlinks.
5. Create a map of redirects
Develop a clear and comprehensive redirect map that outlines the old URLs and their corresponding new URLs. This map will be crucial for ensuring a seamless transition and maintaining your site’s search engine rankings.
If you create a master spreadsheet similar to mine, you will only have to sort the URLs by “Action” column to get an almost ready map of redirects.
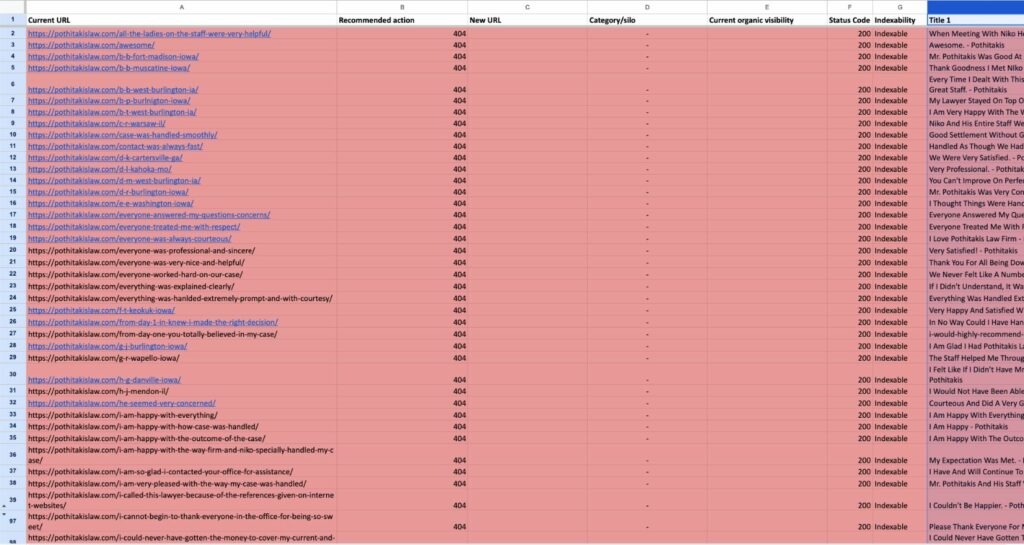
Caveat: Double-check your redirect map for accuracy to avoid creating redirect loops or broken links that can harm the website migration process.
6. Crawl the staging site
Before launching the new site, crawl the staging environment to identify and fix any issues, such as broken links, missing metadata, or other issues.
The tool to use is again JetOctopus or Screaming Frog. Both let you crawl and extract data from a staging site that has a no-index tag or is password protected.
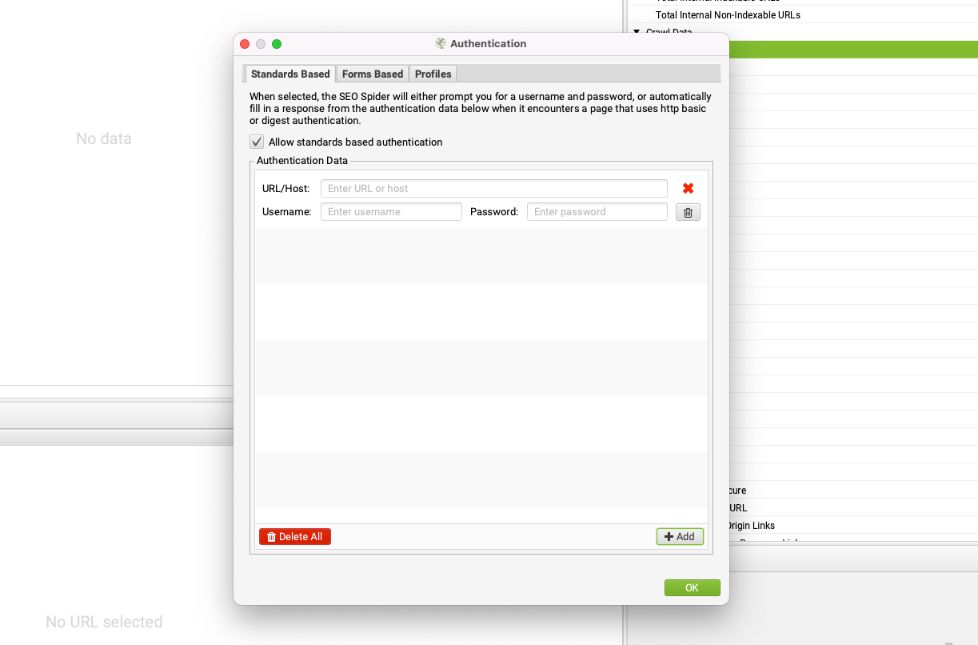
Caveat: Ensure that the staging site is an accurate representation of the final site, as any discrepancies can lead to issues after launch.
7. Implement redirects and launch
With everything in place, set up the 301 redirects according to your redirect map and launch the new site.
There are several methods to implement 301 redirects, depending on your website’s platform, server configuration, and personal preferences.
The common types of redirect implementations include:
- .htaccess file (Apache servers): If your website is hosted on an Apache server, you can use the .htaccess file to create 301 redirects.
- Nginx configuration file: For websites hosted on Nginx servers, you can implement 301 redirects by modifying the server’s configuration file.
- IIS (Internet Information Services) servers: If your website is hosted on an IIS server, you can use the URL Rewrite Module to create 301 redirects. Follow these steps:
- WordPress plugins: If you’re using WordPress, several plugins can help you create 301 redirects, such as Redirection or Rank Math.
- Website builder or CMS: Many website builders and content management systems (CMS) offer built-in functionality for creating 301 redirects. Examples include Shopify, Wix, and Squarespace.
- PHP redirects: If your website uses PHP, you can implement 301 redirects by adding a piece of code at the beginning of the old page’s PHP file.
Depending on the project, it may be you or the developer who will be implementing the redirects. If the latter is true, make sure it’s done correctly (sic!).
Caveat: Monitor the site closely during and after the launch to catch and resolve any unforeseen issues immediately.
TIP: If possible, I recommend doing the migration over the weekend during the ***** hours so if something goes wrong, no one (except you) will notice it right away and you will have time to roll things back.
8. Crawl immediately after the launch
Once the new site is live, perform another crawl to confirm that redirects, links, and other site elements are functioning correctly.
Specifically, crawl your map of redirects and make sure each URL returns the correct status code.
In Screaming Frog, you can use the URL List mode and paste the “old” URLs from your migration sitemap there.
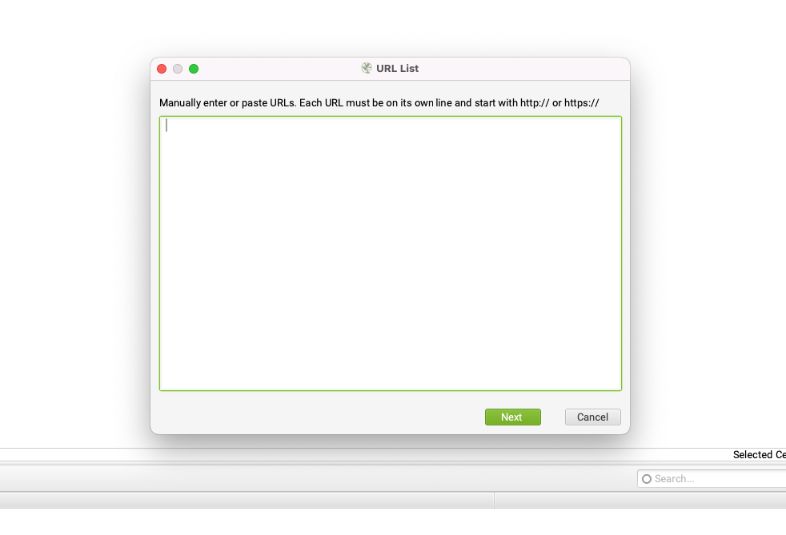
Of course, in addition to that, also crawl the entire website in regular spider mode!
Caveat: Address any issues identified during the post-launch crawl promptly to minimize potential negative impacts on your site’s traffic and rankings.
9. Keep the old XML sitemap intact for a few days/weeks
Retain the old XML sitemap for a short period after the migration, as it can help search engines discover and index your new URLs more quickly.
Caveat: Don’t forget to update and submit your new XML sitemap to search engines once the old one is removed to ensure continuous and efficient crawling of your site.
10. Make annotations and monitor closely
Annotate the migration **** in your analytics tools (GA4) and keep a close eye on your site’s performance metrics, such as traffic and rankings. The essential tools to use here include:
- Google Search Console
- Google Analytics 4 (or another analytics tool)
- Semrush (or another tool that allows for position monitoring)
- Automated weekly crawl that will alert you if something is happening (Semrush Site Audit)
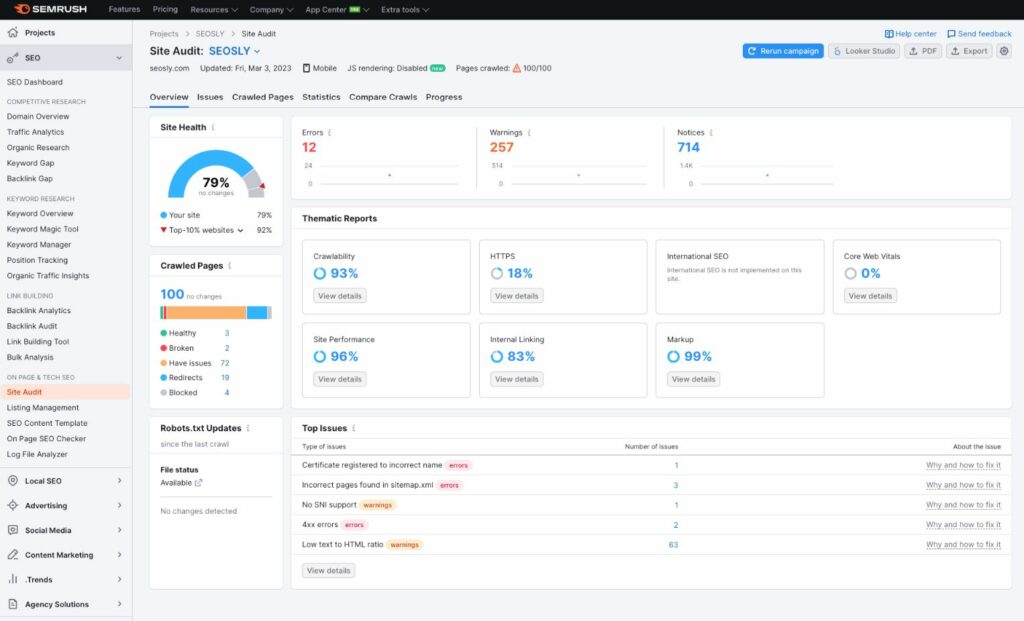
This monitoring will help you identify any issues that may arise after the migration.
Caveat: Be prepared to act quickly if you notice any significant drops in traffic or rankings, as timely intervention can prevent long-term negative effects.
11. Have the backup ready to roll back (just in case)
Before launching the new site, create a complete backup of your current site as a safety net. If the migration encounters major issues, you’ll have the option to roll back to the previous version.
Depending on where the site is hosted, you may have the option to easily roll back the site. This is something that Cloudways offers.
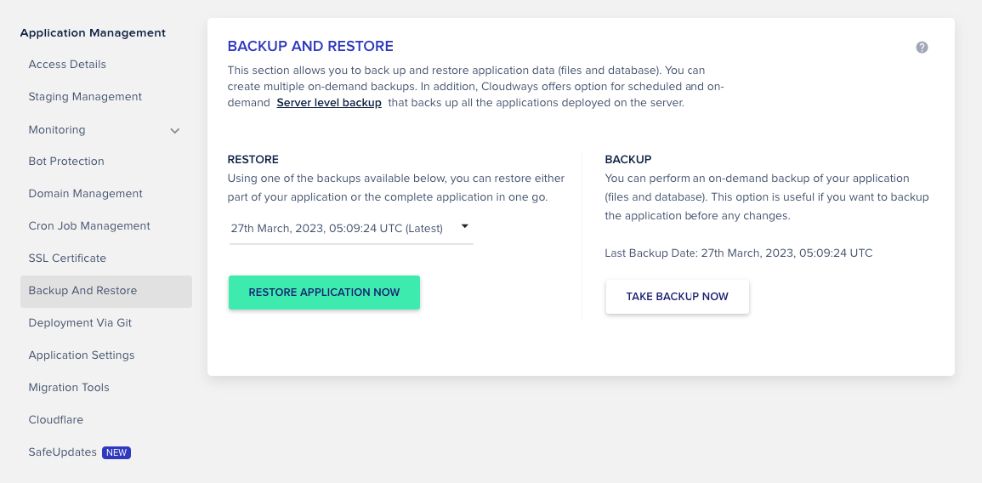
Caveat: Keep in mind that rolling back should be a last resort, as it can also have SEO implications. Focus on resolving issues on the new site whenever possible, and only consider rolling back if absolutely necessary.
5 real-life examples of failed migrations that killed the site
I have really seen tons of failed migrations and I am often hired to assess what went wrong. Of course, there are lots of possible reasons for a failed migration.
However, these 5 ones are quite common and quite nuanced:
- With the domain change, people sometimes forget to remove the no-index tag from the new website once it goes live. This is a recipe for a complete disaster.
- A marketing guy who knows nothing about SEO evaluates which articles should be removed without looking at the SEO data behind these articles. He decided to remove 5 articles but totally neglects the fact that they account for 95% of organic traffic on the website and have awesome links.
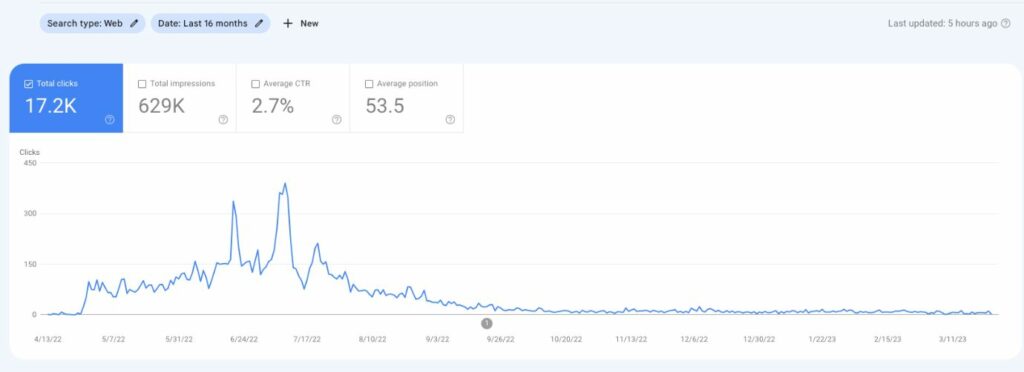
- An SEO agency made of (I am sorry) idiots forgets about one step of the migration. You guessed it. They forget to create and implement the map of redirects.
- A developer forgets to update canonical tags and the redirected URLs (the URLs) contain canonical link elements that point to the dev (and not-indexable) version of the site. A total disaster. Yep.
- During the migration, the internal linking structure gets totally wiped out and the site suffers significant traffic losses. Before the migration, the site had a relatively OK internal linking structure. After the migration and the new “design”, quality internal links were replaced with “Read more” or worse image arrow links. Congratulations!
After going through these painstakingly detailed nuances and potential pitfalls of website migration, I can’t help but wonder: How on earth do people still manage to make such basic mistakes and obliterate their websites? Is it the thrill of playing Russian roulette with their online presence, or maybe just an unwavering **** for digital chaos?
Okay, I got quite angry just recalling these situations and I can go on and on indefinitely. I think you get the point so let’s stop here.
Final thoughts on migrating without losing traffic
In all seriousness, though, I understand that website migrations can be daunting and complex, but armed with the right knowledge, you can avoid turning your migration into a tragicomedy.
So take a deep breath, and before you embark on this digital adventure, double-check that you’ve covered all your bases. And remember, the digital world is watching, so let’s try not to turn your migration into an epic fail that goes down in SEO history. Good luck!
Check these articles:
