What Are Ad Groups and How Do They Work?
An ad group is a collection of ads targeting similar keywords within a PPC campaign. This structure allows you to manage your bids on a group level, often set as a cost-per-click (CPC) bid) in Google Ads. You can also specify bids for individual keywords within the group.
For example, if you’re running a campaign for a bookstore, you might create separate ad groups for “fiction books,” “non-fiction books,” and “children’s books.” Each ad group would contain ads tailored to those categories and include related keywords and content.
Ad groups centralize your ads around a common theme or goal to increase your ads’ relevance to your target audience. In other words, your ads appear for the most relevant searches in Google.
This streamlines your PPC campaign management and optimizes your ad spend. It also reduces advertising costs since more relevant ads tend to earn higher click-through and conversion rates.
How Do Ad Groups Affect PPC Campaign Performance?
Ad groups can influence quality score, ad relevance, cost efficiency, and conversion rates. These factors are crucial for maximizing return on investment (ROI.
- Quality score (QS): Measures the relevance and quality of your ads, keywords, and landing pages. Well-structured ad groups improve QS by ensuring that ads and landing pages match their target keywords.
- Ad relevance: Alignment with a user’s search query. Ad groups that focus on specific themes or products increase ad relevance.
- Cost-efficiency: Effectiveness of your ad spend in achieving desired outcomes. Ad groups can lead to higher QS and ad relevance, potentially reducing CPC and maximizing ROI.
- Conversion rates: Percentage of users who take a desired action after clicking your ads. Ad groups that match search intent tend to have higher conversion rates because users experience a seamless transition from search to action.
Integrating keywords, ad copy, and landing pages within an ad group ensures that every element connects to a relevant theme. This alignment leads to consistency across your messages and user interactions. Ad text that closely matches search queries and landing pages that deliver on an ad’s promise can enhance the user experience (UX) and may increase conversions.
How to Find Keywords for an Ad Group
Using relevant ad group keywords is essential for maximizing conversions and ensuring your ads appear to the right audience at the right time.
Start with a broad approach. Your business’s core offerings can become relevant keywords. List keywords that closely describe your products or services, including your brand or brands you represent.
For example, if you’re selling water safety equipment, your base keywords might be “life jackets,” “waterproof flashlights,” and your brand name.
Build Your Keyword List with Keyword Magic Tool
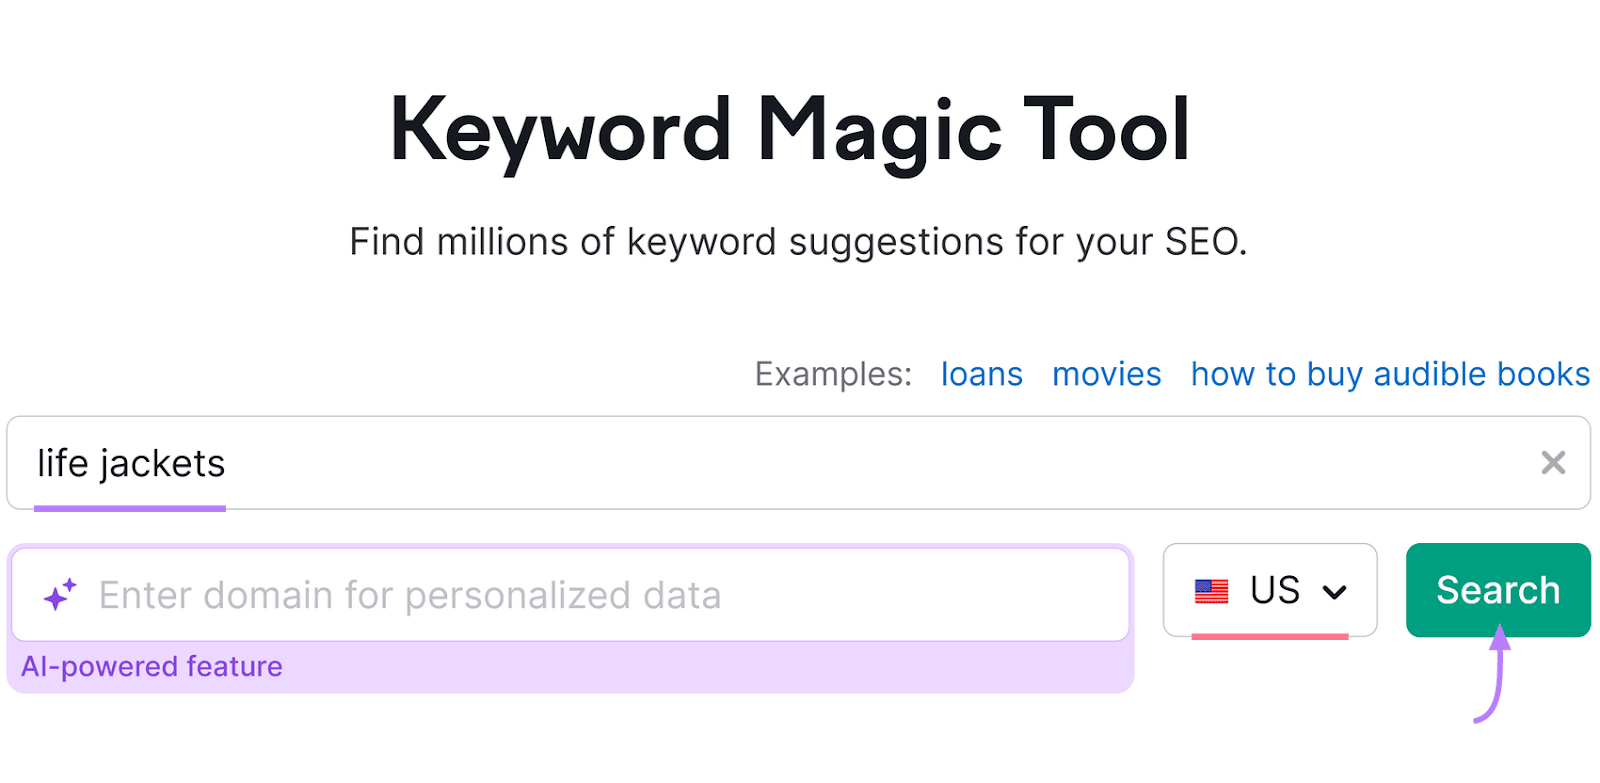
Use Semrush’s Keyword Magic Tool to identify search possibilities for your broad term. And build a keyword list for your ad group.
Type your broad search term in the box, select your location, and click the “Search” button.
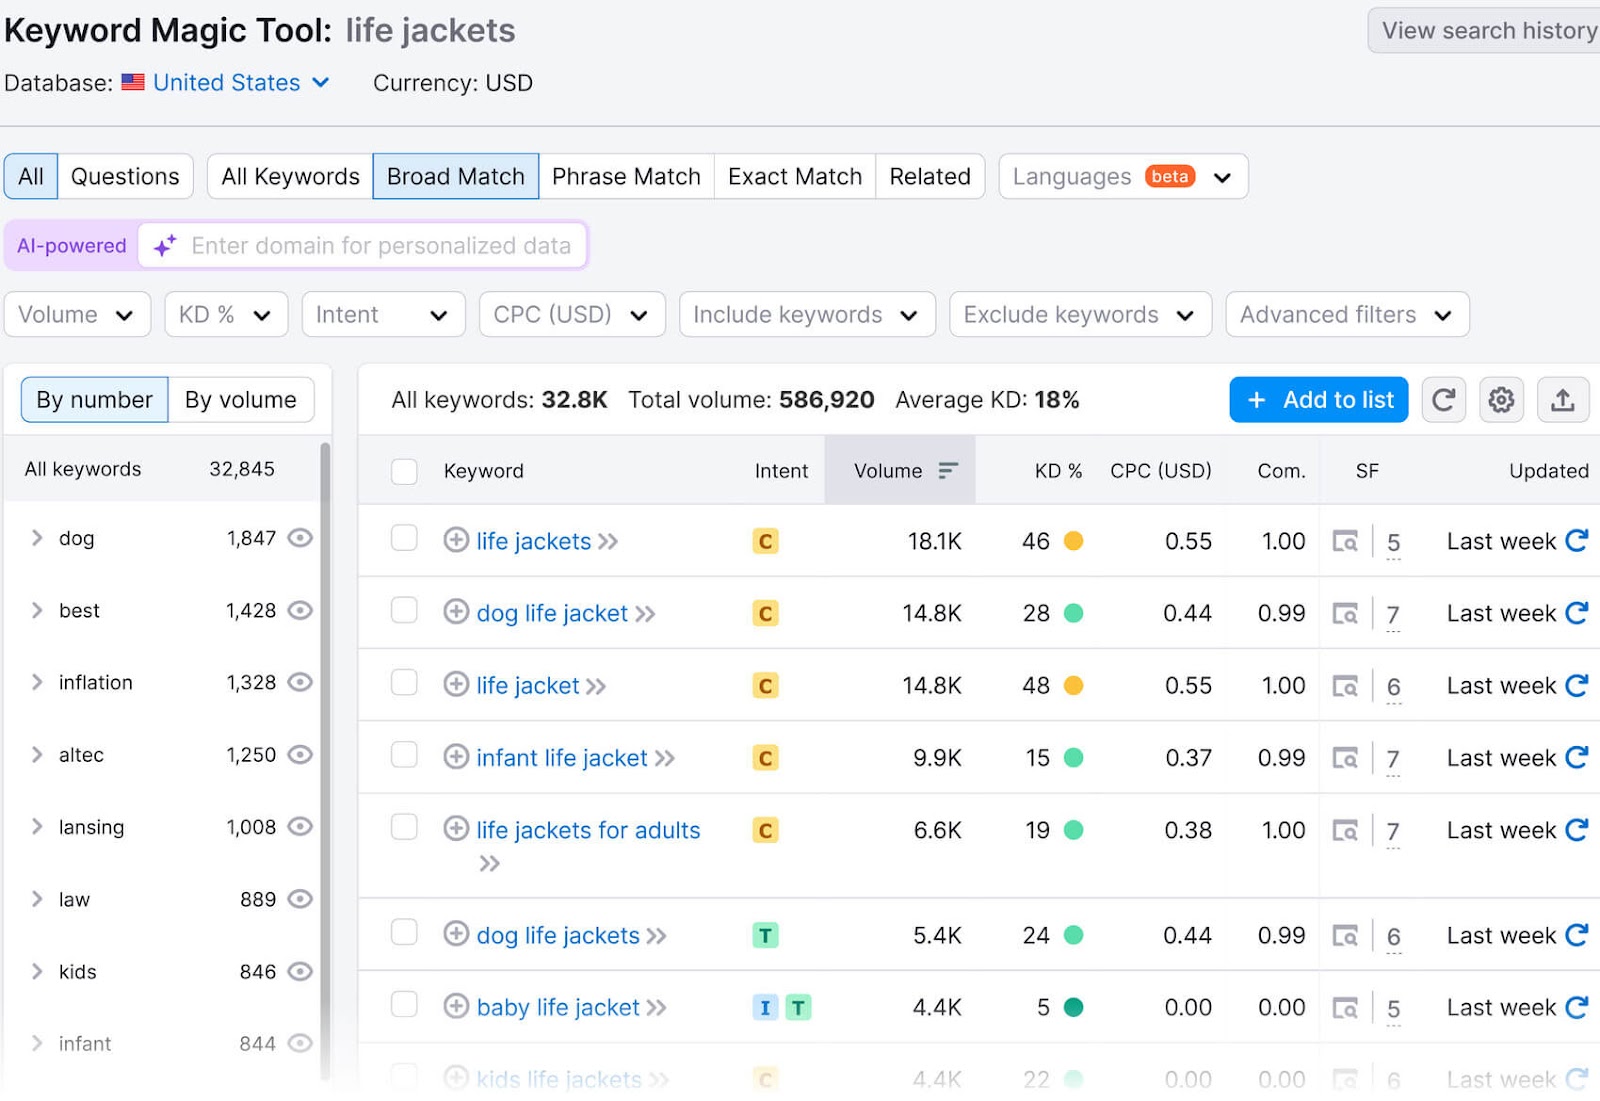
You’ll see a comprehensive keyword analysis of your term. Like this:
Prioritize High-Relevance Keywords by Search Intent
Identify and prioritize high-relevance keywords to drive more traffic and conversions.
Search intent refers to why users type specific queries into a search engine. It falls under four categories:
- Informational: Users seeking general information (e.g., Do you have to wear life jackets in a kayak?) Targeting informational keywords builds brand authority and trust.
- Commercial: Searches where a user wants to find out more about brands, goods, or services (e.g., best life jackets for kayaking). Focusing on commercial intent keywords allows you to attract users in the consideration phase.
- Navigational: Users looking for a specific website or page (e.g., “Brand name” kayaking lifejackets). Optimizing for navigational keywords helps users easily find your brand.
- Transactional: Keywords indicating a readiness to purchase (e.g., Buy kayaking life jackets online). Choose transactional keywords if you aim to sell products directly from your website.
Note each keyword’s search intent in the “Intent” column.
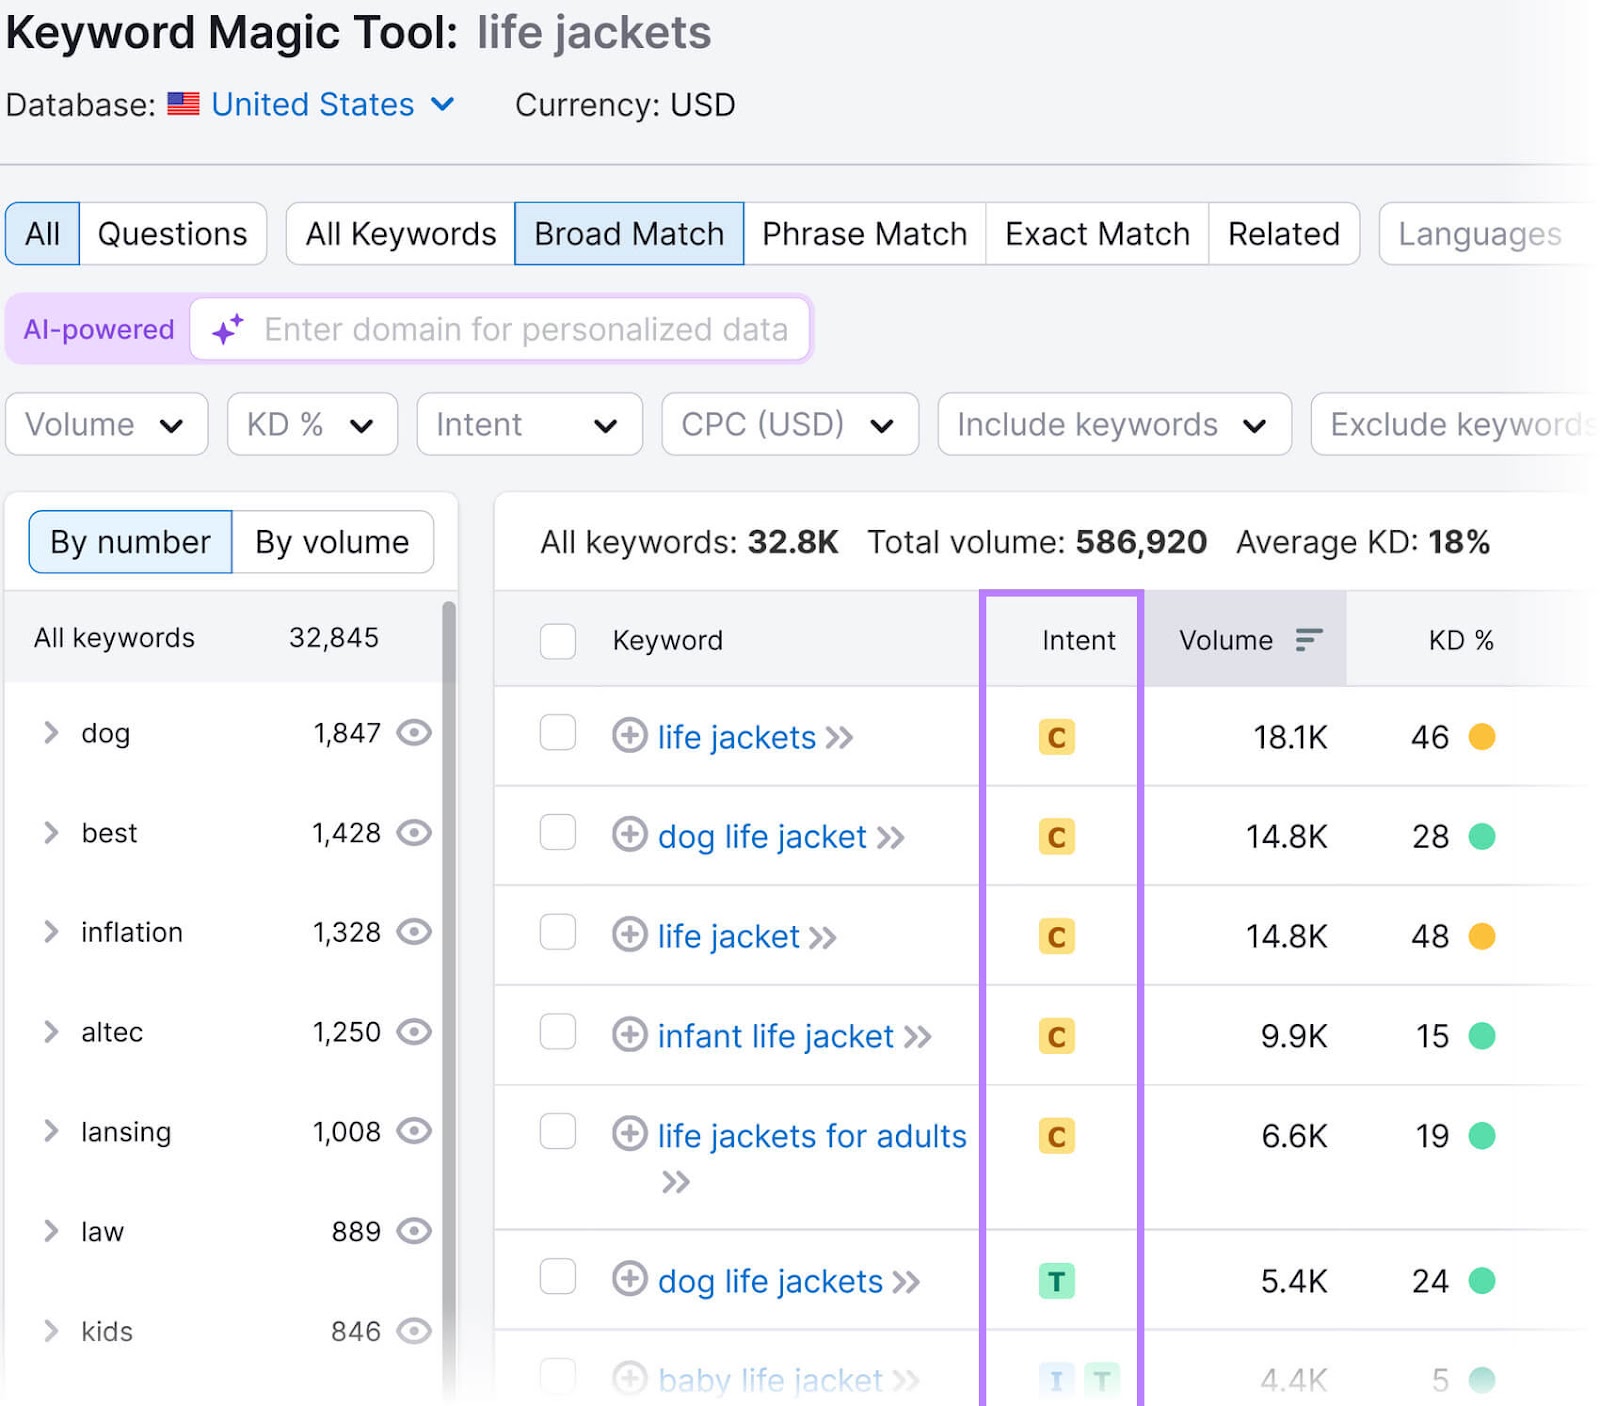
To filter the results by search intent, click the “Intent” drop-down menu. Check the box next to your chosen keyword intent. Then, click the “Apply” button.
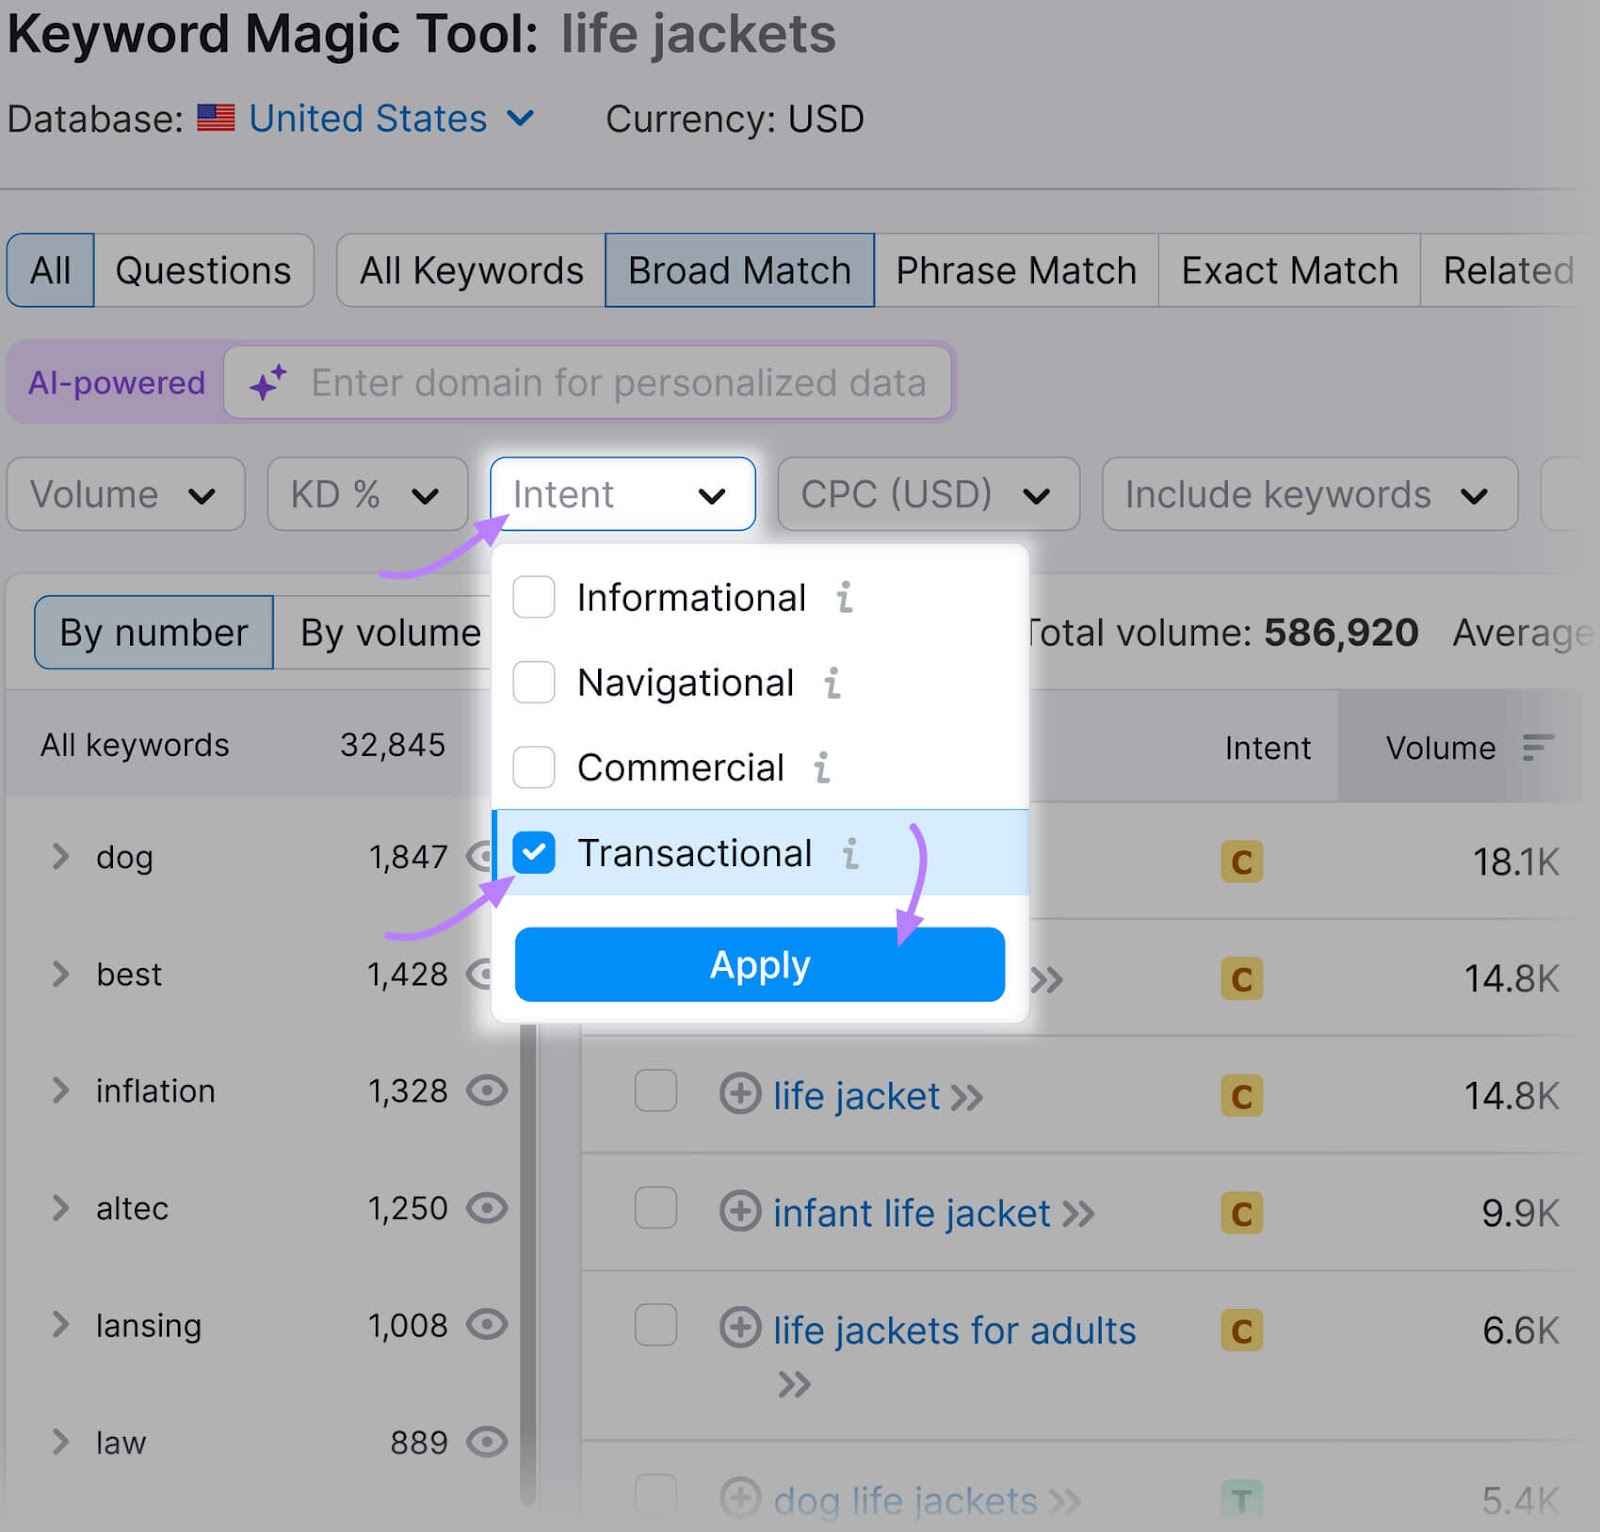
Click “Transactional” to see keywords that contain transactional search intent.
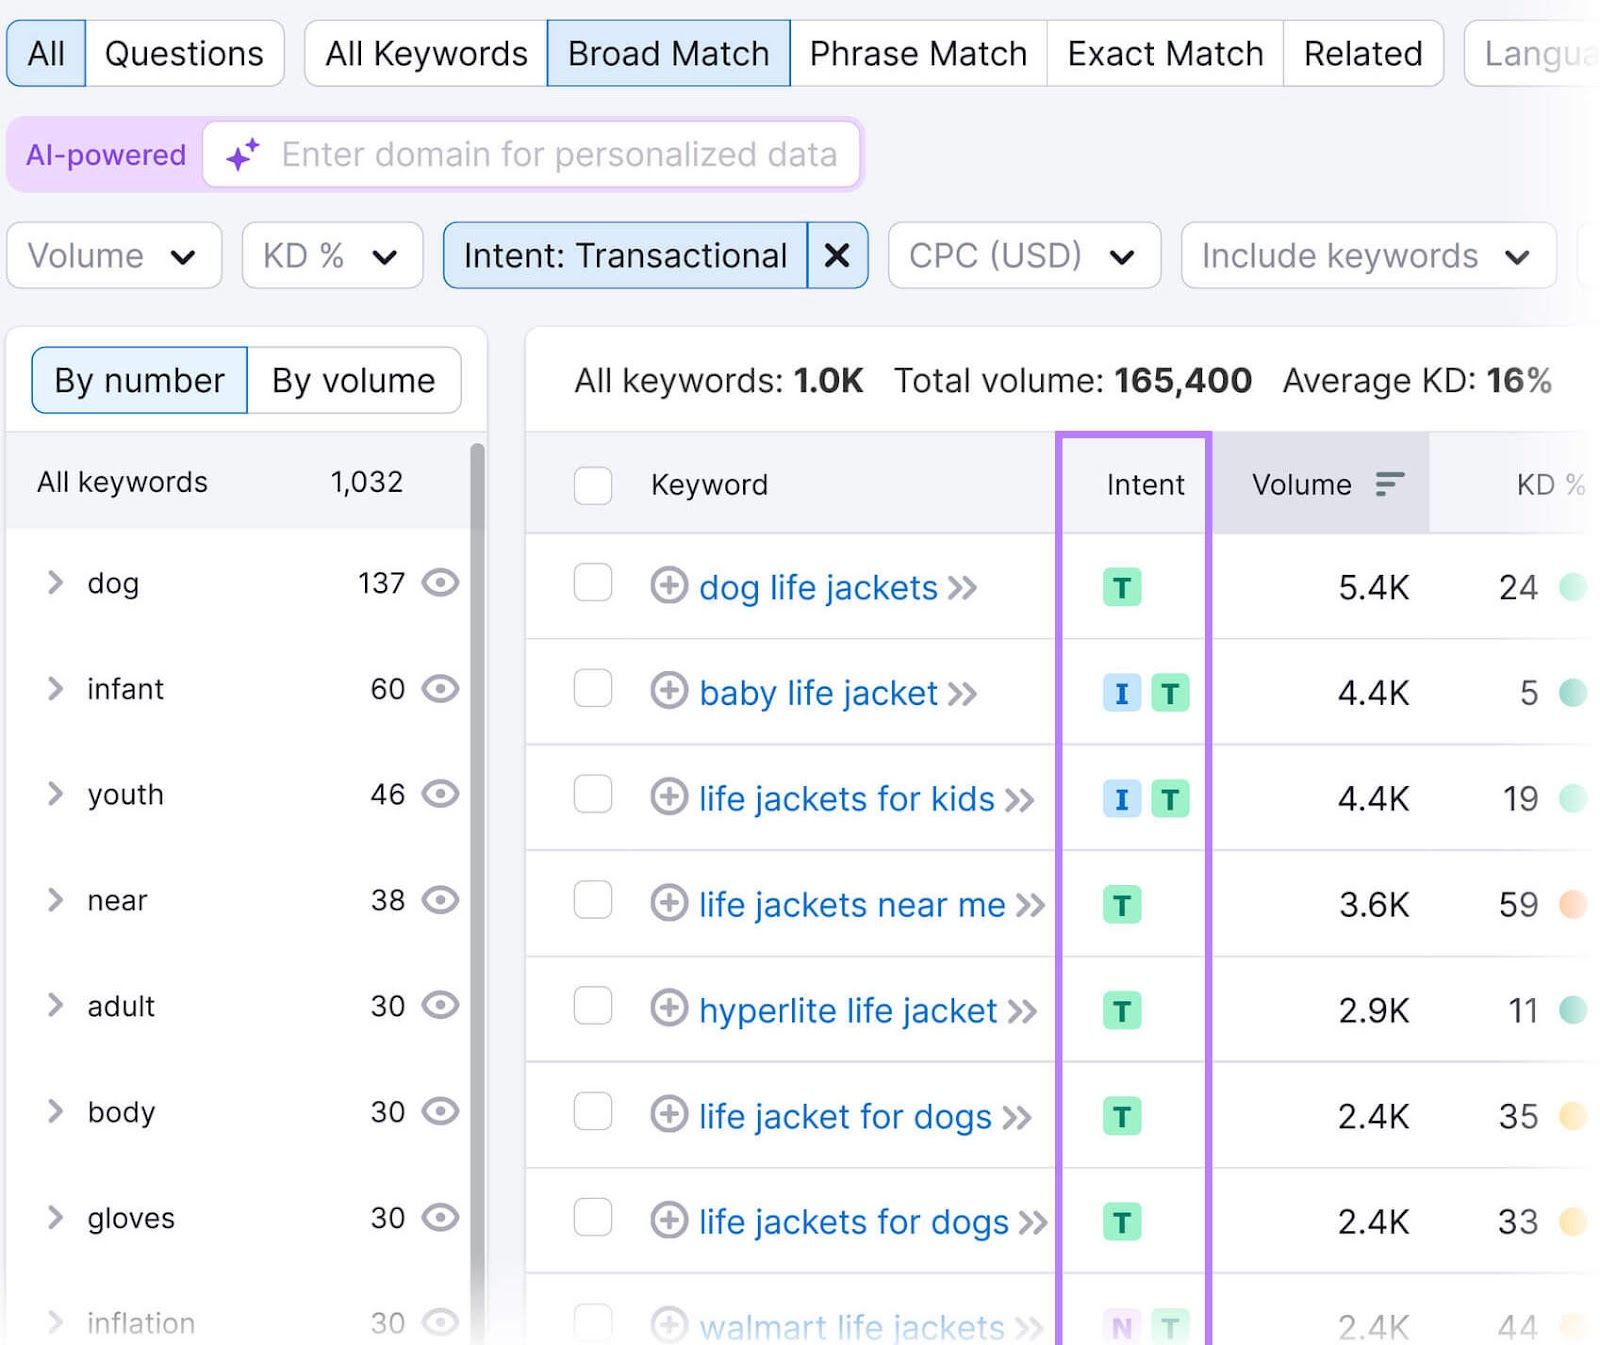
Refine this list by grouping the keywords by match types.
Segment Keywords by Match Types
Keyword match types are relevant in Google Ads as they affect which search queries that make your ads appear in Google.
The three keyword match filters include:
- Broad match: Targets keyword variations, including synonyms and related searches. For example, “life jackets” will show related keywords like “ life jacket” and “baby life jacket.”
- Phrase match: Includes your broad search term’s exact phrase or close variations. From our “life jackets” example, you’ll see keywords like “life jackets for adults” and “fishing flotation jacket.”
- Exact match: Keywords that exactly match the term’s meaning. Like “flotation jackets.”
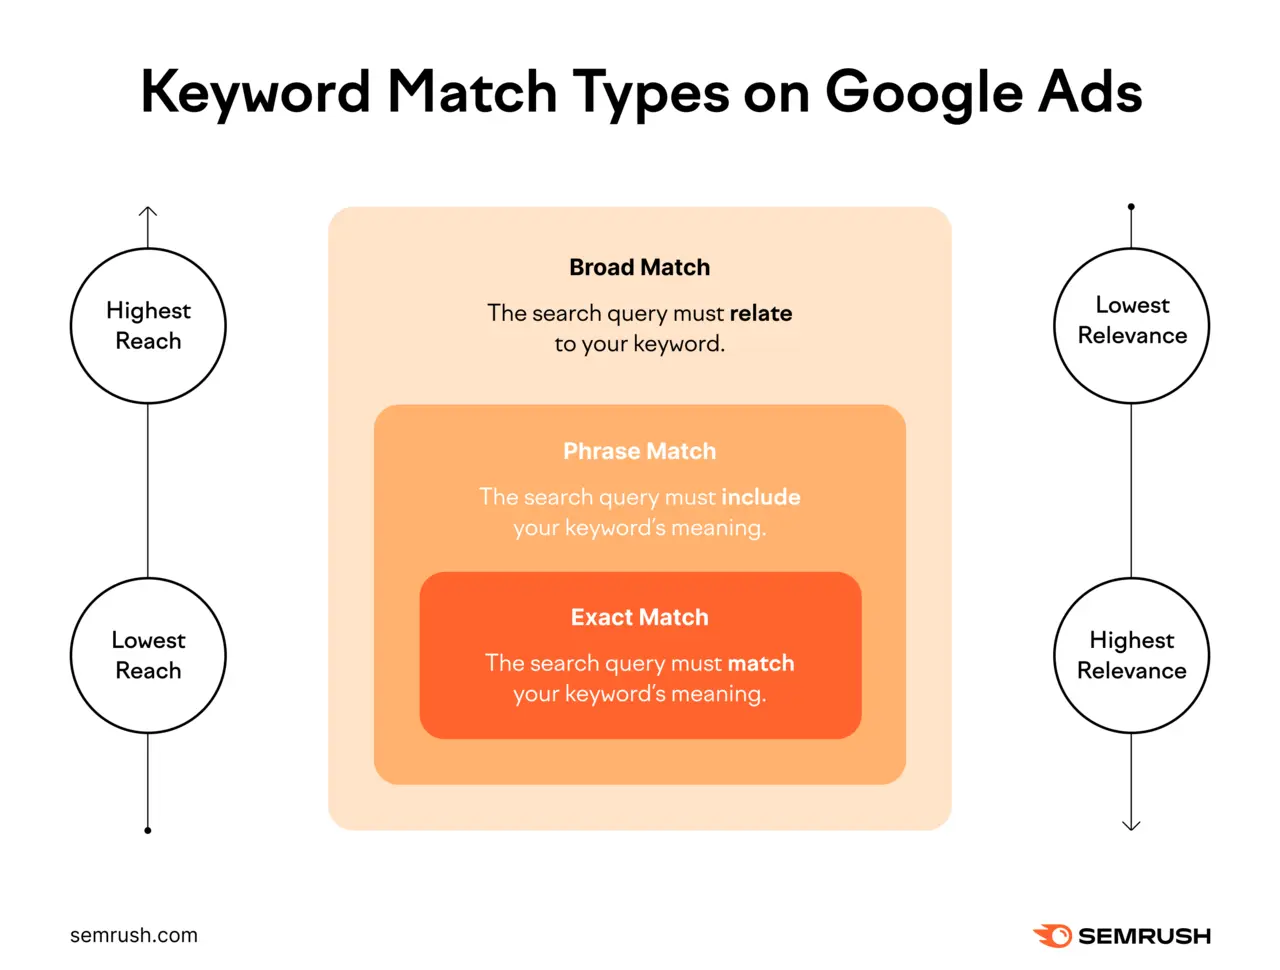
Filter the keyword results on the Keyword Magic Tool by match types. Select the match type from the top bar.
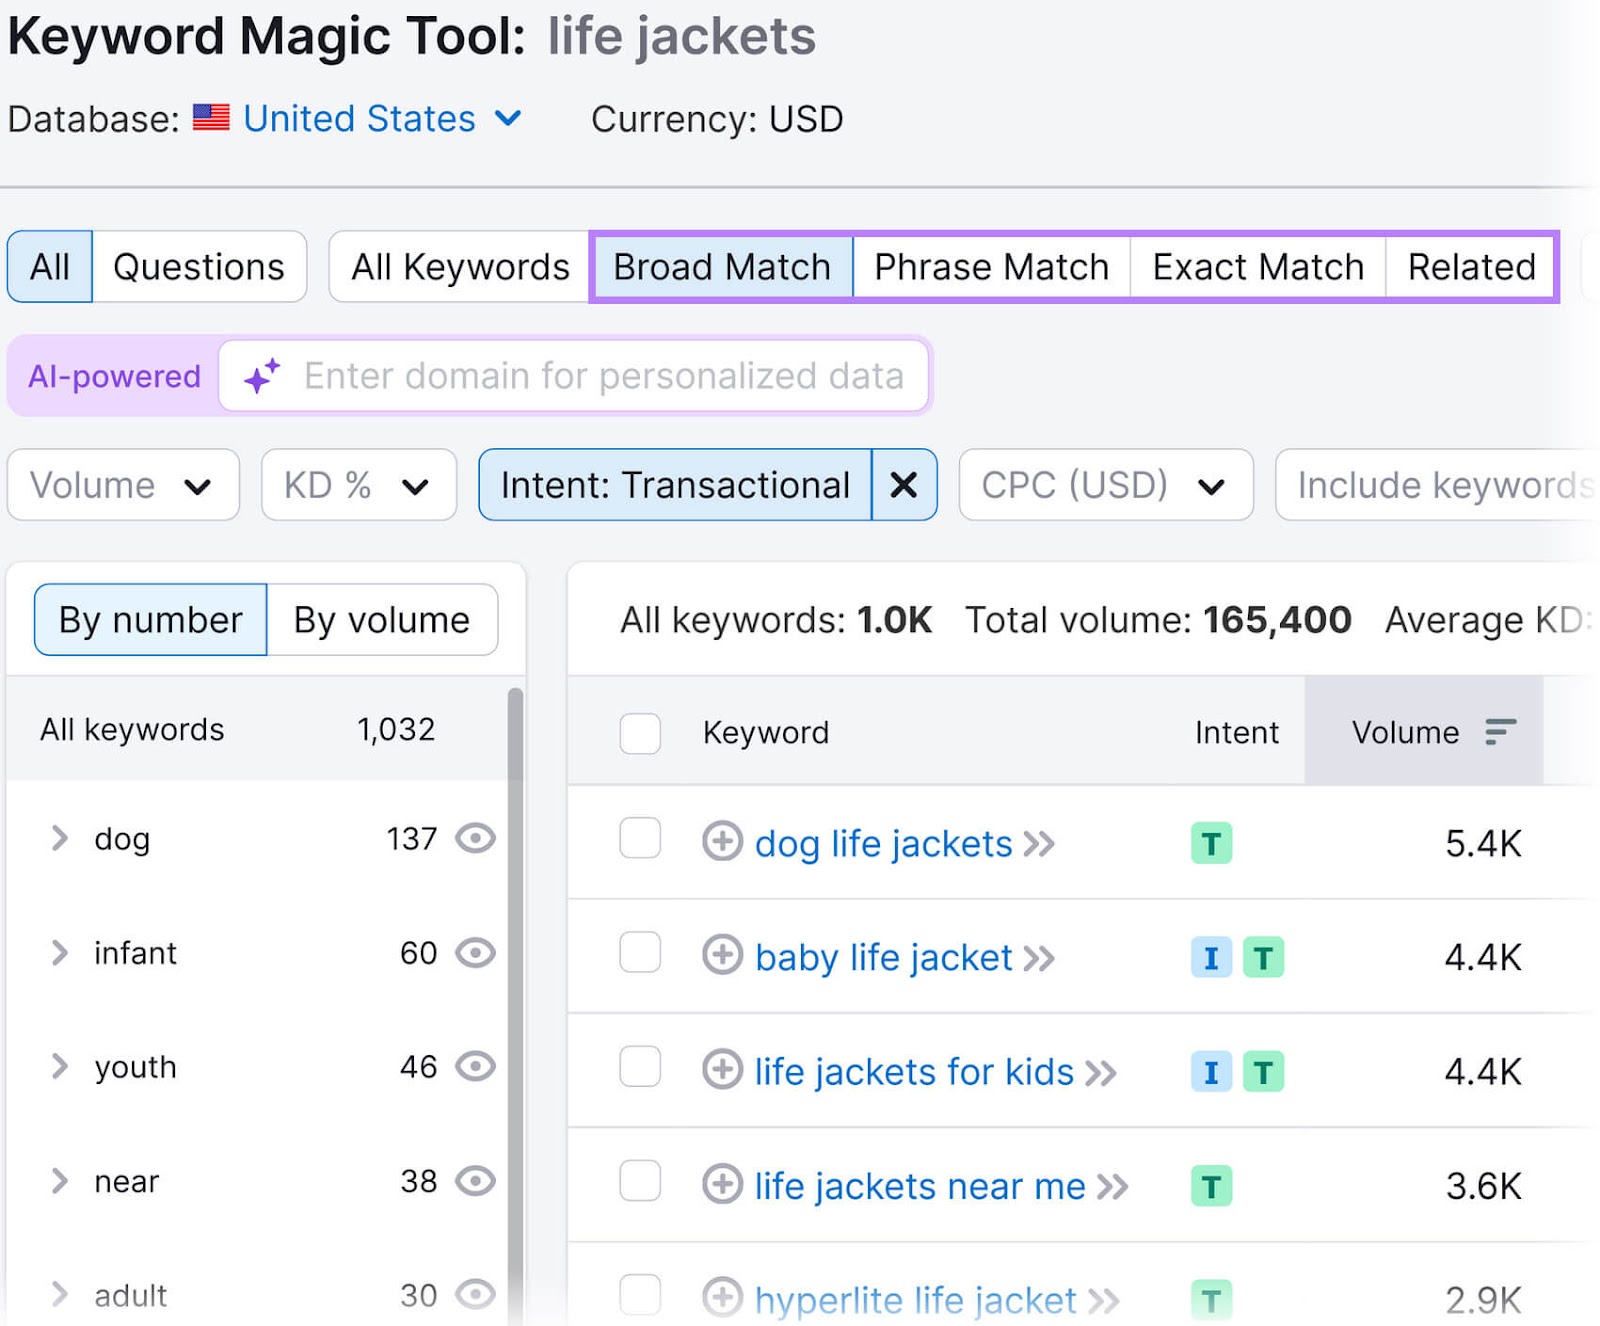
The “Related” filter displays keywords that show similar search results to your broad search term.
Choosing the right keyword match type depends on your advertising goals, budget, and desired traffic.
To attract a wider audience, choose broad match. Phrase match helps you target users with a specific intent that matches your offering. However, it’s not as restrictive as an exact match.
With an exact match, aim for precise searches that are most relevant to your products or services. This match type is best for campaigns where every click counts, such as limited-time offers or highly competitive product categories.
Group Keywords by Themes or Topics
When you’re creating ads, group keywords by theme or topic. This approach helps you create ads that are relevant to the user’s search intent—which can improve quality score and lower CPC.
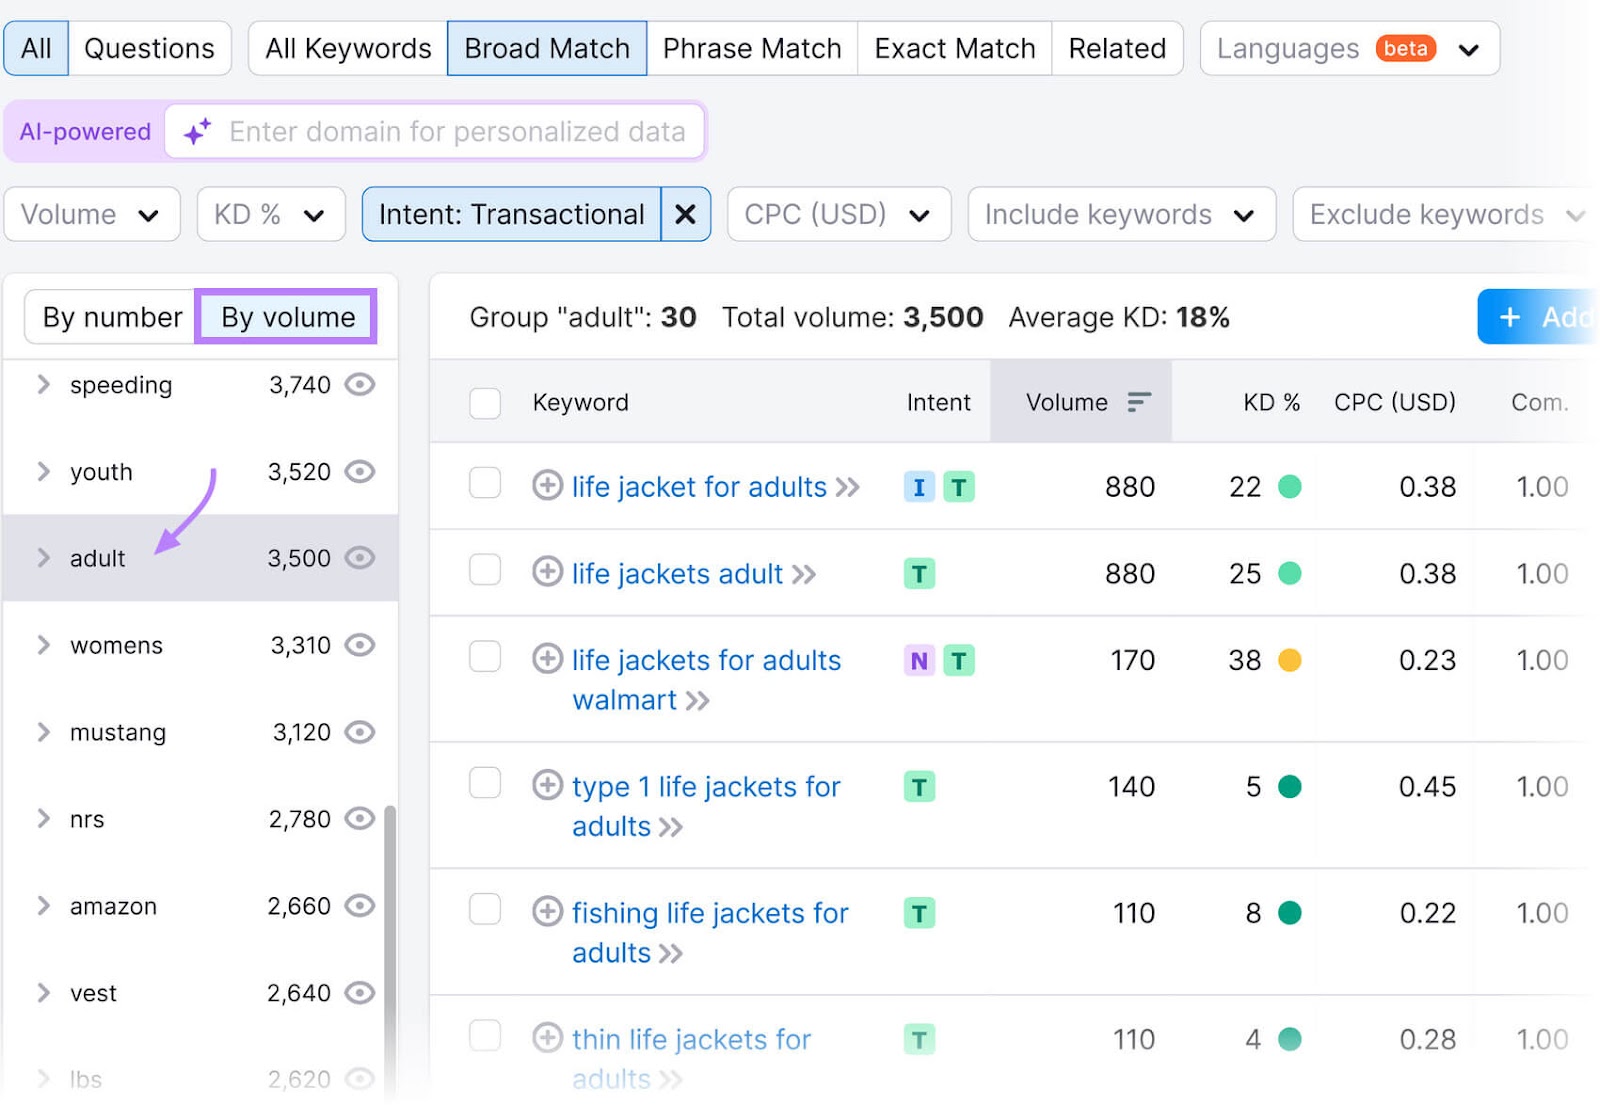
On the left side of the keyword results, you will see keyword groups. Filter these groups by number (the quantity of keywords in a group) and volume (the total average number of monthly searches for the keywords in the group).
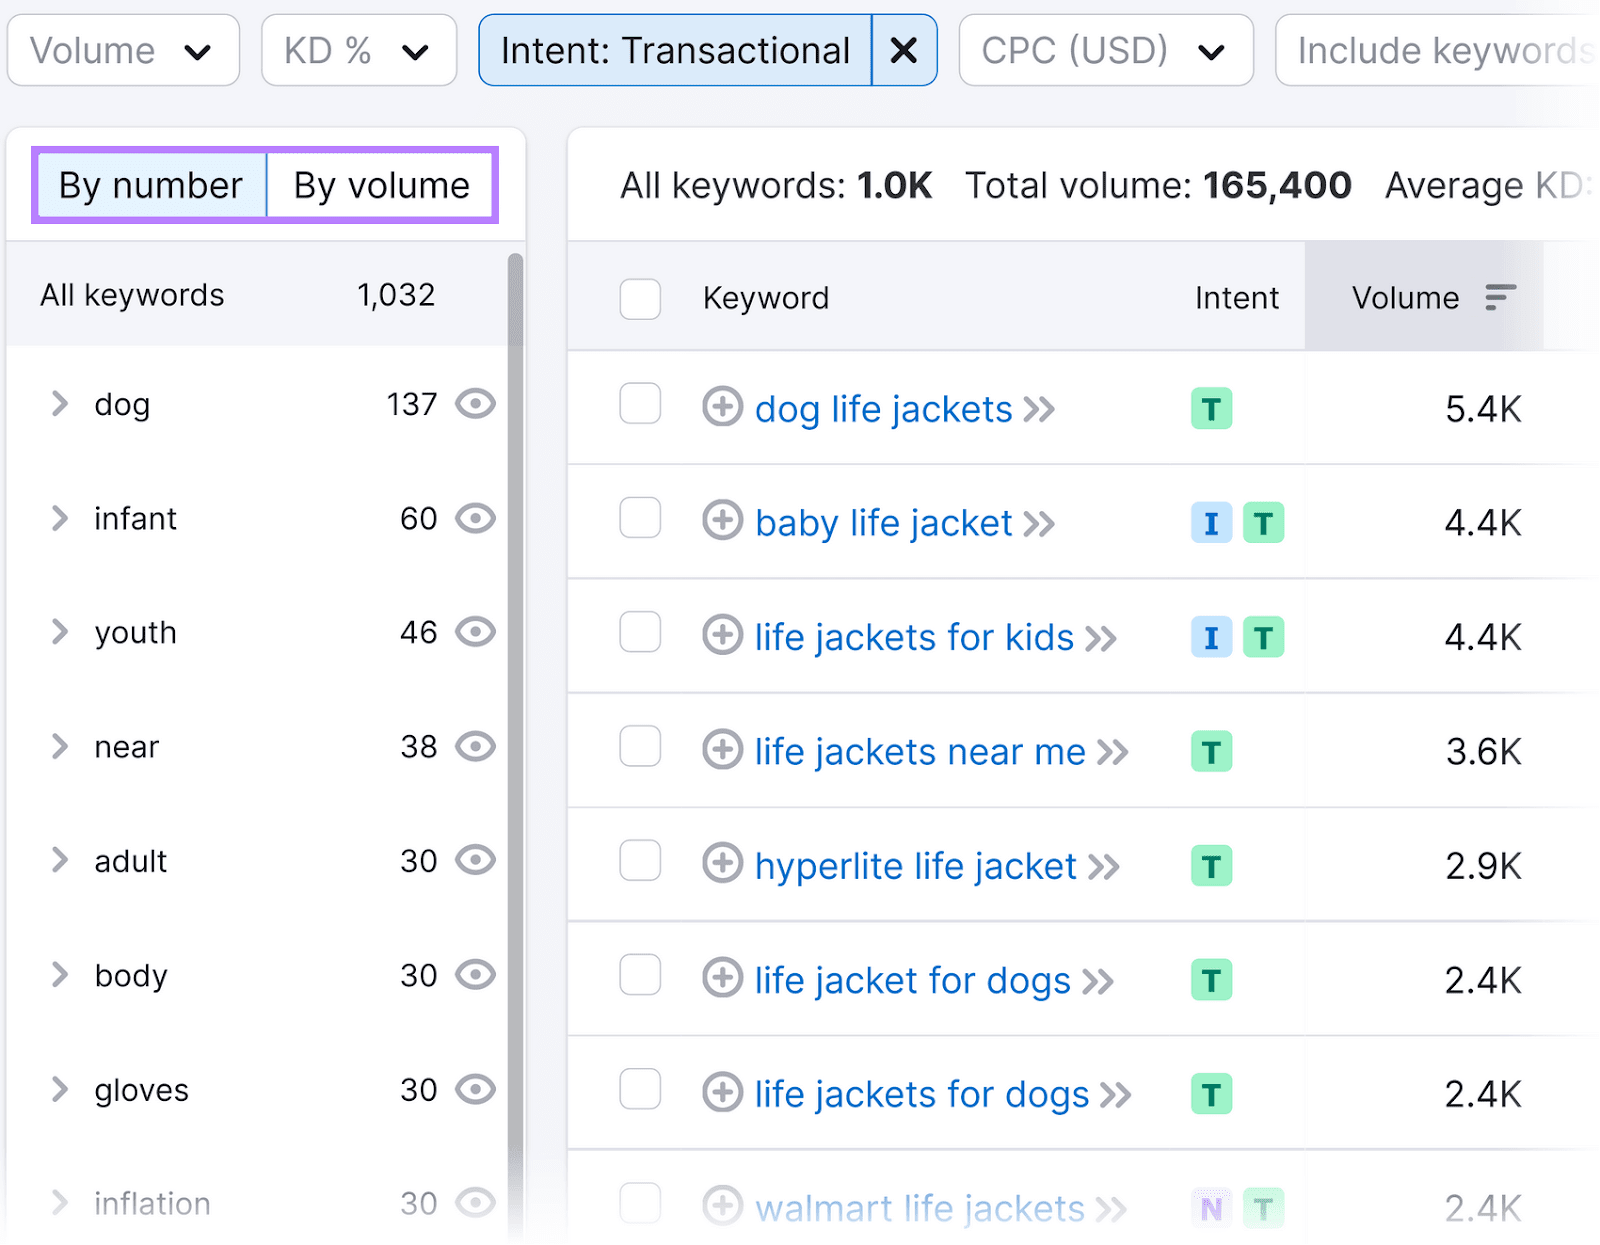
Let’s say your ads target ***** users who want to buy life jackets.
Click “By volume” to see the keywords users searched the most. Then click the “*****” group.
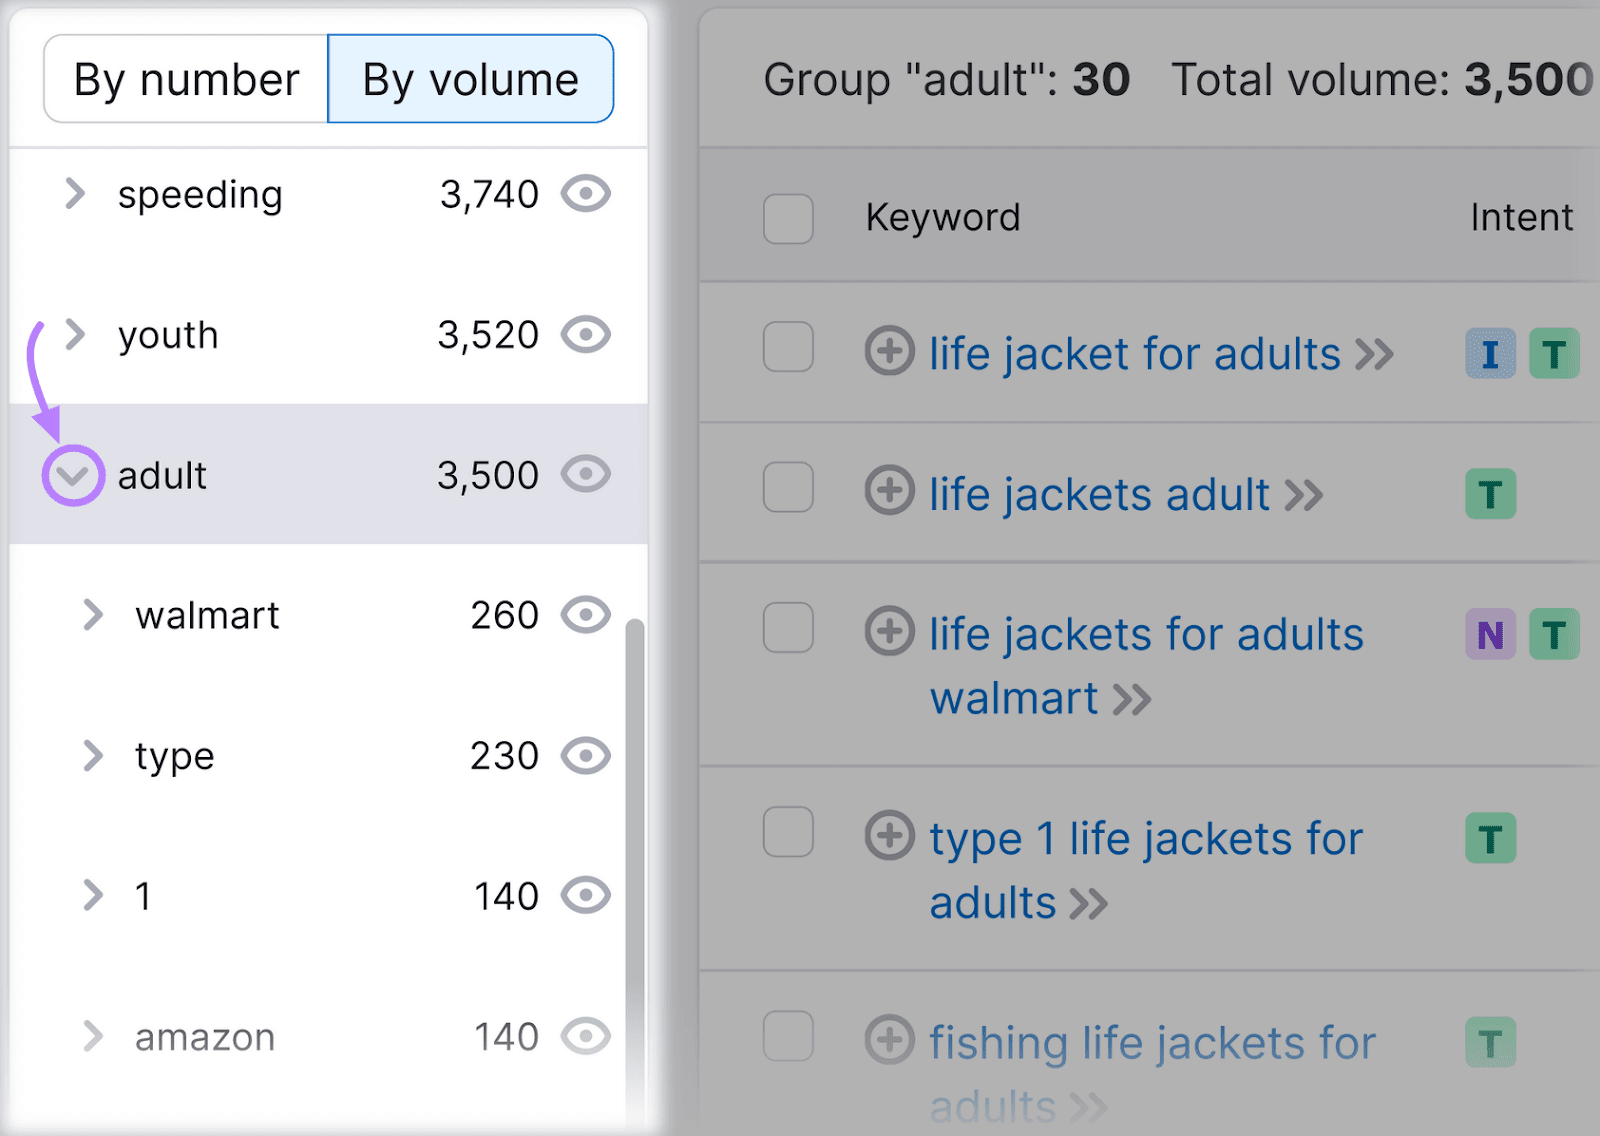
Click the arrow beside the group to see subgroups.
Add Your Keywords to a List
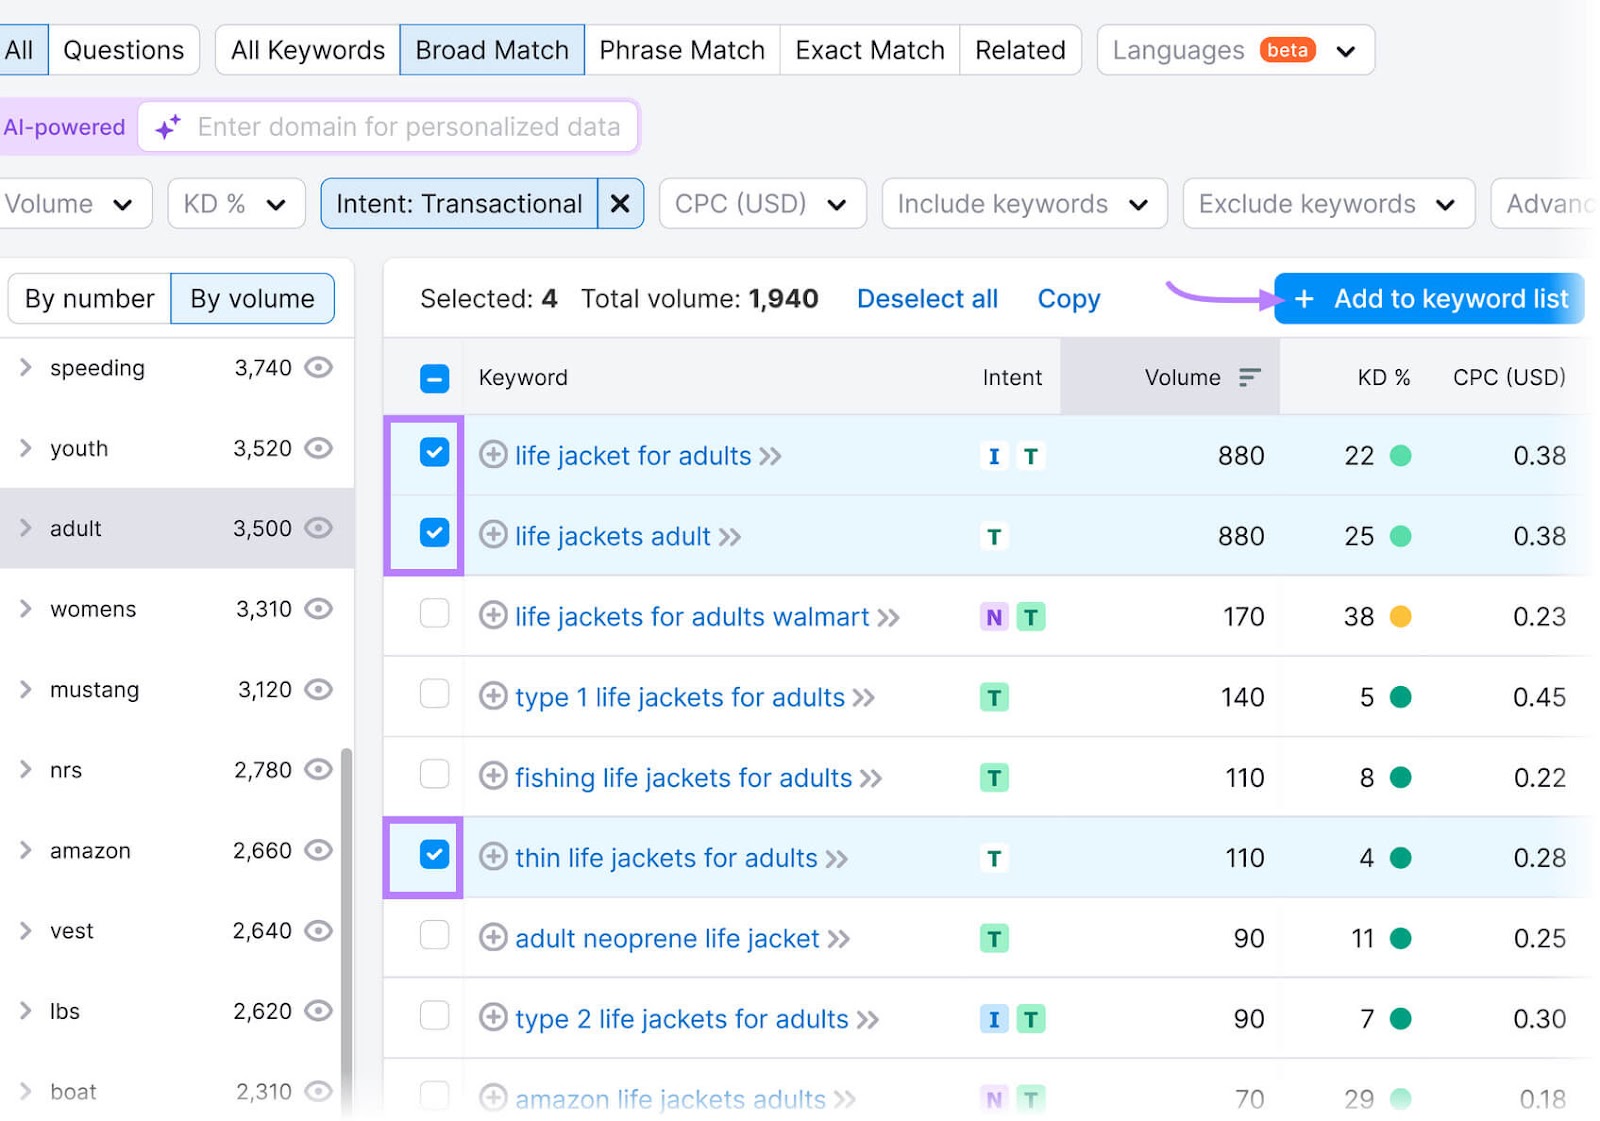
Tick the checkbox next to a keyword to select it. Then click the “+ Add to keyword list” to add it.
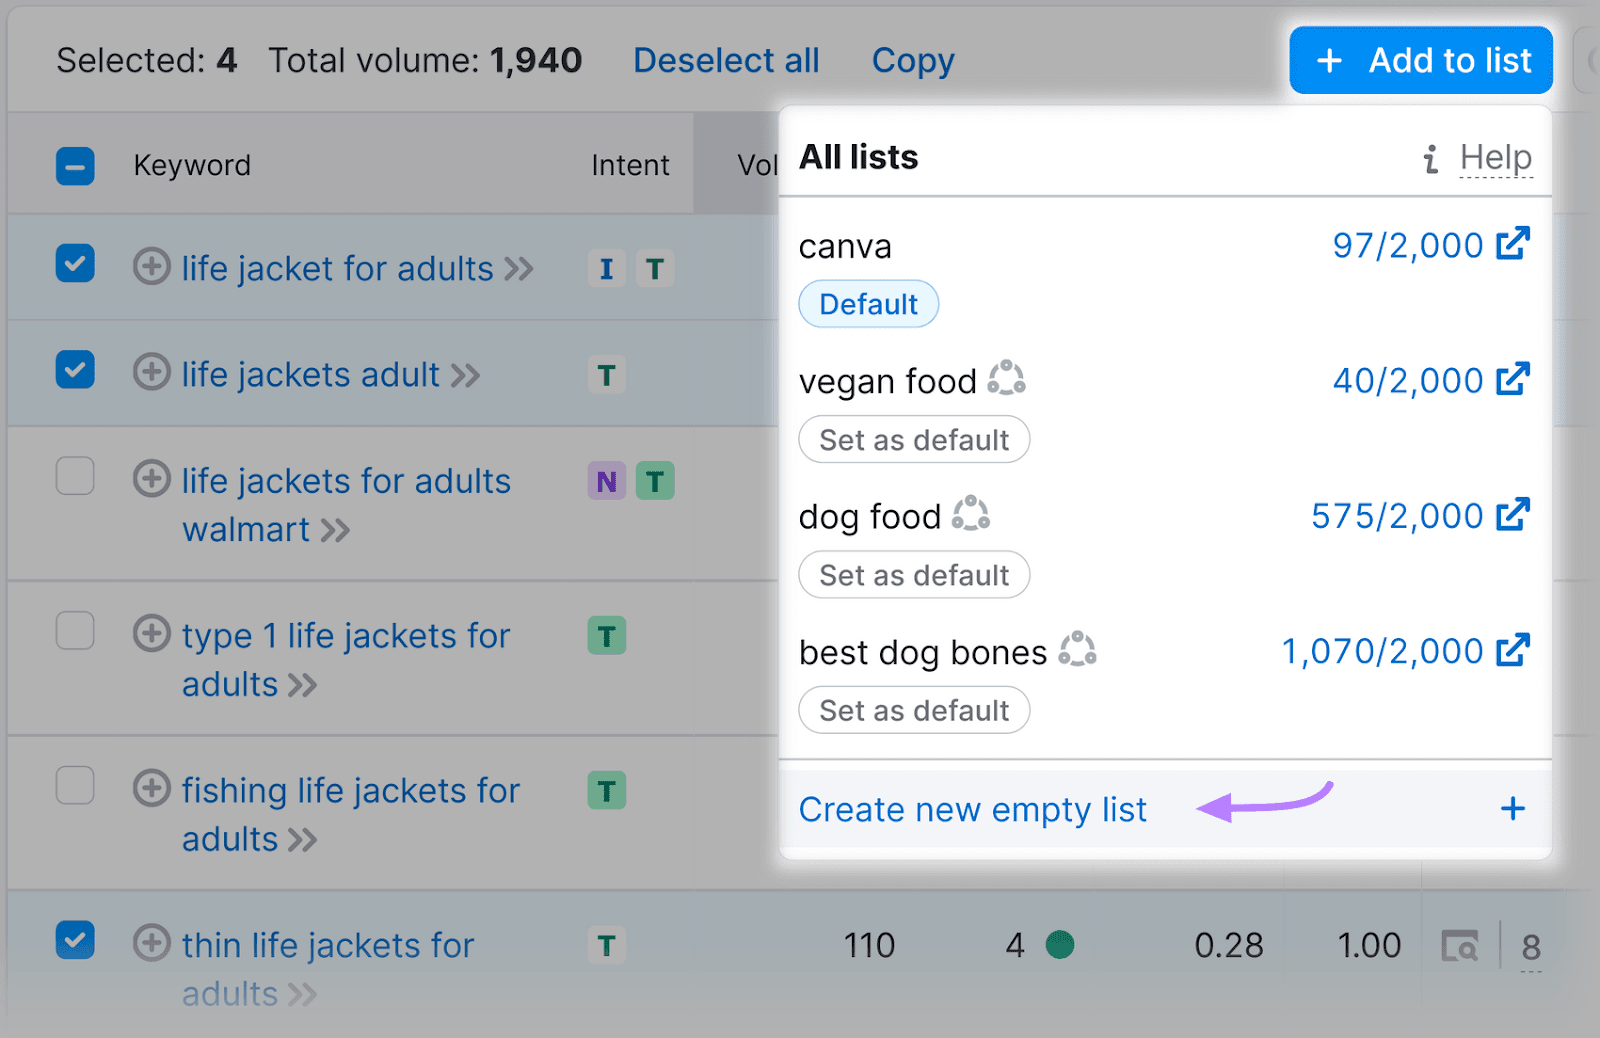
Click “Create new empty list.”
Enter your list’s name, and click the checkmark to save it.
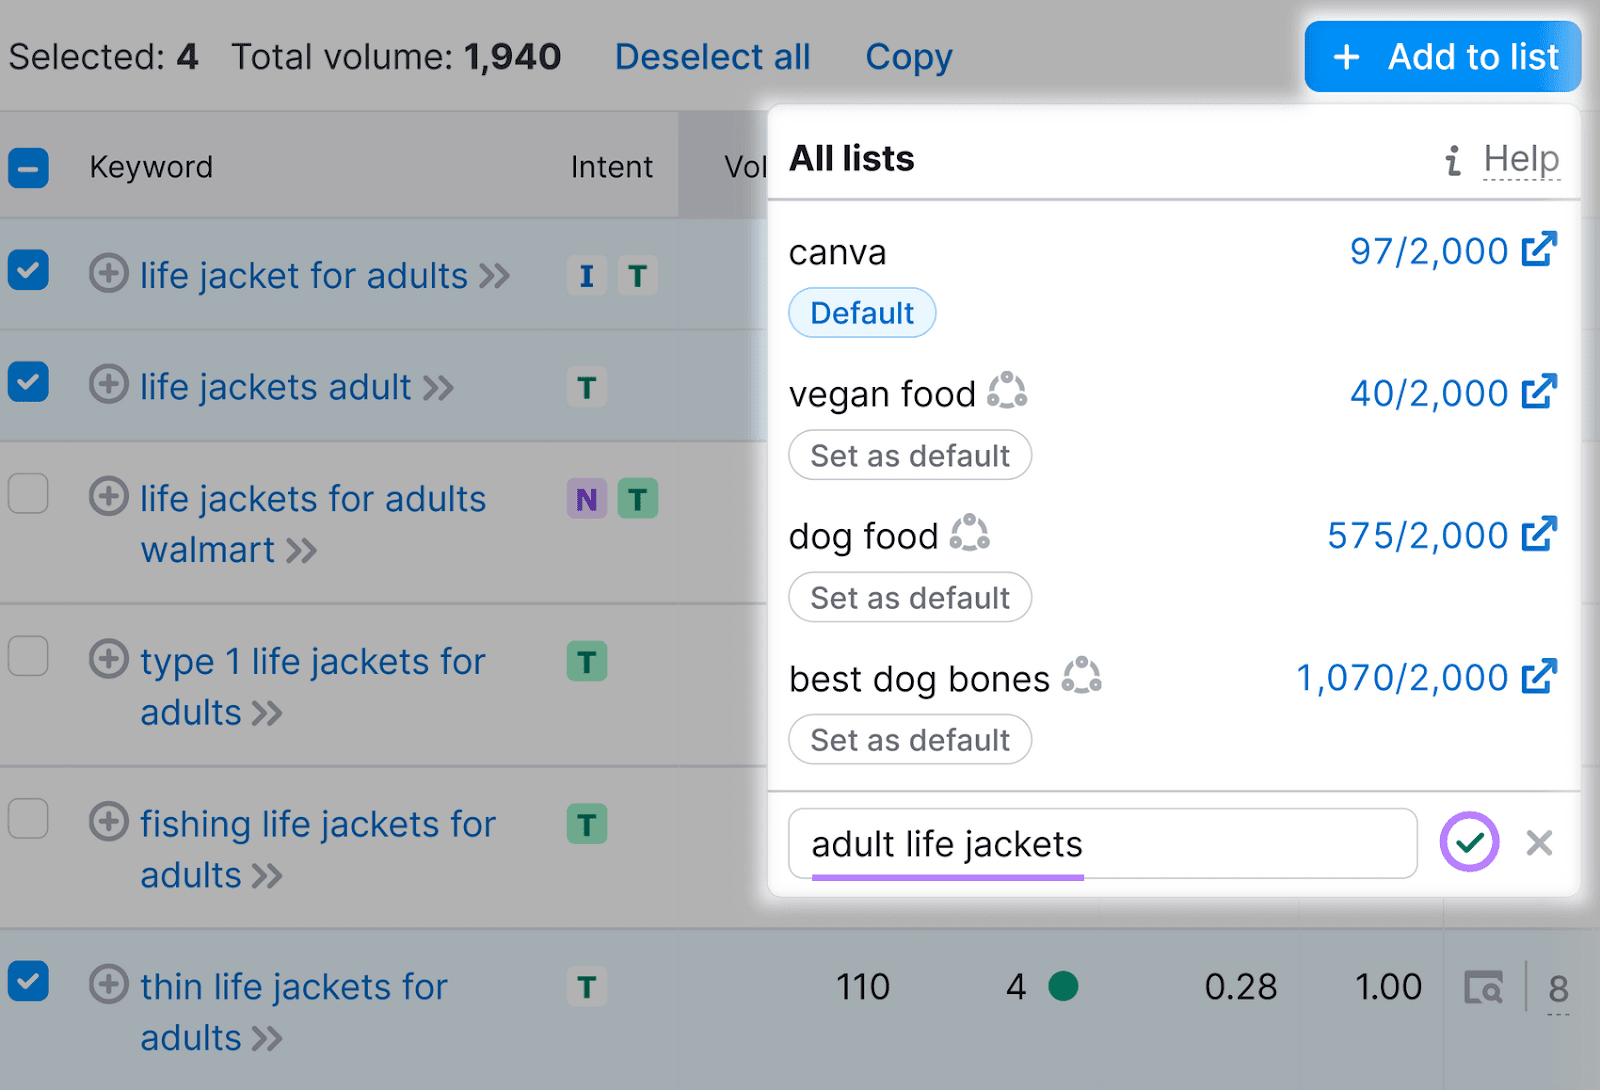
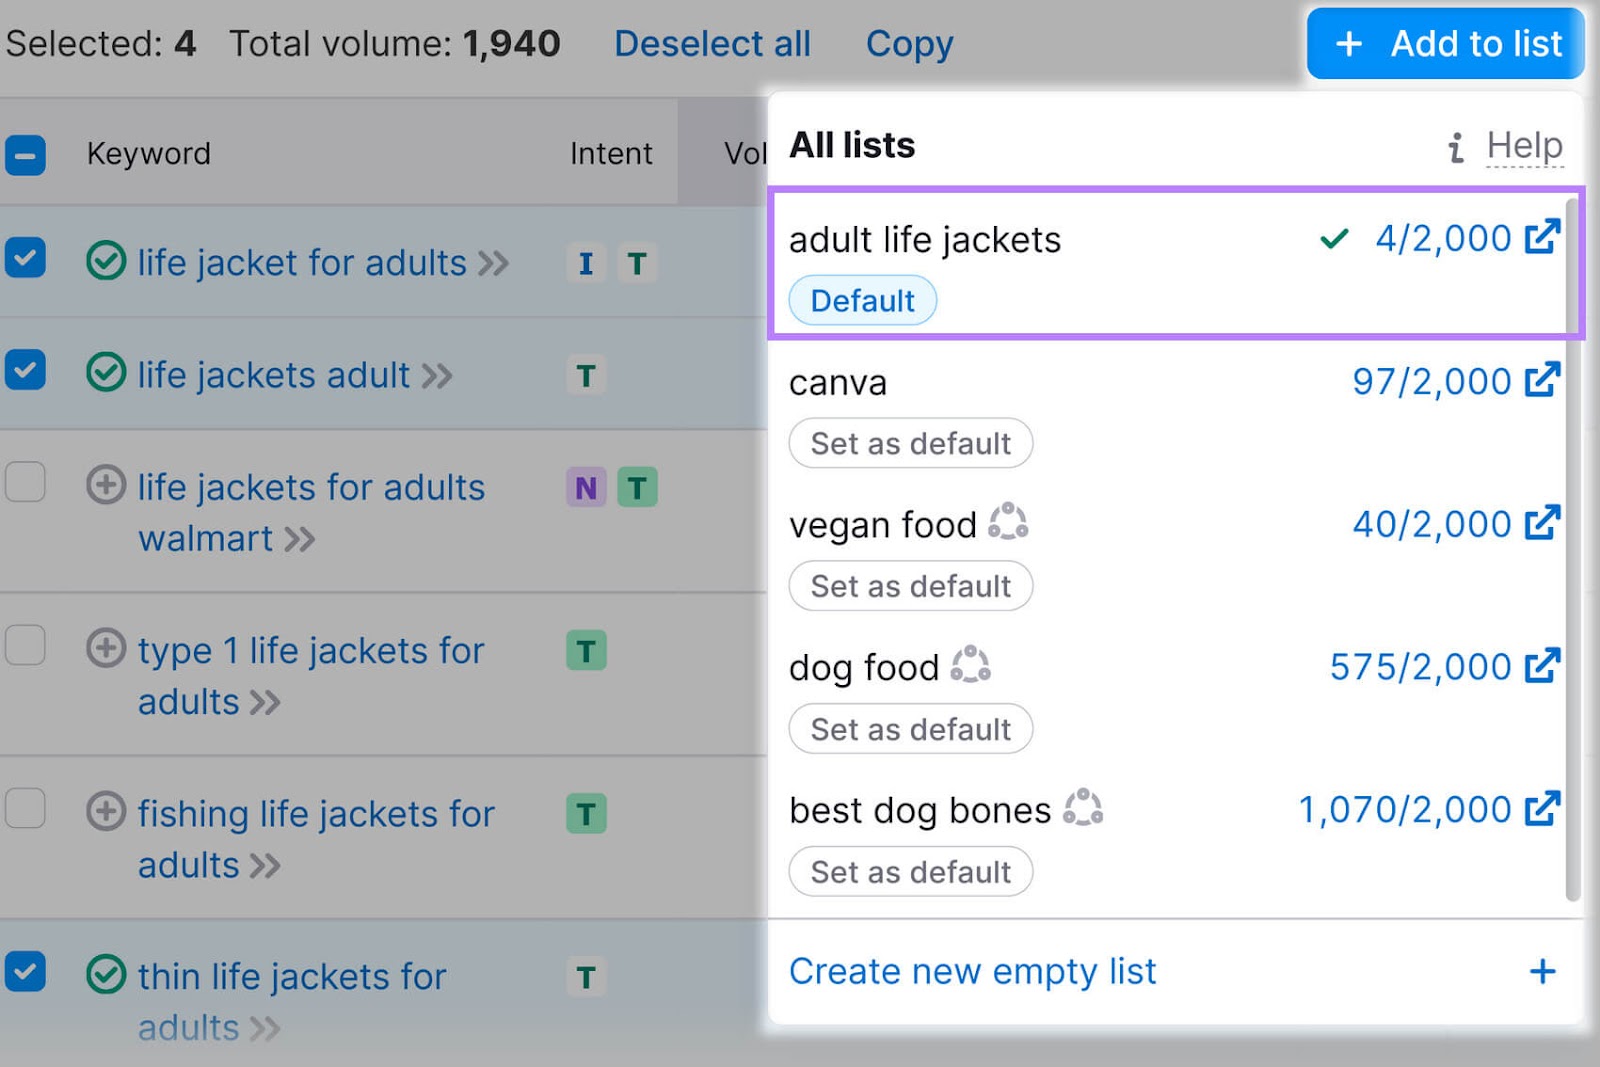
You just created a keyword list for your ad targeting. Repeat the last two steps to add more relevant keywords to the list.
Analyze Your Competitors’ Keywords
Use Semrush’s Advertising Research tool to identify the keywords your competitors are bidding on.
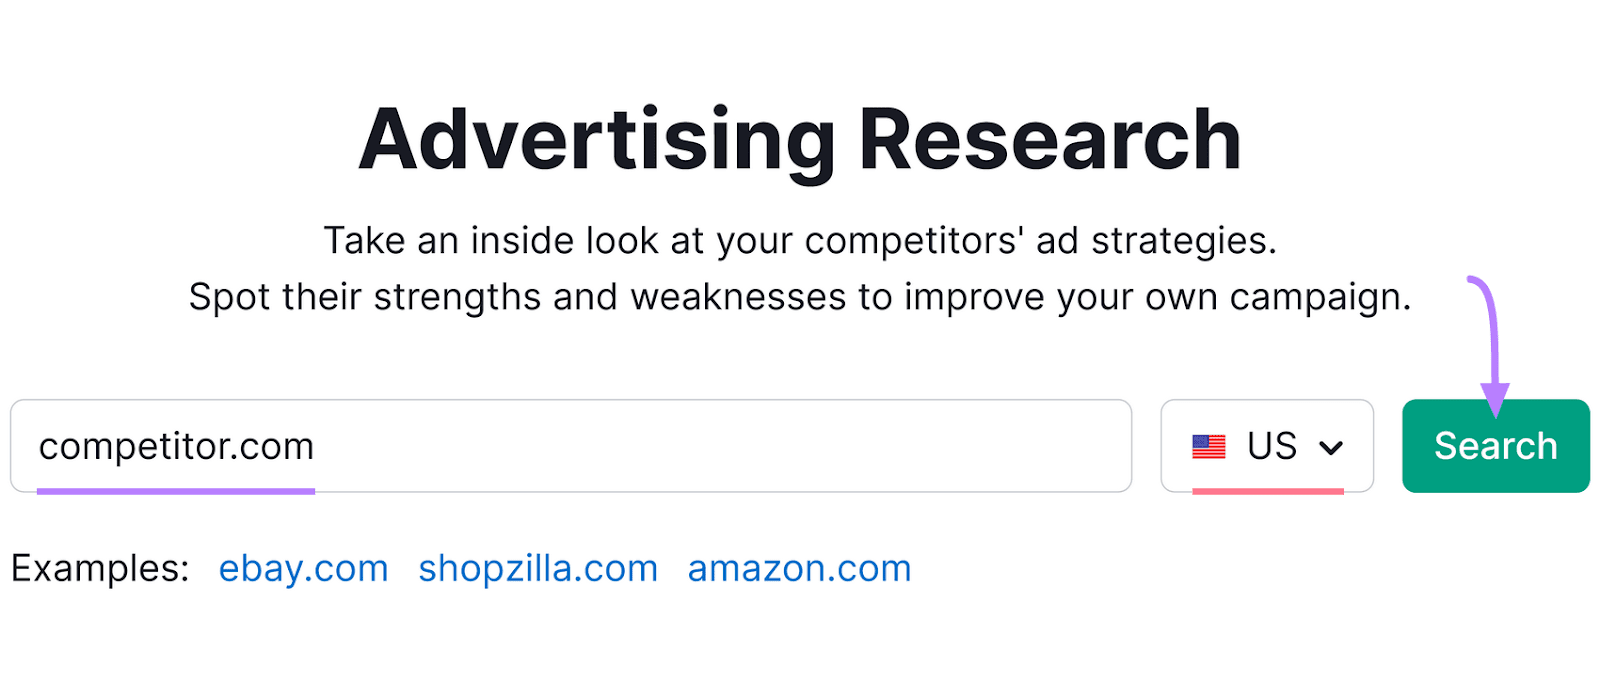
Type your competitor’s URL in the text box, select your location, and hit the “Search” button.
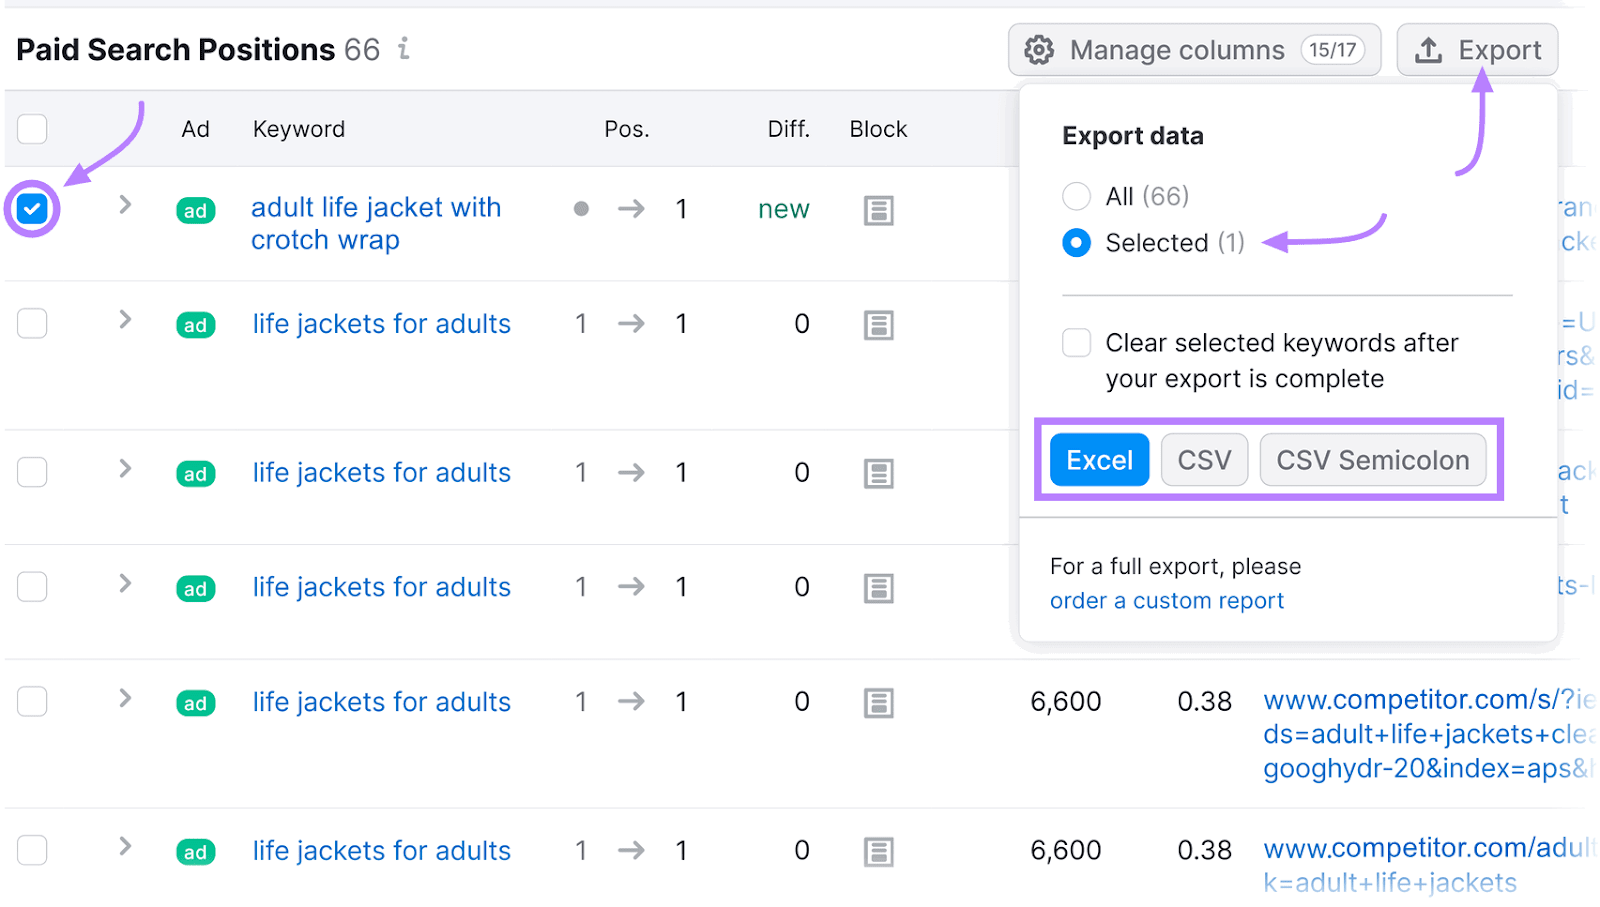
Scroll down to the “Paid Search Positions” section to see the domain’s keywords and positions in Google’s paid search results.
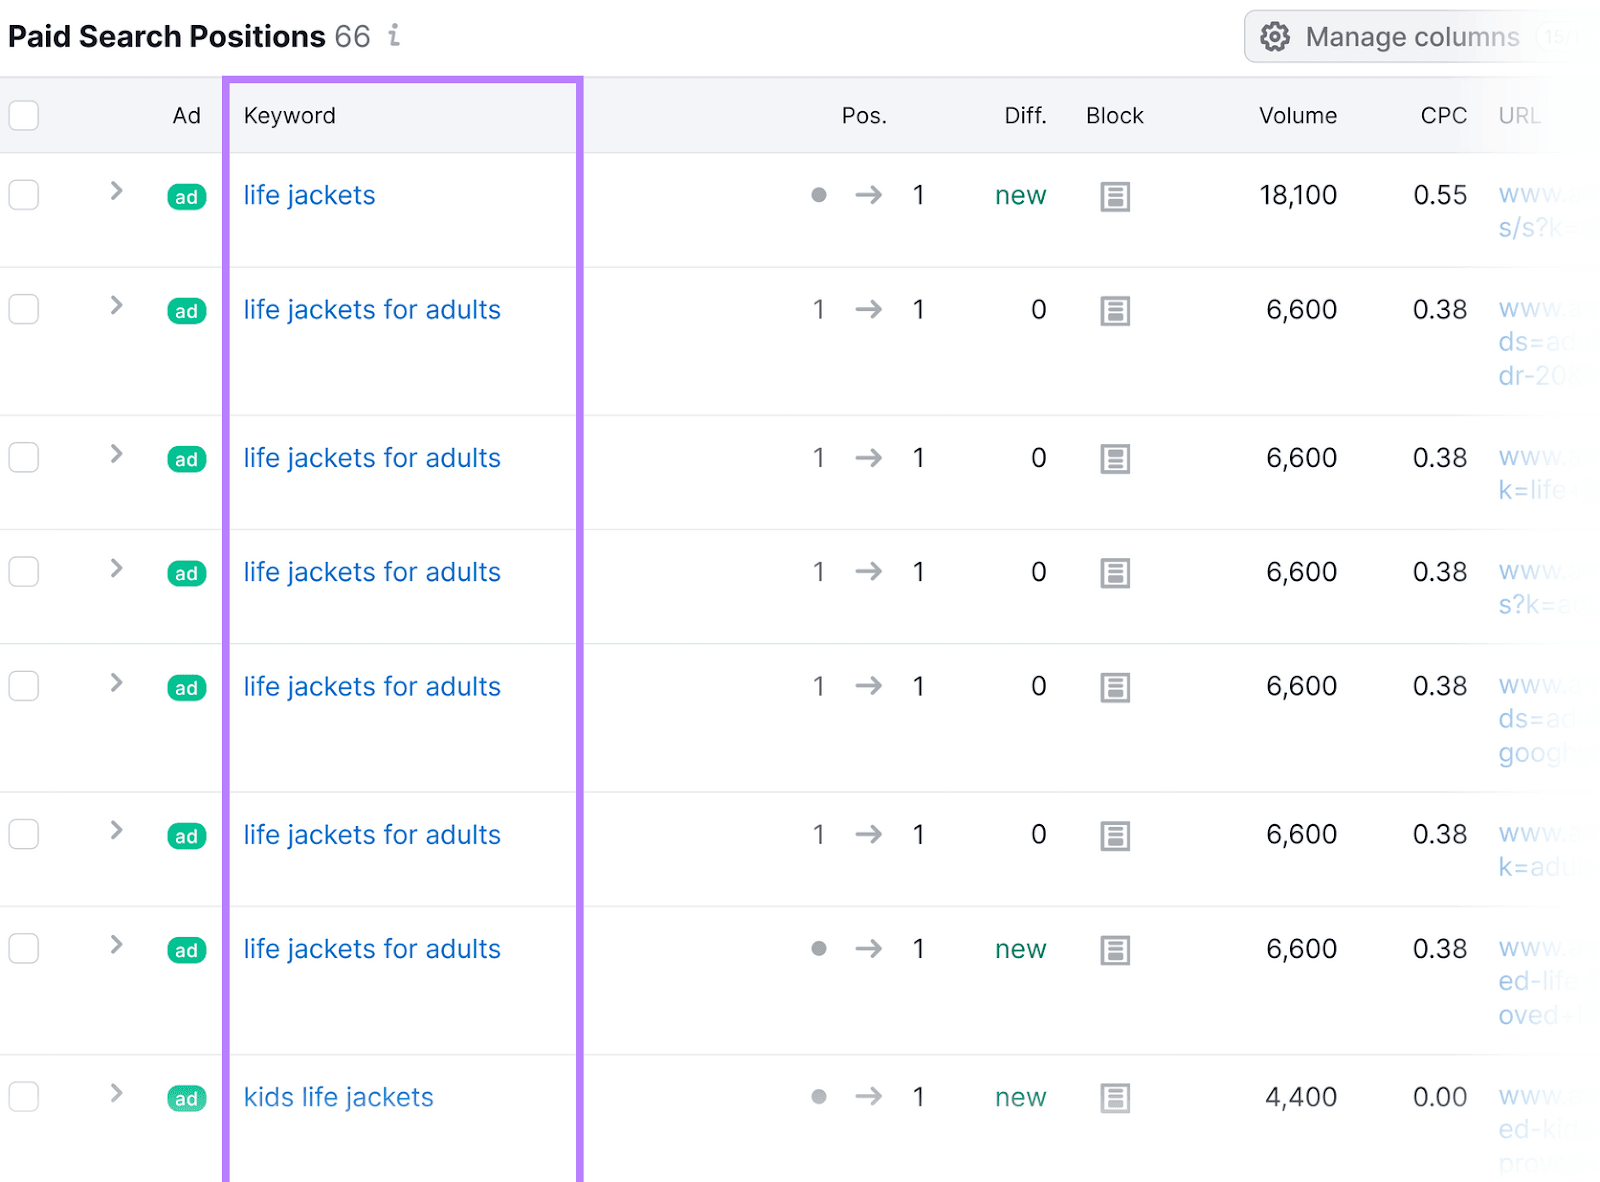
Review the keywords and identify those that are most relevant to your ad campaign. Select the keywords. Then choose “All”(all the keywords) or “Selected”(only the keywords you selected). And click “Export” at the top right corner.
Repeat these steps for other industry competitors to add more relevant keywords to your list.
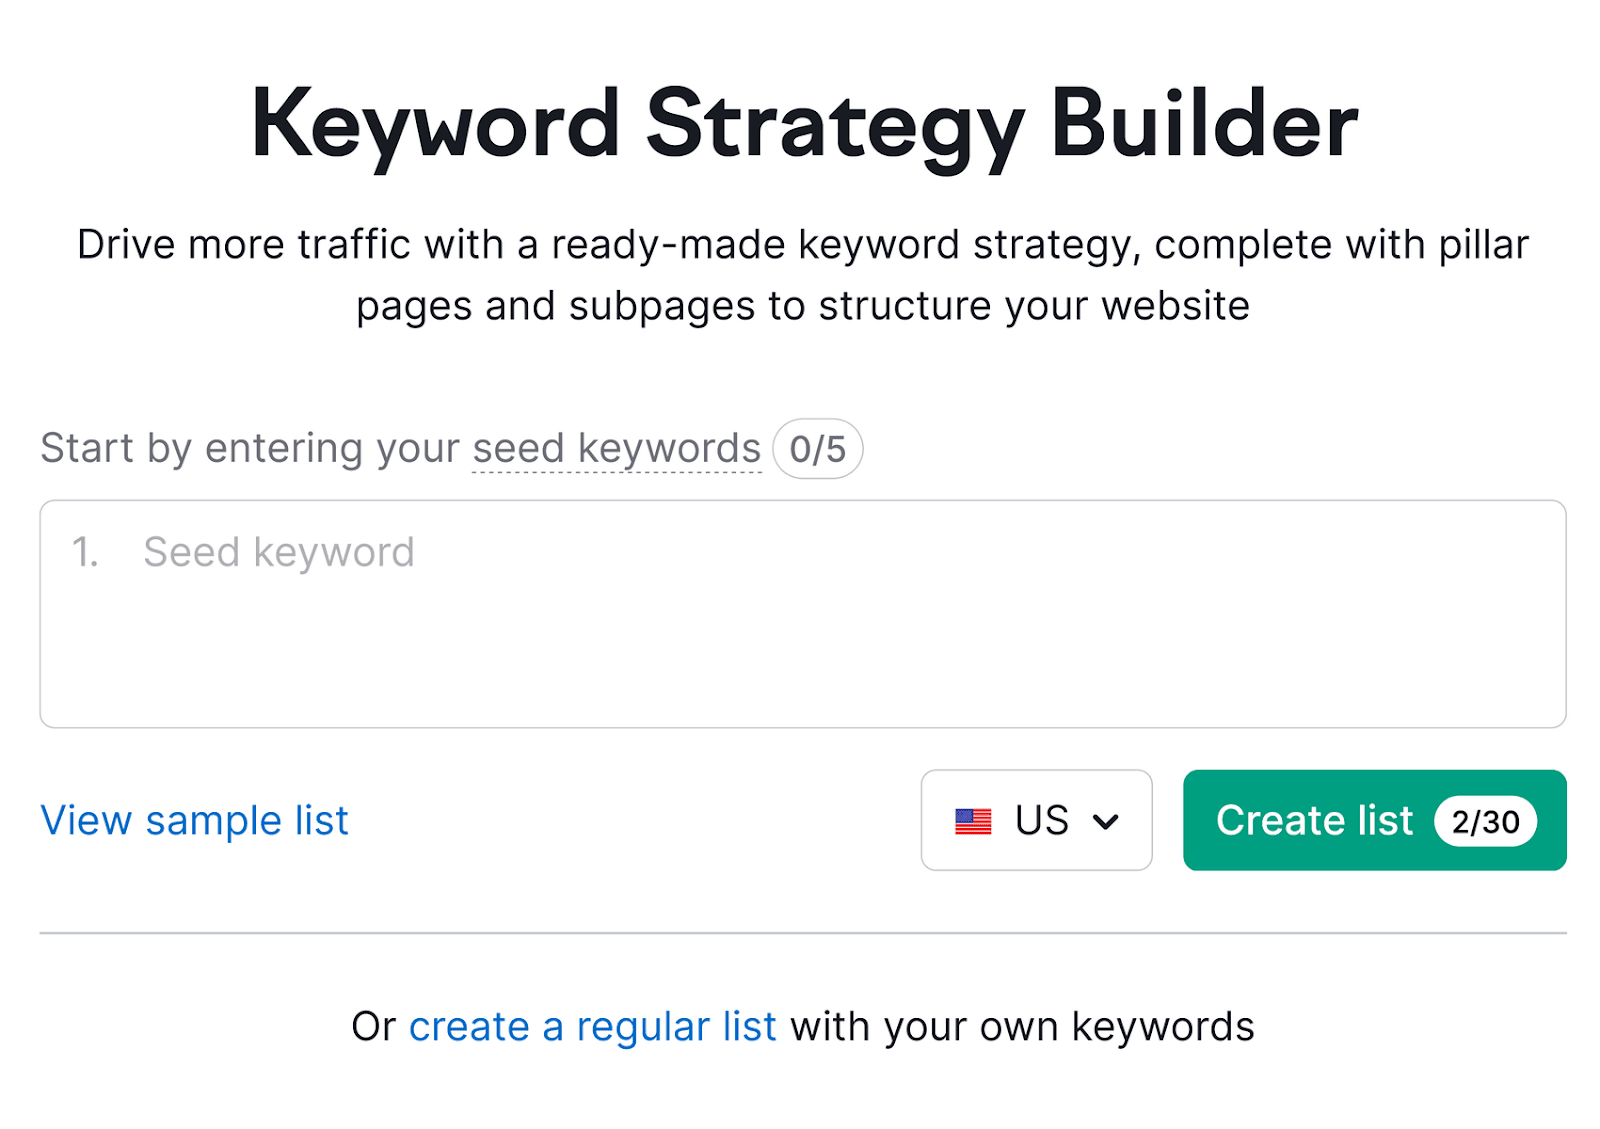
Then use Keyword Strategy Builder to add these relevant keywords to your initial list.
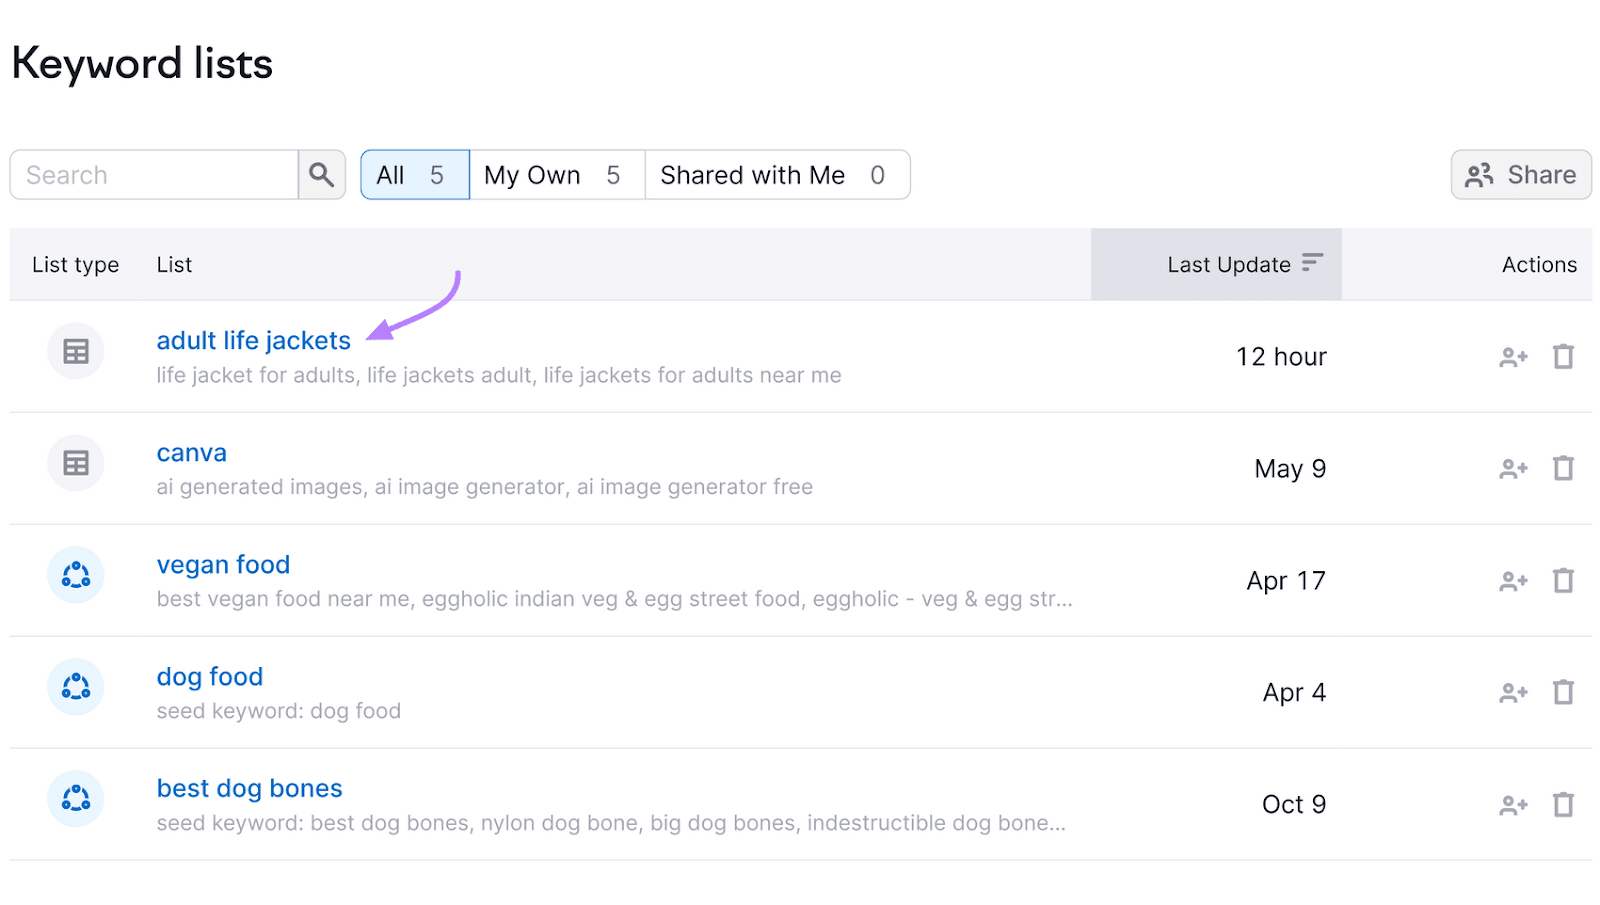
Scroll down to “Keyword lists” and click the list where you want to add keywords.
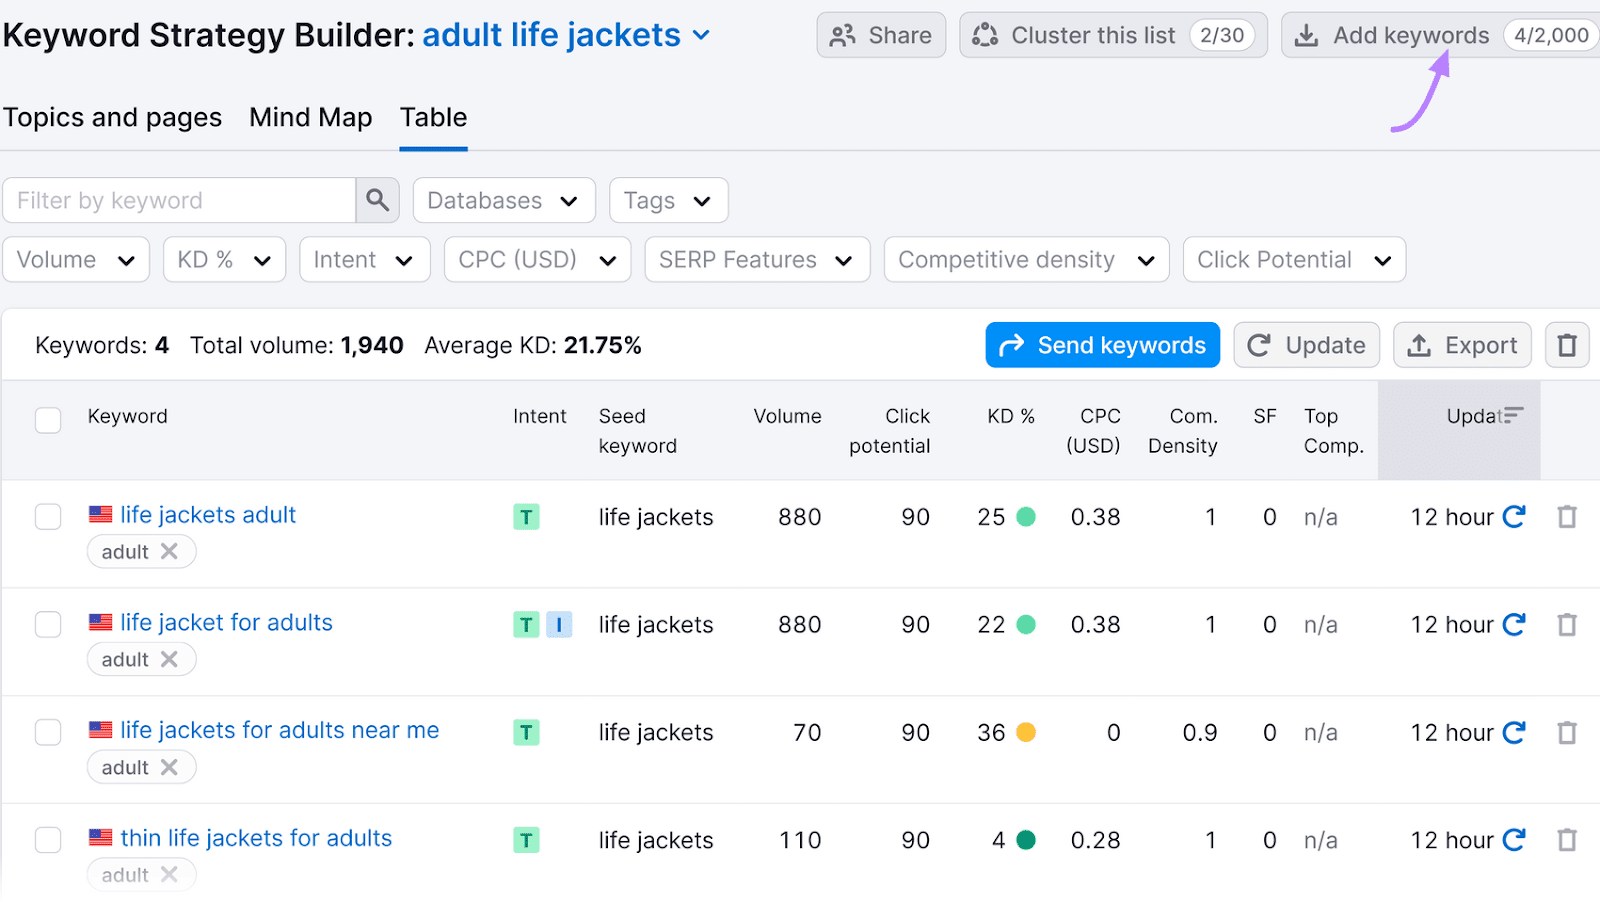
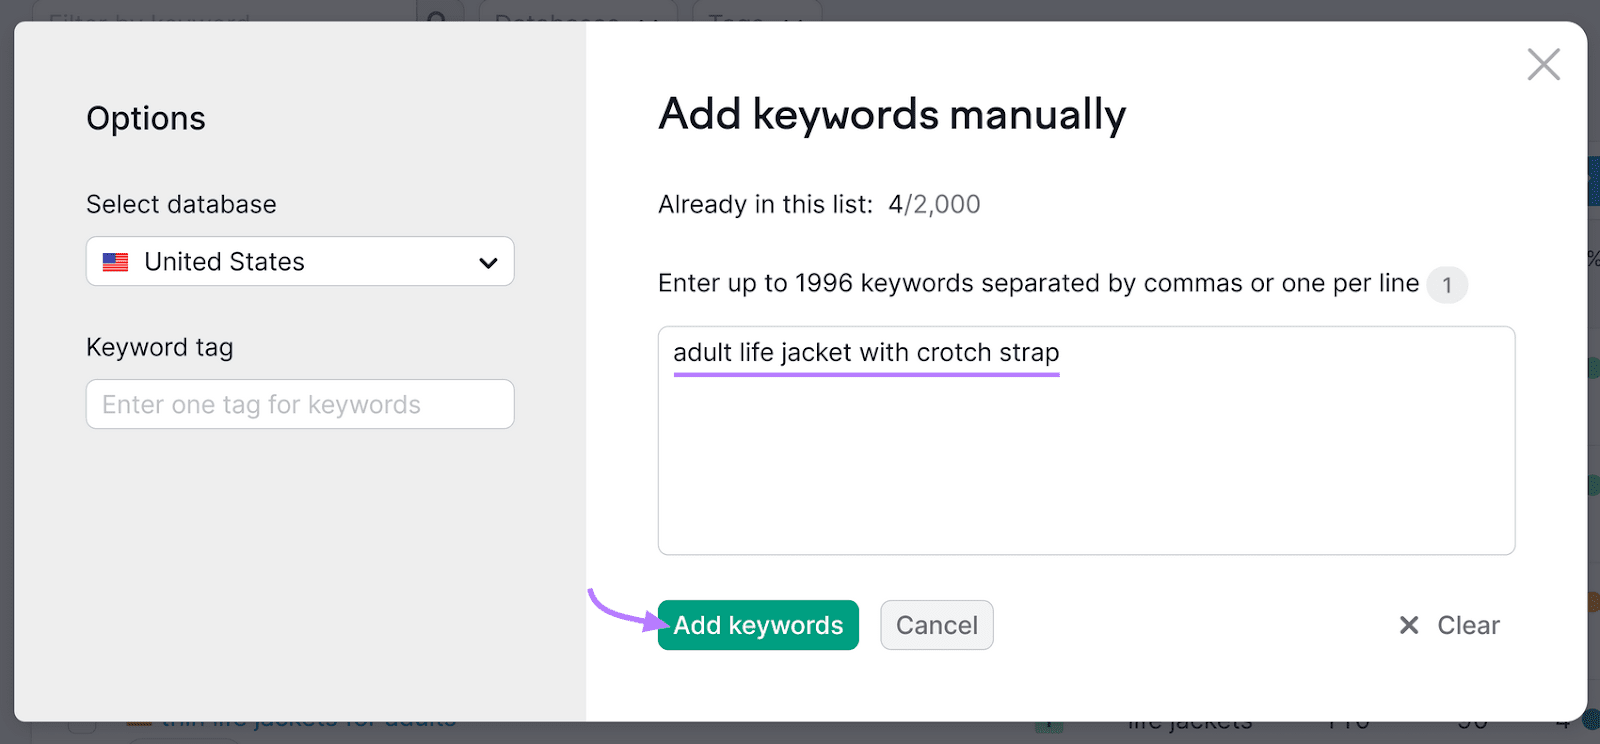
Click the “Add keywords” button.
Input your competitor keywords and click “Add keywords.“
Fine-Tune Your Keyword List
Analyze and group the keywords in the PPC Keyword Tool to streamline your keyword list.
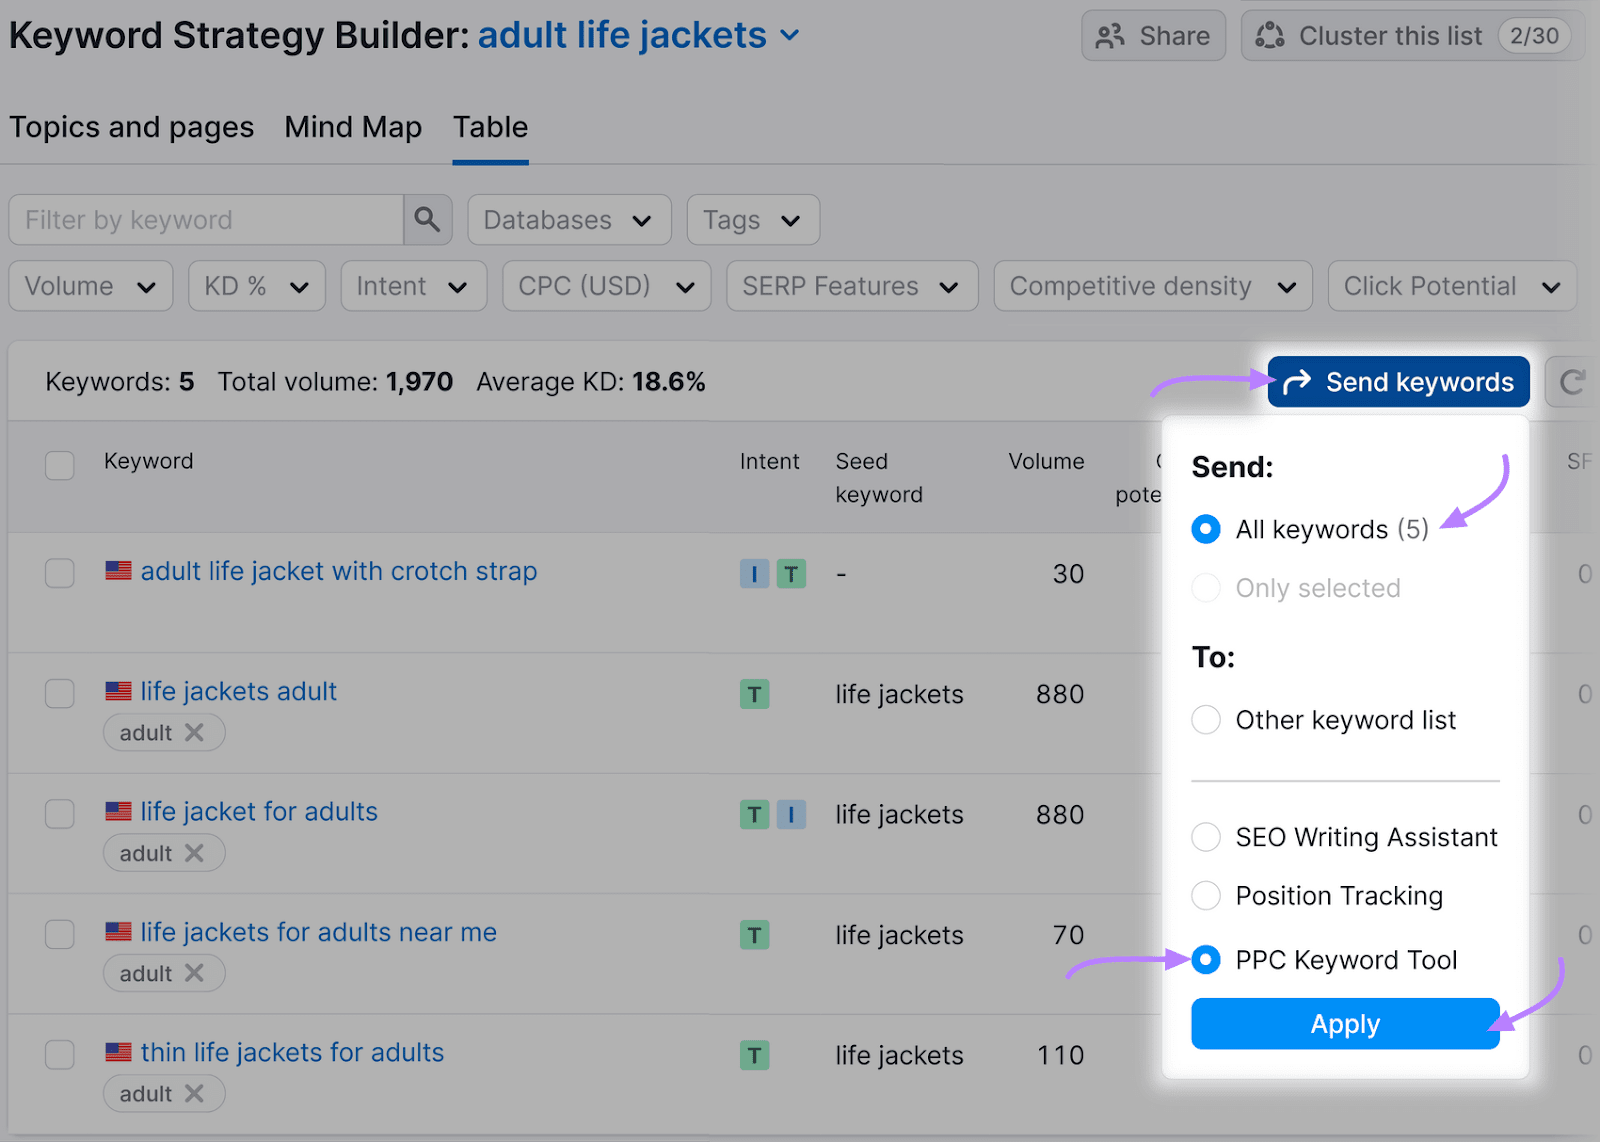
From your Keyword Strategy Builder’s interface, click “Send keywords.” Then select “All keywords” to send all the keywords, and then “PPC Keyword Tool.” Click “Apply.”
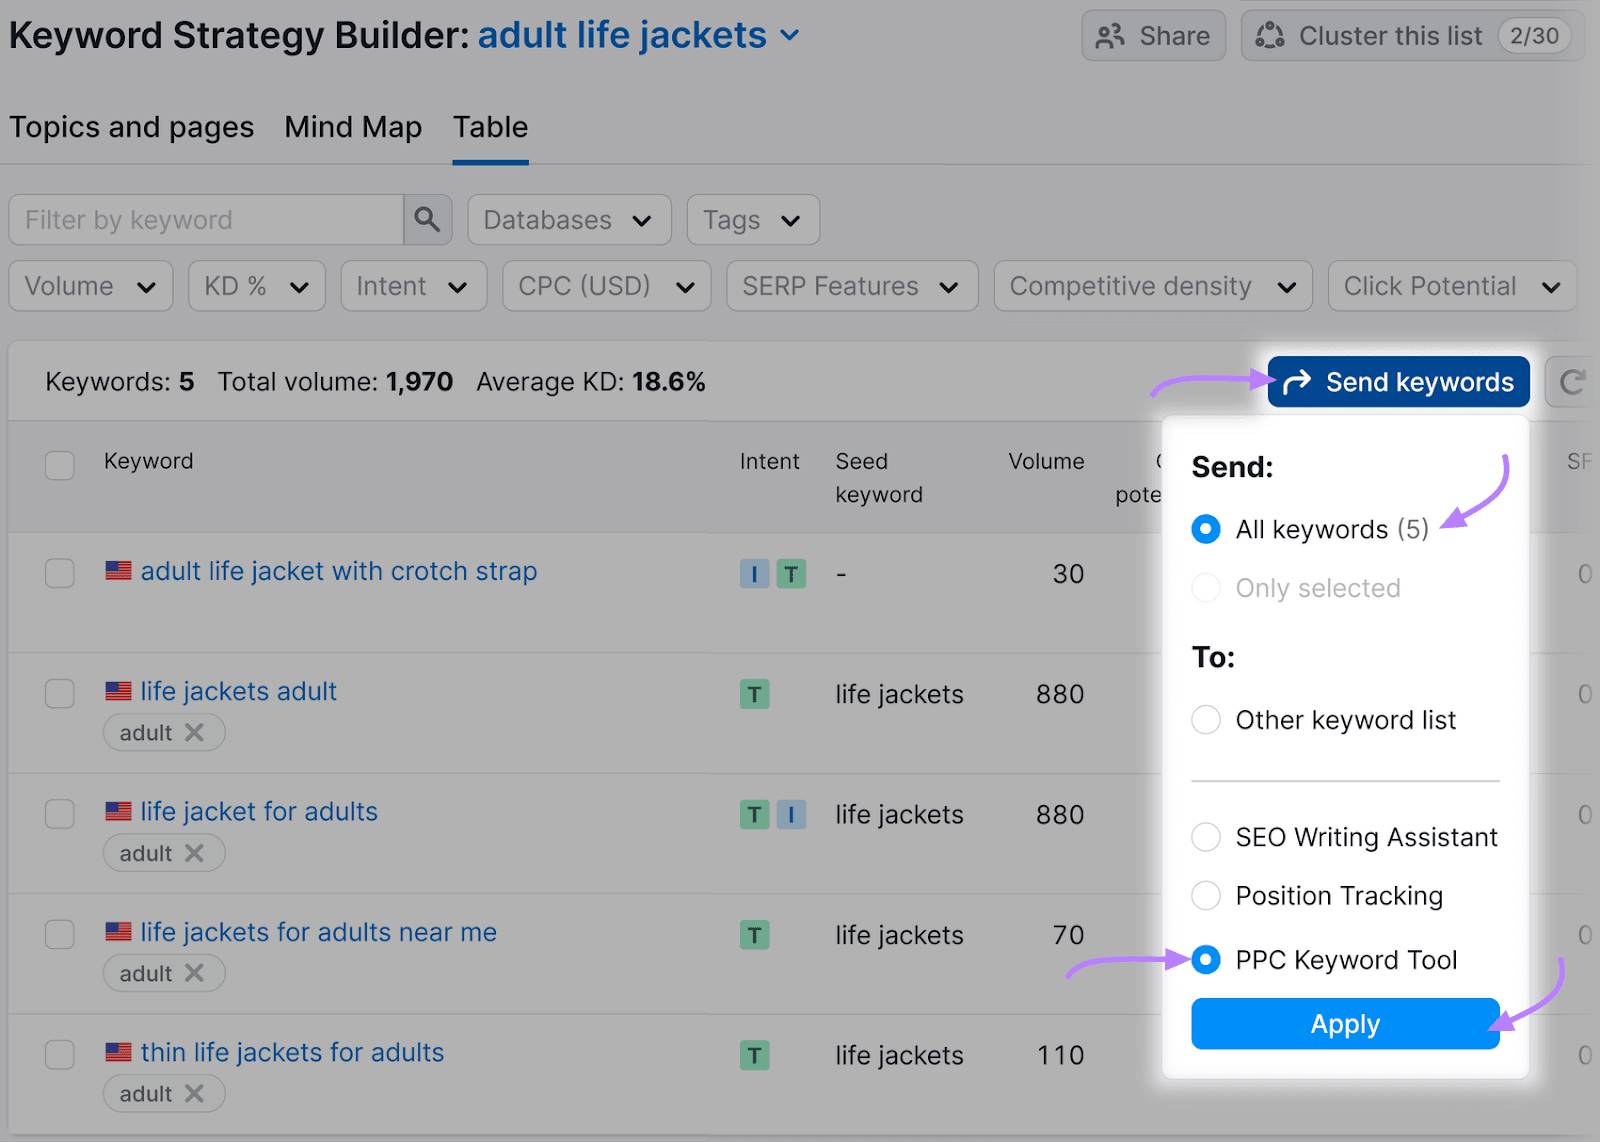
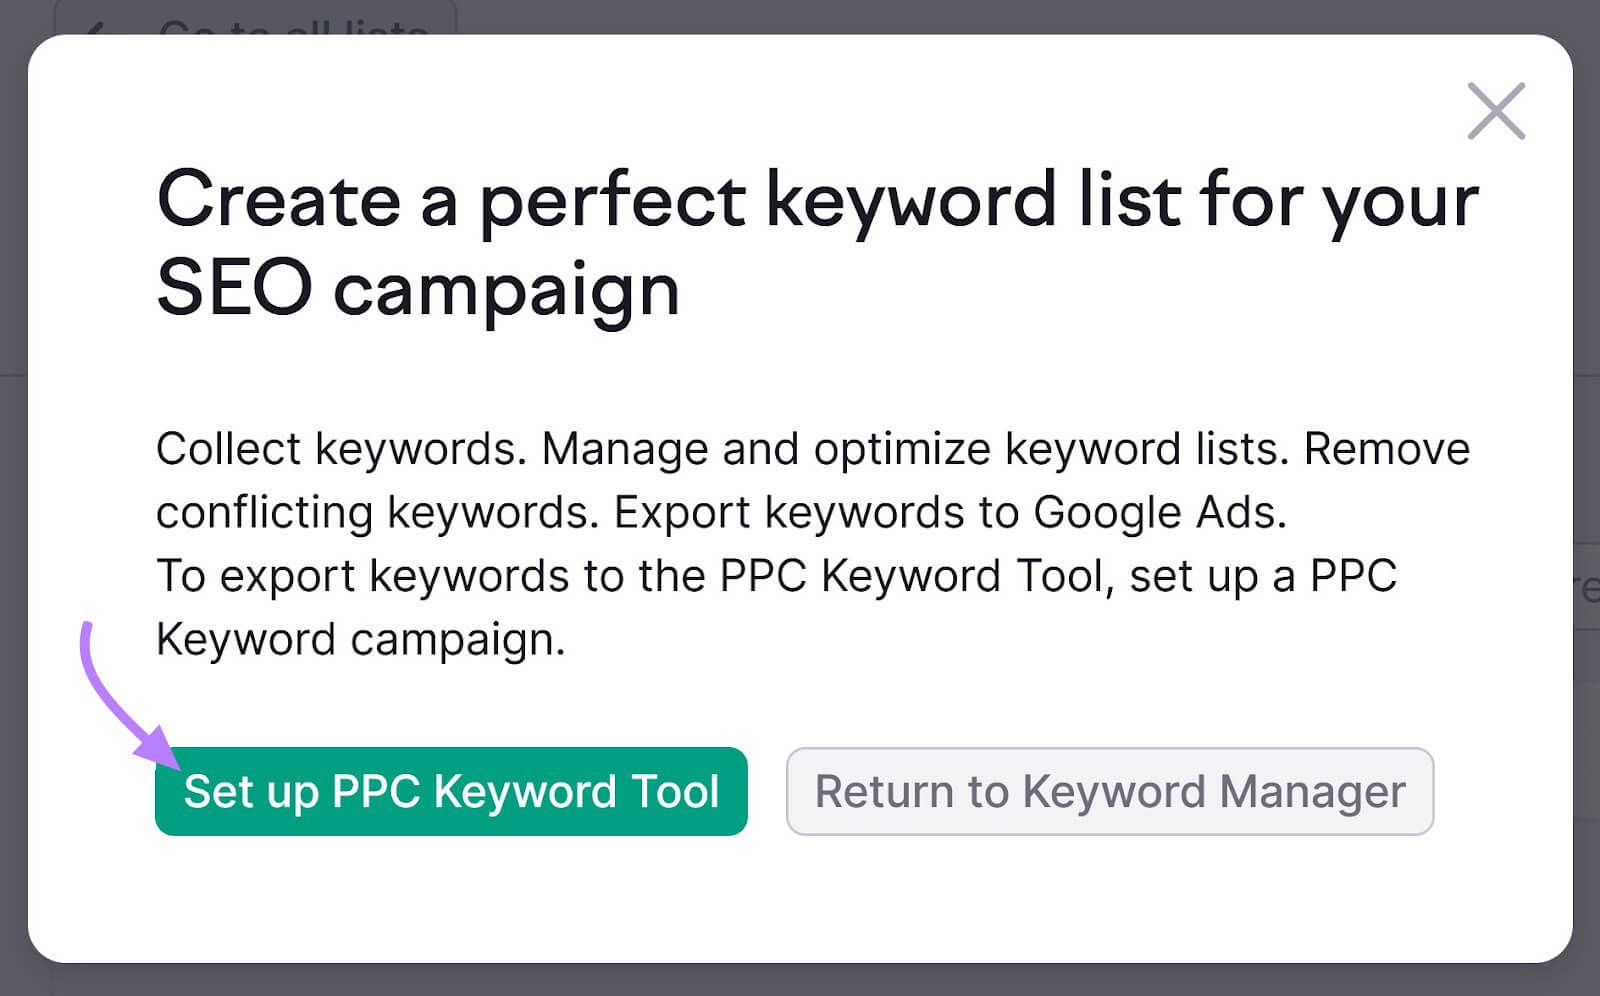
If you haven’t configured your PPC Keyword tool, you’ll see the following prompt. Click “Set up PPC Keyword Tool.”
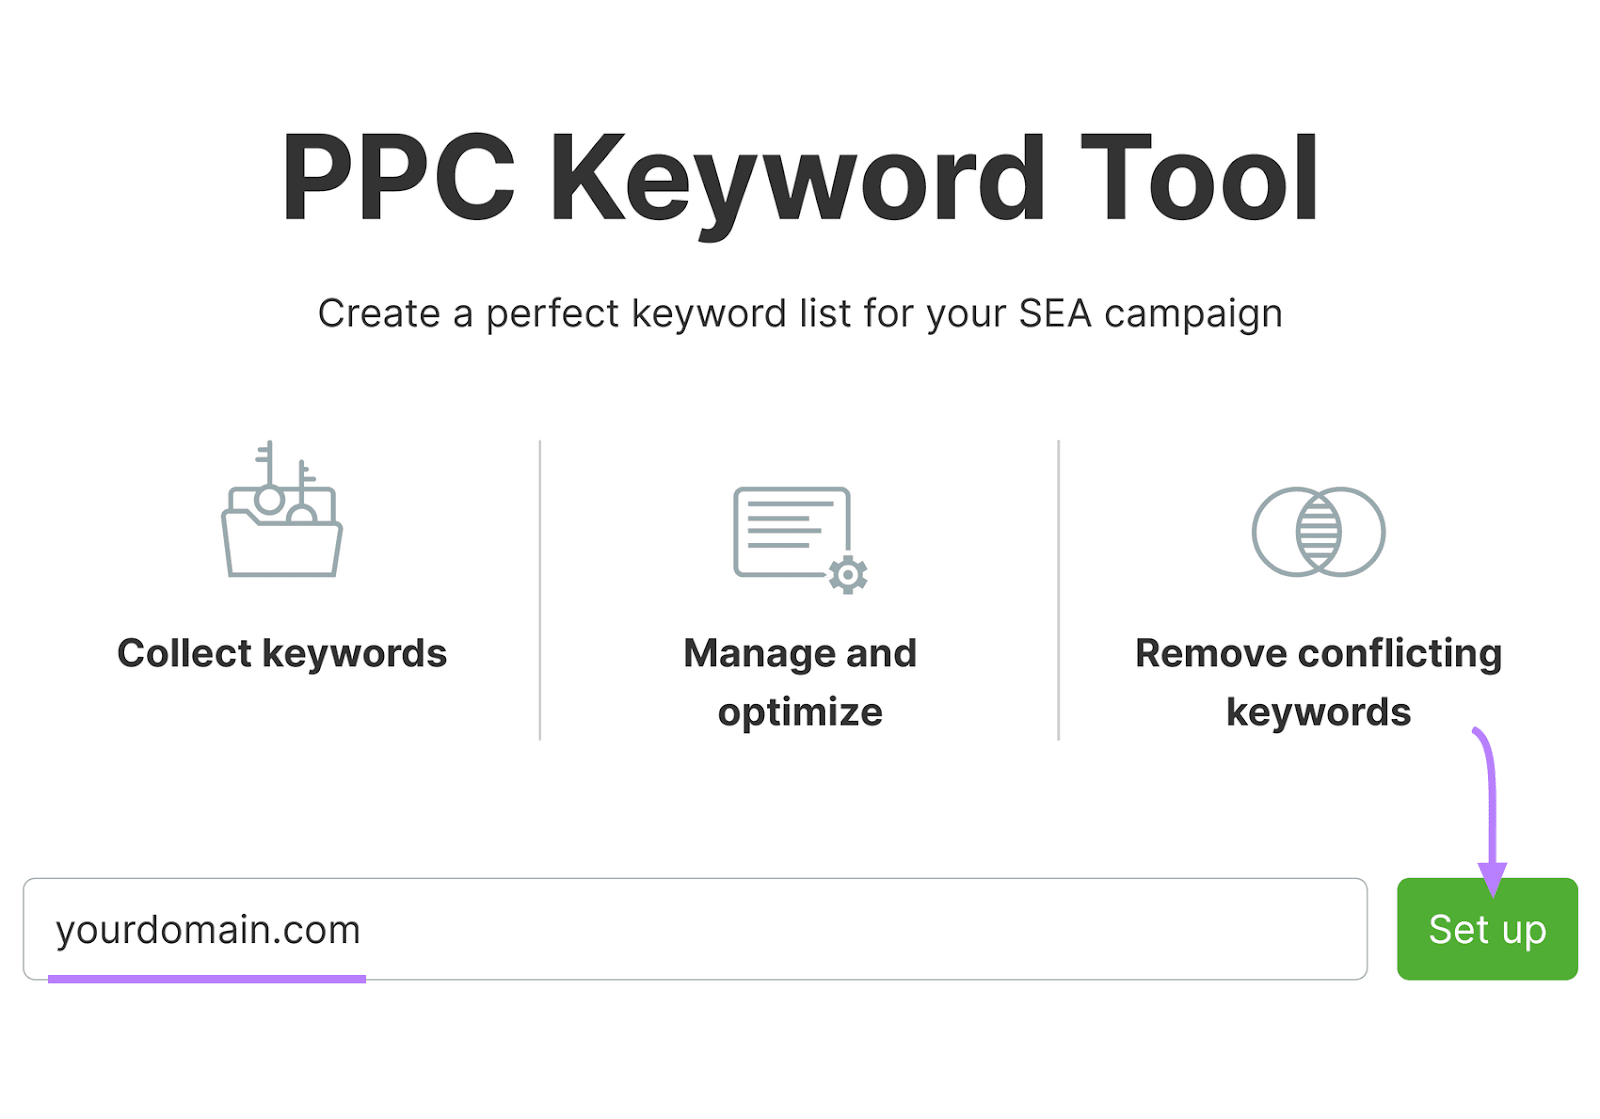
Type your website’s URL in the input box, and click “Set up.”
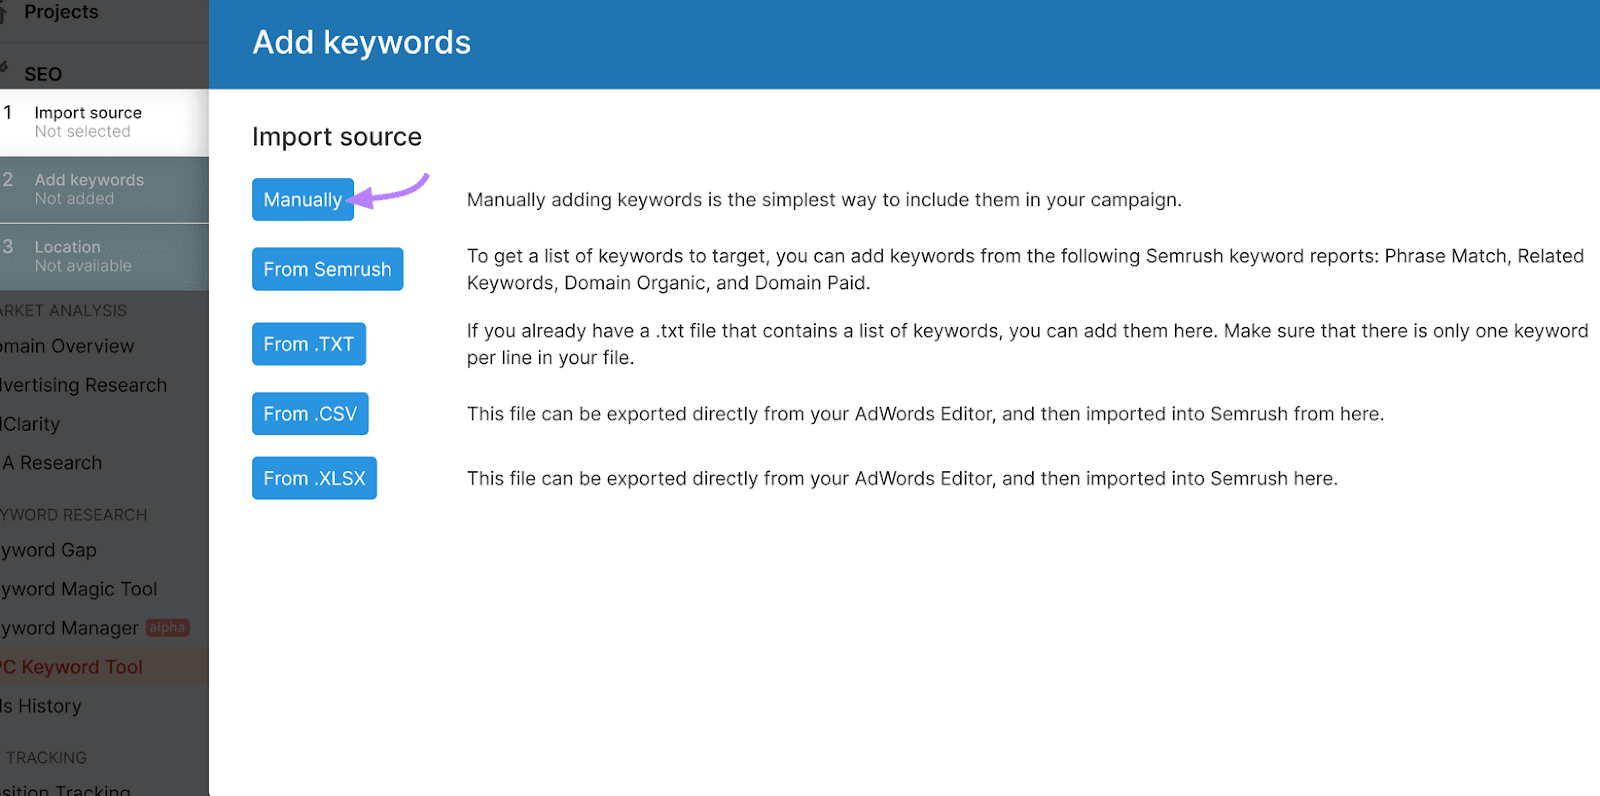
Click “Manually.”
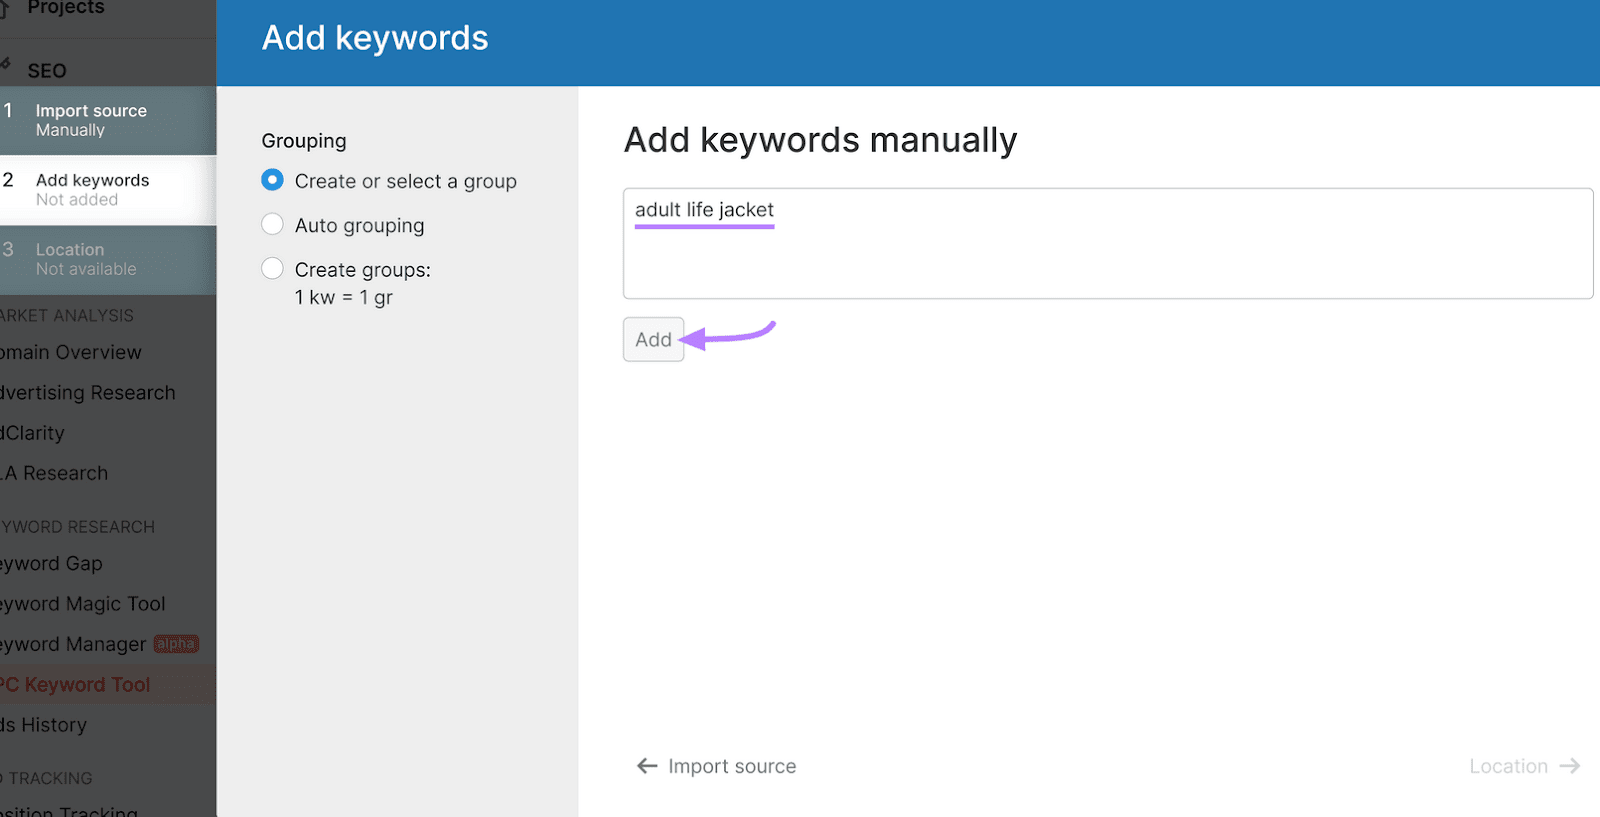
Type any of your keywords into the text box. Click “Add.”
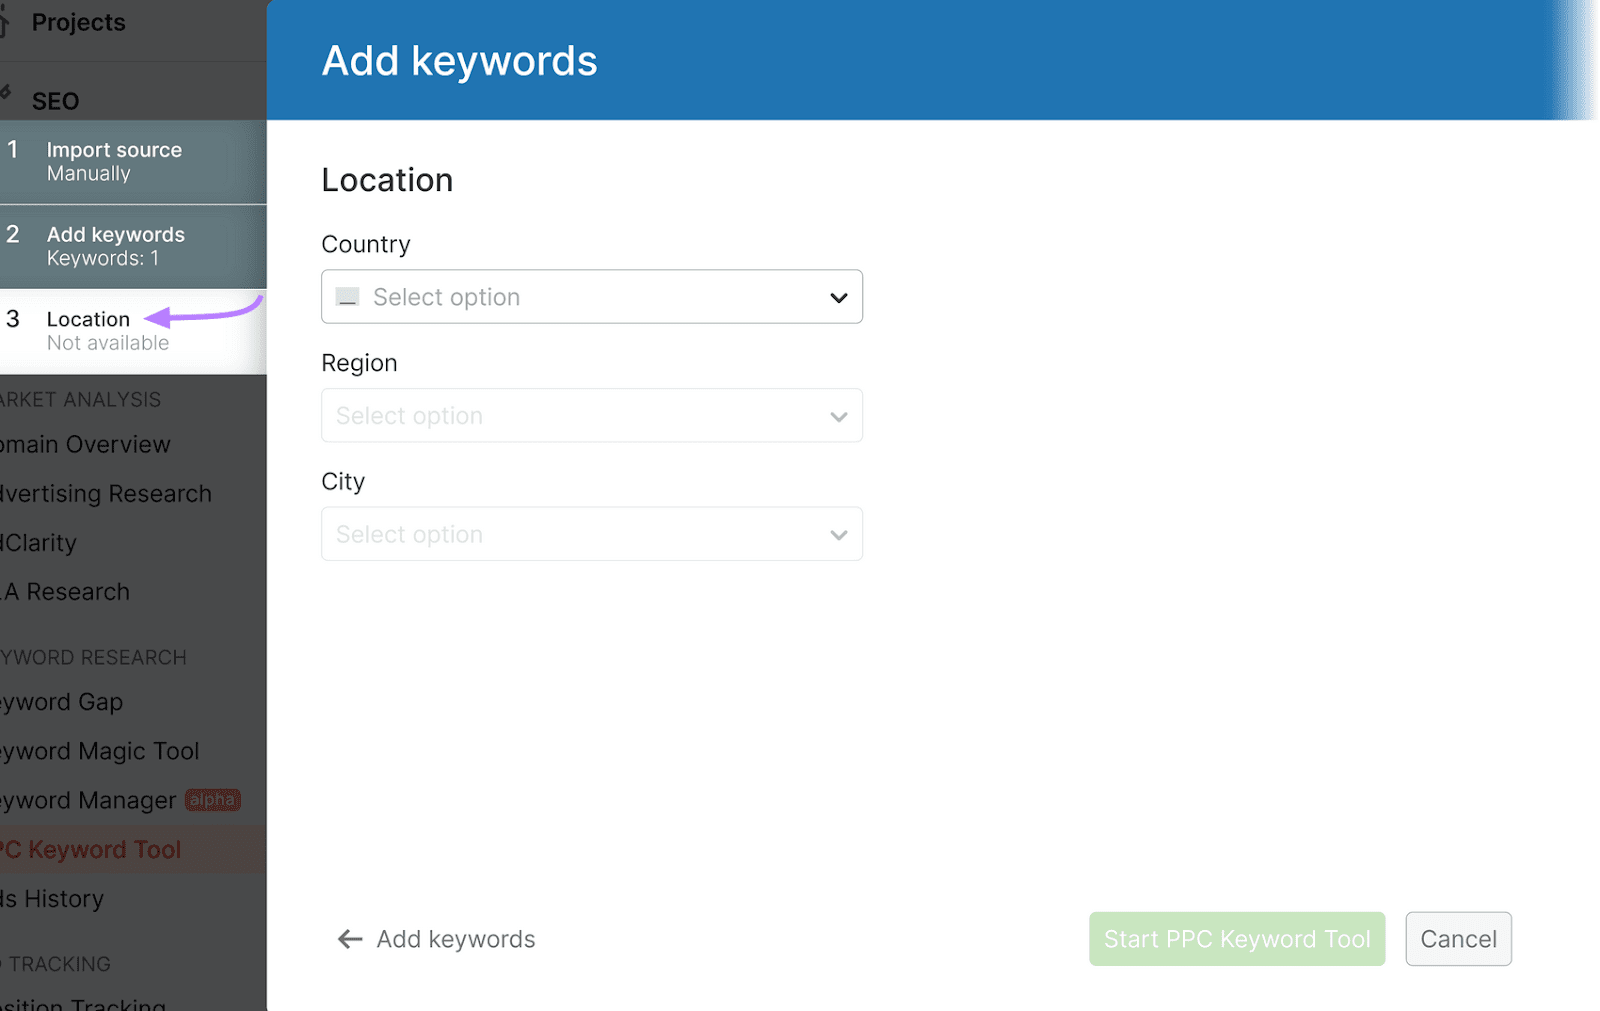
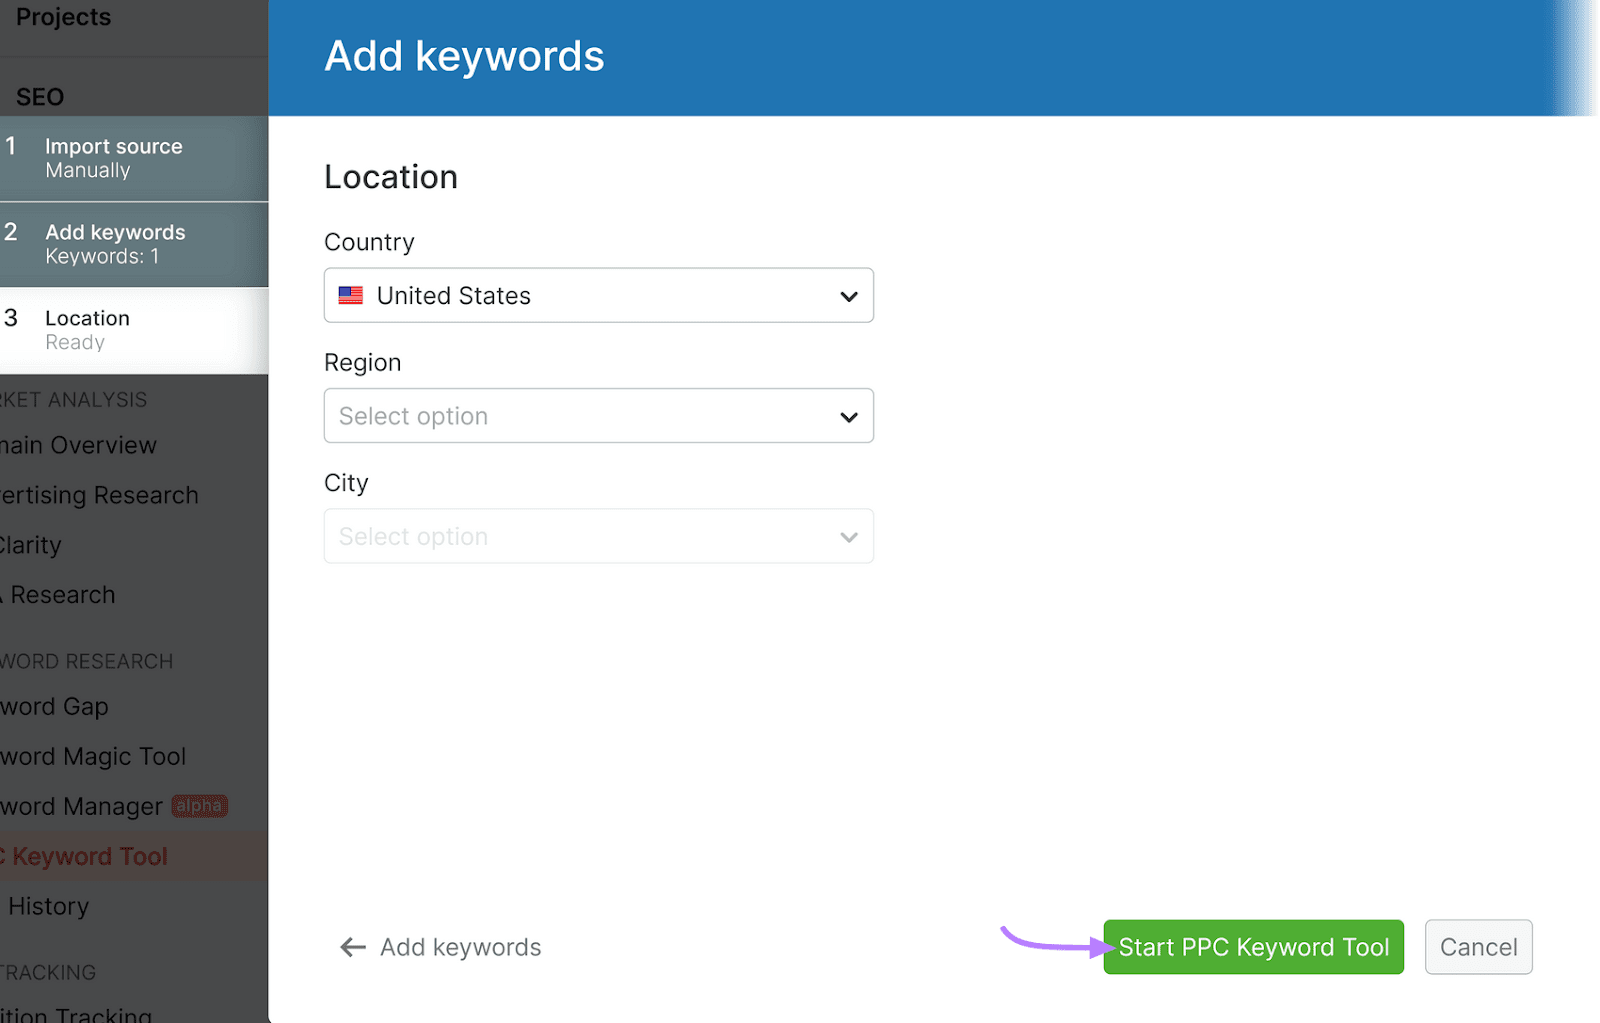
Click “Location.”
Select your country using the “Country” drop-down menu. If you want your ads to target a specific region or city, select them from the corresponding menus.
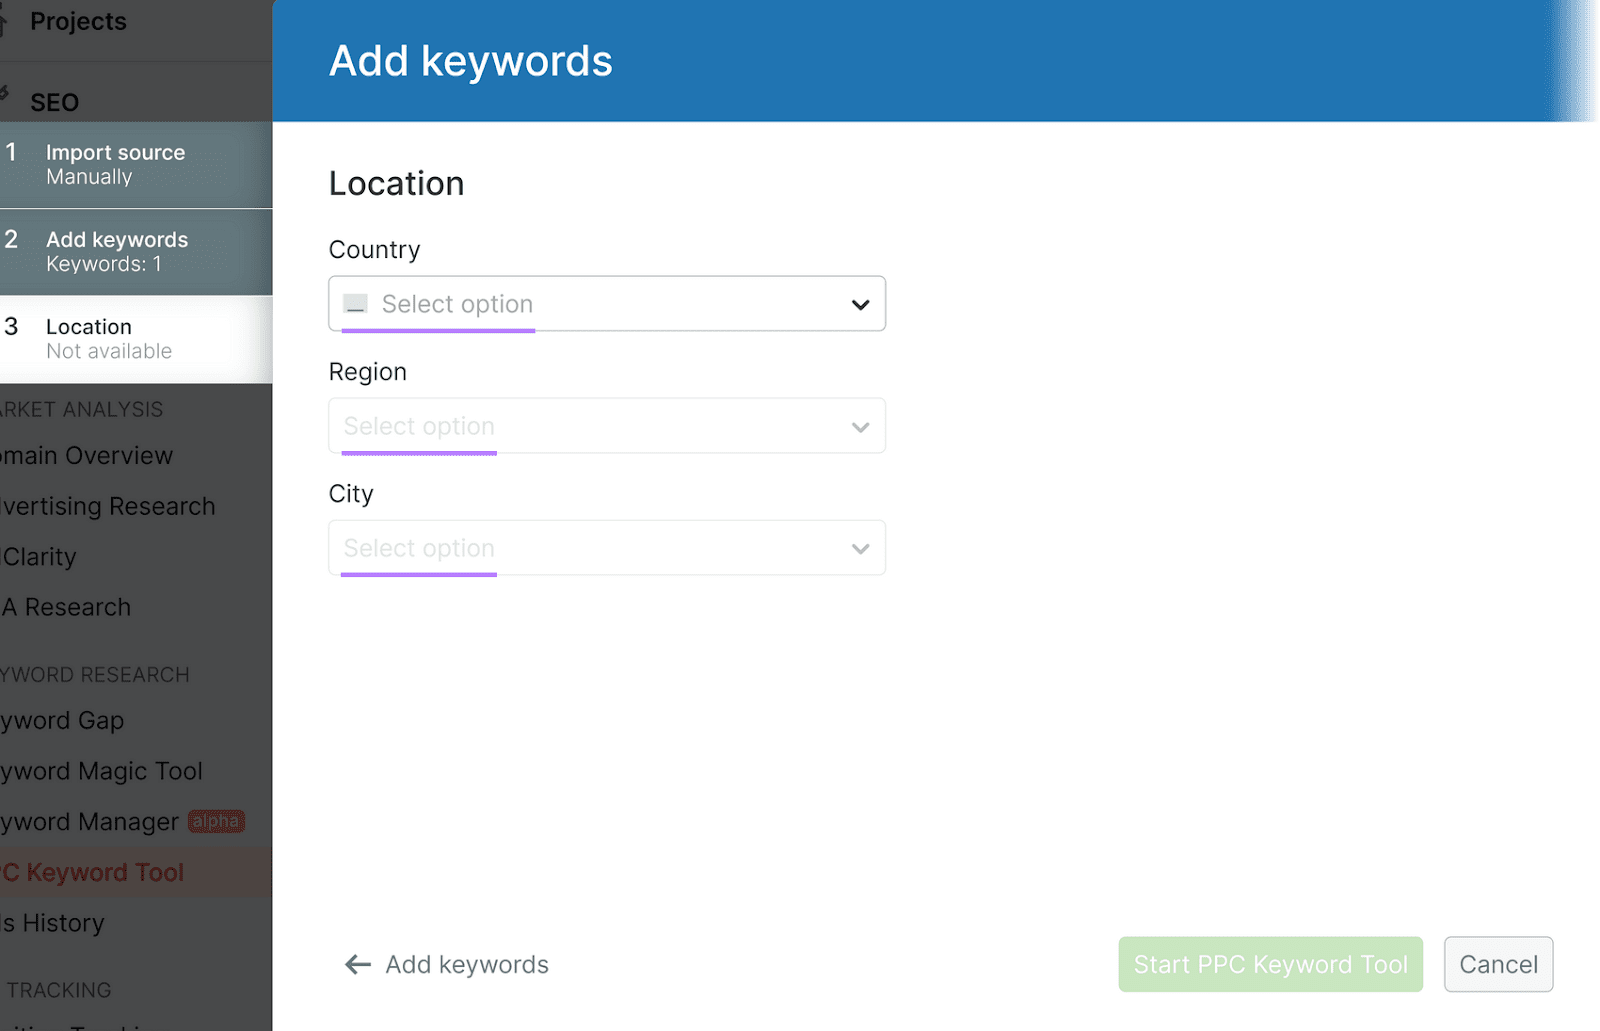
Click “Start PPC Keyword Tool.”
Go back to your keyword list in Keyword Strategy Builder. Click “Send keywords” > “All keywords” > “PPC Keyword Tool” > “Apply.”
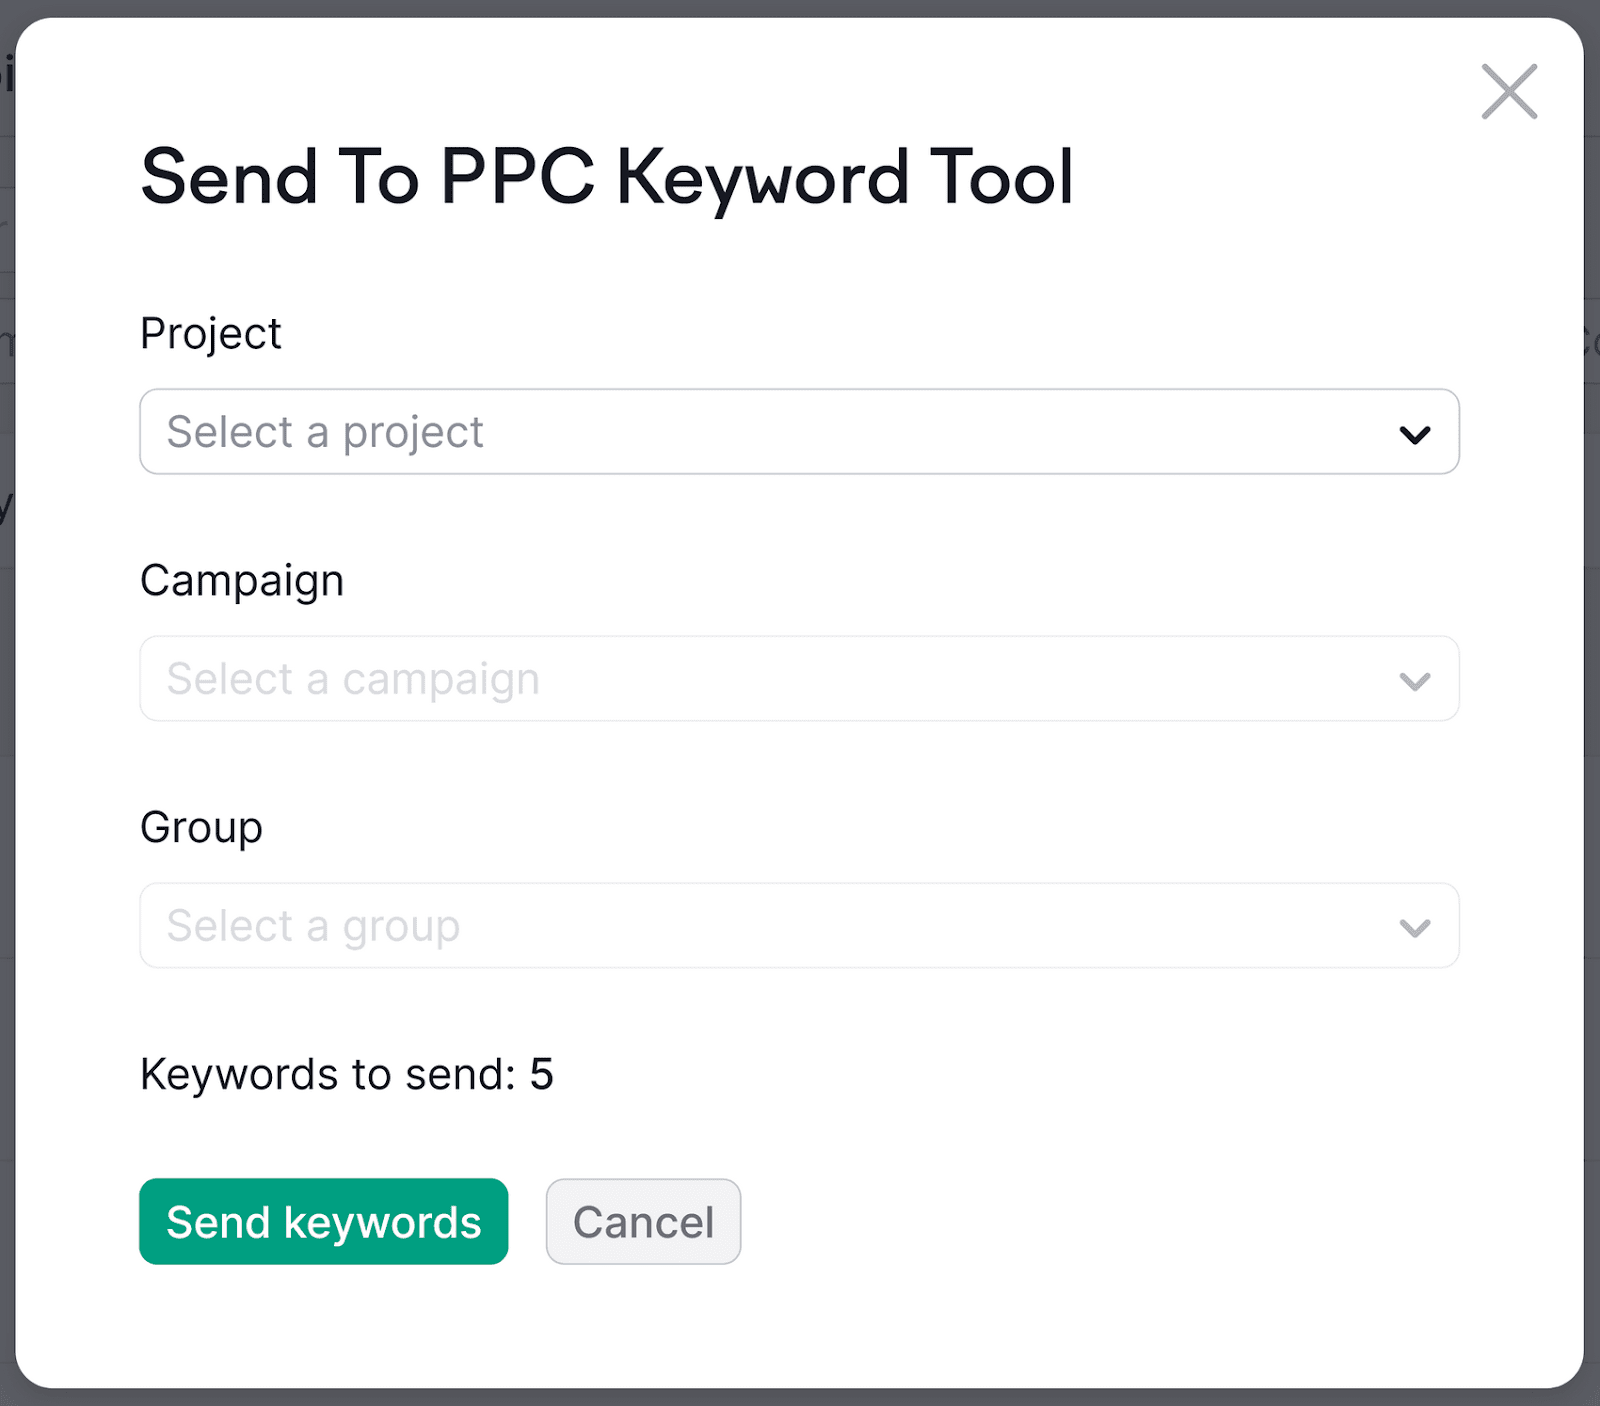
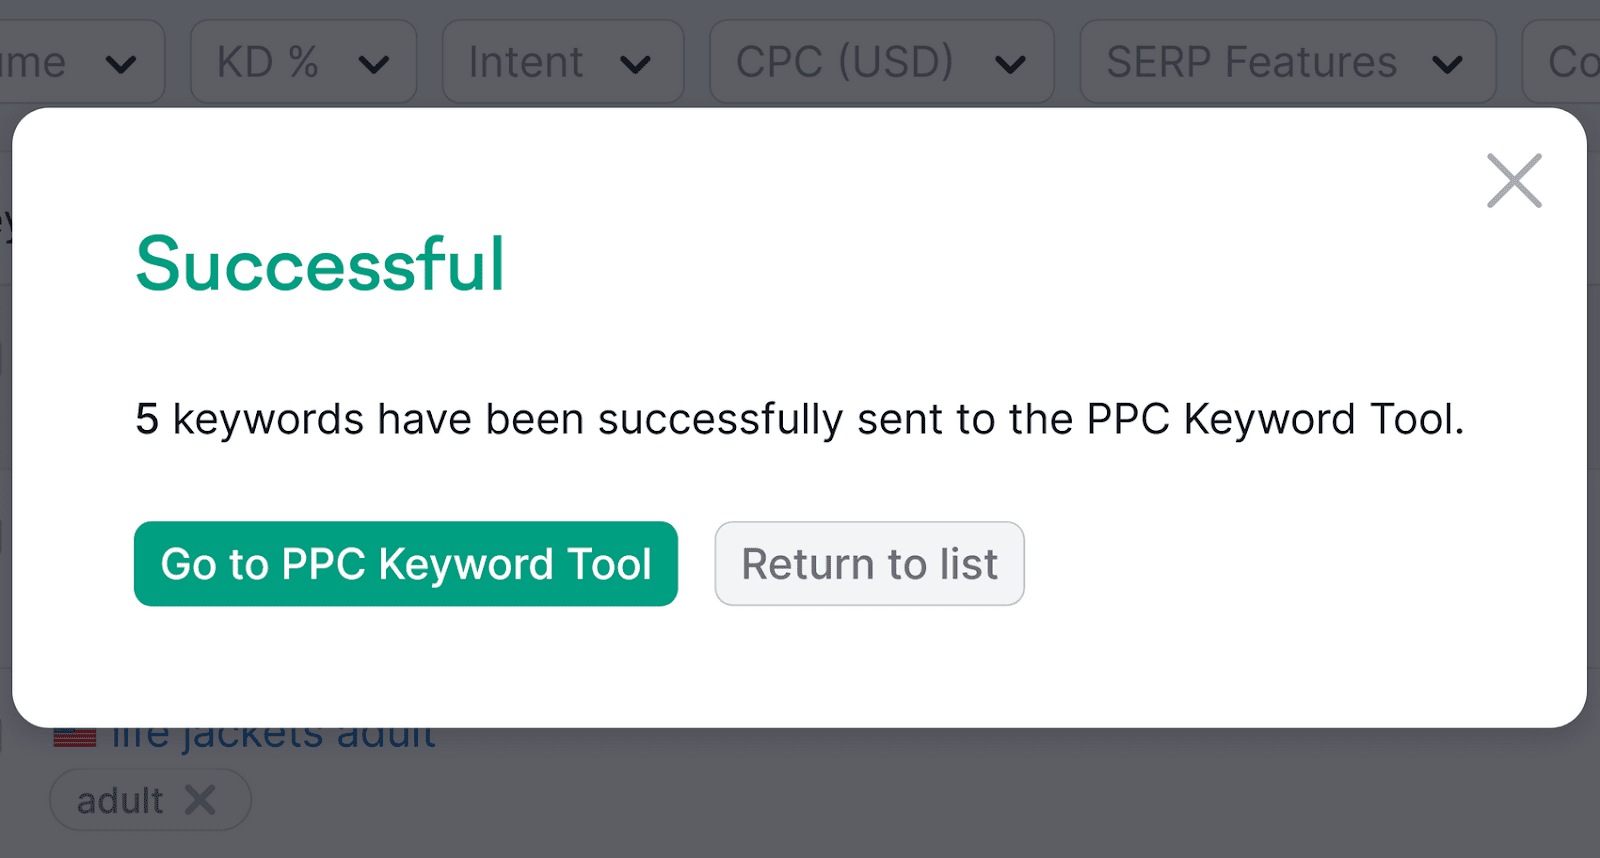
You’ll see this box.
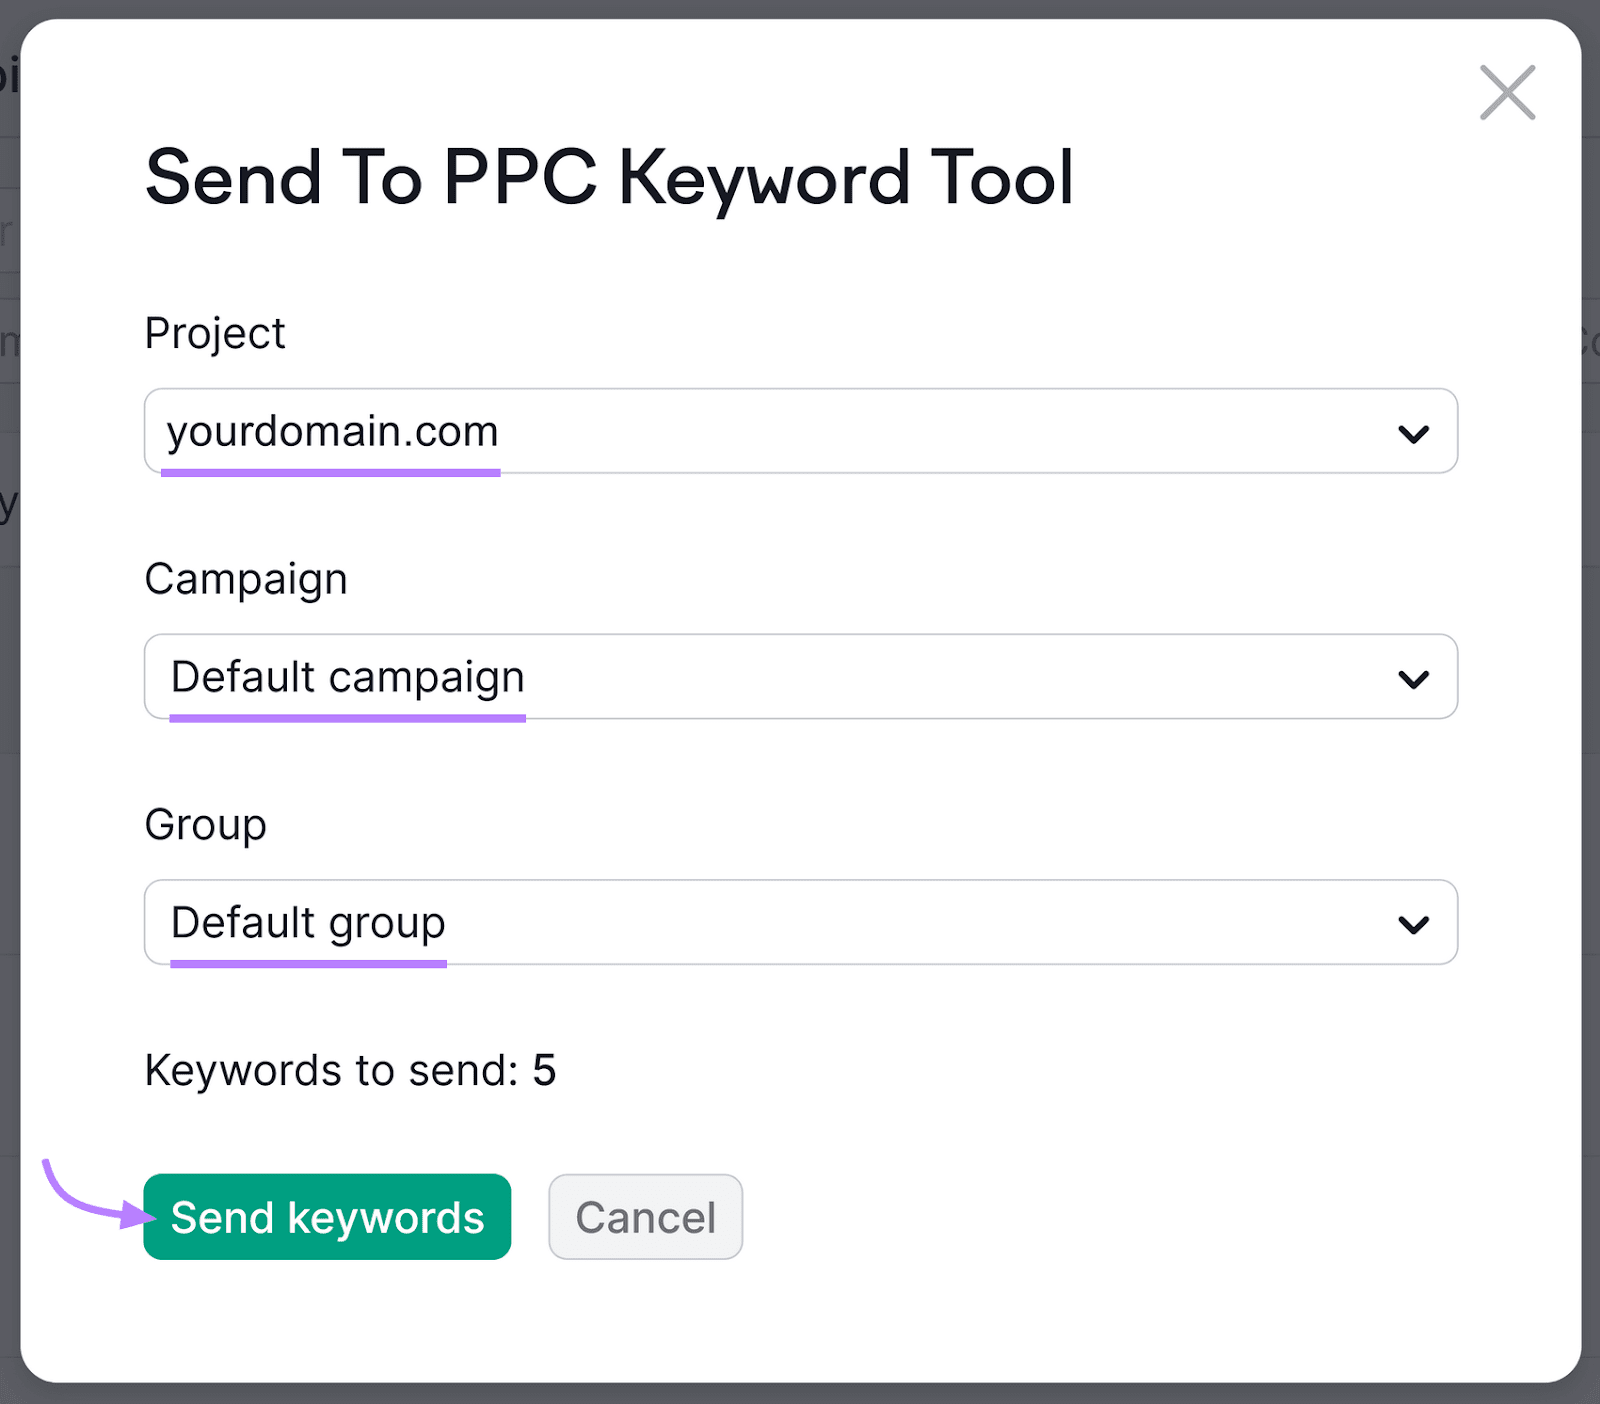
Select the project you just created under the “Project” drop-down menu. Then, choose “Default campaign” and “Default group” under the “Campaign” and “Group” drop-down menus. Click “Send keywords.”
Click “Go to PPC Keyword Tool.”
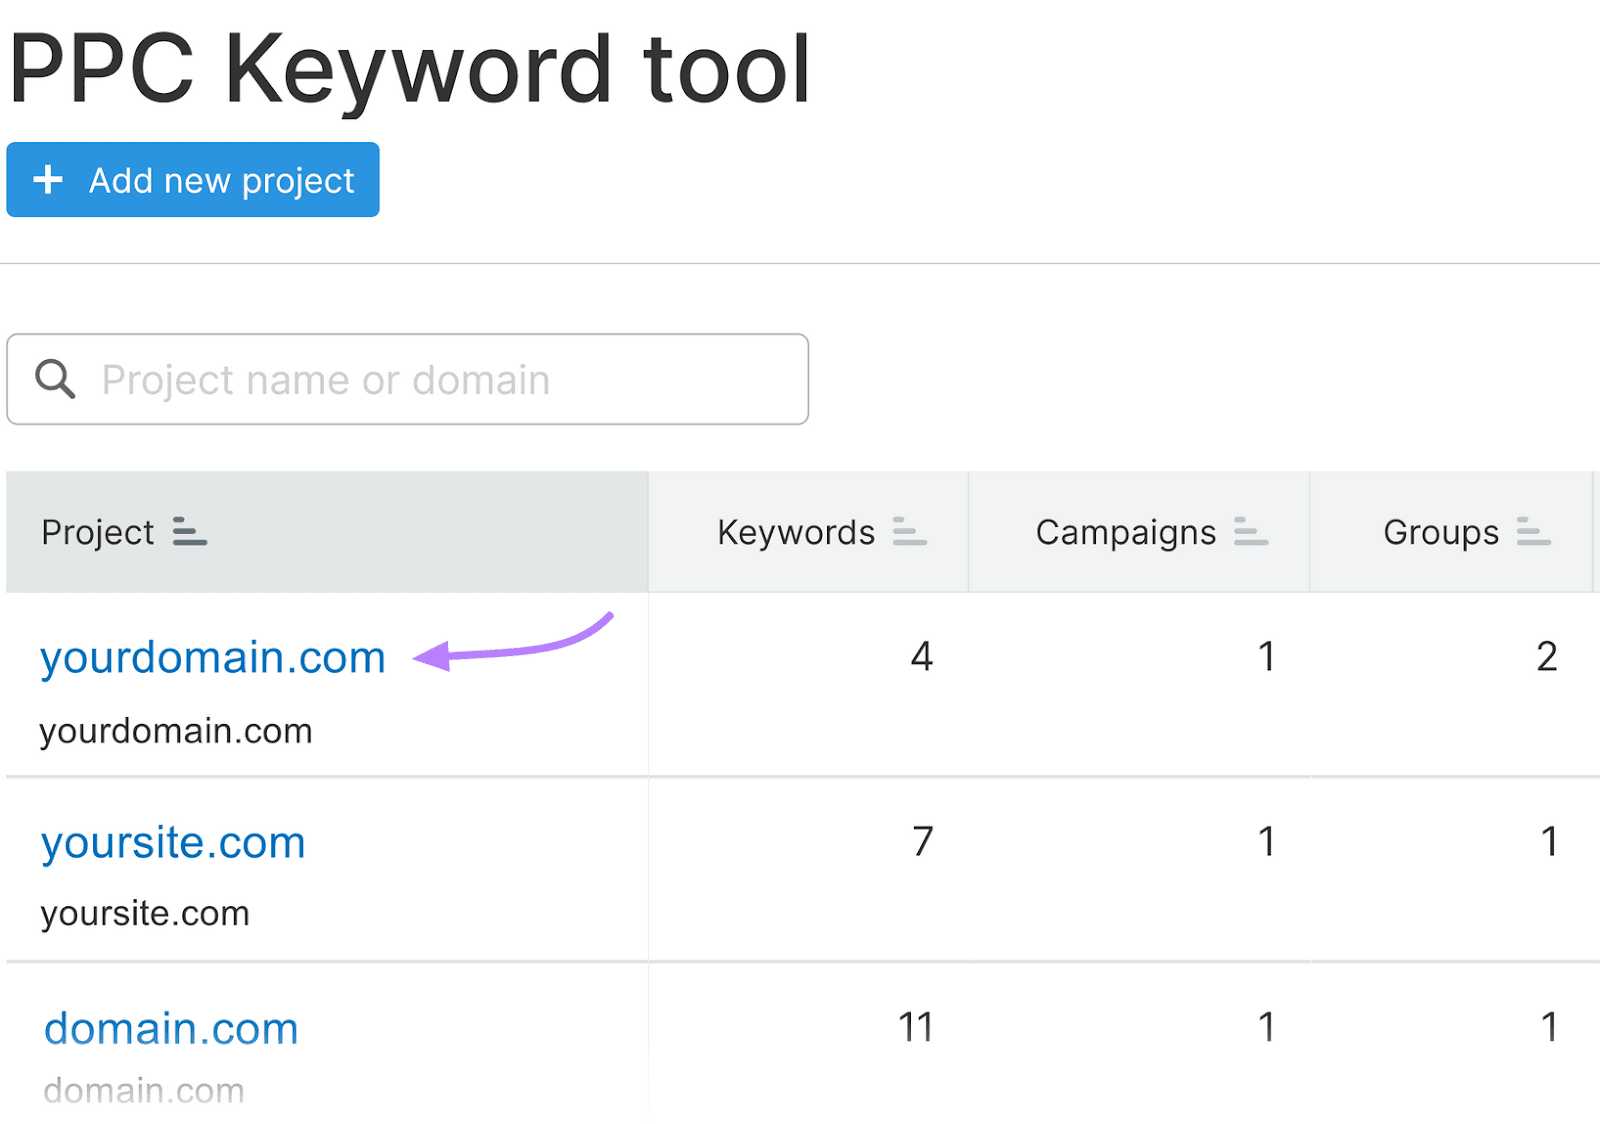
Click on your project.
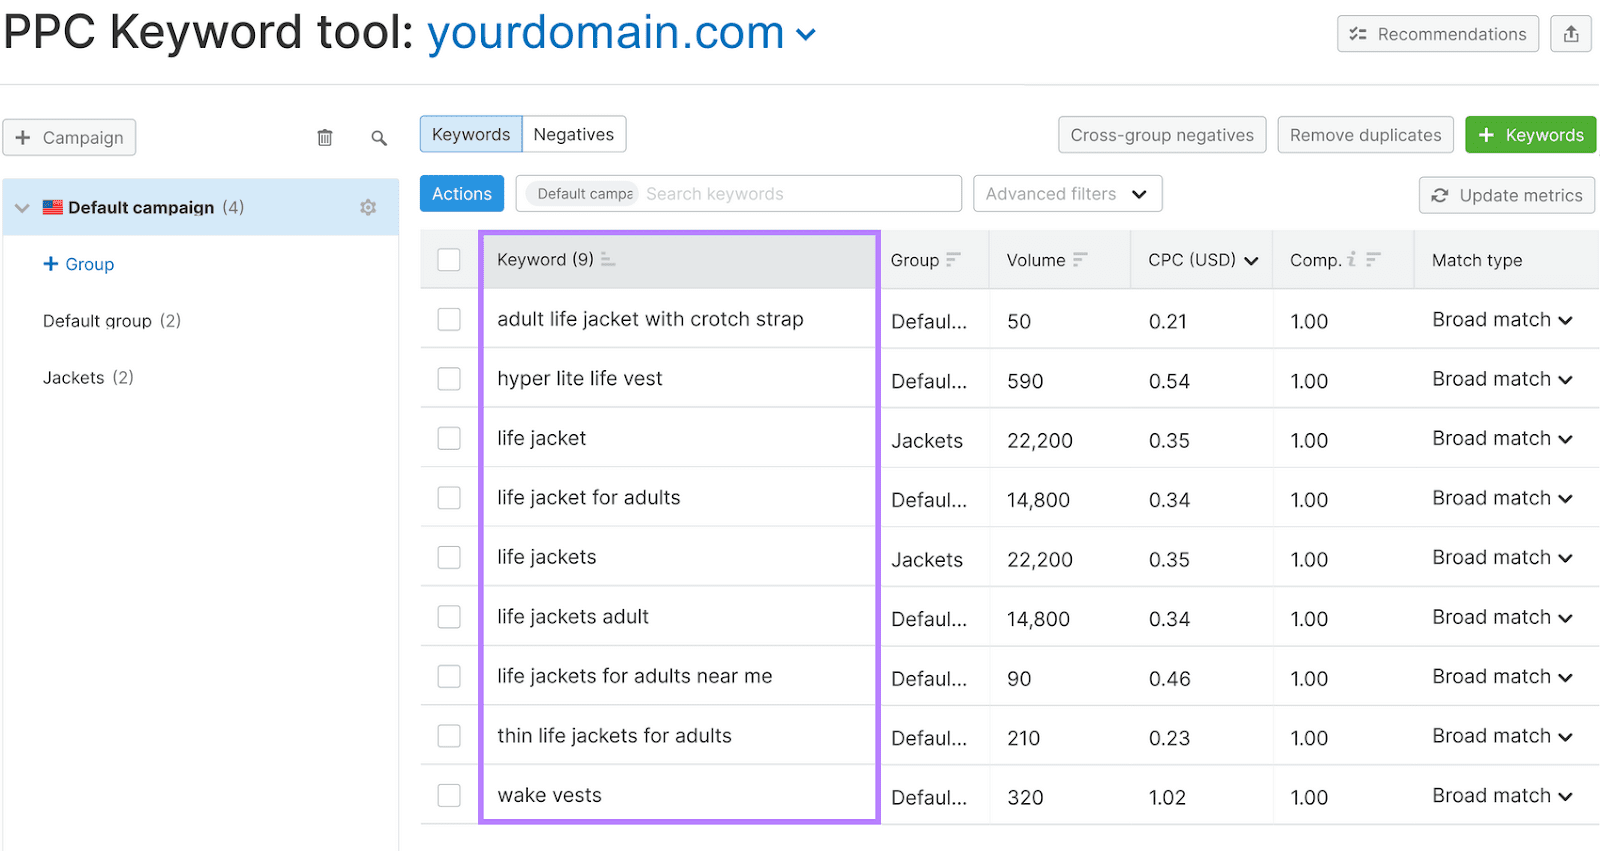
You’ll see your list of keywords.
Organize Your Keywords in Groups
Keyword groups can make it easier to evaluate and manage your ad spend.
In the PPC Keyword Tool, click “+ Group.”
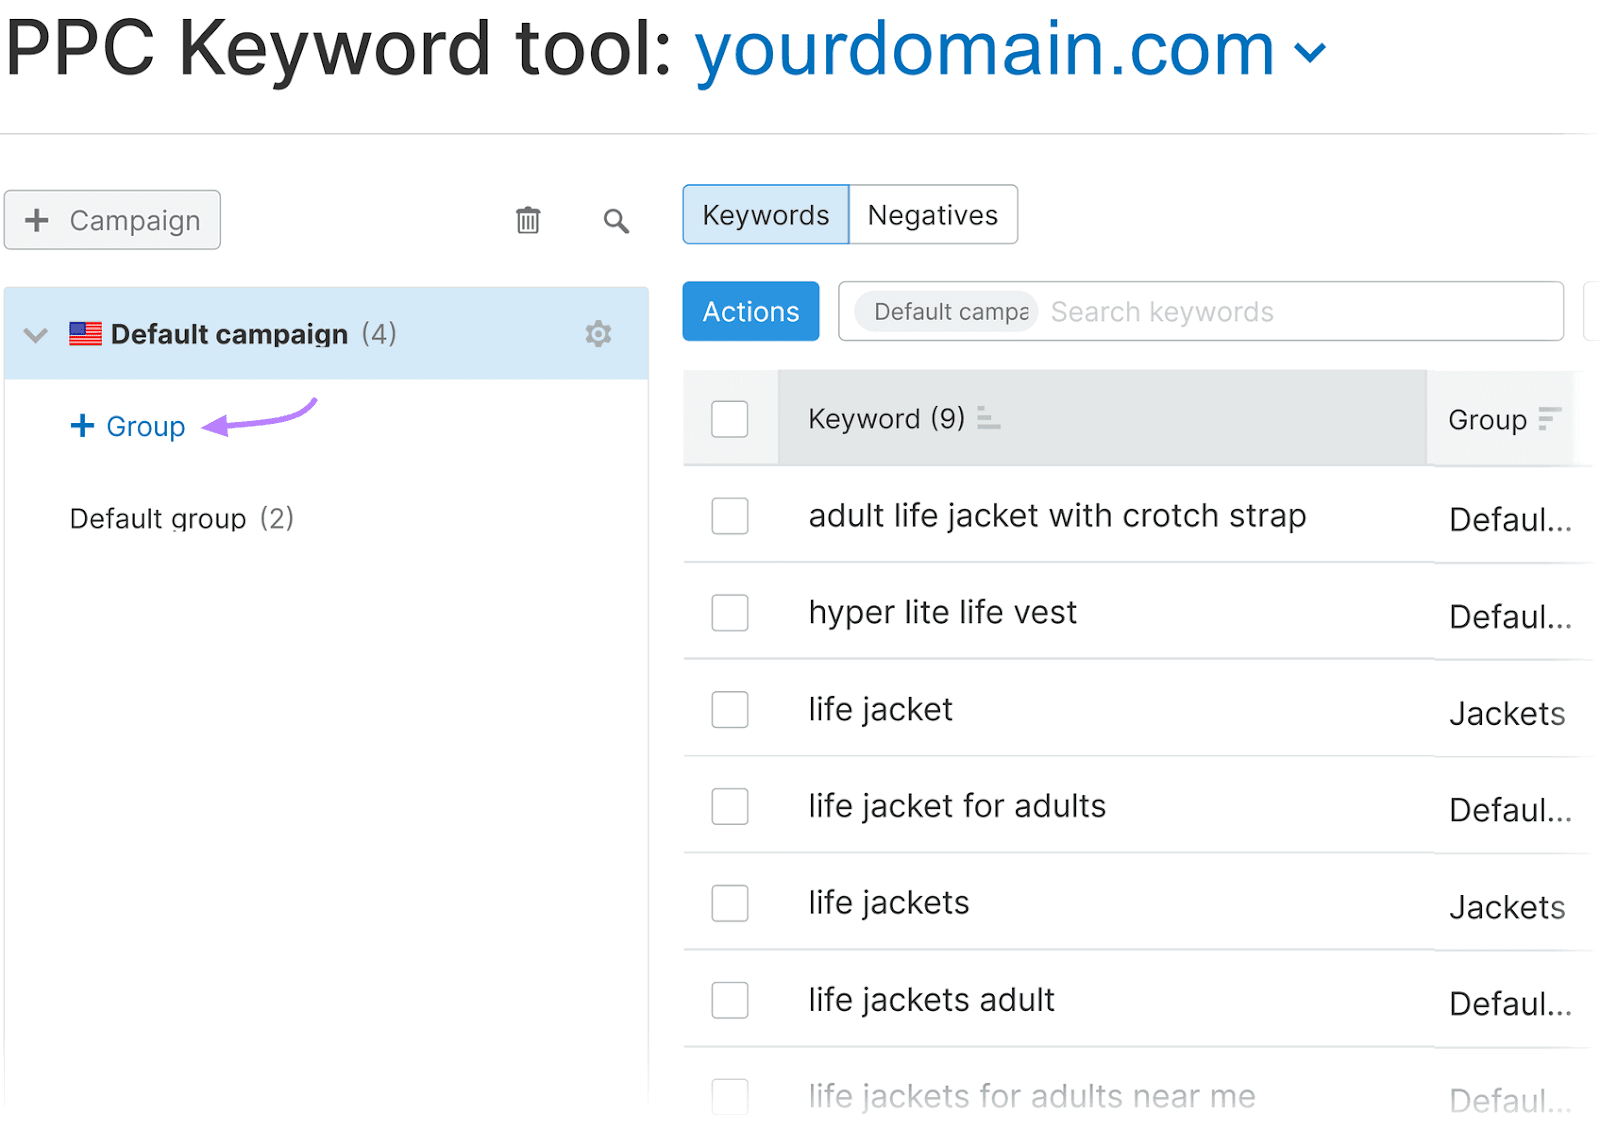
Enter your group name, and click the check mark.
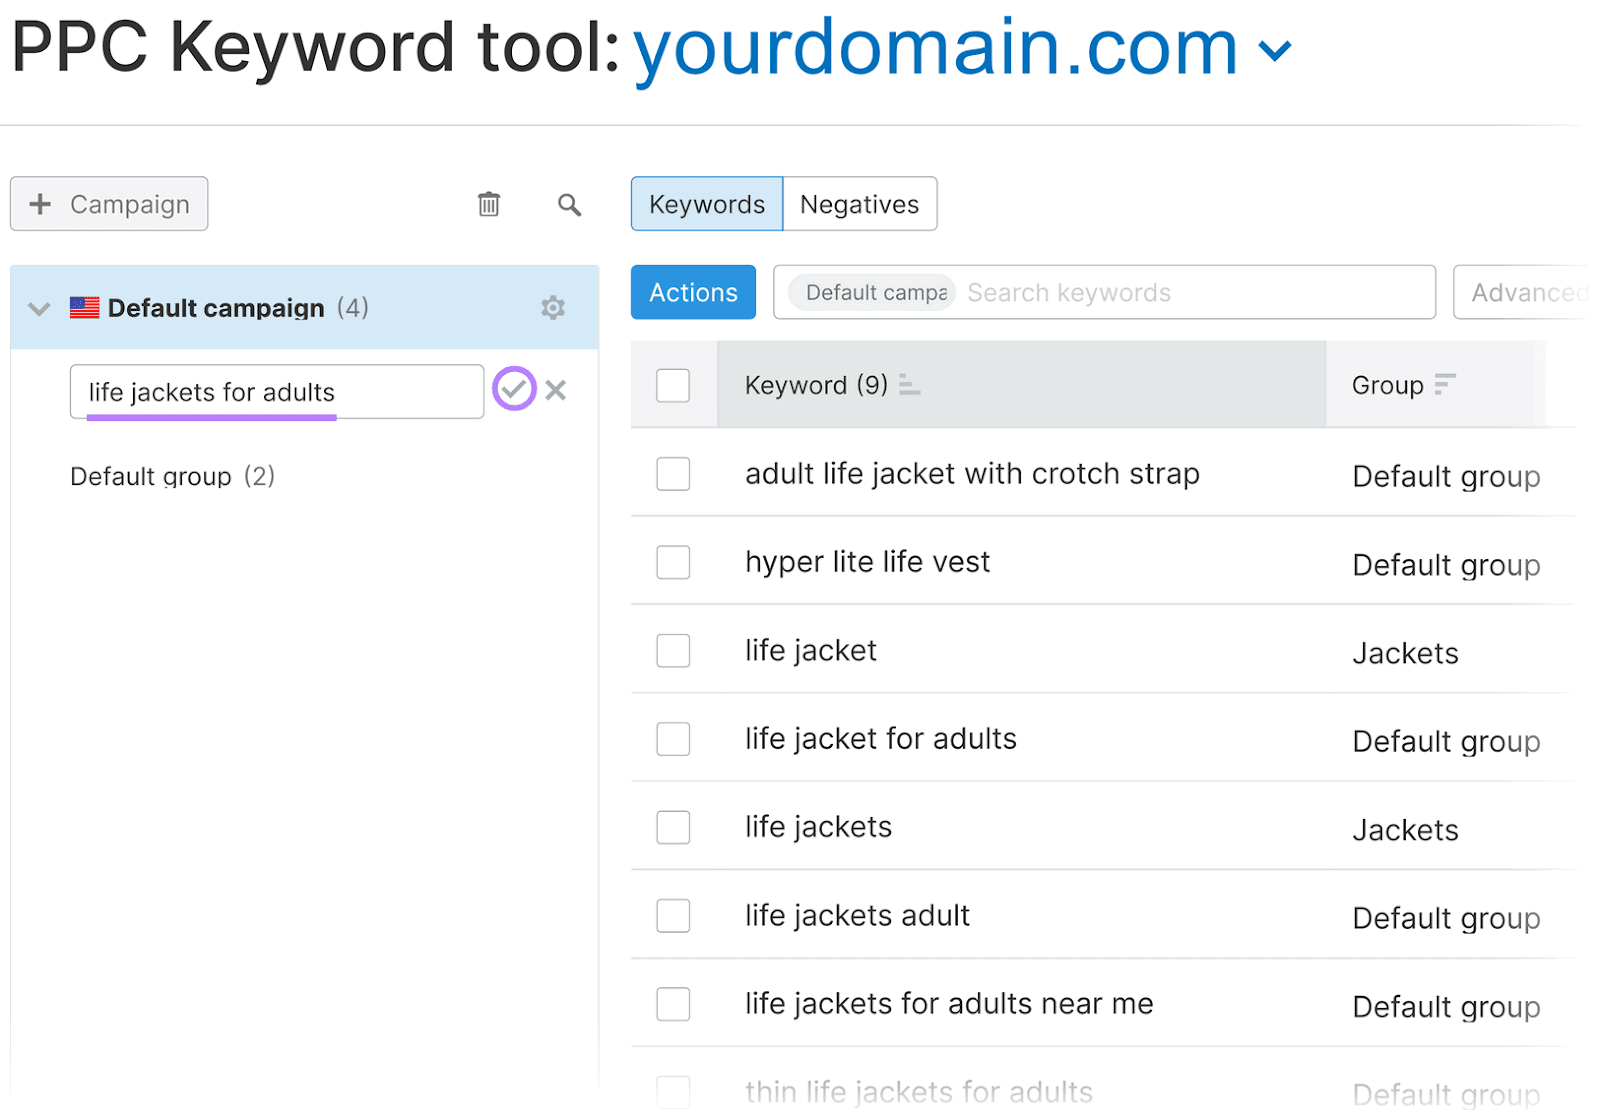
Click the checkboxes next to each keyword you want to add to your new group.
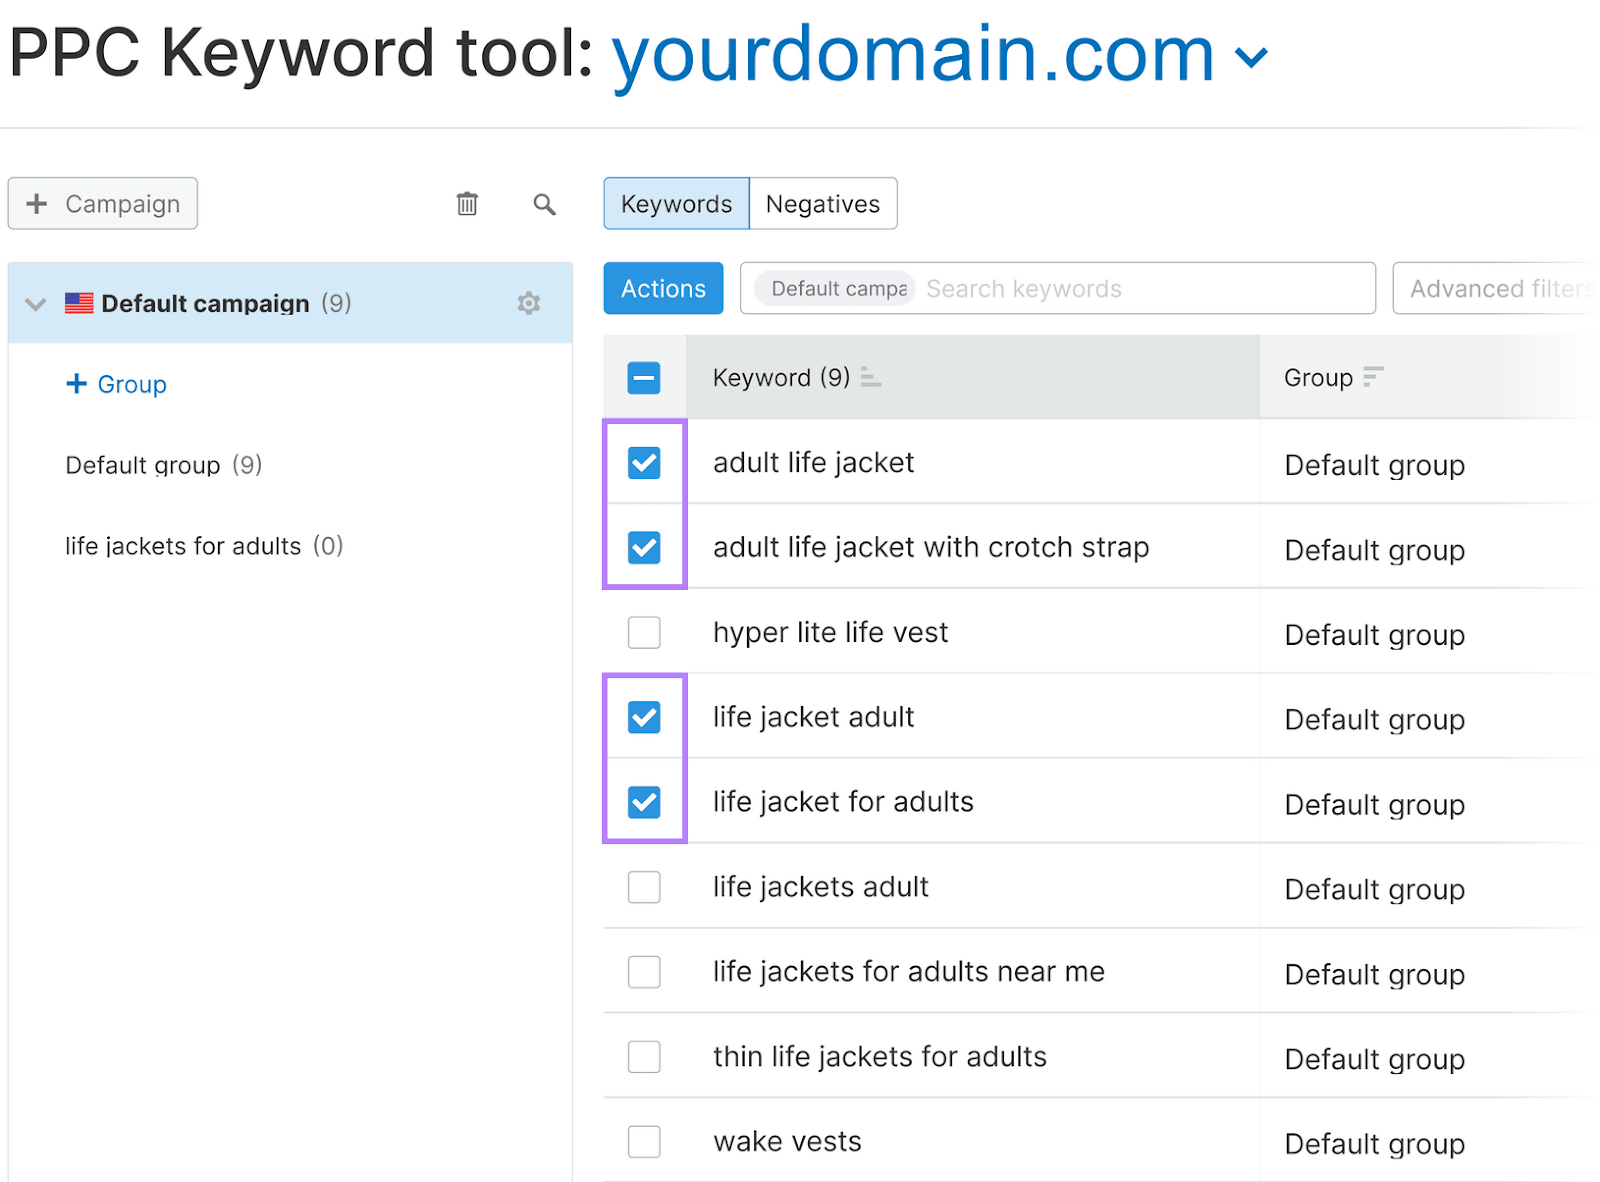
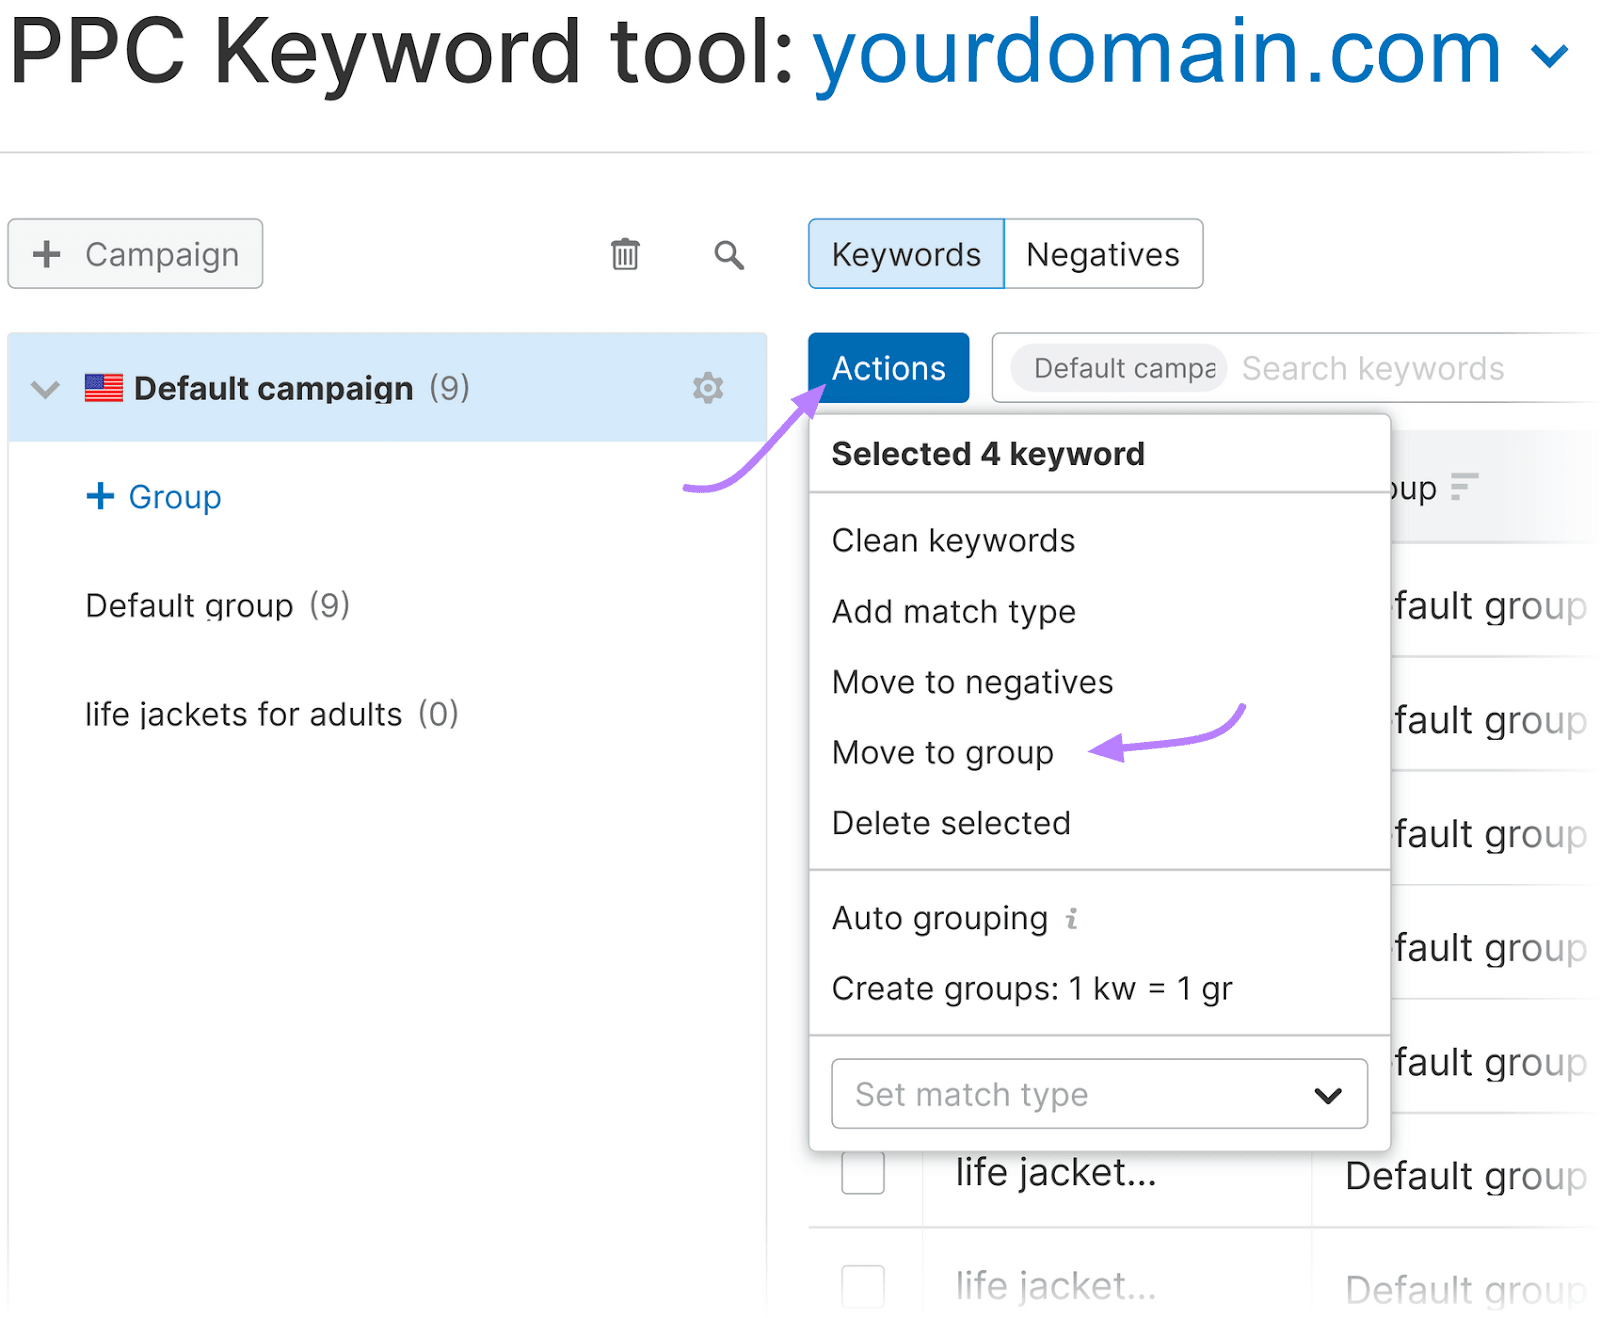
Click “Actions” > “Move to group.”
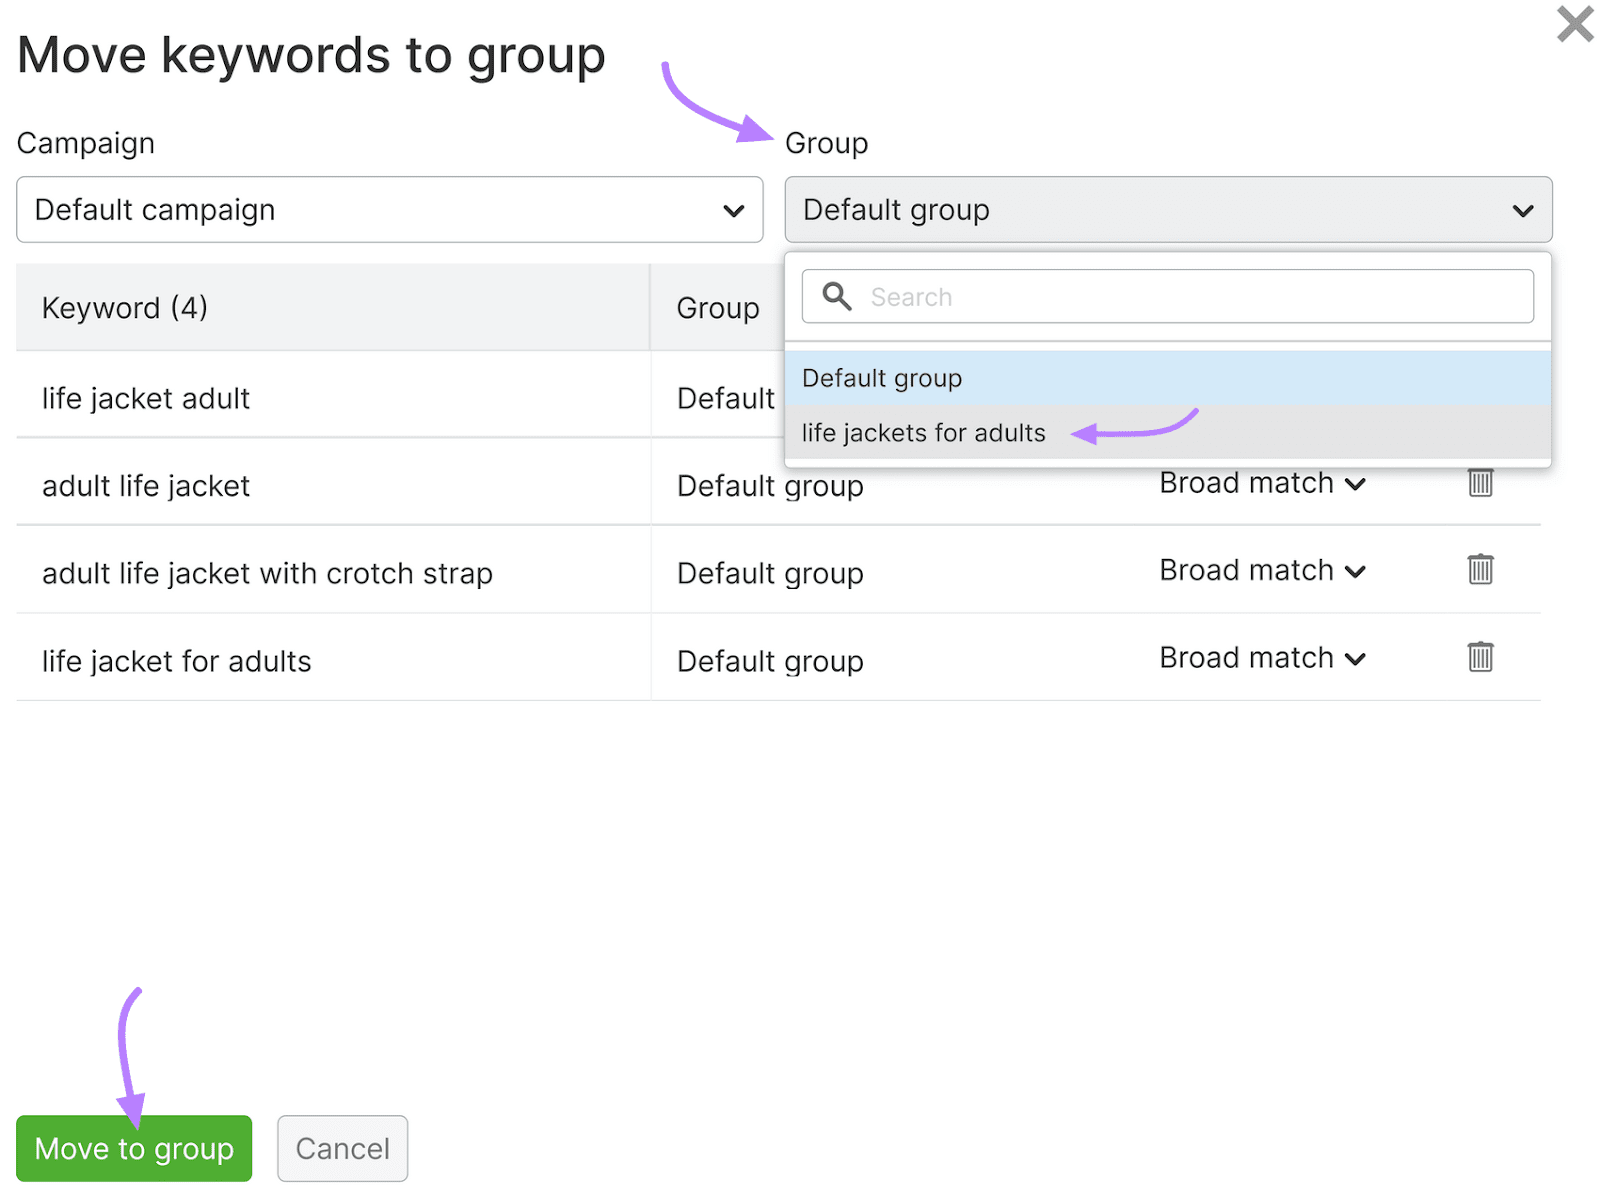
Click the dropdown under “Group.” Then, select your group and click “Move to group.”
Use Keyword Matching and Negative Keywords
Choose the right keyword match type and use negative keywords to save ad spend.
Selecting a match type controls how closely a user’s search needs to match your keywords. Negative keywords prevent your ads from showing in Google searches that aren’t relevant to your business.
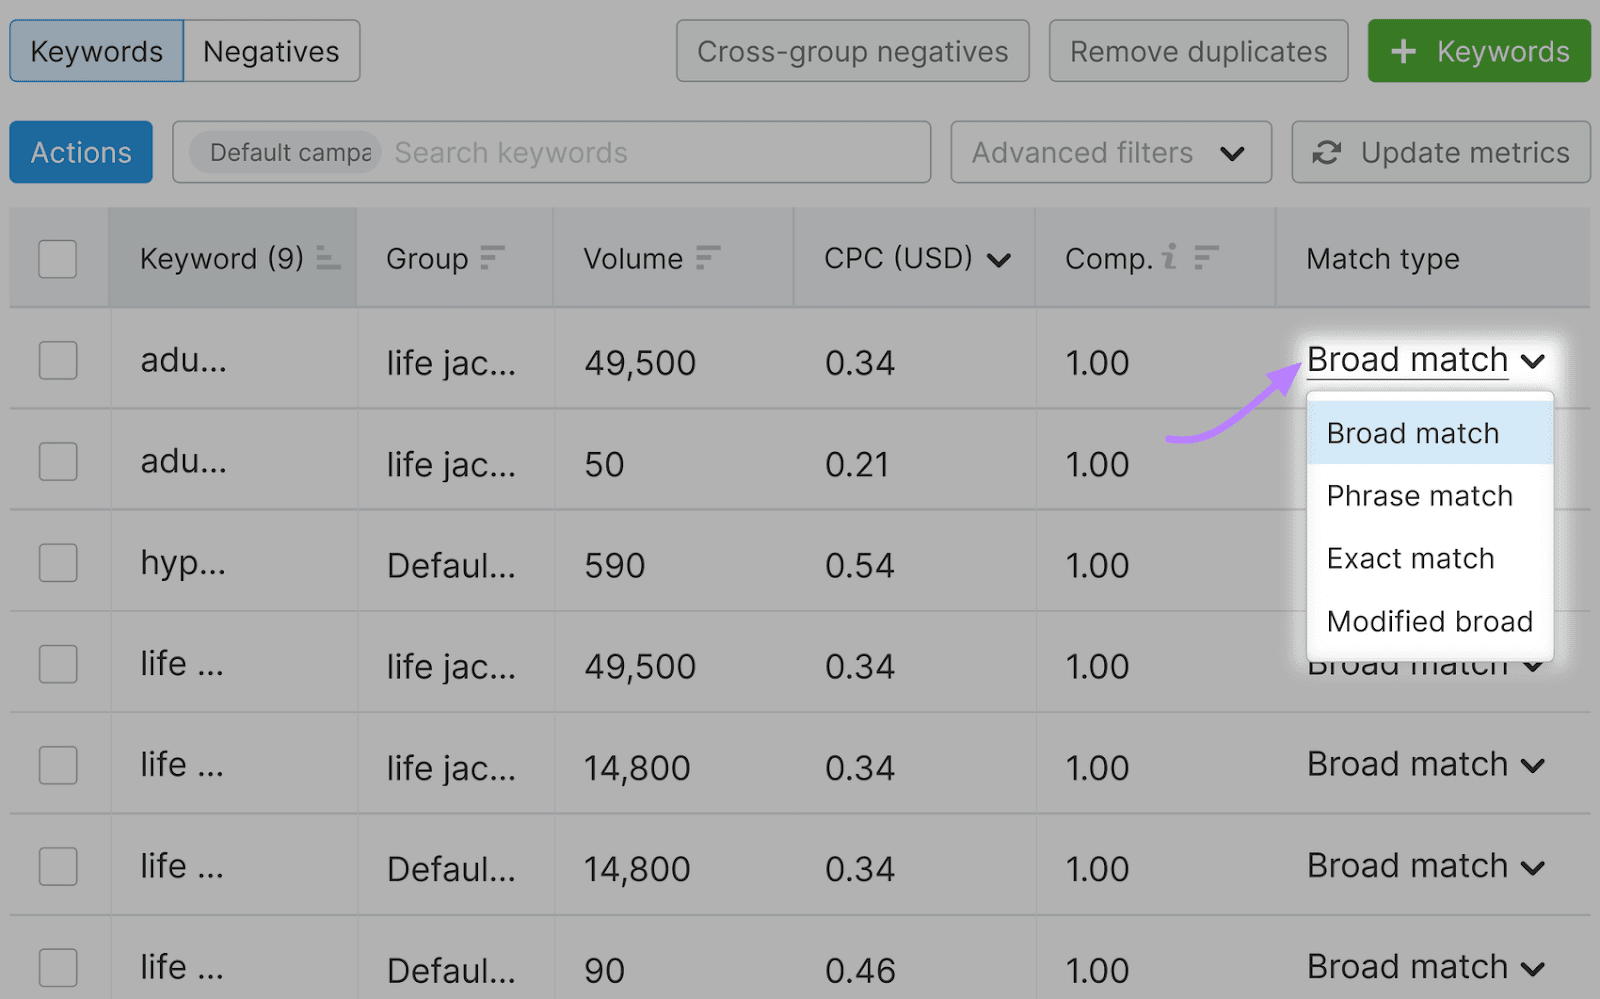
Use the PPC Keyword Tool to change your keyword’s match type.
Under the “Match type” column, select the drop-down menu on the row of your preferred keyword. Then, choose your desired match type.
Here’s how to specify negative keywords you don’t want to trigger your ads.
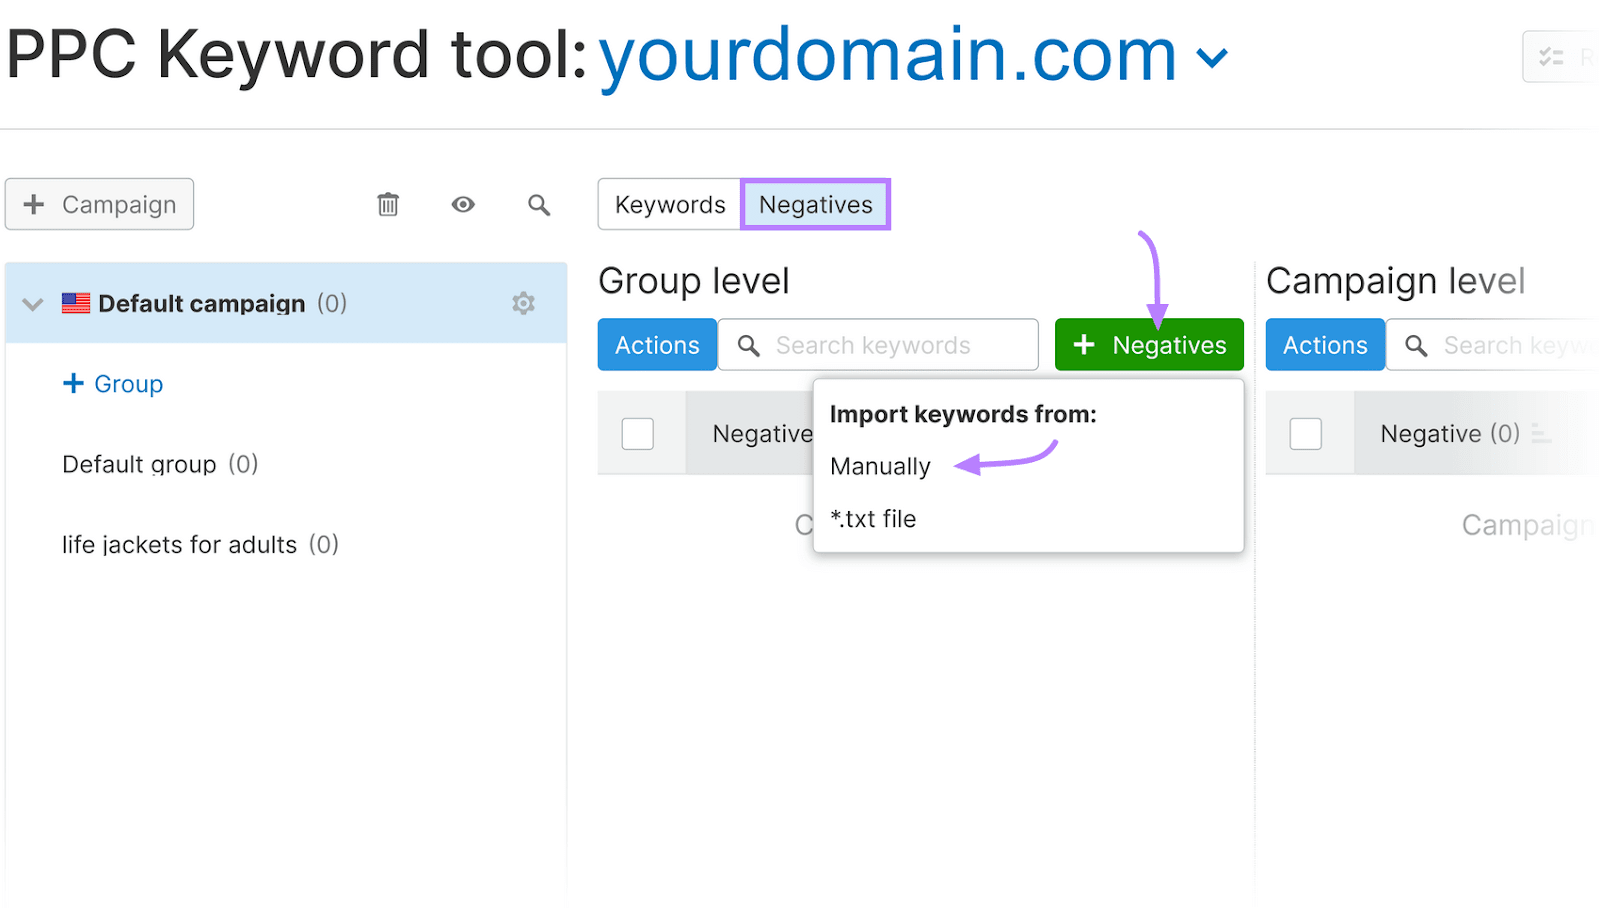
Click the “Negatives” tab. Then click “+ Negatives” > “Manually.”
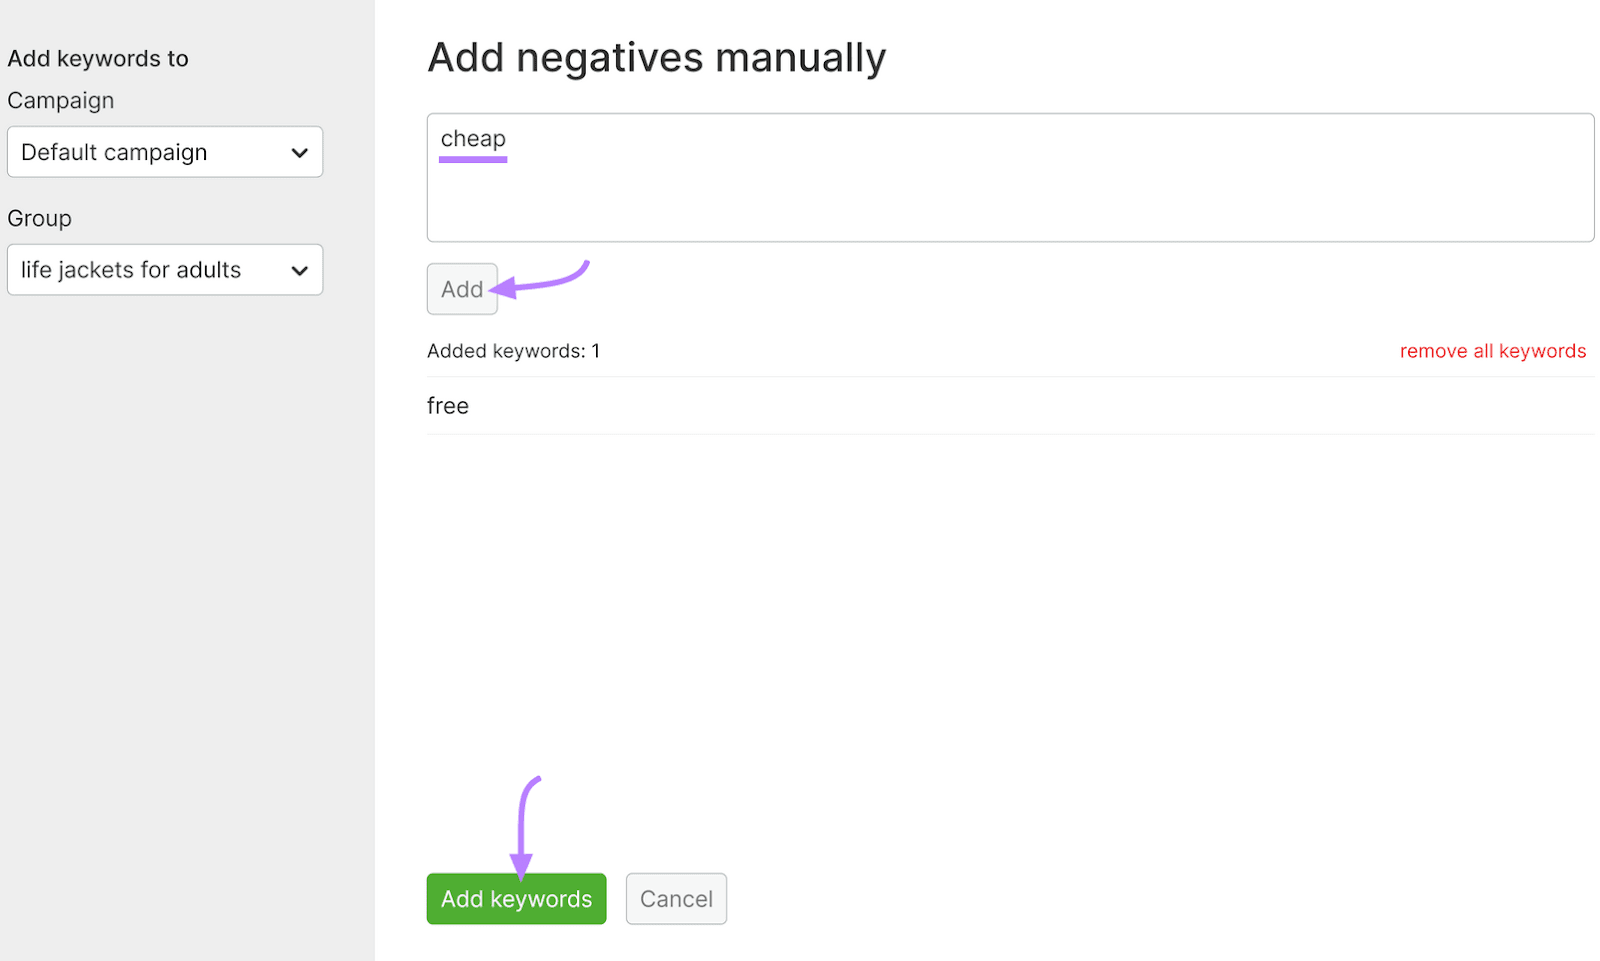
Type your negative keywords in the text box. Click “Add” and then “Add keywords.”
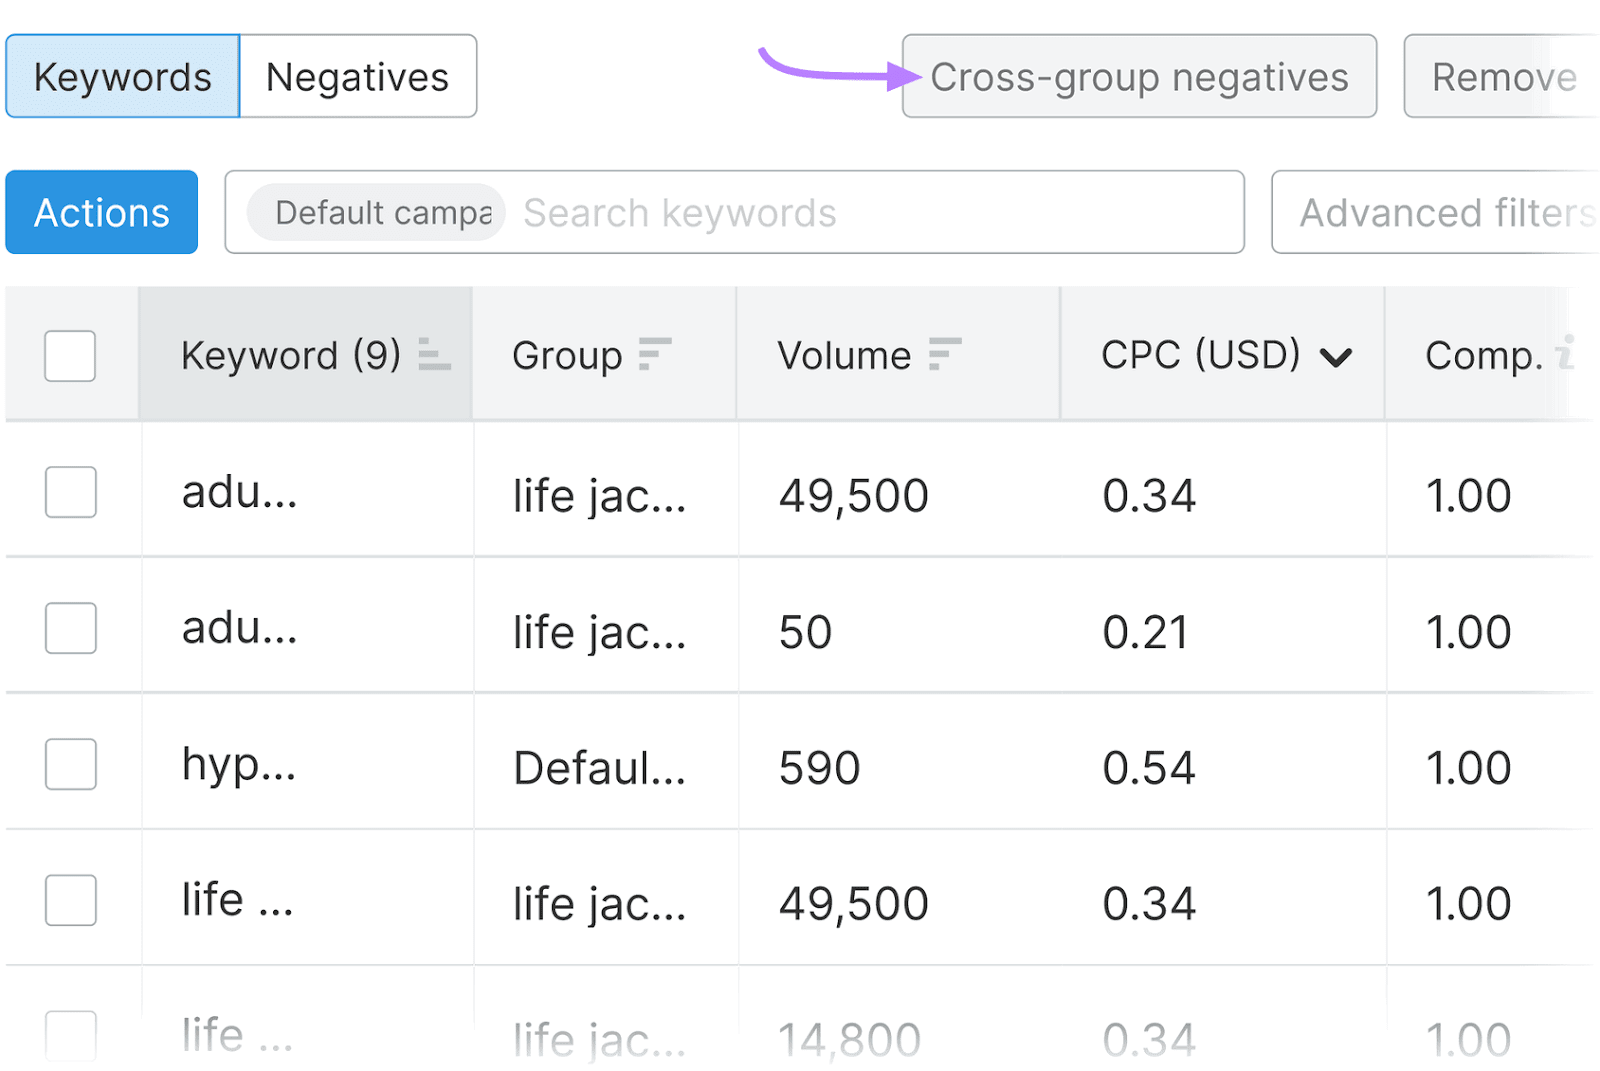
Use the PPC Keyword Tool’s cross-group negatives feature to generate negative keyword suggestions.
Click the “Cross-group negatives” button.
Click “Add to negatives.”
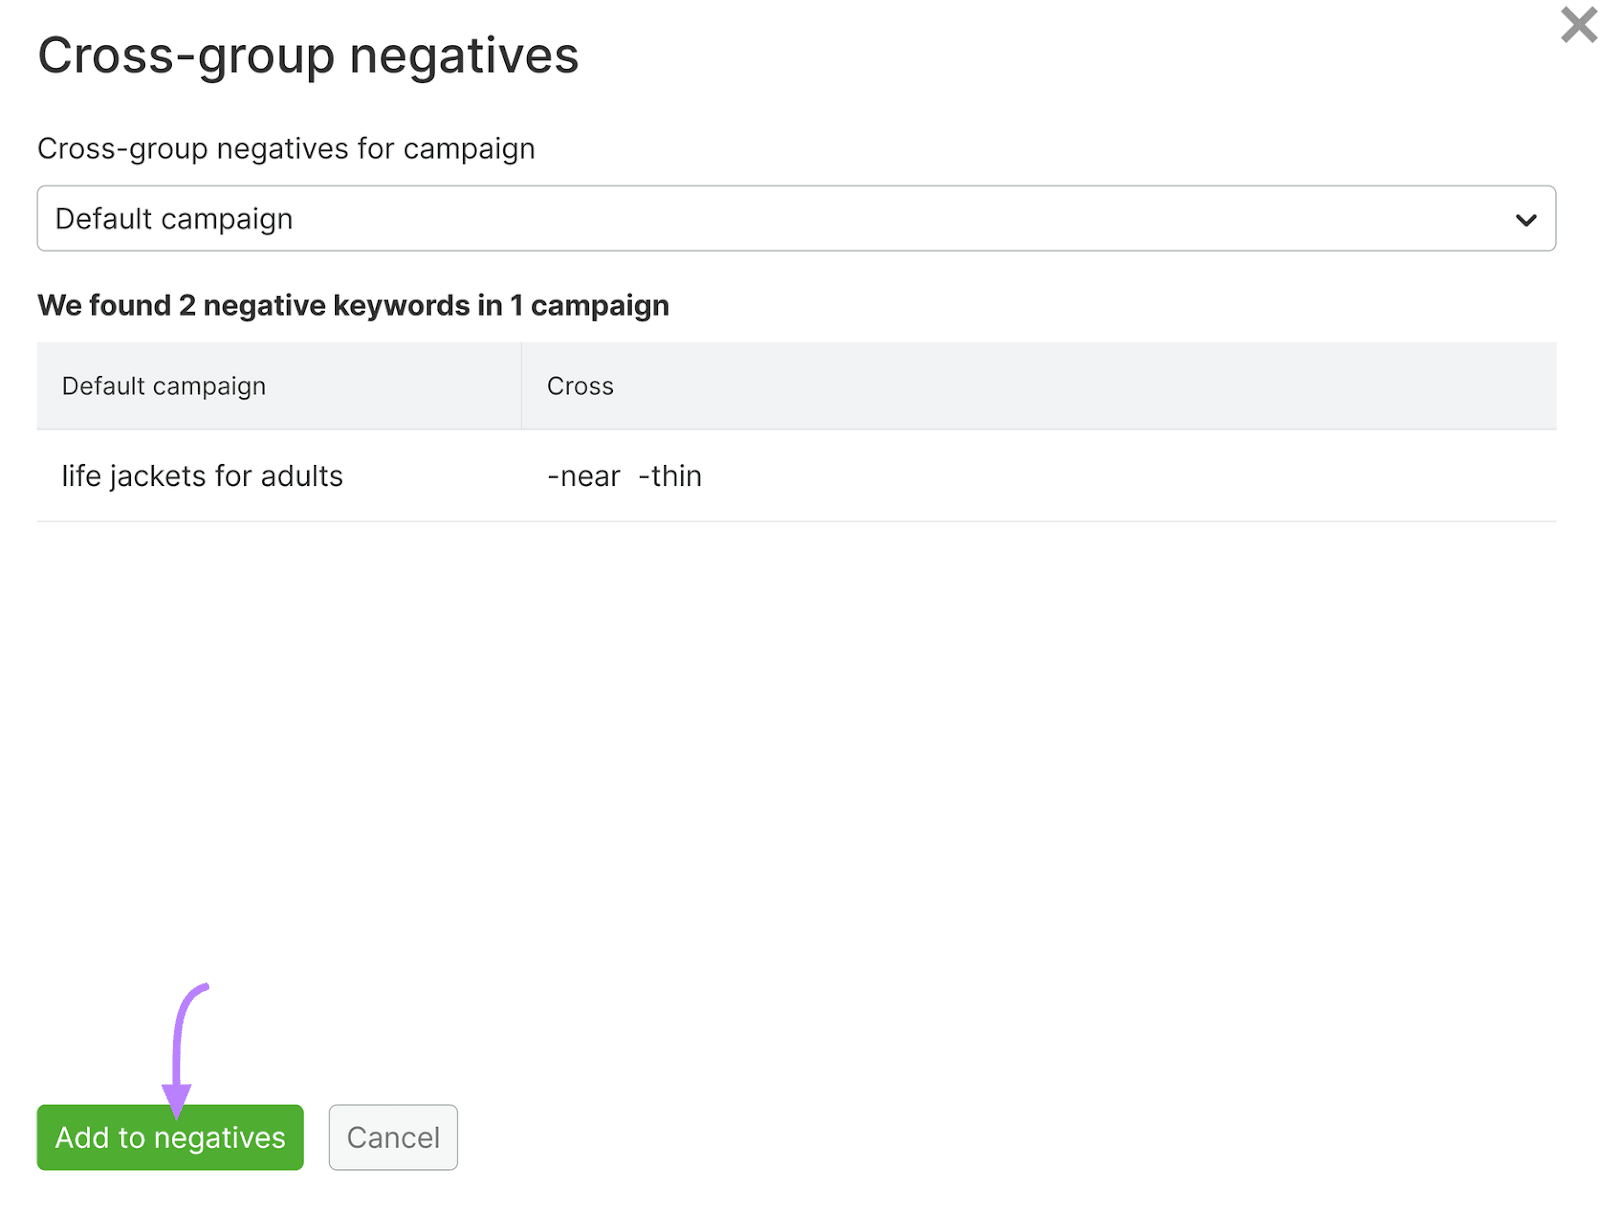
Continue this process to discover more negative keywords. Add these to your negative keyword list to keep your ads from appearing for irrelevant search queries.
Export Your Keyword List
The PPC Keyword Tool allows you to export your keyword lists. Export the lists to your preferred ad platform, like Google Ads.
Click the “Export data” button at the top right corner. Choose “All.” Select your campaign from the “Campaign” drop-down menu. Choose “Keywords + Negatives” from the drop-down menu labeled “Report.” Click the “Export to CSV” button to download the file.
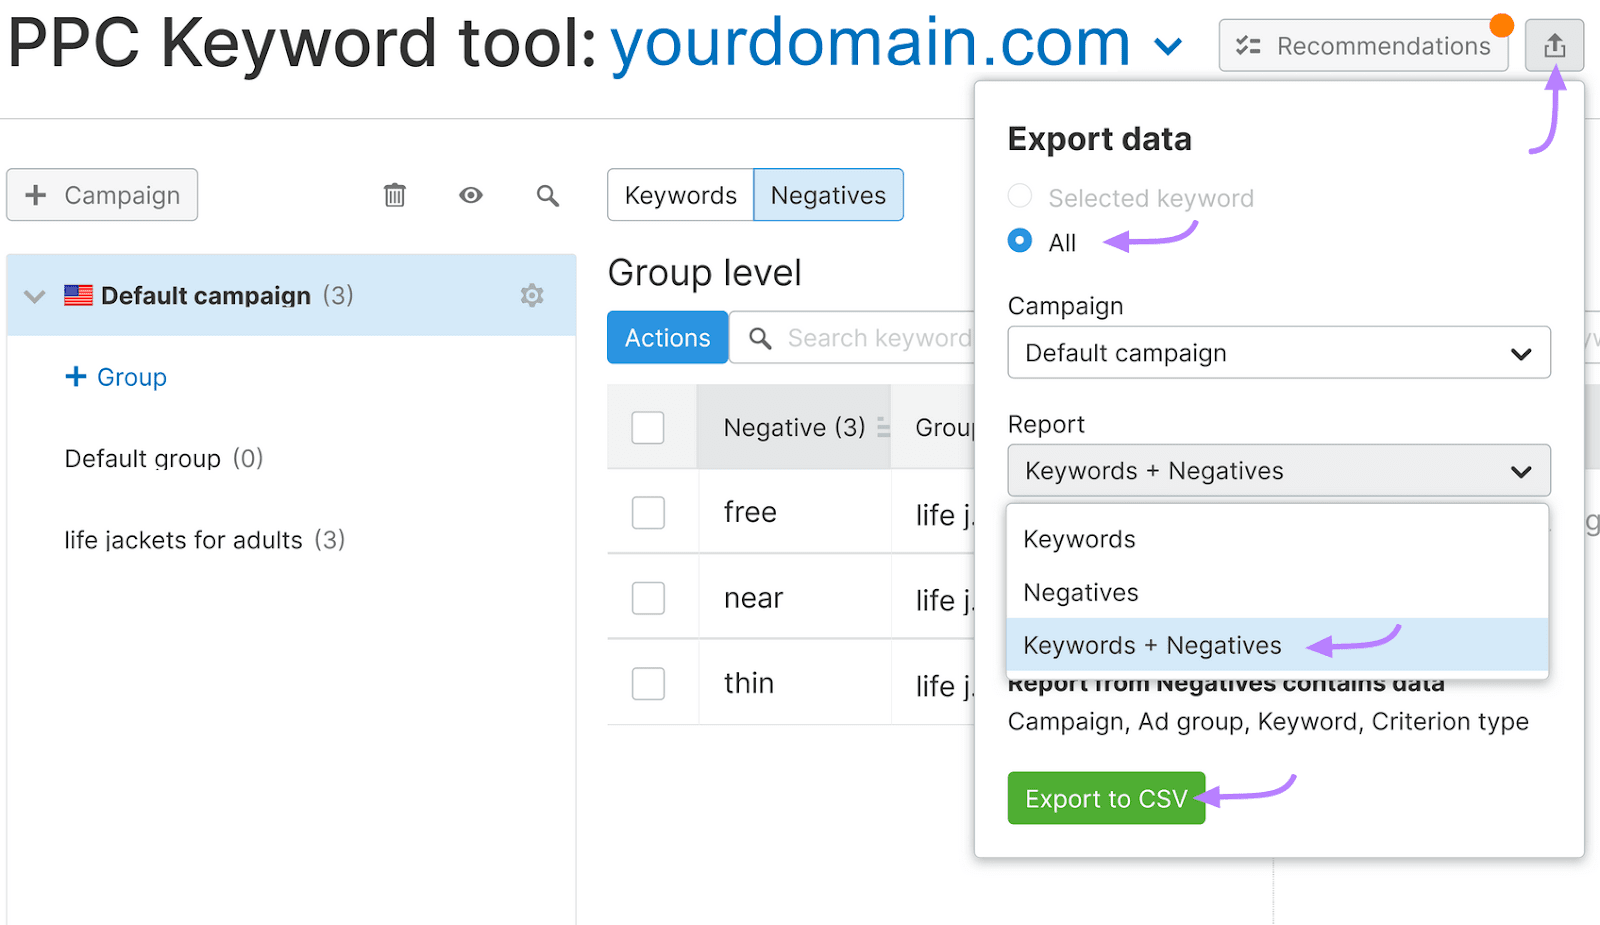
This will save the file to your device’s local drive. Then, you can upload it to Google Ads.
Let’s say you want to add your keywords manually while creating your ad group on Google Ads.
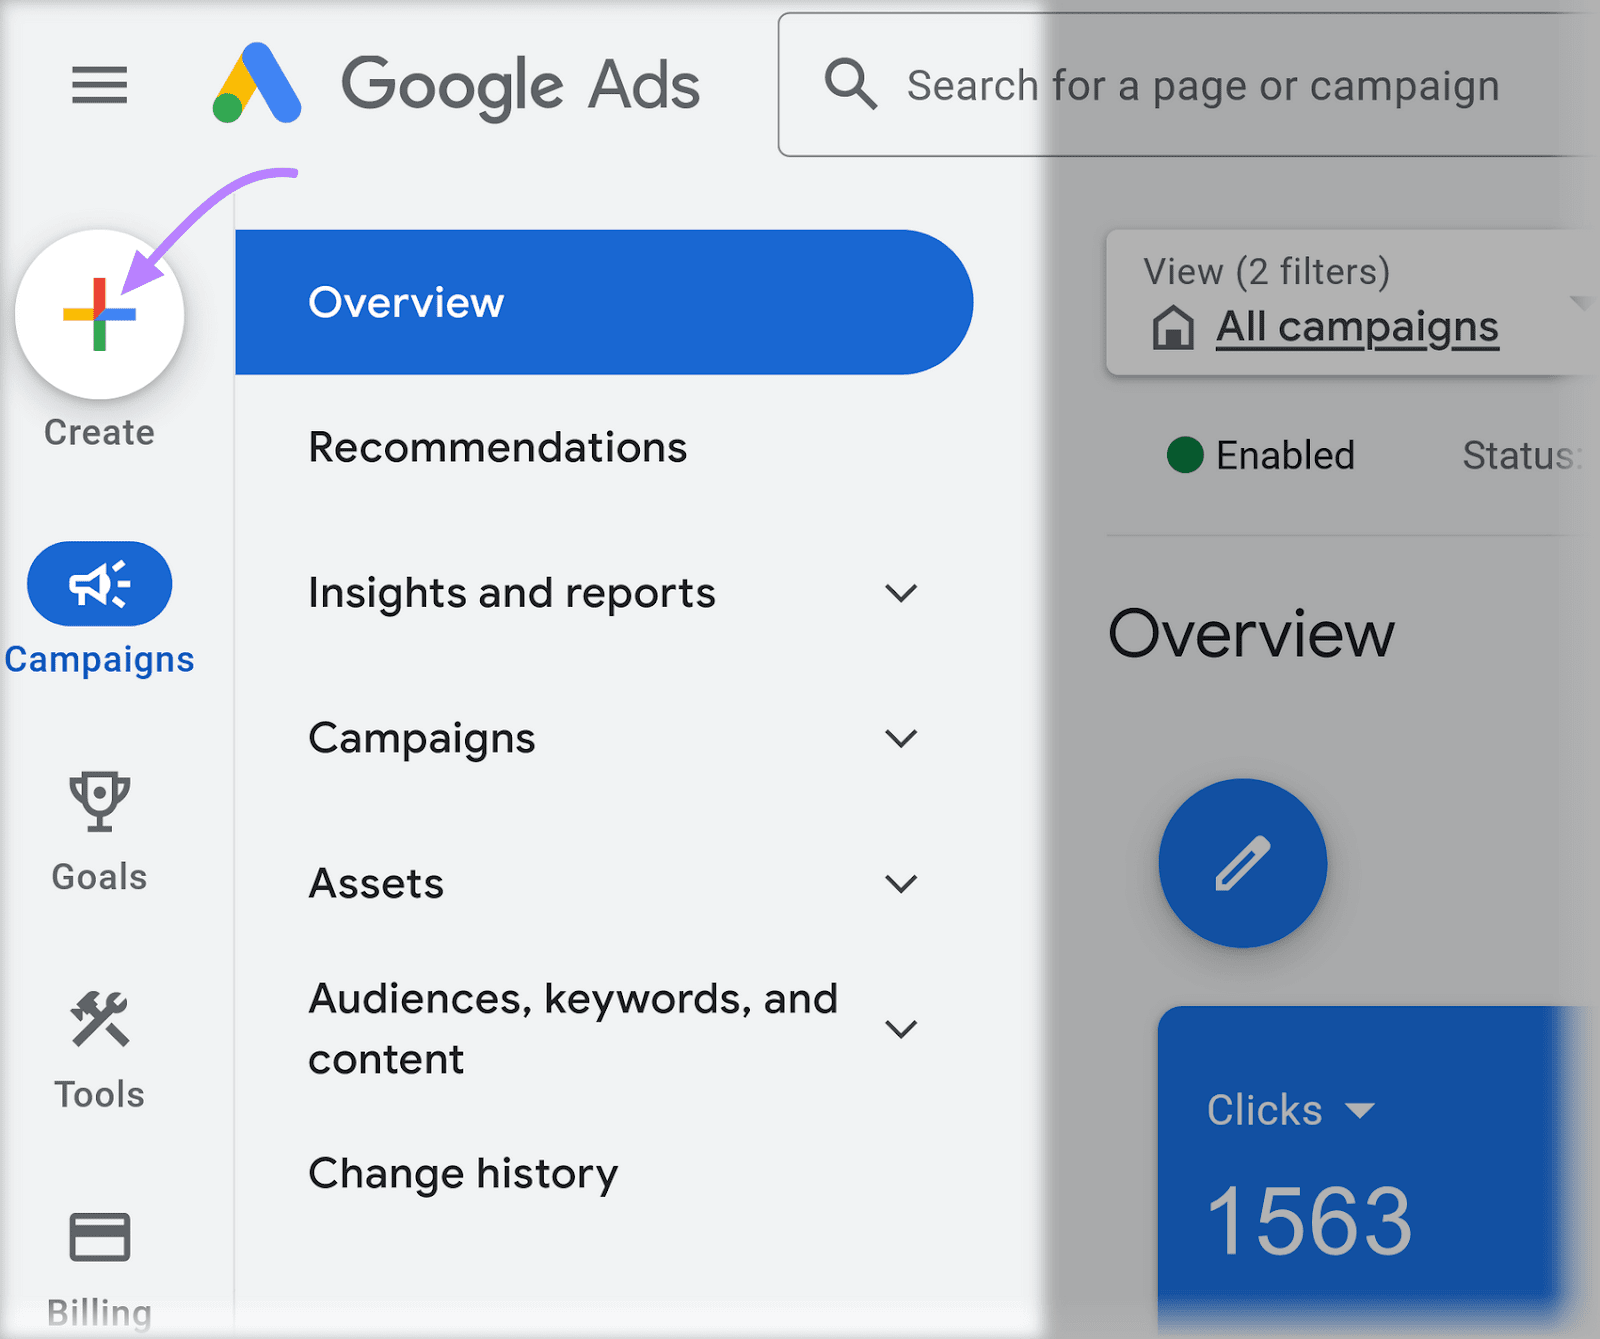
On your Google Ads account, click the “Create” plus icon at the top of the leftmost navigation pane.
Select “Ad group.”
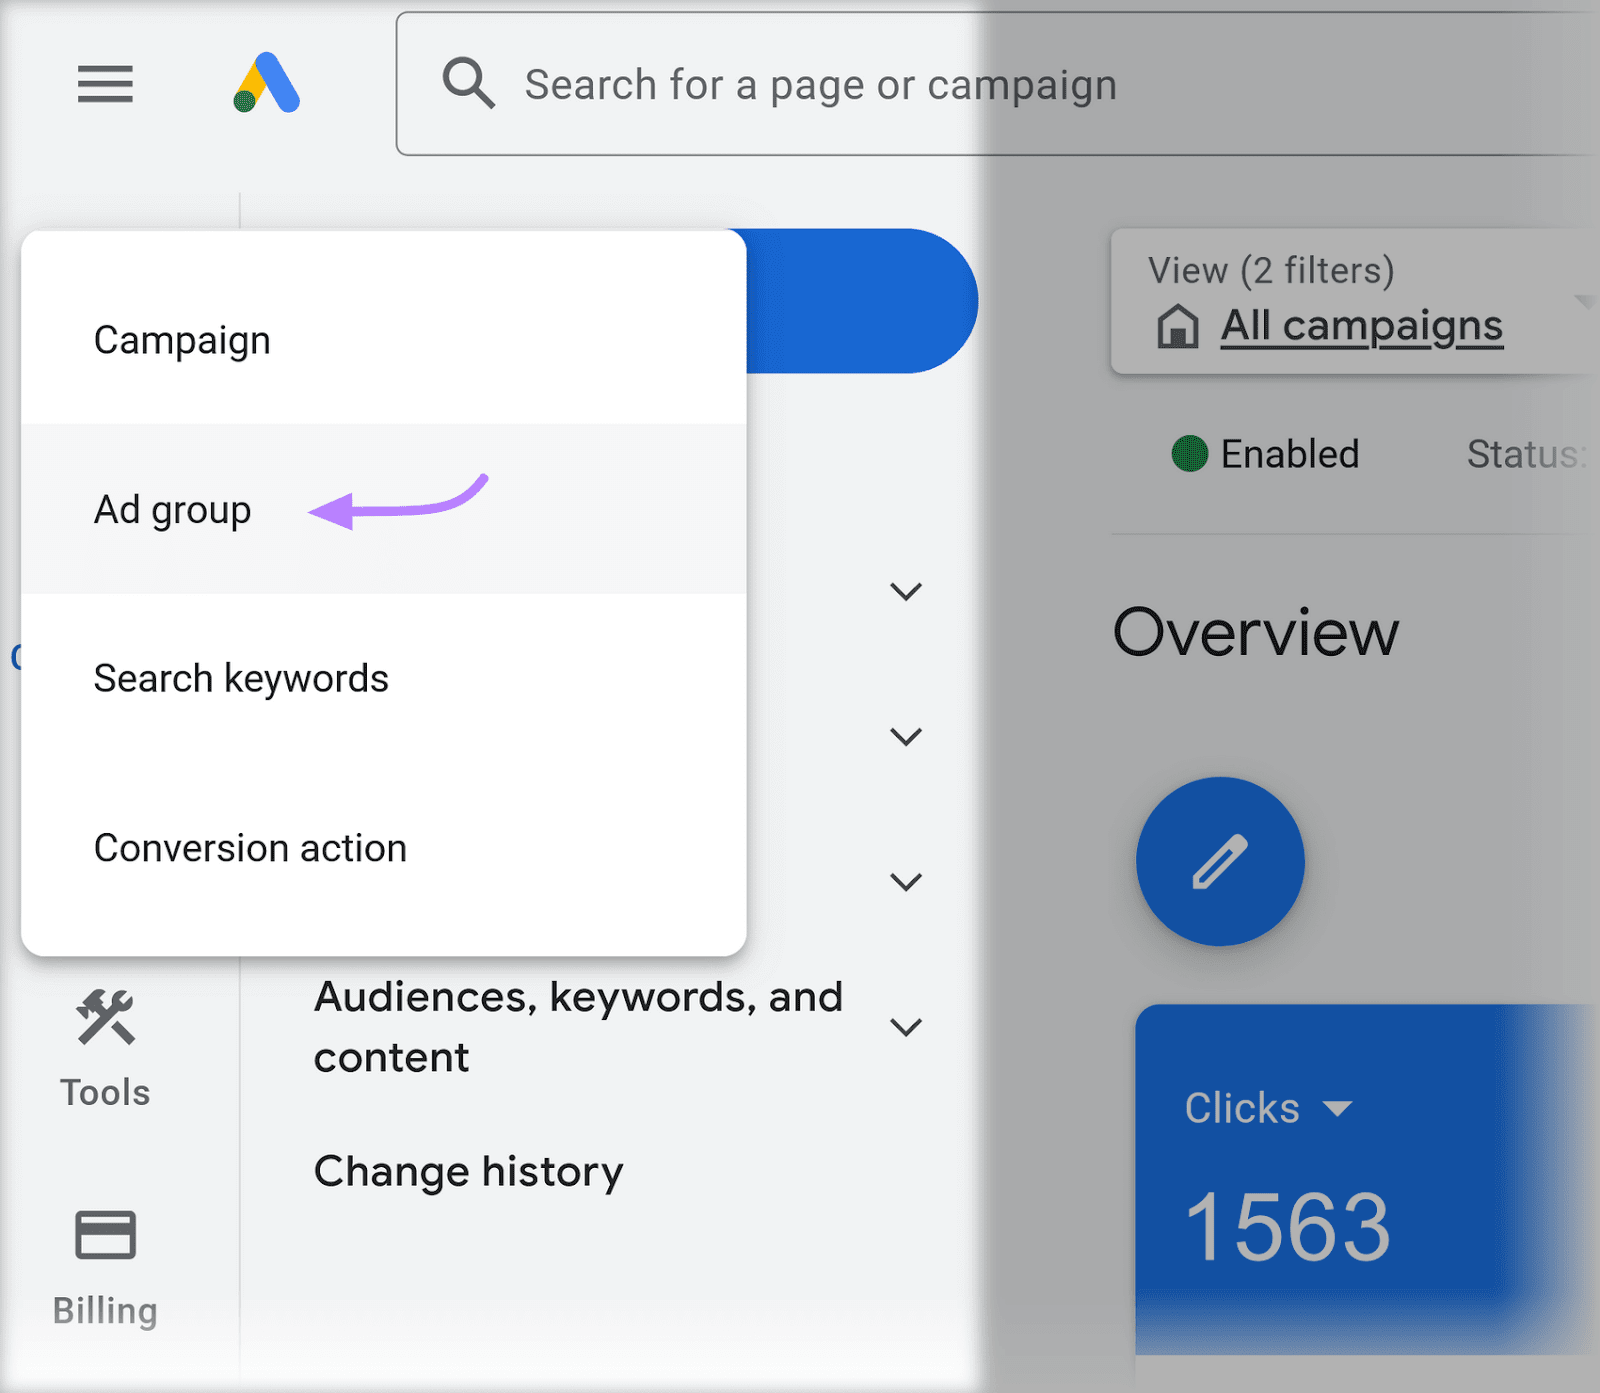
Choose the campaign to which you want to add the group.
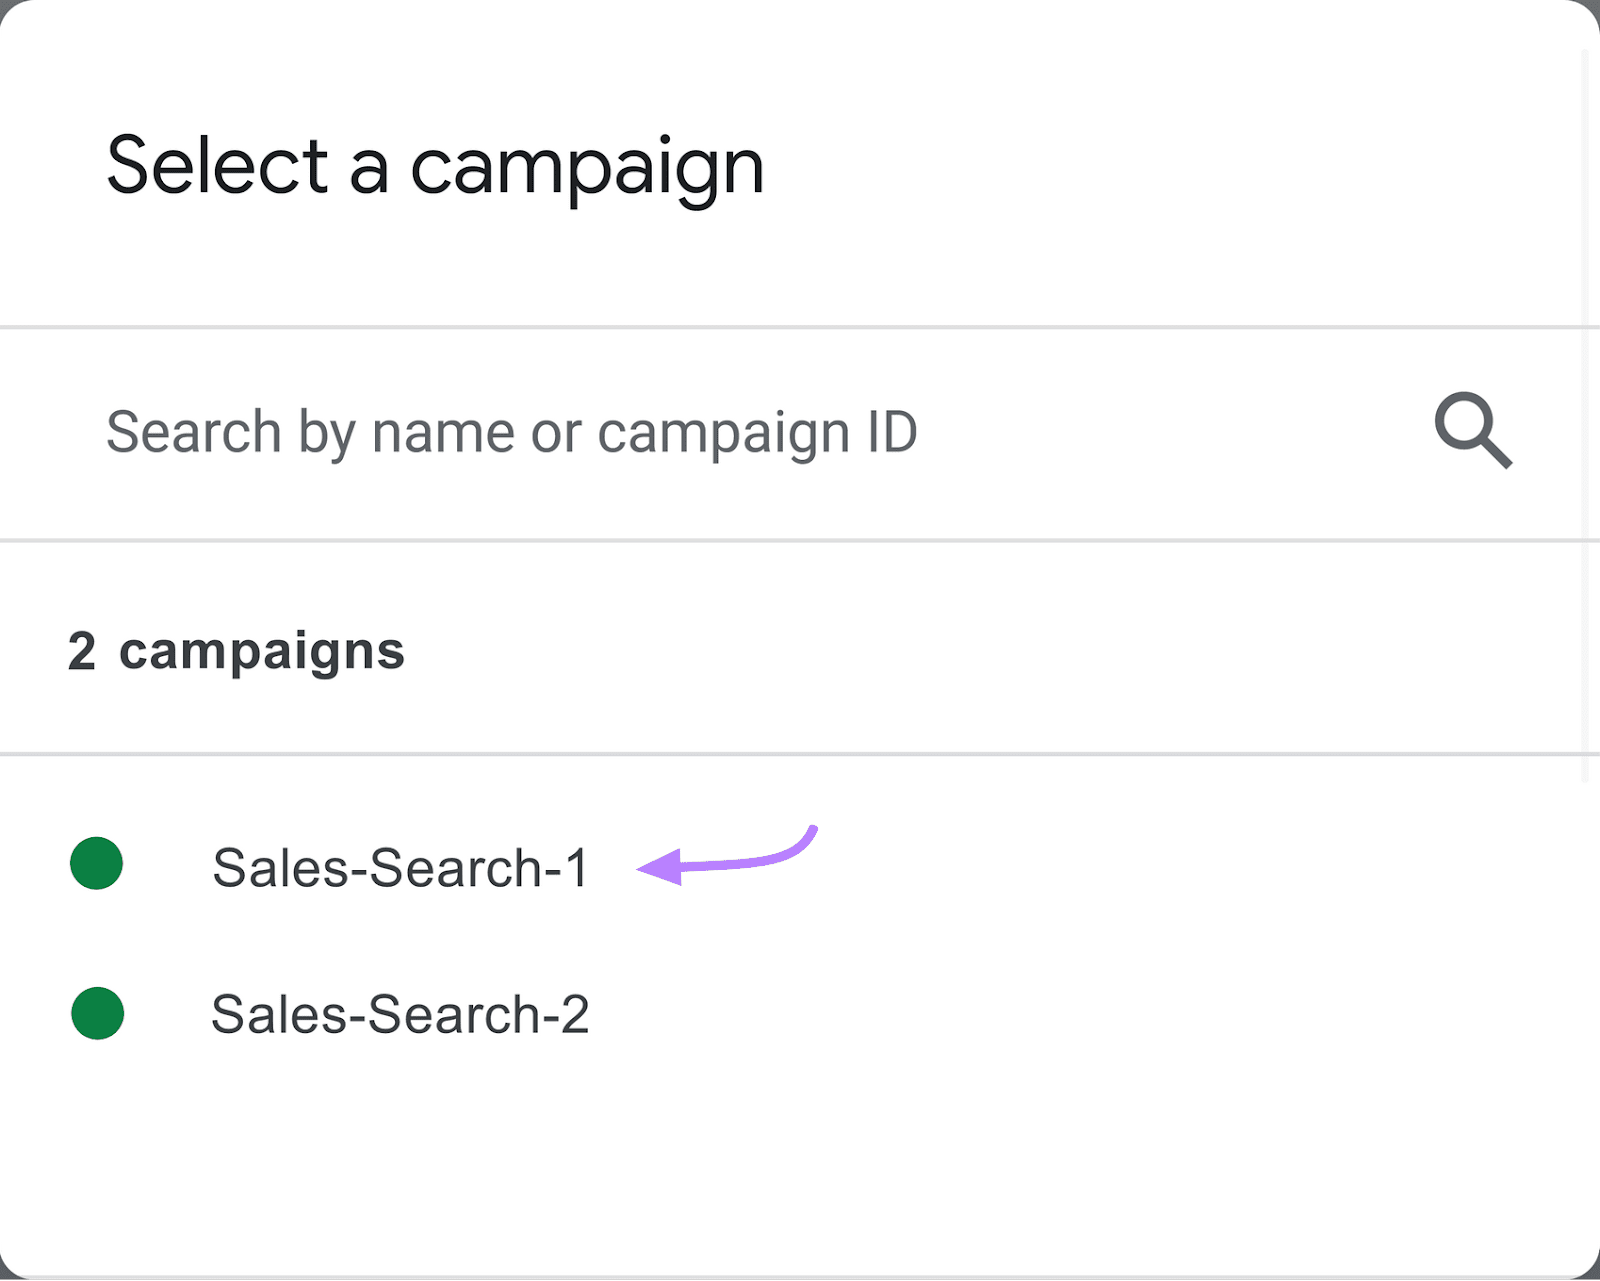
Select your ad group type.
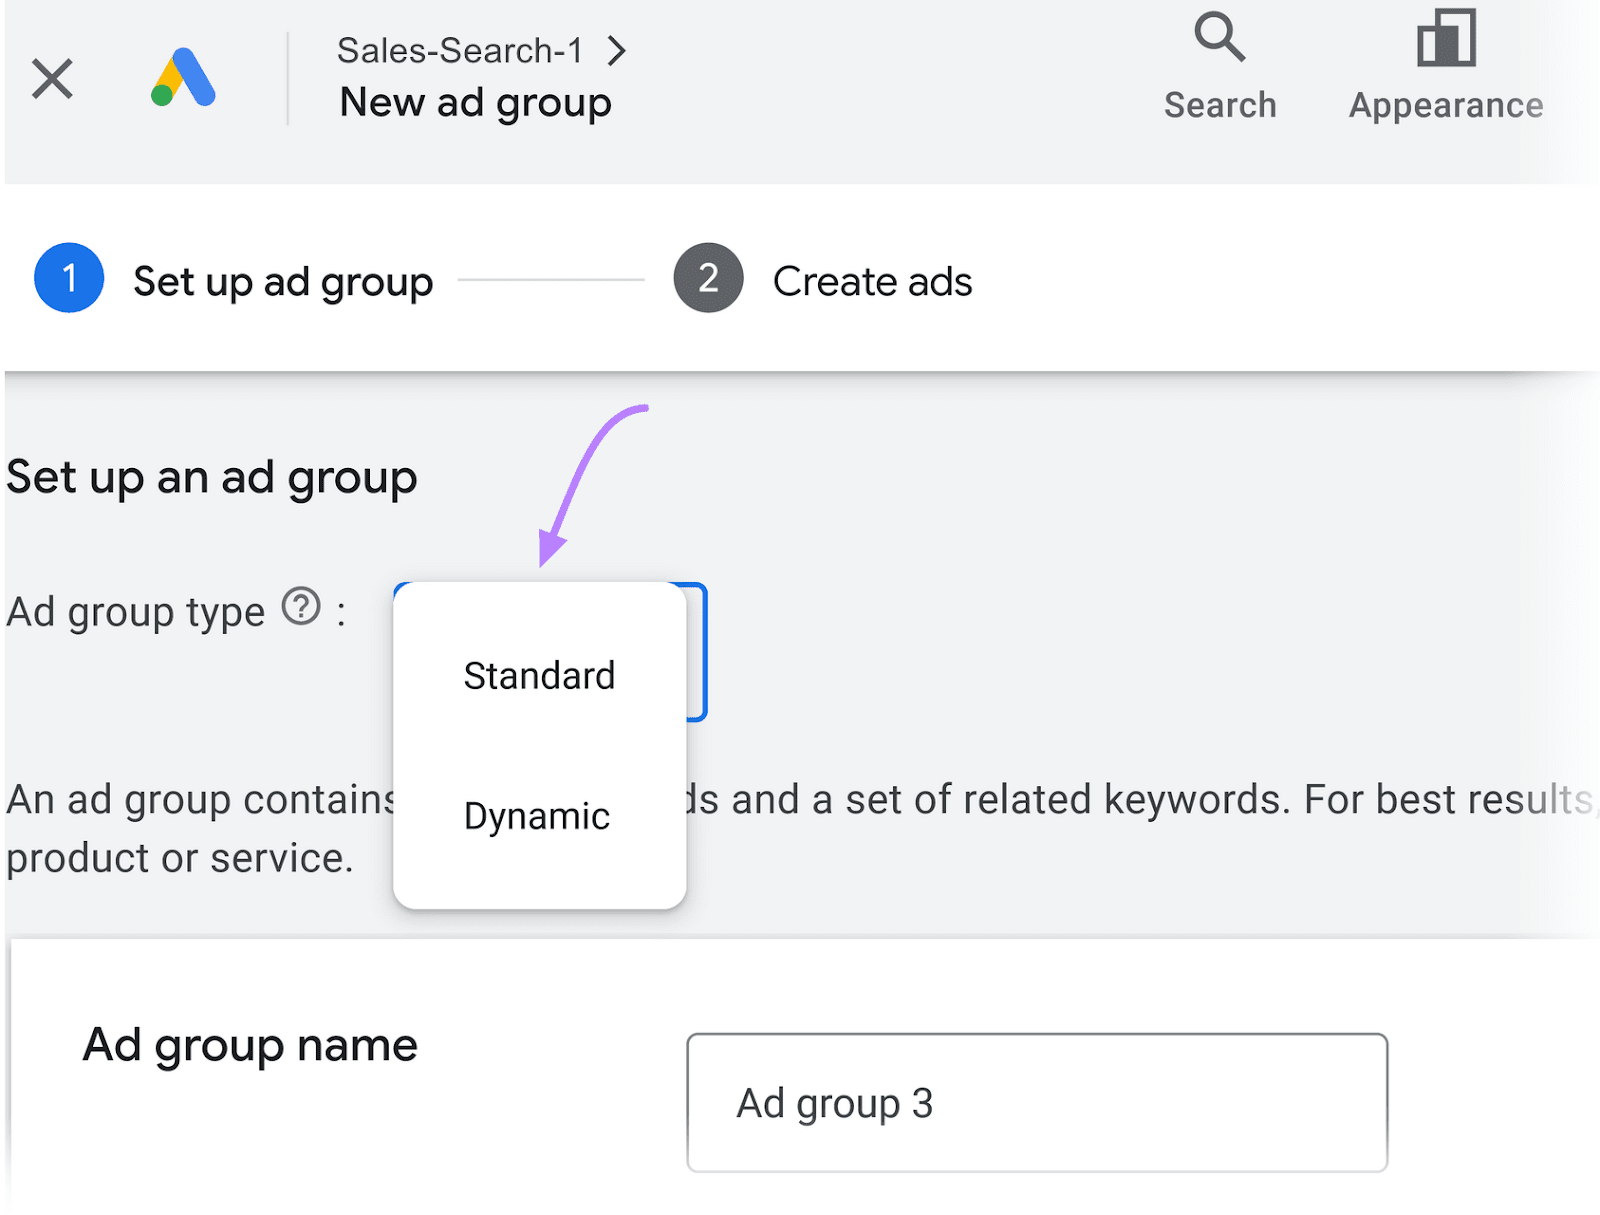
Ad group types include:
- Standard Search Ads: Text ads triggered by your chosen keywords
- Dynamic Search Ads: Text ads that pull content from your website to target relevant searches and automatically create headlines
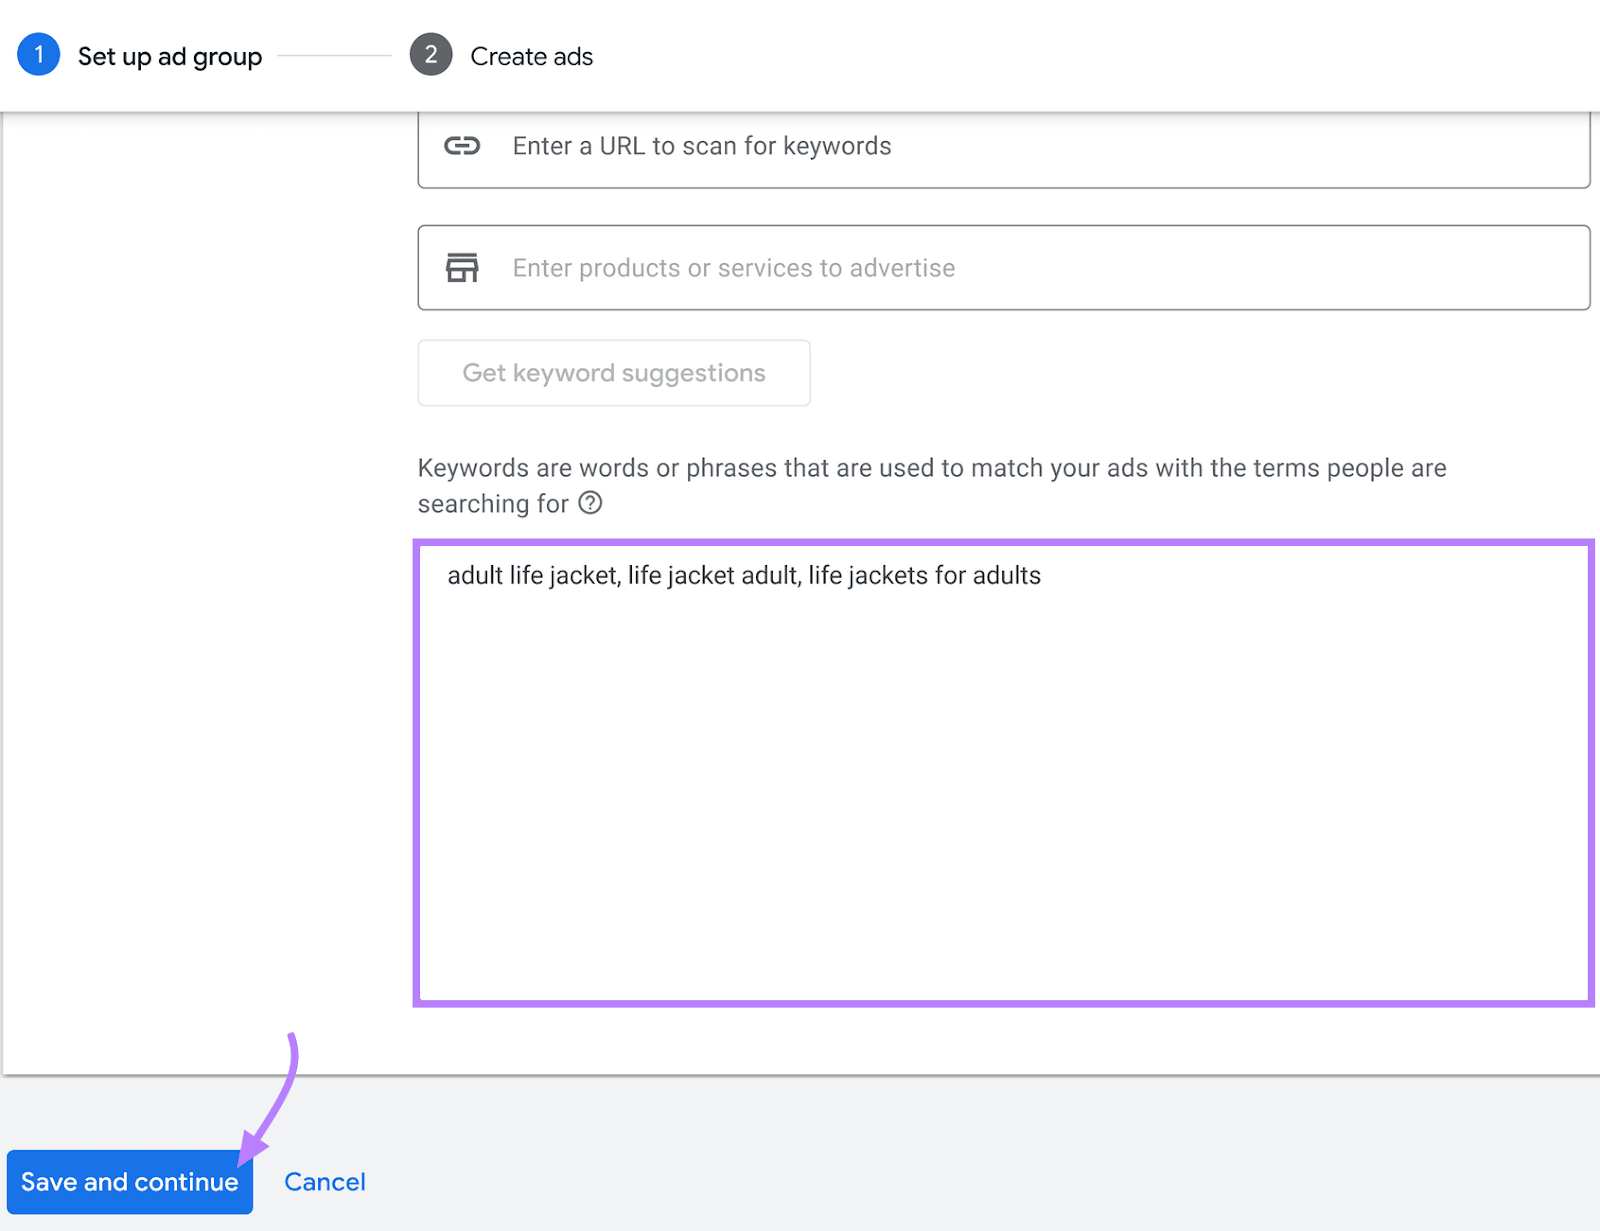
Scroll down to select your ad group name and input your keywords. Click “Save and continue.”
You’ll need to create a responsive search ad (RSA) for your ad group. Because you can’t have an ad group without an ad.
RSAs can improve your ad performance because they adapt to users’ search queries to increase relevance and engagement. They offer flexibility and enable Google to test various ad combinations (headlines and descriptions) automatically for better results.
Further reading: Responsive Search Ads: The Ultimate Guide for Beginners
Input your “Final URL” and “Display path”. You’ll see your ad’s preview on the right.
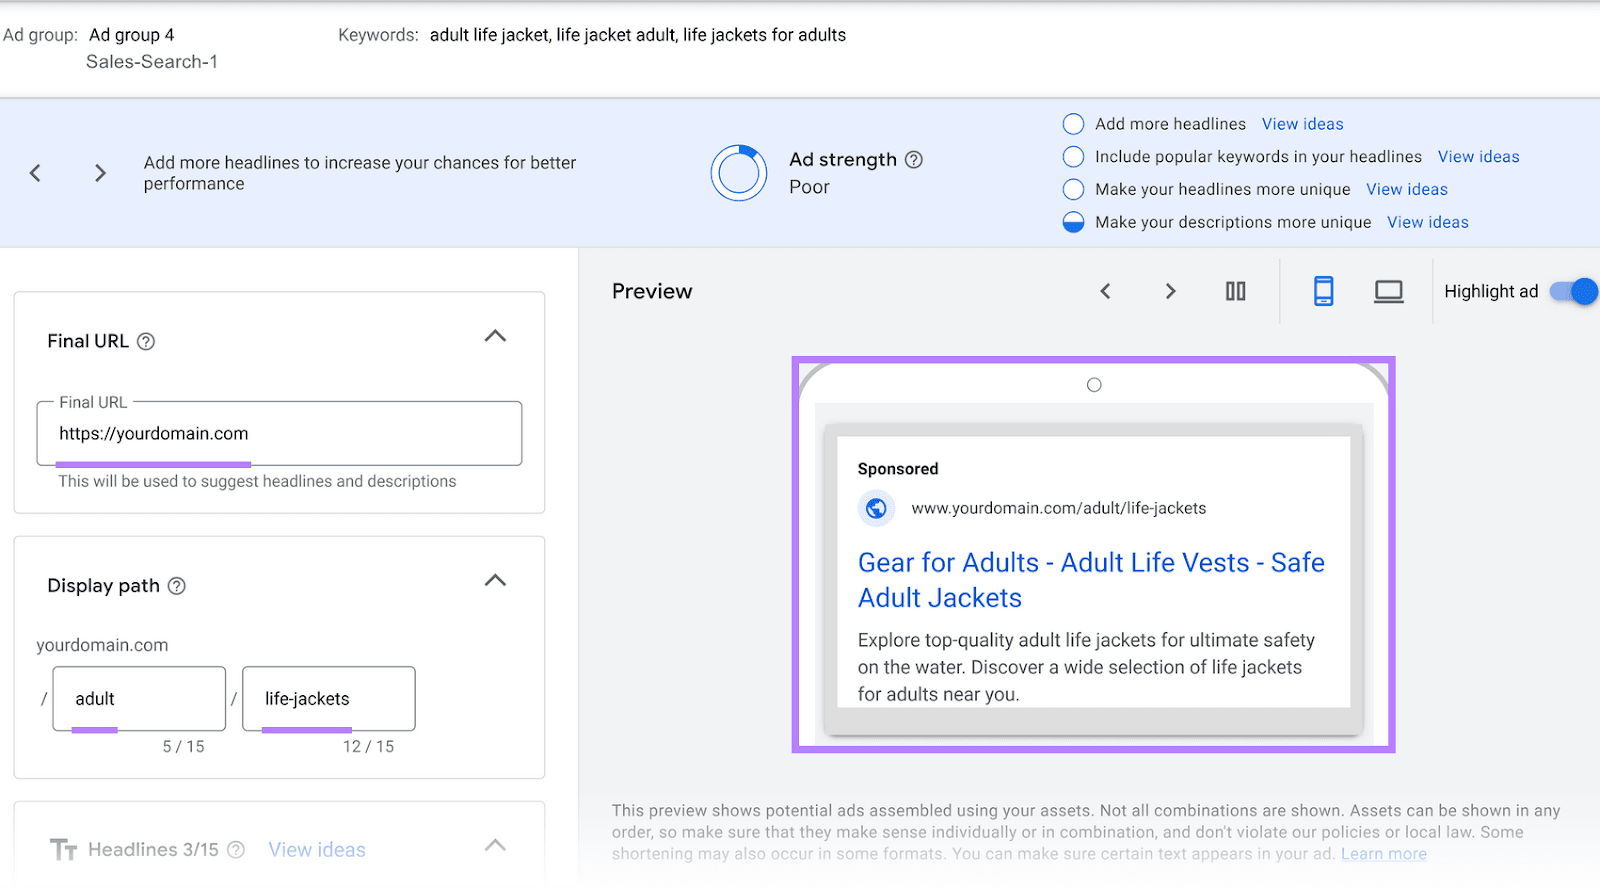
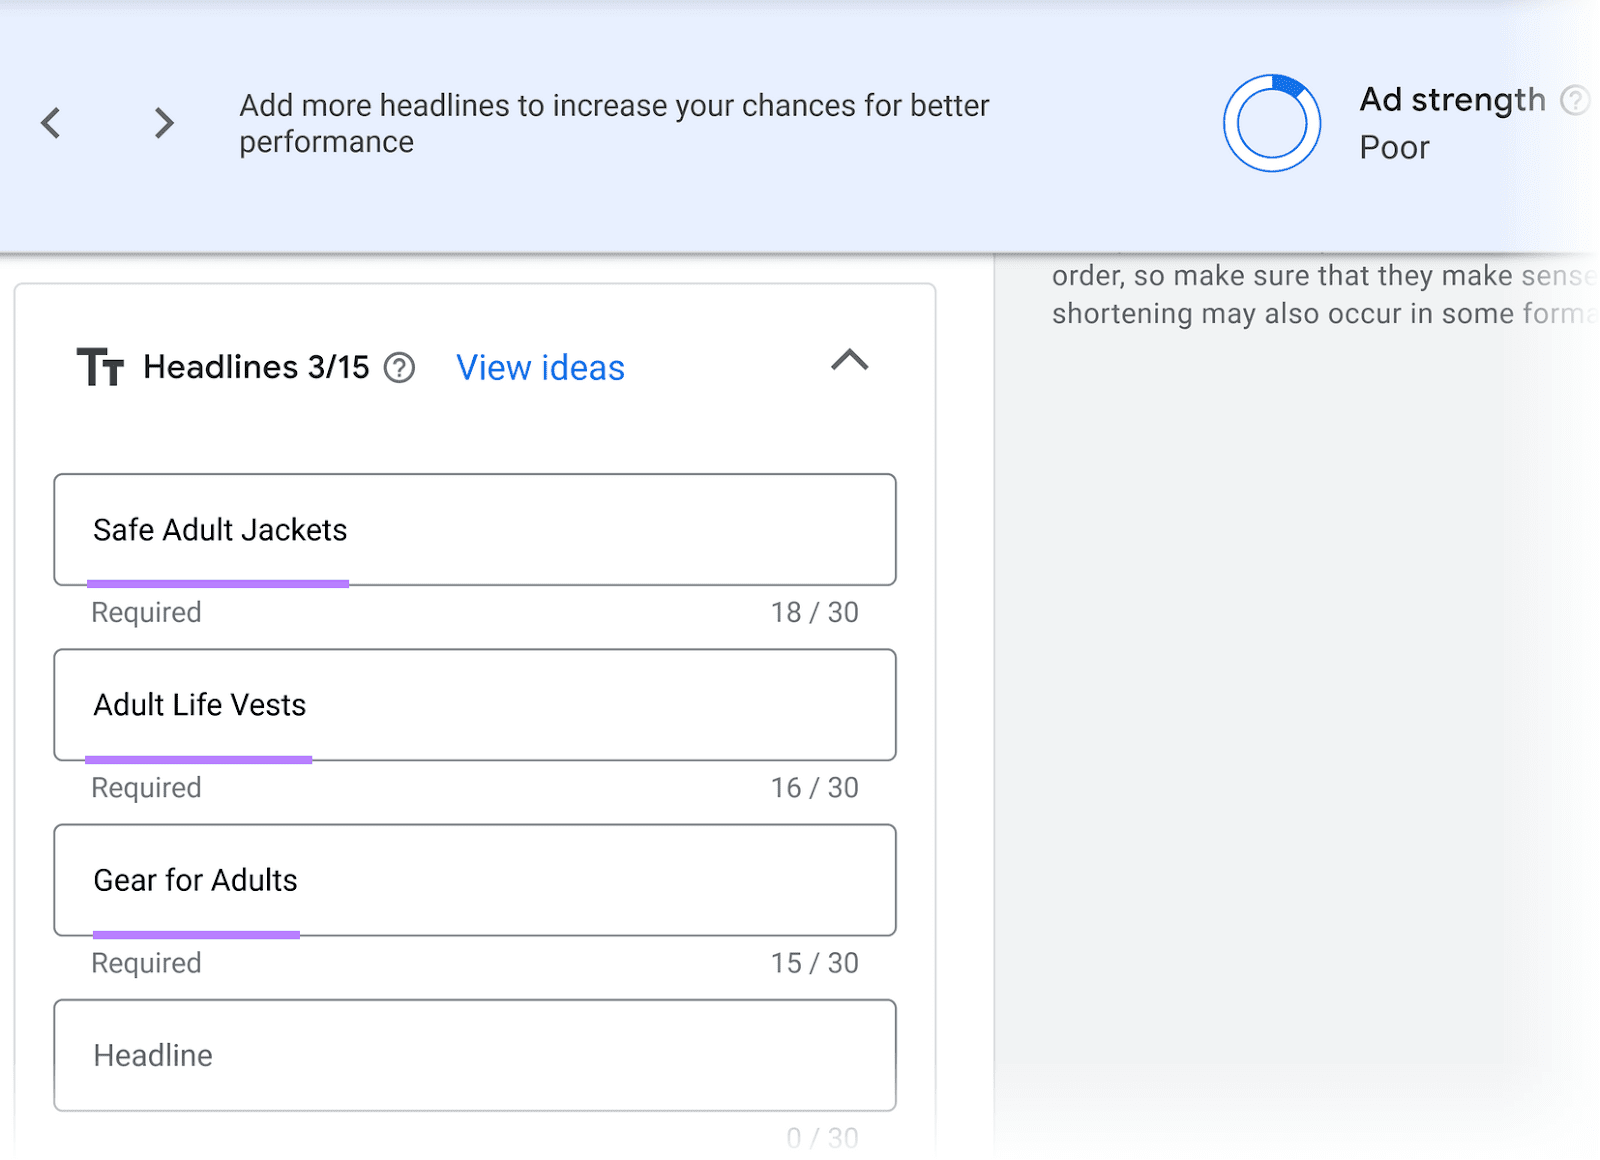
Scroll down to add your headlines. You can add a minimum of three and maximum of 15.
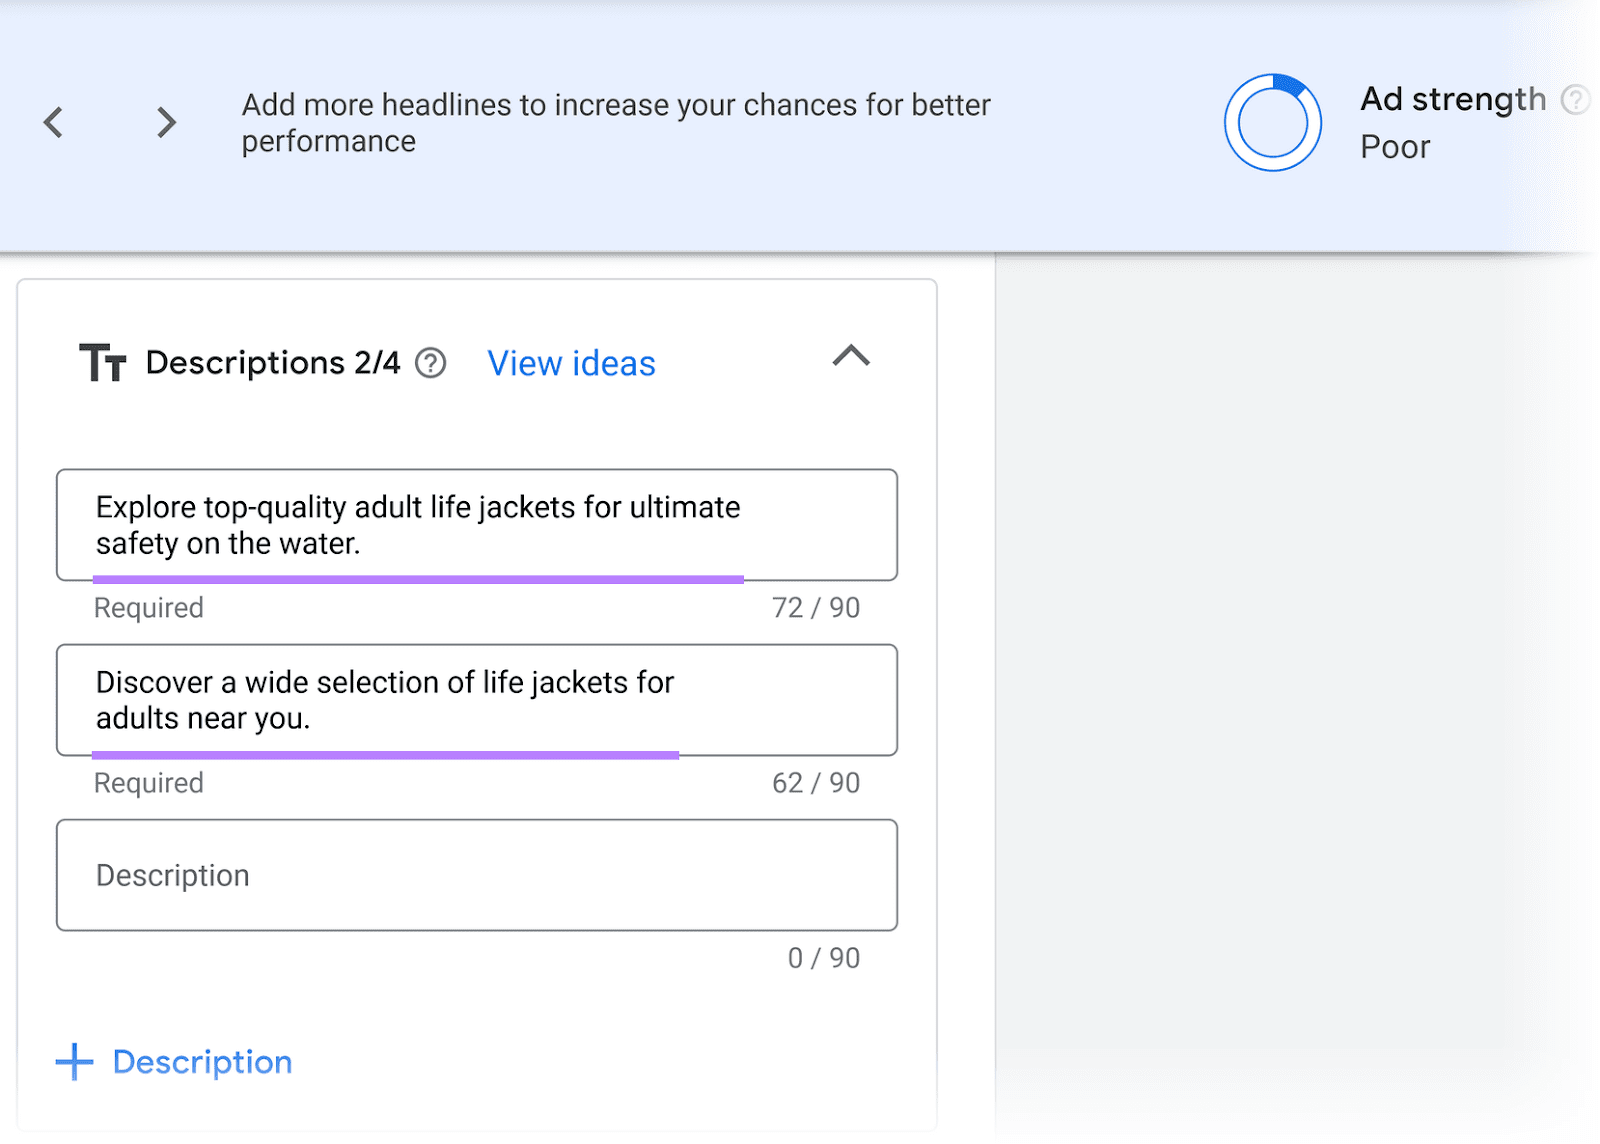
Then add your ad’s descriptions. You have have at least two, and up to four descriptions.
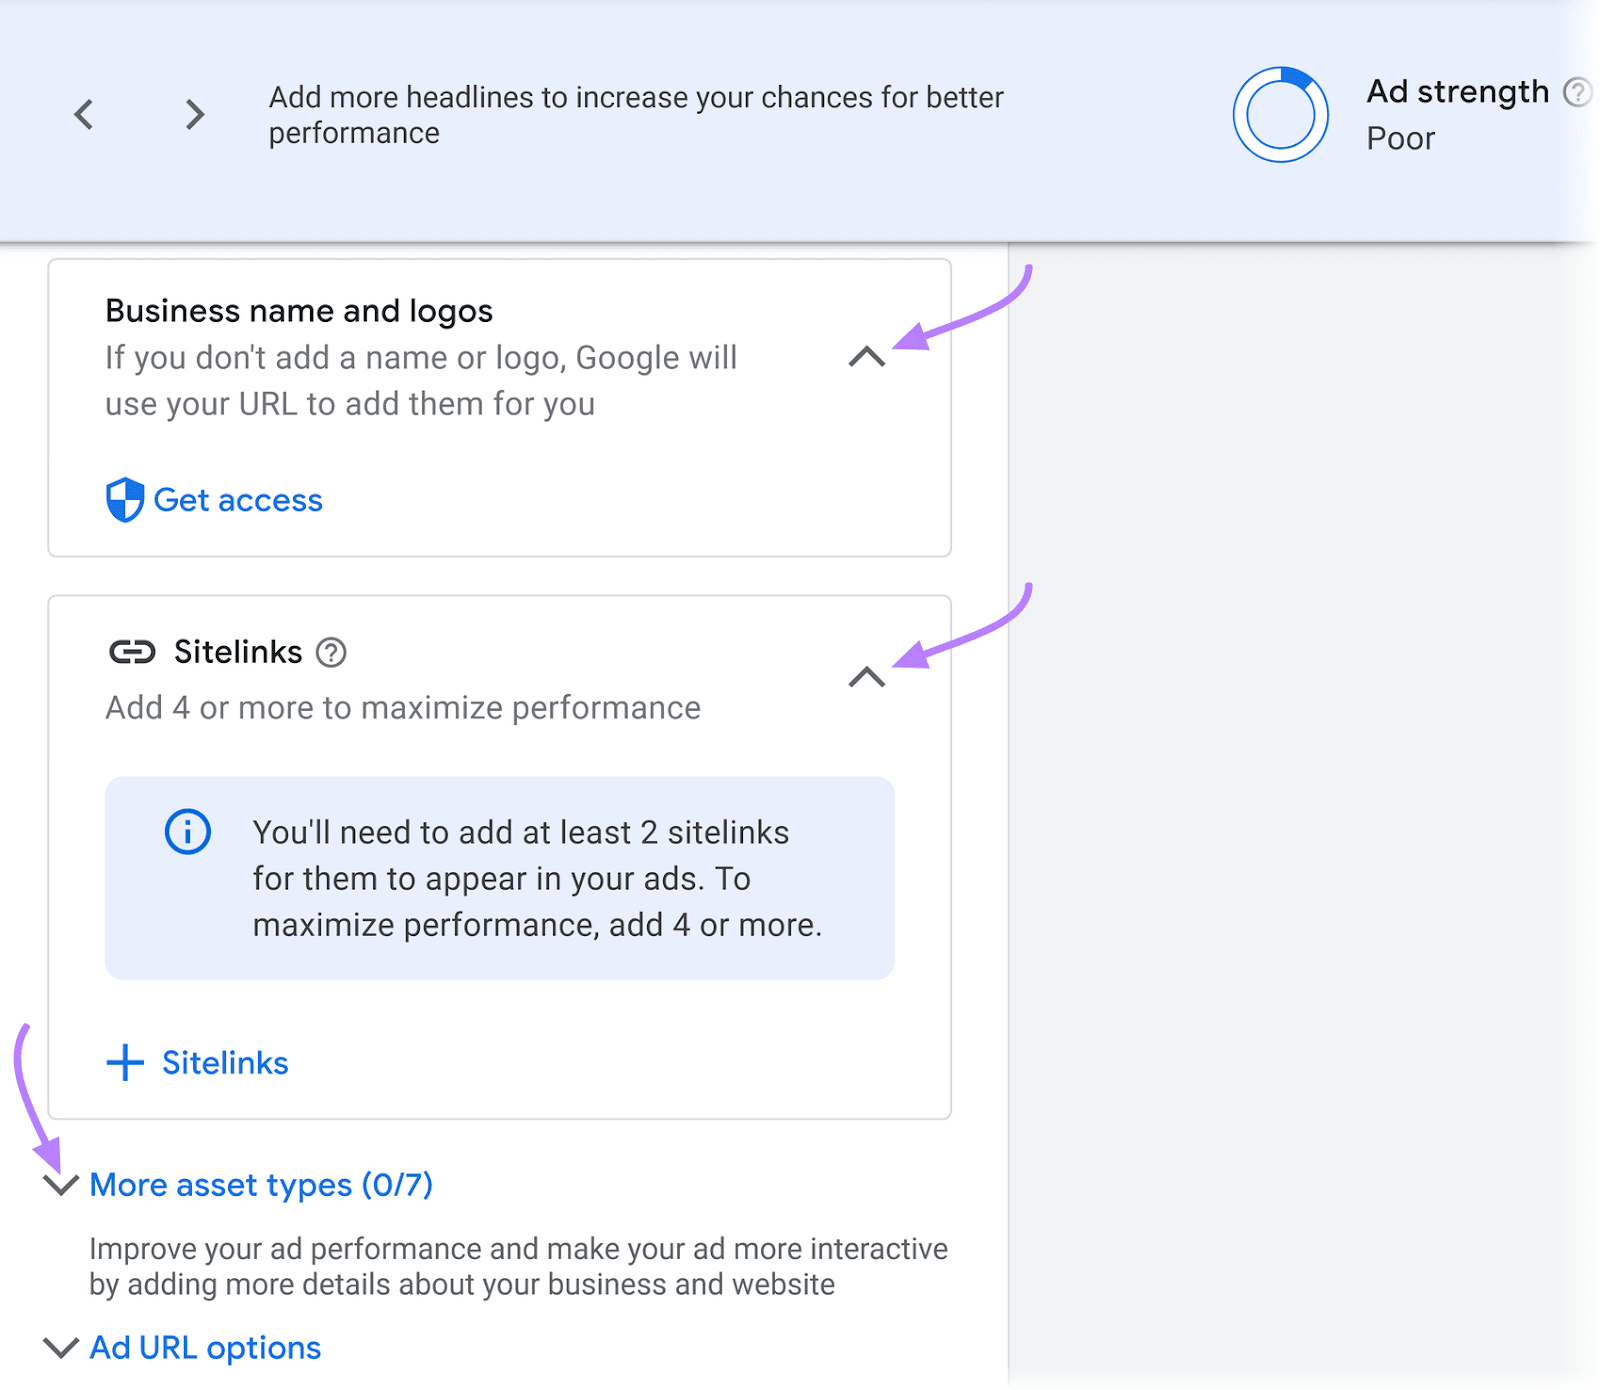
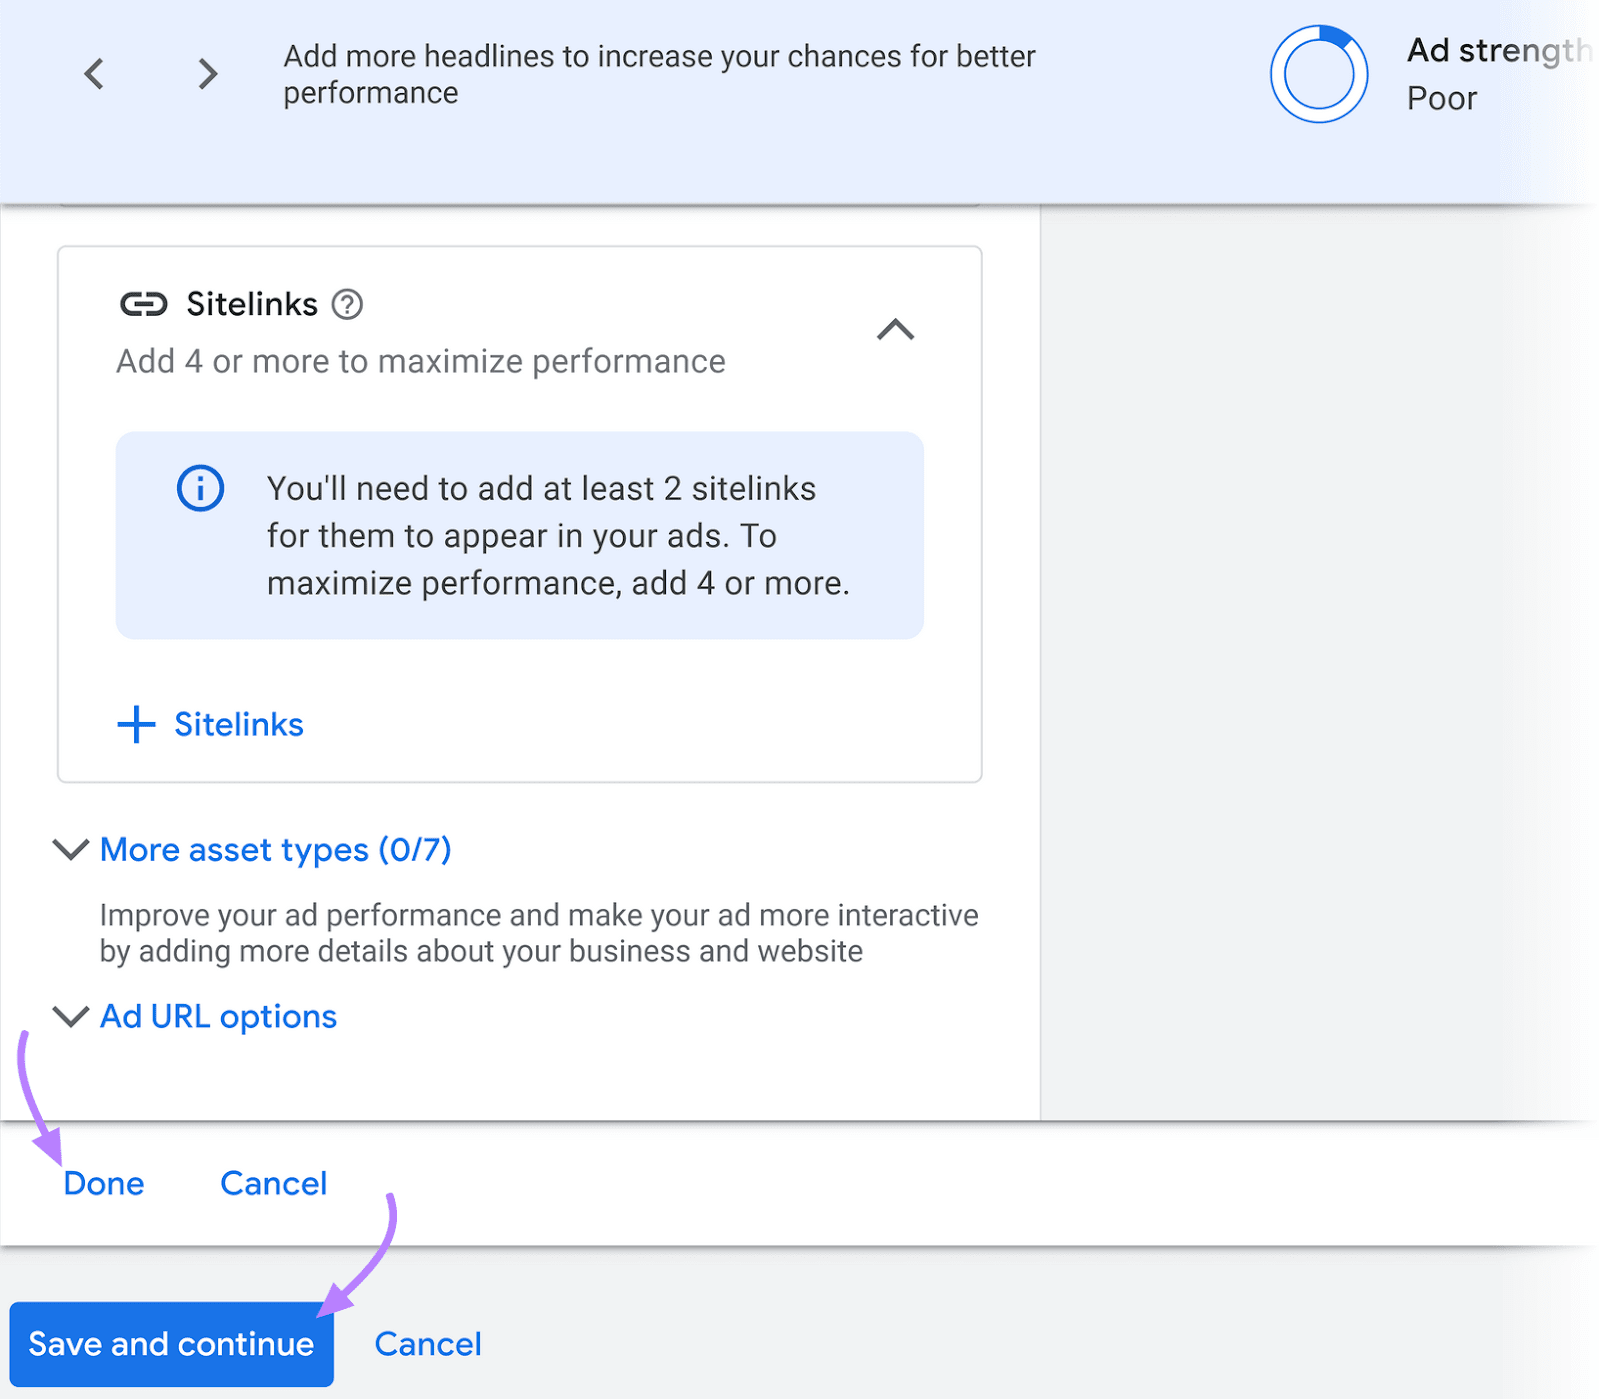
Consider adding more information like your business’s name and logo, sitelinks, and asset types.
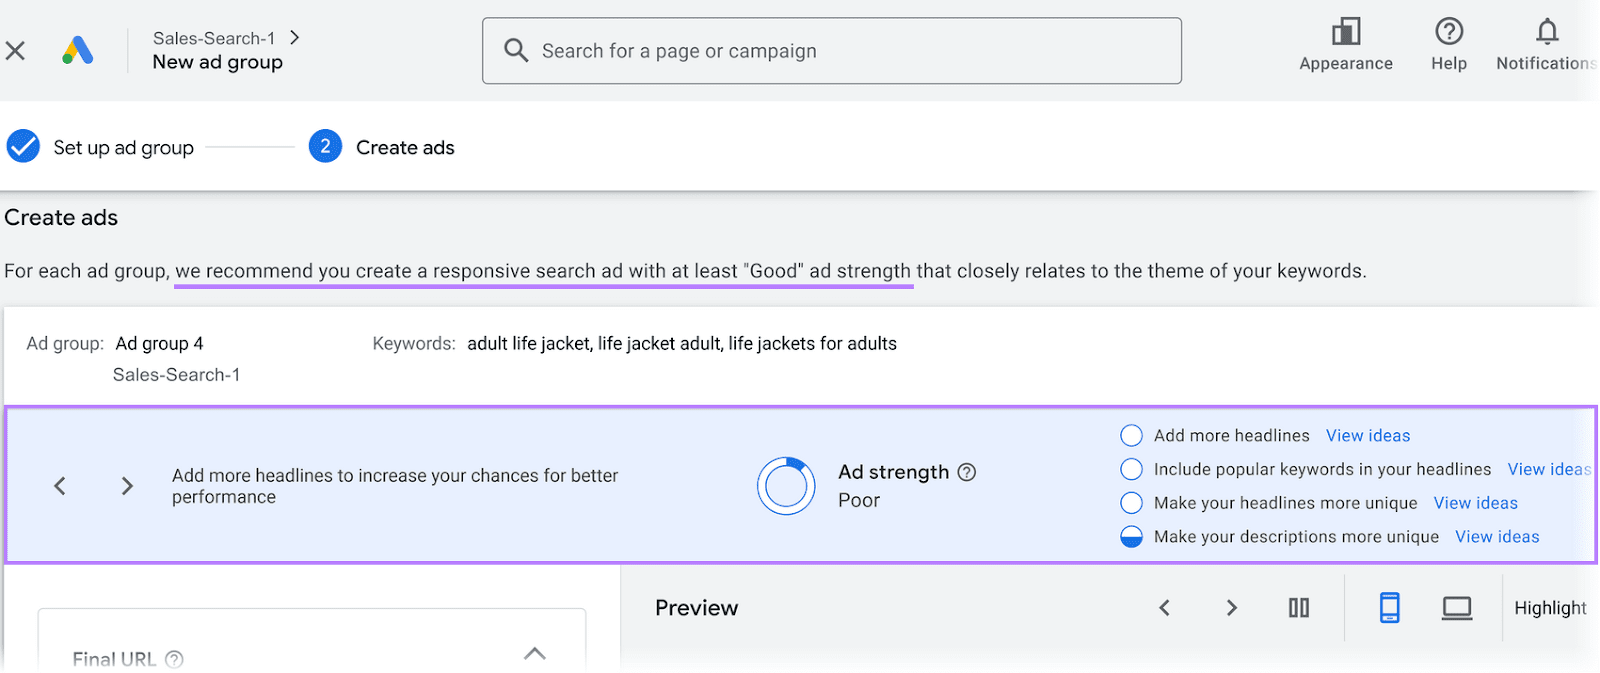
Follow the recommendations at the top right to increase your ad strength(how relevant your ads are). Google recommends that your RSA’s strength should be at least “Good.”
After creating your RSA. Click “Done” > “Save and continue.”
Consider these best practices to achieve better performance metrics and meet your advertising goals.
- Remove underperforming keywords and test new ones to refine your targeting
- Test automated bidding strategies to optimize for conversions or clicks
- Monitor your bids and adjust them based on keyword performance
- Regularly review your ad groups to make sure they are relevant
Upgrade Your Ad Group Strategy with Semrush
As you create your ad groups and monitor their performance, upgrade your PPC strategy with Semrush.
Semrush gives you access to a suite of tools that enable you to understand your audience, find the right keywords and get insights to maximize your advertising ROI and surpass your competition.
Sign up for a free trial with Semrush today to go beyond generic approaches and use tailored solutions to improve your ads’ performance.
Source link : Semrush.com
