What Is a Heading Tag?
Heading tags are HTML elements that define headings and subheadings within web pages. They help readers and search engines to understand the hierarchy and relevance of the content on the page.
HTML (Hypertext Markup Language), which is the standard markup language used to create web pages, provides a range of heading tags from <h1> to <h6>.
The <h1> is the highest level (usually the page’s main title), and <h6> is the lowest. Each tag represents a different level of importance or subsection within the content.
What’s the Difference Between a Heading Tag and a Header Tag?
While these two terms are sometimes used interchangeably, they refer to distinct elements in HTML.
As mentioned, heading tags indicate the hierarchy and structure of the text. While a header tag is used to define the header section at the top of a webpage. It typically contains introductory content, navigation links, logos, or other elements that appear at the top of the page.
Think of it like a book.
The heading tags are like chapter titles. Each chapter title tells you what that chapter is about and helps you navigate through the book.
The header tag is like the book cover. It’s the first thing you see when you pick up the book, and it often includes the book’s title, an image, and other introductory information.
Search engine algorithms use heading tags to understand the structure and hierarchy of a web page. They also primarily take keywords from the title tags, heading tags, and the body of the content to understand a web page’s context and determine if the content is relevant to the user’s query.
While each heading tag serves a specific purpose in SEO, the H1 tag holds the highest importance as the main title or heading of the page, followed by H2, H3, and down to H6.
These are in descending order of relevance. If you skip an HTML tag heading (jump from an H2 to an H4, for example), the heading structure will be broken. Which isn’t ideal for on-page SEO.
Heading tags play a big role in content readability. Adding different sections with appropriate headings on a webpage divides the content into scannable blocks, making it easier for humans and search crawlers to understand. This readability factor is a practical benefit you can immediately see and appreciate.
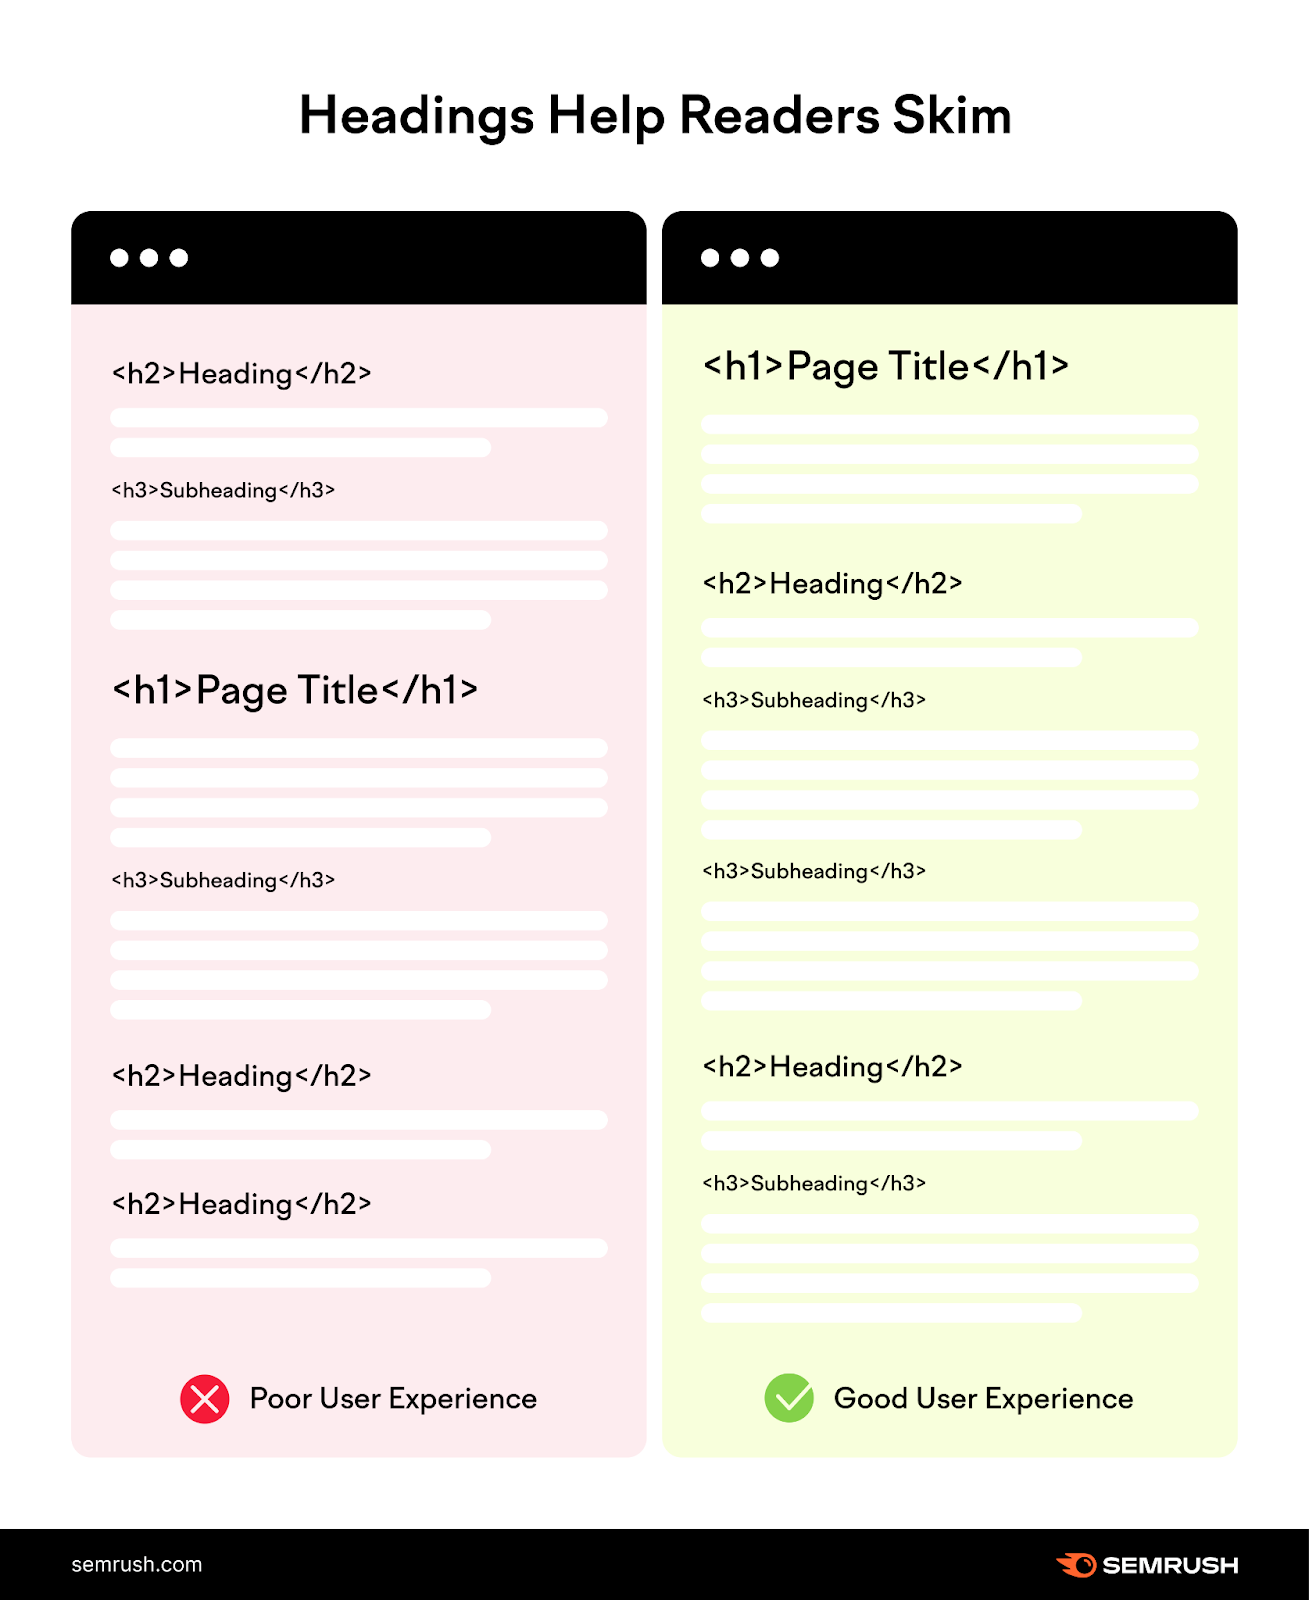
In SEO, the required standard is using your heading tags sequentially in descending order. For example, an H3 should follow an H2. And not vice versa.
Google specifically considers this structure necessary, as outlined in their developer documentation style guide.
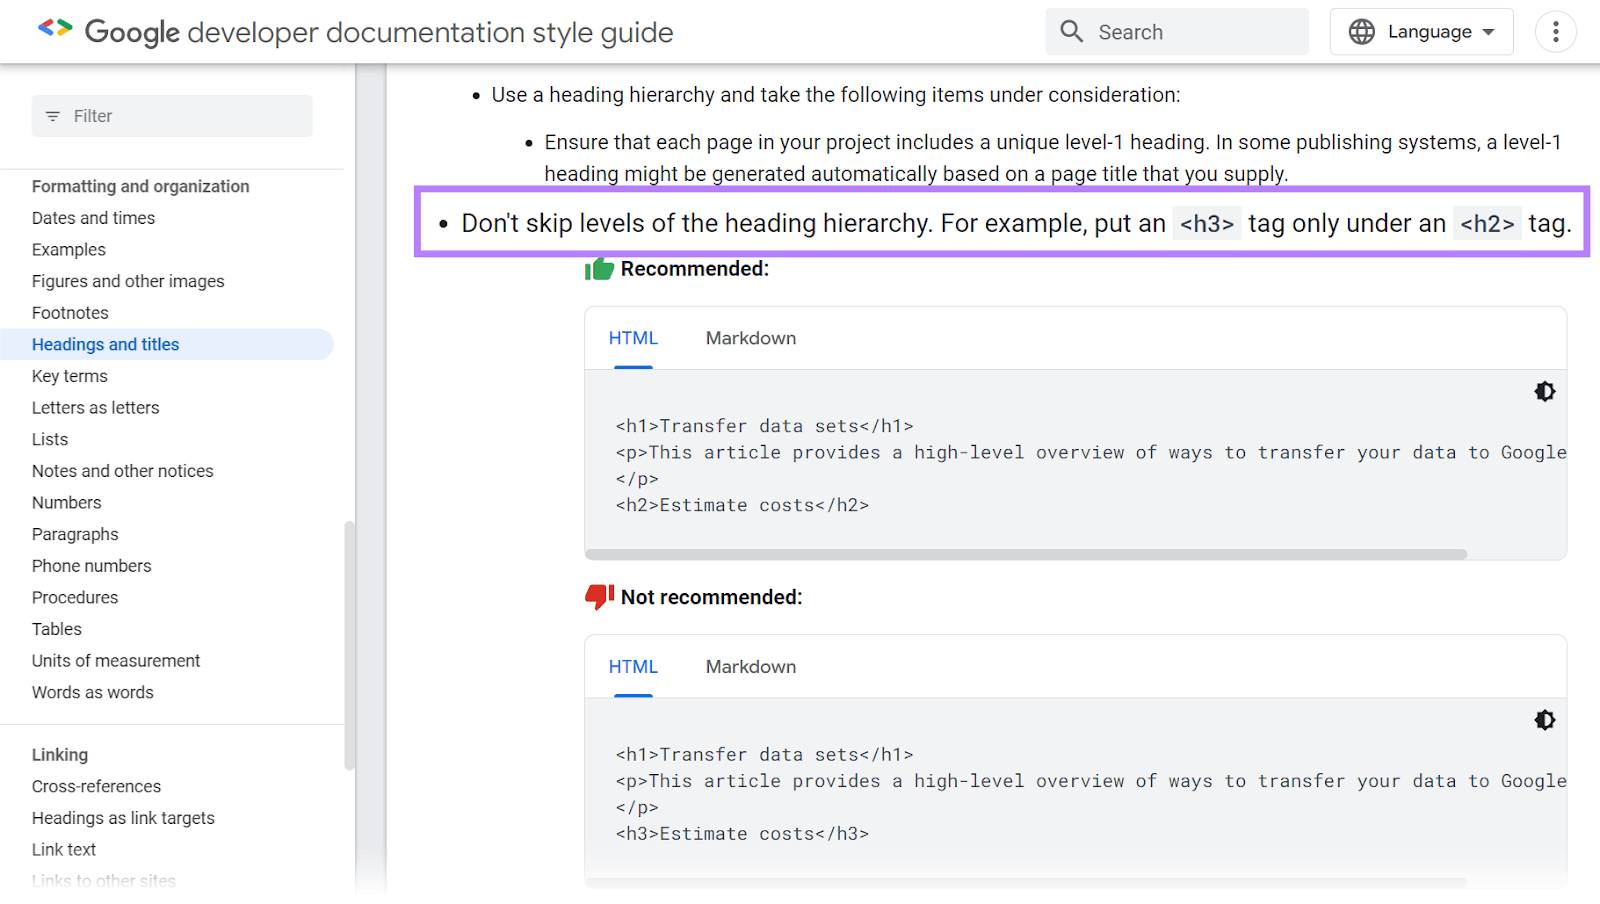
Each HTML tag heading has its relevance. Let’s get into some details:
Heading 1: <h1>
The H1 tag (or “Heading 1)” is an essential HTML element that defines a webpage’s main title. When you look at a web page’s source code for Heading 1, it consists of three parts:
- Opening tag: <h1>
- Title text: This is the text you want to display as the main heading
- Closing tag: </h1>
Here is an example of an H1 tag in our page’s HTML code and live page:
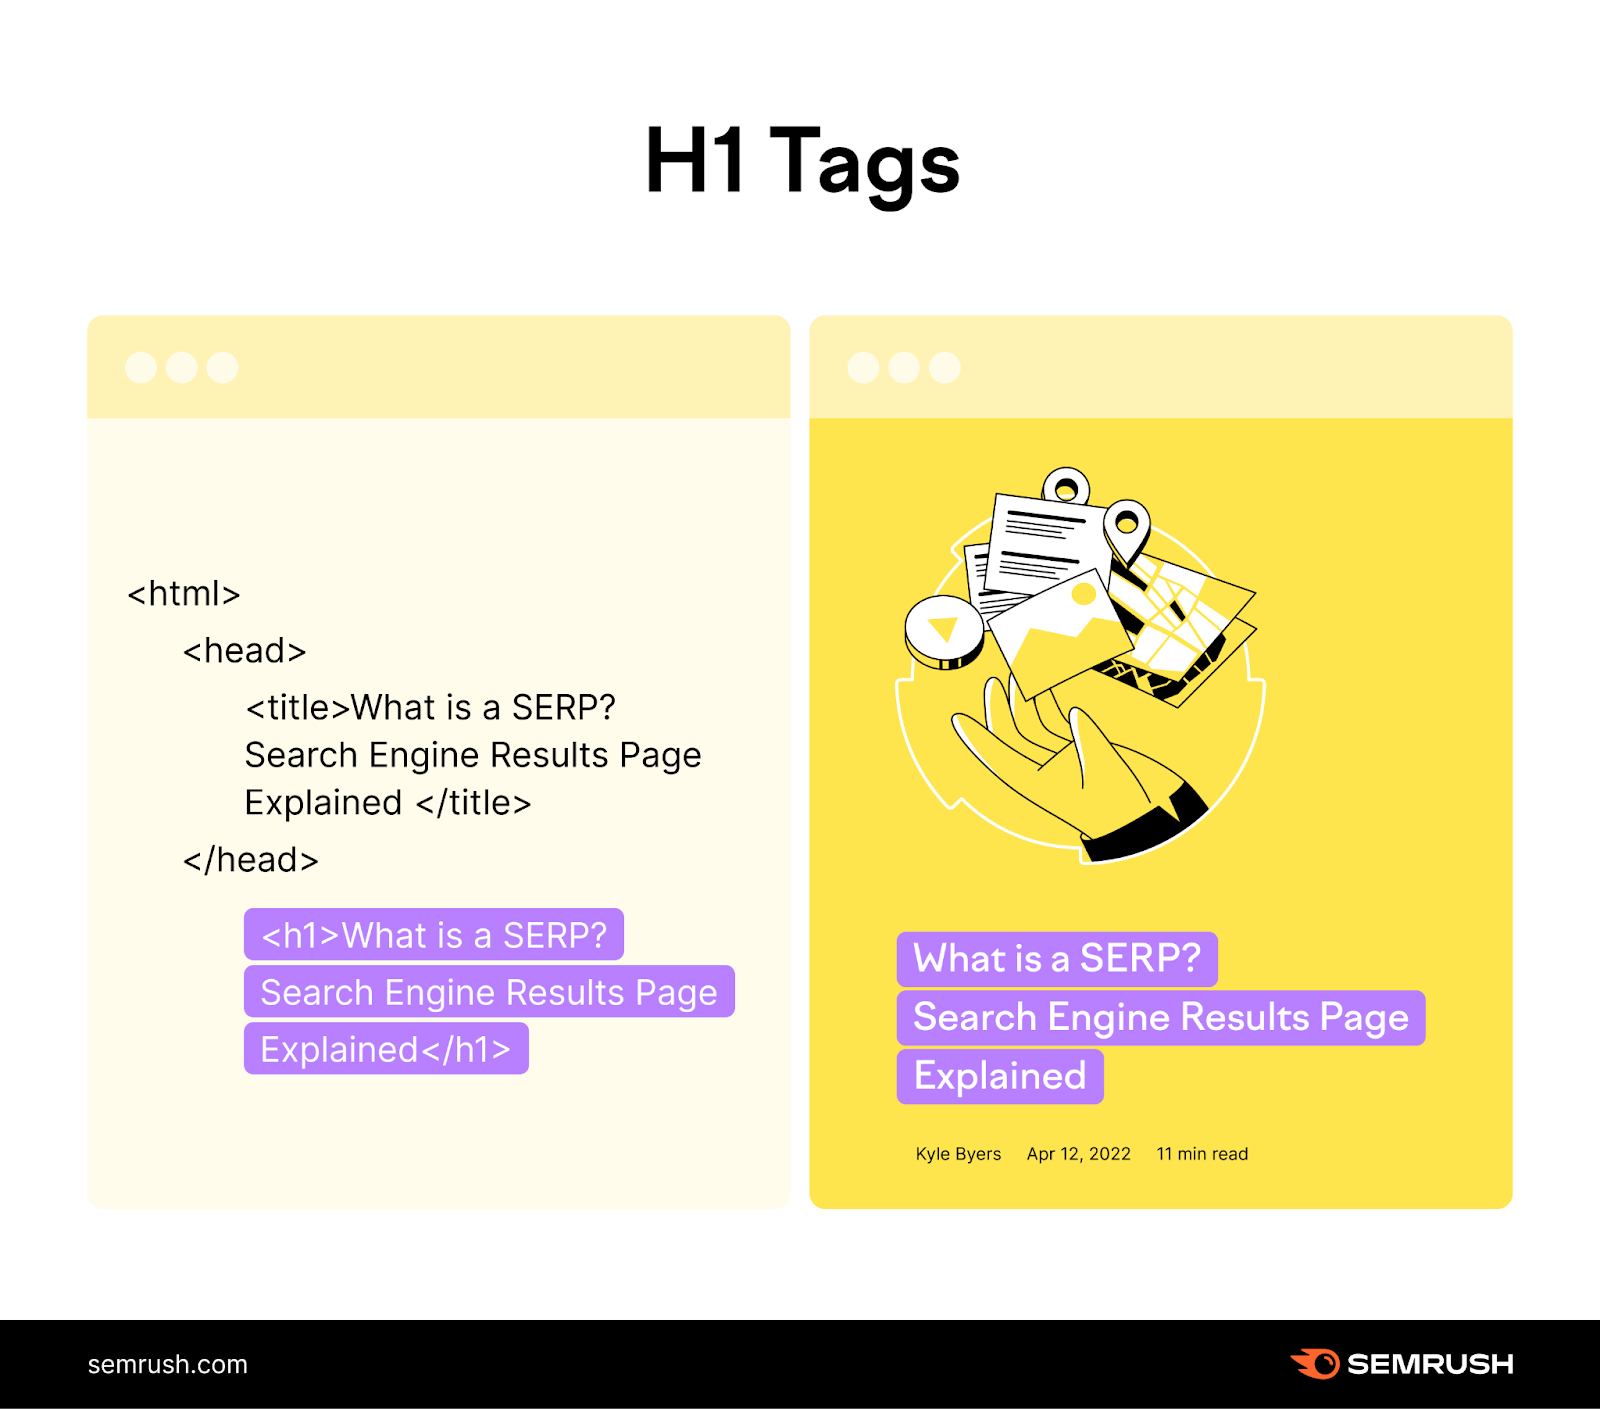
But you don’t always need to use code. Popular content management systems (CMSs) like WordPress offer user-friendly interfaces with input fields for page titles that automatically become the H1 tag.
Still, if you encounter issues with H1 tags on your website, getting into the underlying HTML might be required to diagnose and fix the problem.
From a user’s perspective, the H1 tag is crucial for navigation. They rely on it to quickly understand the web page’s purpose and decide if it aligns with their needs.
Imagine being at the library trying to find a book to read, but they had no titles telling you the main topic. That’s what it would be like if web pages didn’t have H1 tags.
A clear and concise H1 tag provides the tip of the iceberg of the page’s content.
Beyond user experience, Google’s algorithm heavily weighs the content of your H1 tag when determining your page’s relevance to search queries. That’s why you should optimize your H1 tag with your primary keyword.
Also, each page on your website should only have one unique H1 tag. Multiple H1 tags can confuse users and search engines regarding the page’s primary focus.
Heading 2: <h2>
H2 tags function as subheadings.
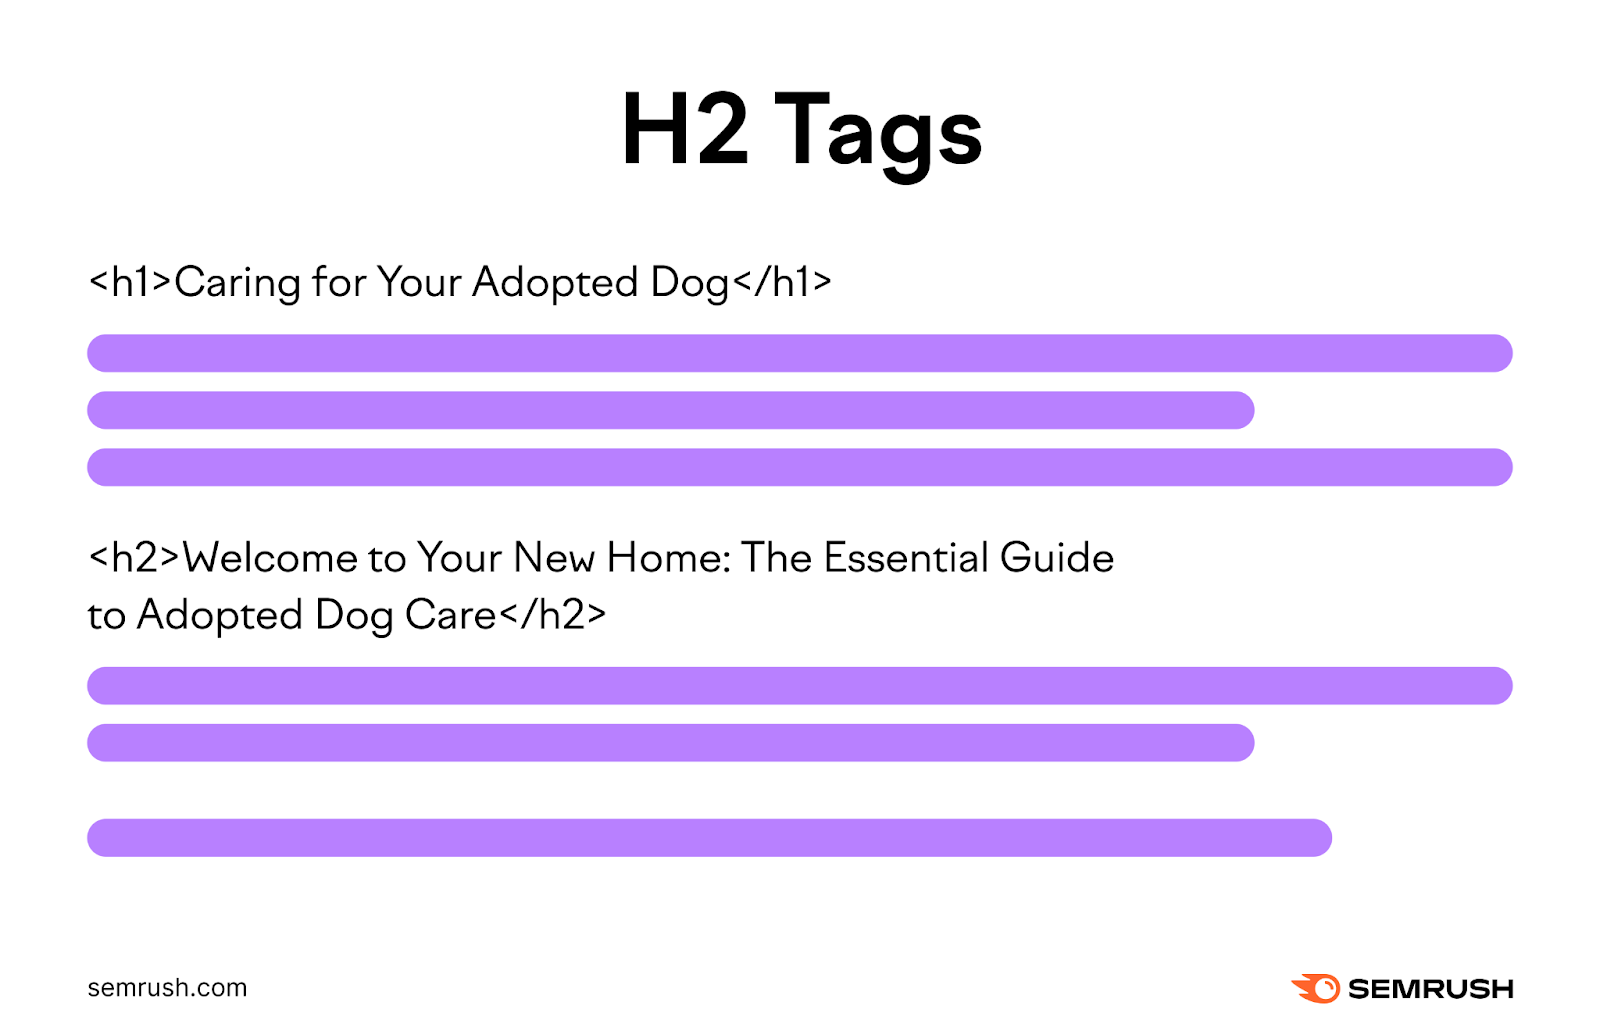
H2 tags are the first sub-headings after the H1 tags. Like chapters within a book, they are the first subsections that classify the broader topic established by your H1.
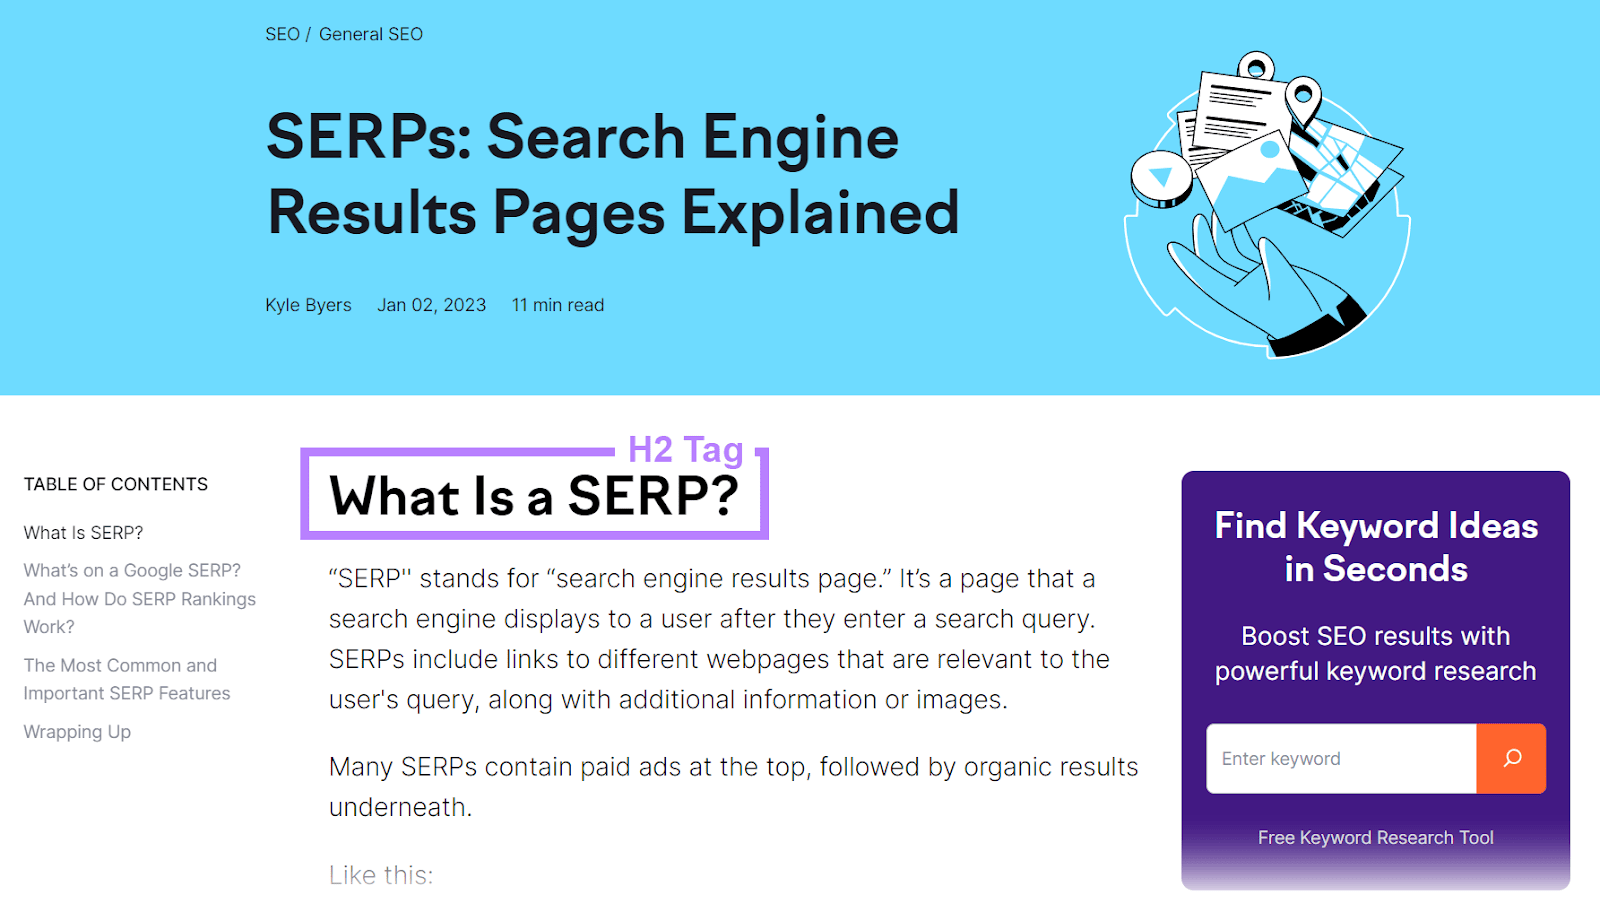
The H2s give a perfect description of what the blog post covers. Here is an example of an H2 on our page on SERPs: Search Engine Results Pages Explained:
Heading 3: <h3>
H3 tags are used for subcategories or subsections under H2 tags. They are handy when an H2 section covers several distinct subtopics or requires further elaboration on specific points.
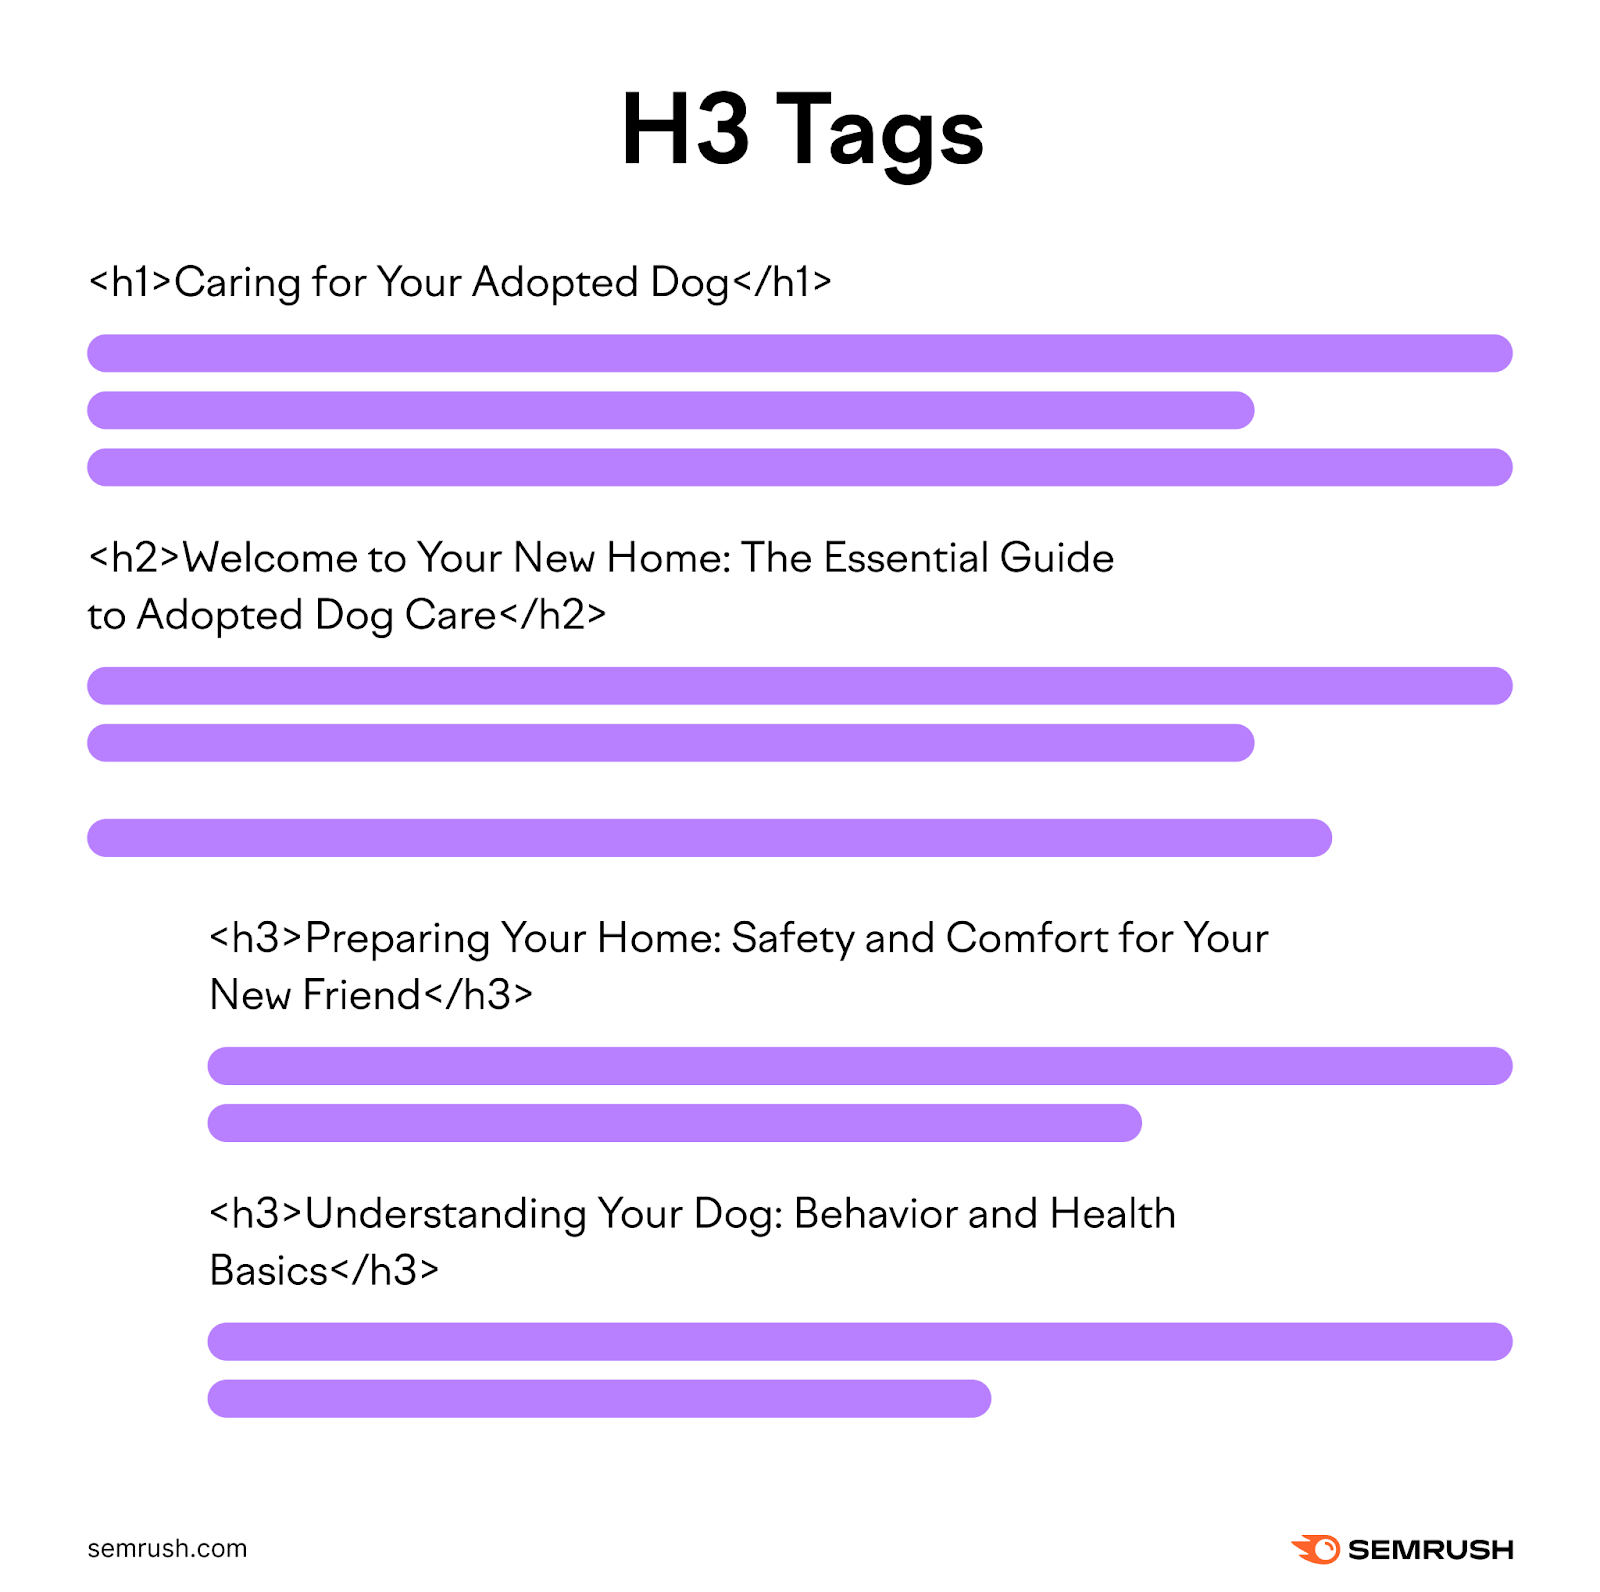
You can use them to highlight key arguments, introduce examples, or present different perspectives within the H2 section.
For instance, in our blog post on SERPs, we used the H3 tags to present a few common SERP features, which is one of the H2s.
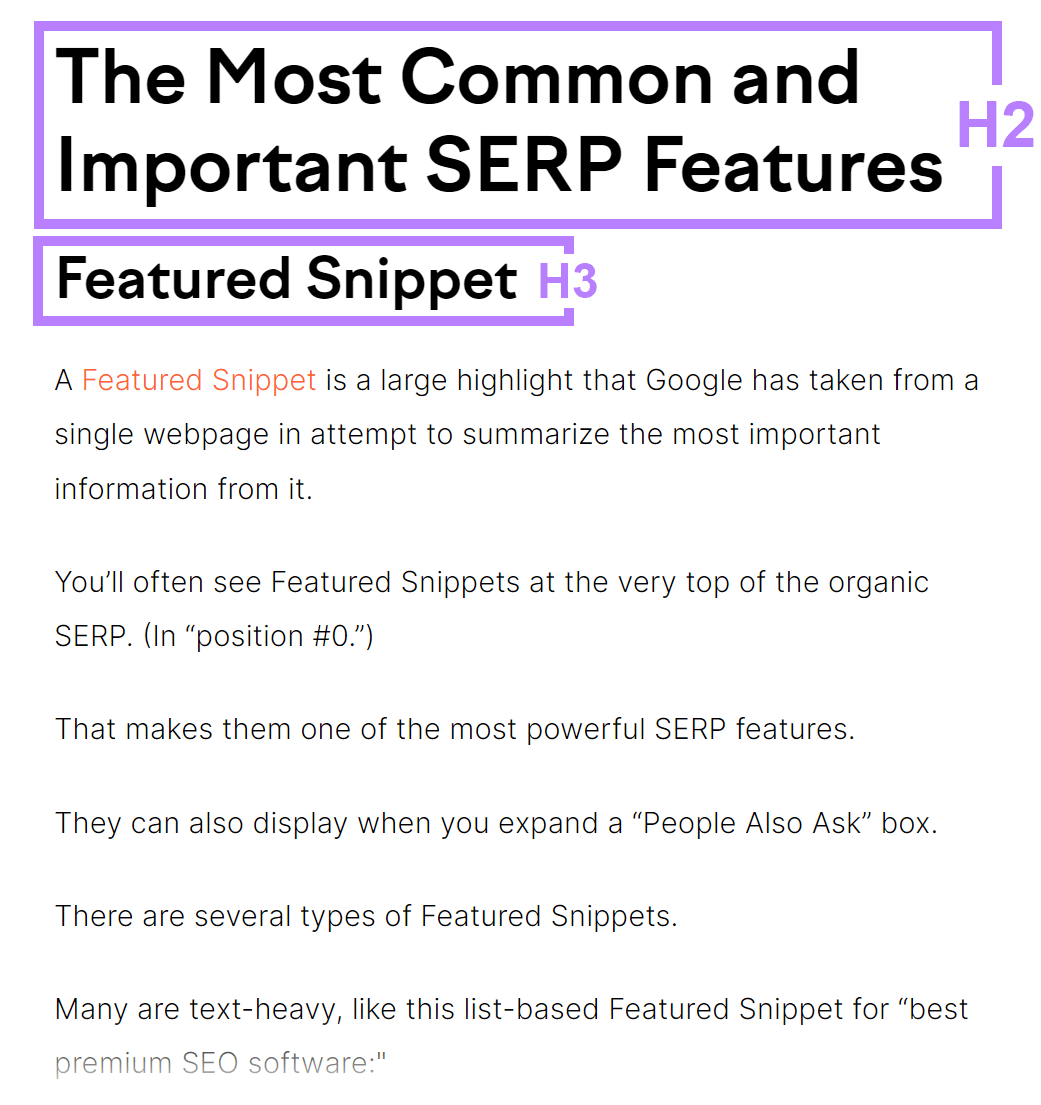
To maintain a logical hierarchy, you must use H3 under H2, not directly under H1.
Also, too many subheadings (H3 tags) can fragment the content and disrupt the flow of information. Therefore, they should be used strategically to break down complex sections and maintain a balanced structure like the above example.
Heading 4: <h4>
H4 tags help you further explain points made in the H3 tags.
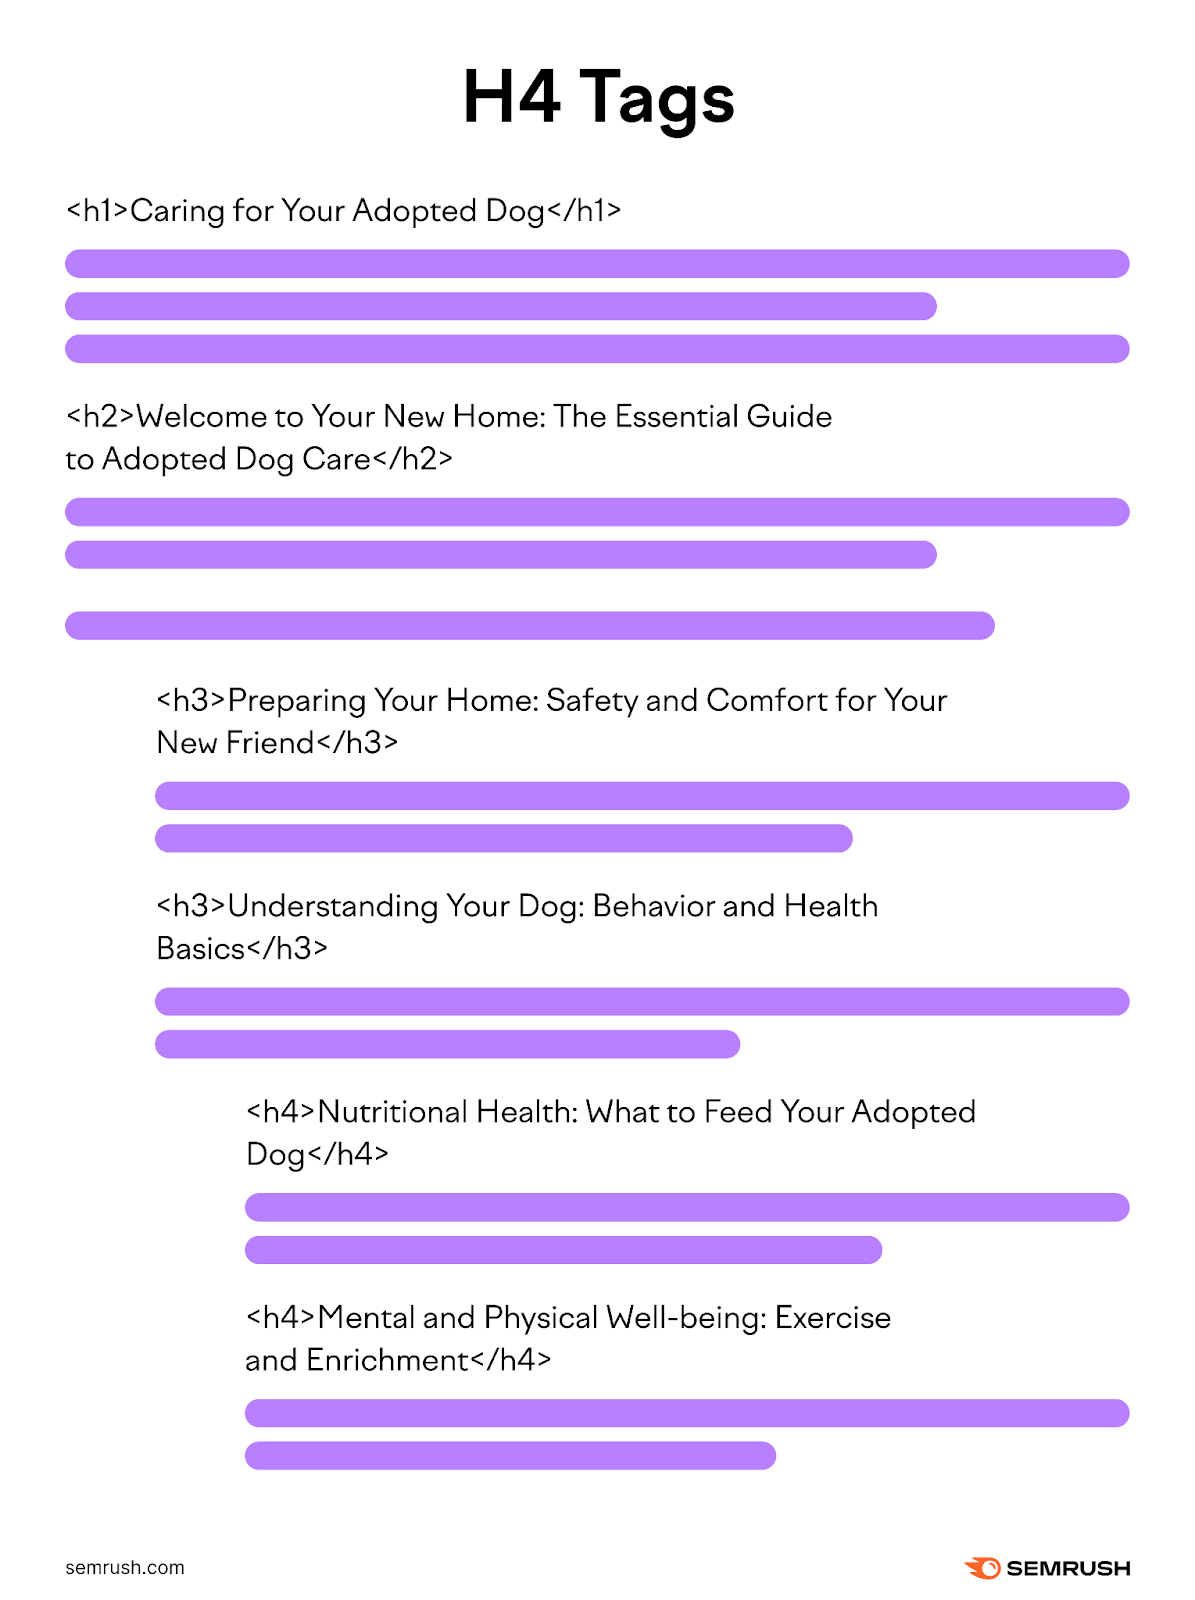
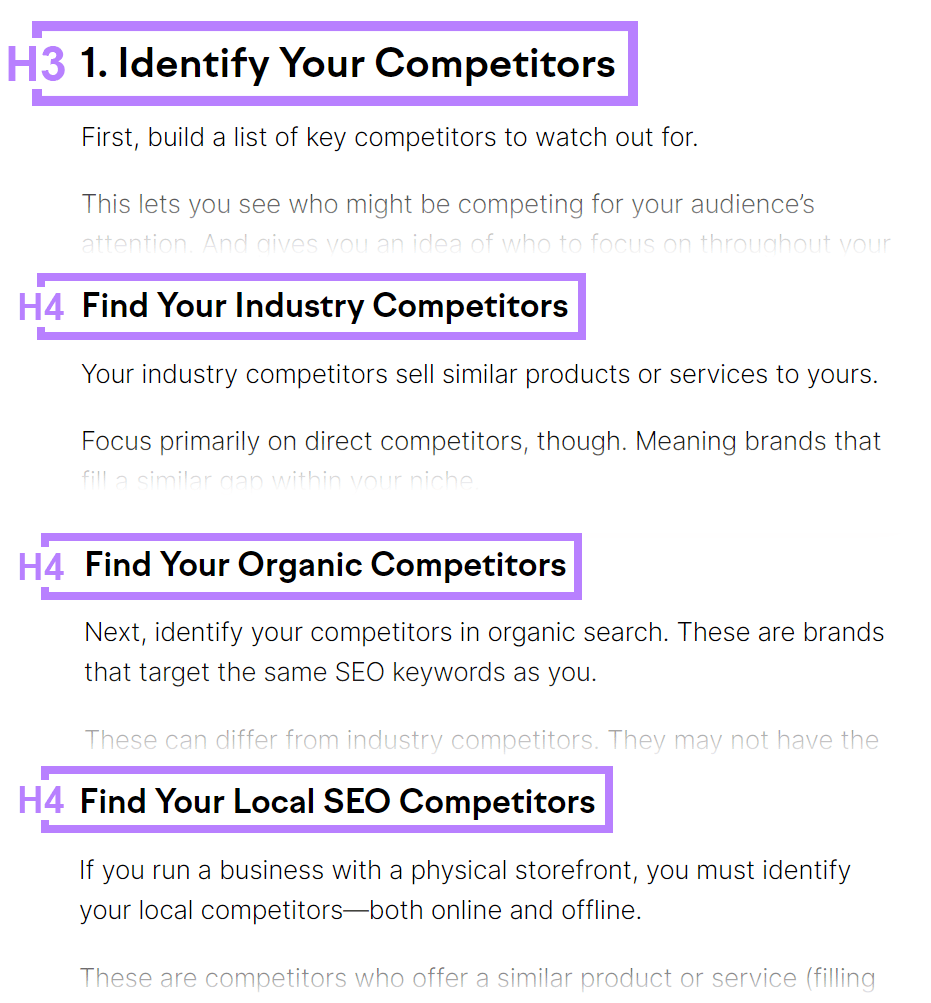
For example, in this post about competitive analysis, we use a H4 to further break down the step of identifying competitors.
“Find Your Industry Competitors,” “Find Your Organic Competitors,” and “Find Your Local SEO Competitors,” each warrant their own subsection in identifying competitors. Adding these as H4s “nests” them as such under this umbrella.
Heading 5: <h5>
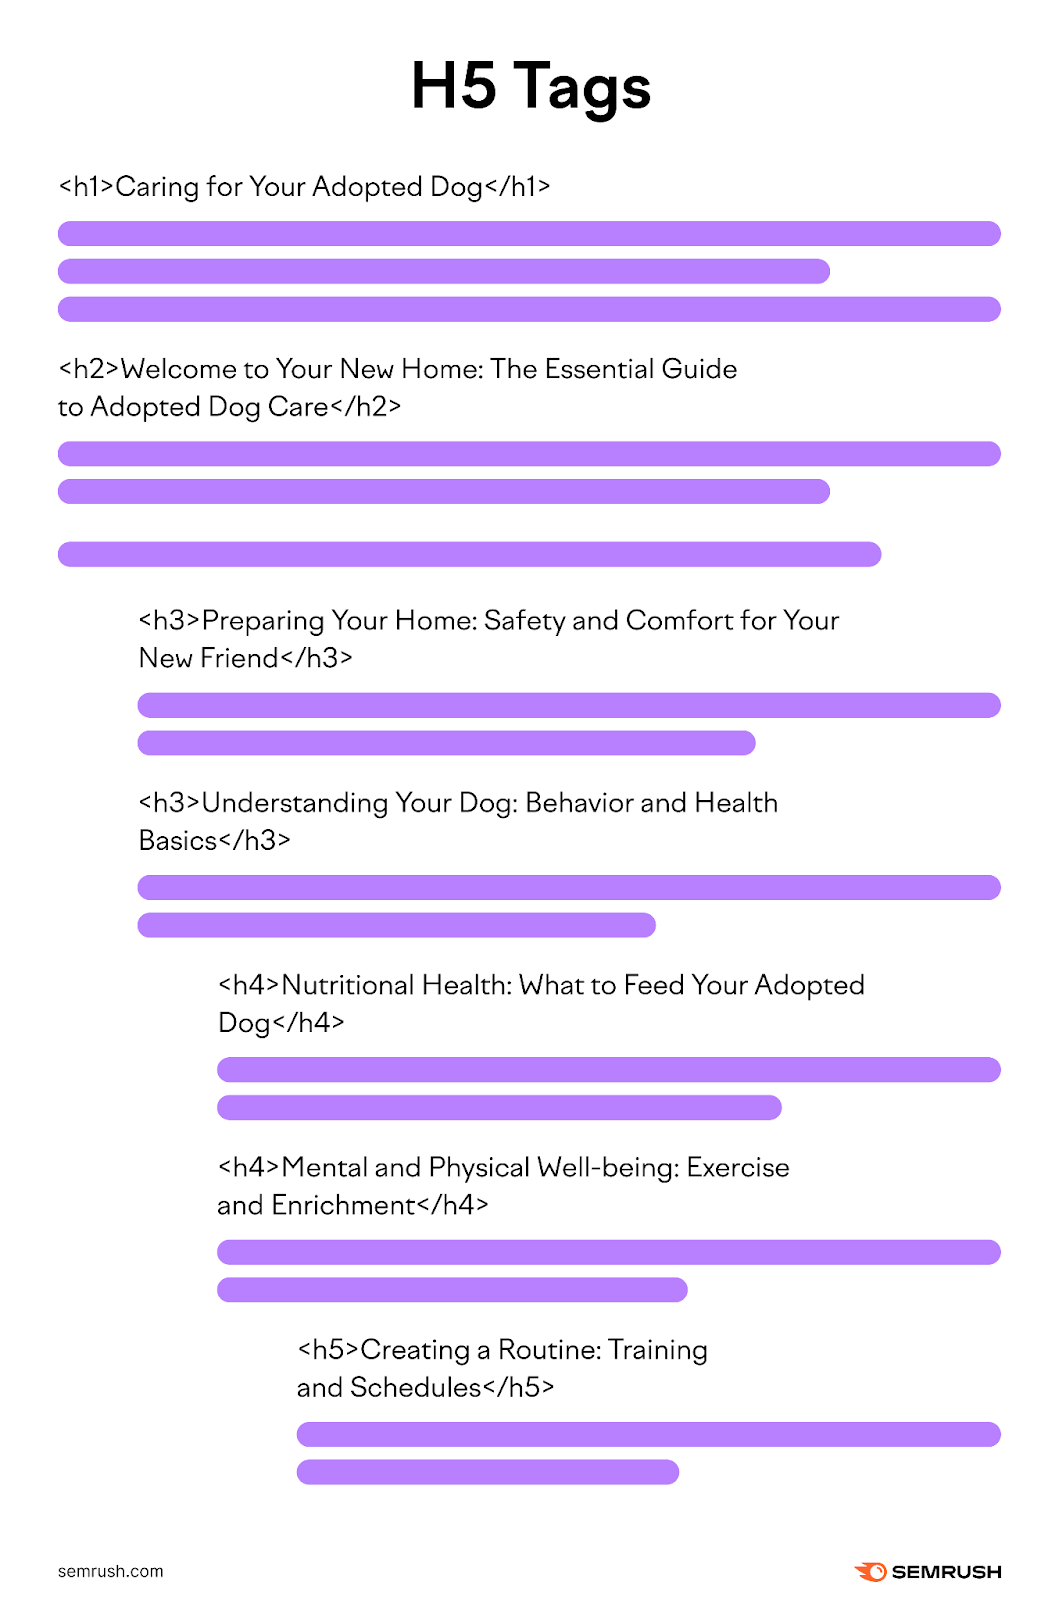
H5 tags for sub-subsections are rare in modern web design. One crucial reason is that Google primarily relies on the topmost heading levels (H1-H3) to understand the content structure and hierarchy. Therefore, using lower levels like H5 can have less impact on SEO.
However, they are occasionally used for specific subtopics within a well-established H4 section. They should not be used to introduce entirely new ideas or concepts.
Heading 6: <h6>
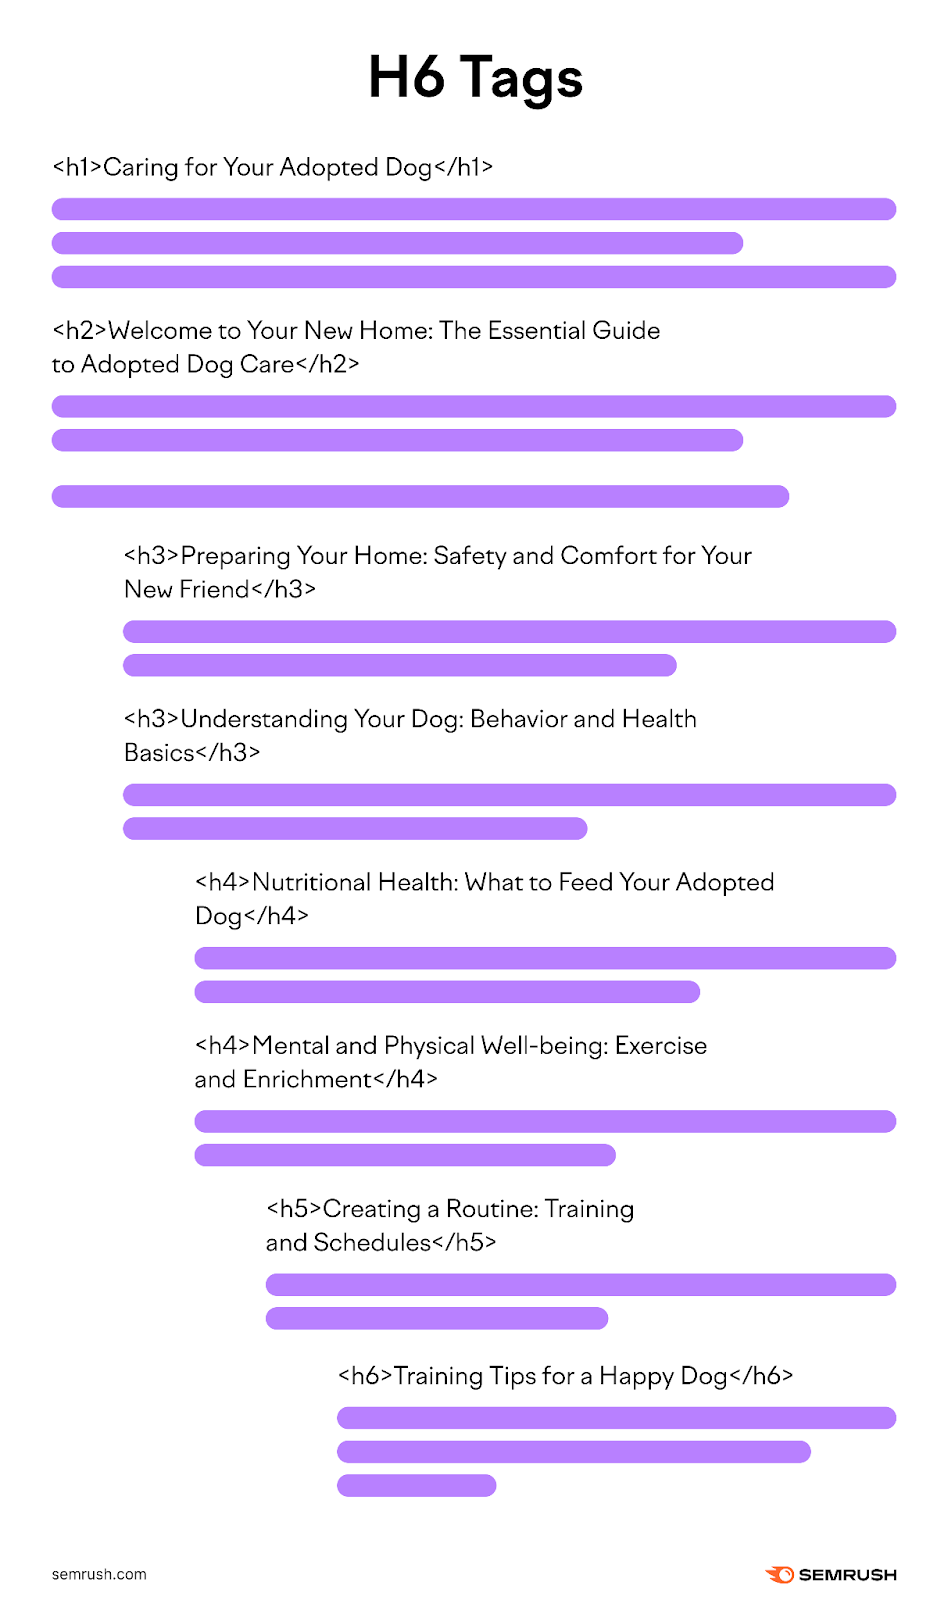
The H6 tags are the lowest heading level within the content hierarchy. You can use these tags to organize sections under the H5, especially in detailed content.
Using headings strategically on your web pages makes them more skimmable and easier to navigate, which creates a better user experience. Since easy-to-scan content is highly engaging, your readers will find what they want quickly and engage with your site. Which is good for SEO.
You can get even more SEO benefits by using primary keywords in your H2s and H3s (as long as you can use them naturally) and long-tail keywords and keyword variations in lower-level tags like H4s.
For example, if your H1 is “How to Write SEO Headlines,” here’s an example of one way you can structure your H2-H6 tags to create a web page that’s natural and informative:
- H2: What Makes an SEO Headline Good?
This subheading introduces the readers to SEO factors that gauge the quality of SEO-friendly headlines.
This section relates keyword optimization’s role in great headlines. There can be quotes from search engine documentation or expert interviews that relay the relevance of keyword optimization in headlines.
- H4: How to Effectively Optimize Your Keywords in Your Headlines
This section informs readers how to optimize keywords in headlines.
- H5: Best Keyword Optimization Tools
This section provides a list of the best keyword optimization tools.
- H6: Pros and Cons of Keyword Optimization Tools
The H6 tags will be helpful to list the pros and cons of the tools provided in the H5.
HTML Heading Tag Best Practices
Here are strategic ways to use heading tags for search engines to understand the relevance and context of your web pages:
Correctly Add Heading Tags in HTML
Use the following HTML format to enter a heading 1 tag:
<h1>heading tag text</h1>
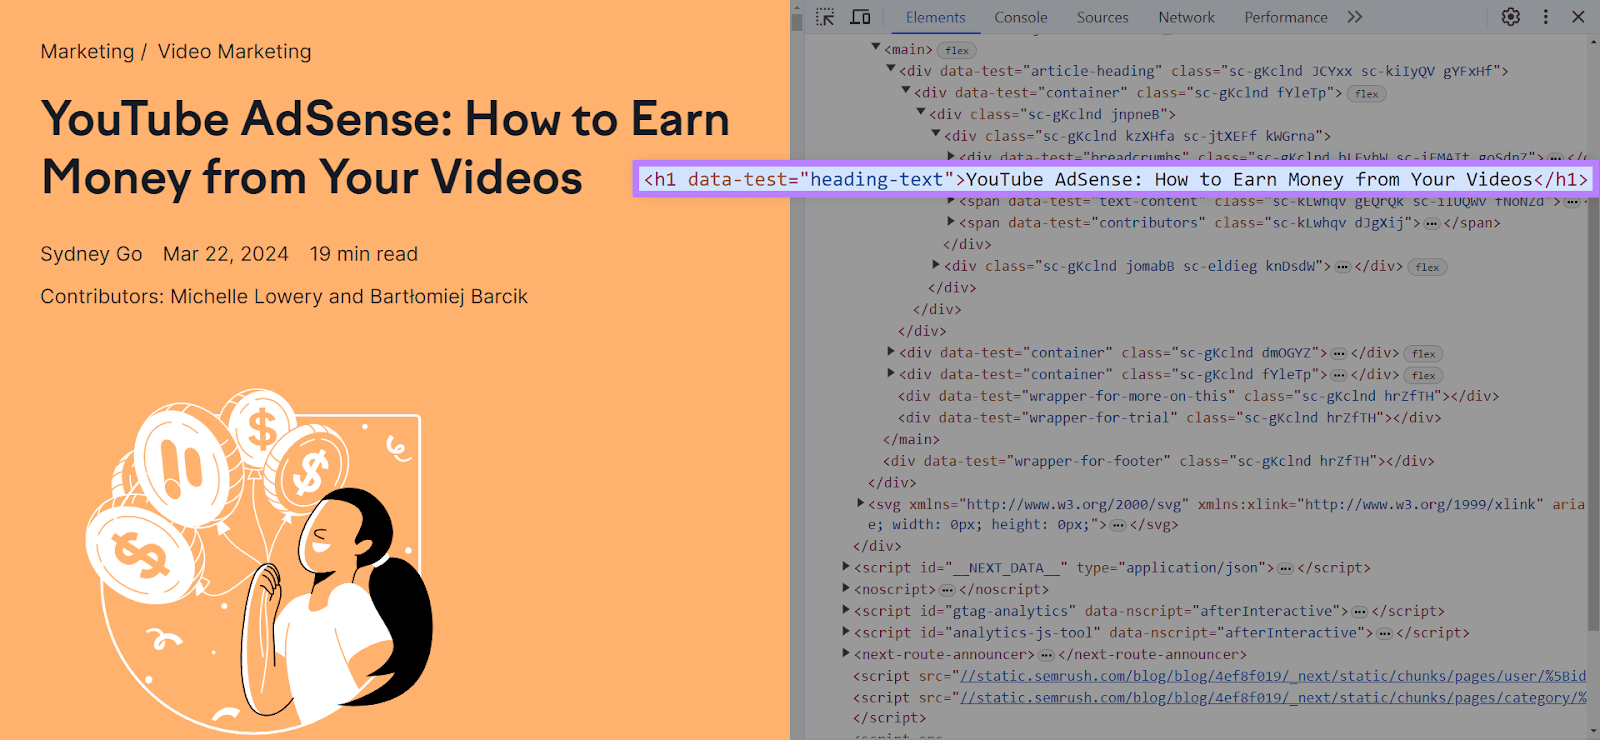
For example, our H1 for this post is “YouTube AdSense: How to Earn Money From Your Videos.”
It will look like this in the HTML code and live page:
You can repeat this same format for your H2s down to your H6s. So, an H2 would be <h2>heading tag text</h2>, and so on.
Content management systems like WordPress, Wix, and Squarespace can create heading tags without digging into the HTML code. A rich text editor allows you to highlight text and select the type of heading tag.
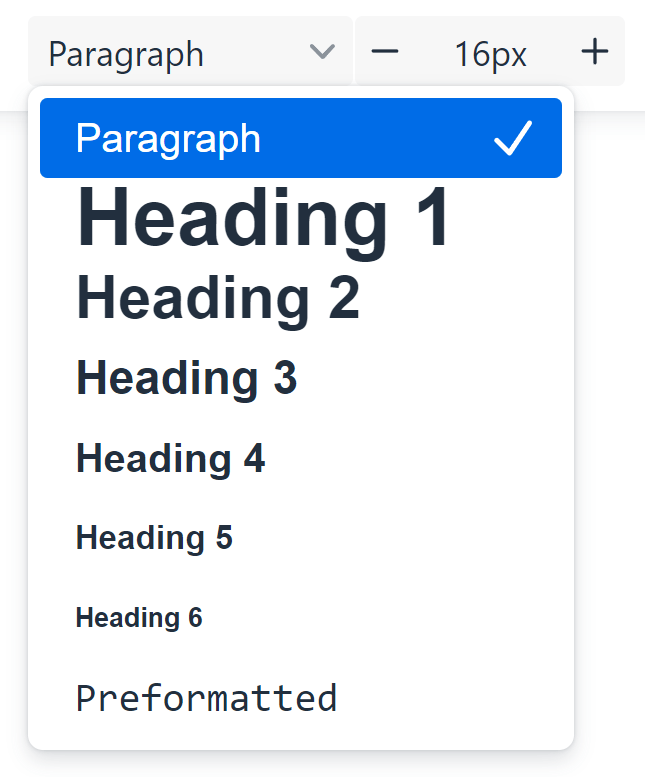
Read our blog post on H1 tags to learn how to add them to different content management systems.
Align Heading Text with Content Type
Your heading text should match each section of your web page’s content type.
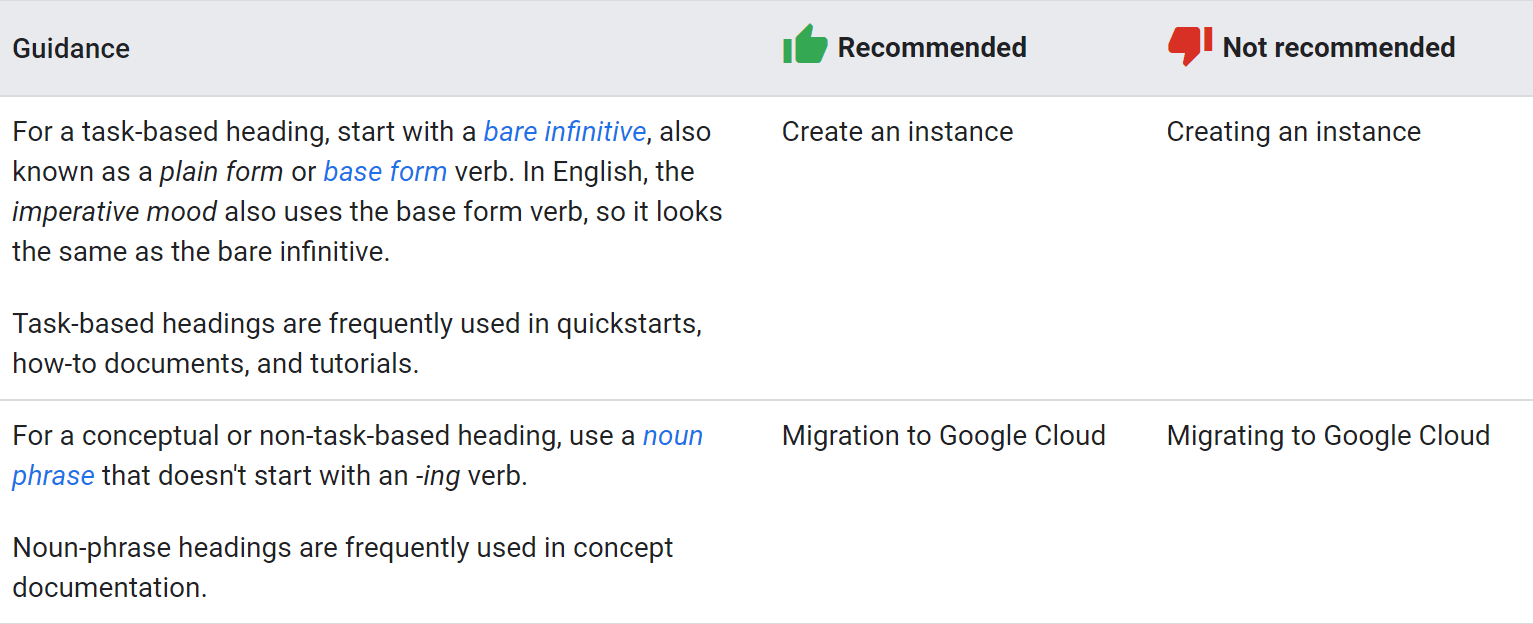
Use task-based headings when a section is about practical guides. Task-based headings are action-oriented and should start with imperative verbs to encourage user engagement.
For example, in this section, instead of writing “Heading Text Should Reflect Content Type,” we choose “Align Heading Text with Content Type.”
On the other hand, you can use conceptual headings to introduce and explain the content in a section. Unlike task-based headings that often start with imperative verbs, they require noun phrases.
For example, “The Future of Artificial Intelligence” could be used instead of “Harness the Power of AI in Your Business.”
The general guideline when using conceptual heading is to avoid using a noun phrase that starts with an -ing verb.
Google confirms this tactic in one of its documentations, distinguishing between a task-based and conceptual heading. Imperative verbs are infinitive and directly ask the reader to do something.
Add Your Keywords to Your Heading Tags
Optimizing your heading tags with your target keyword helps Google determine how well your content matches the search query.
For instance, it’s a common practice in all our blog posts to include our primary keywords in the H1 tags and then naturally use them alongside the secondary keywords in the H2-H6 tags.
However, it’s important to avoid keyword stuffing.
Keyword stuffing is the practice of excessively using keywords in the web page’s content, meta tags, or other elements to manipulate search engine rankings. This affects a site’s credibility and visibility on search engines.
Instead, focus on semantic relevance over keyword density. Semantic relevance involves optimizing related terms to your primary keyword to help search engines understand the overall meaning and search intent of the content. That’s why we use other relevant secondary keywords rather than stuffing our heading tag with a singular keyword.
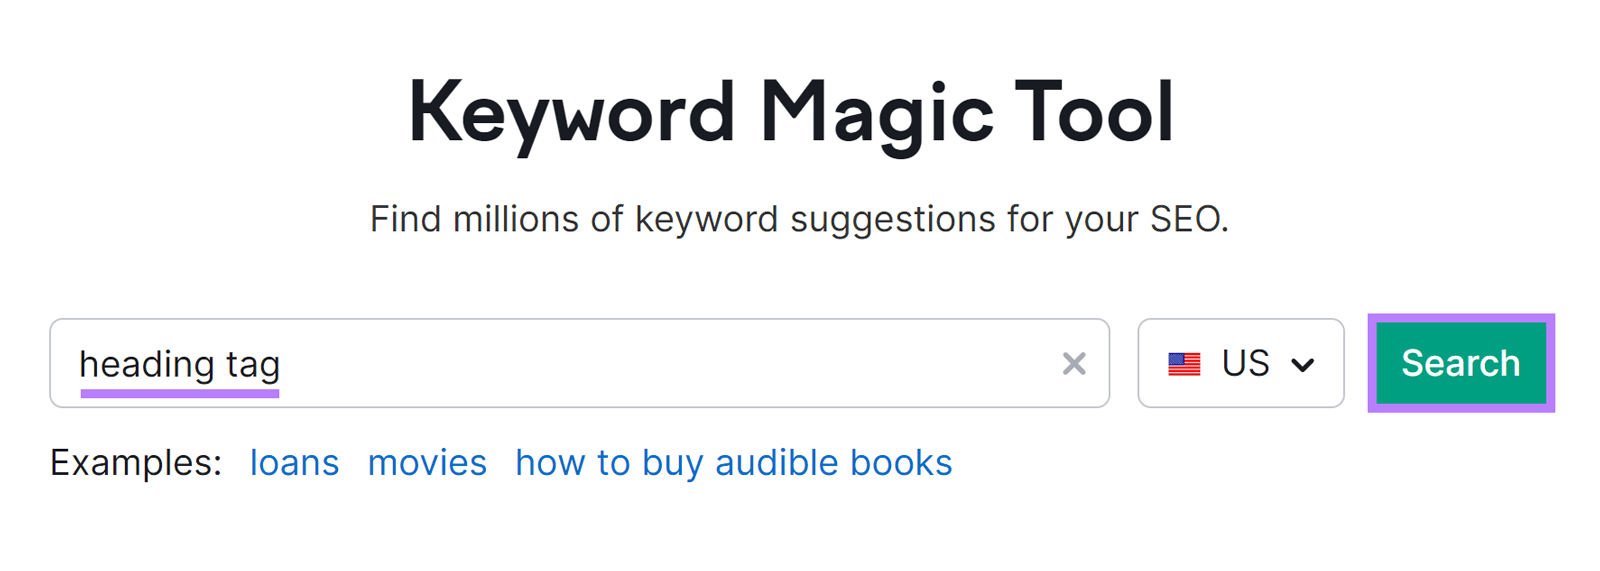
But you don’t have to look for those secondary keywords yourself. The Keyword Magic Tool does the job for you.
Launch the tool, then enter your primary keyword into the search bar and click “Search.”
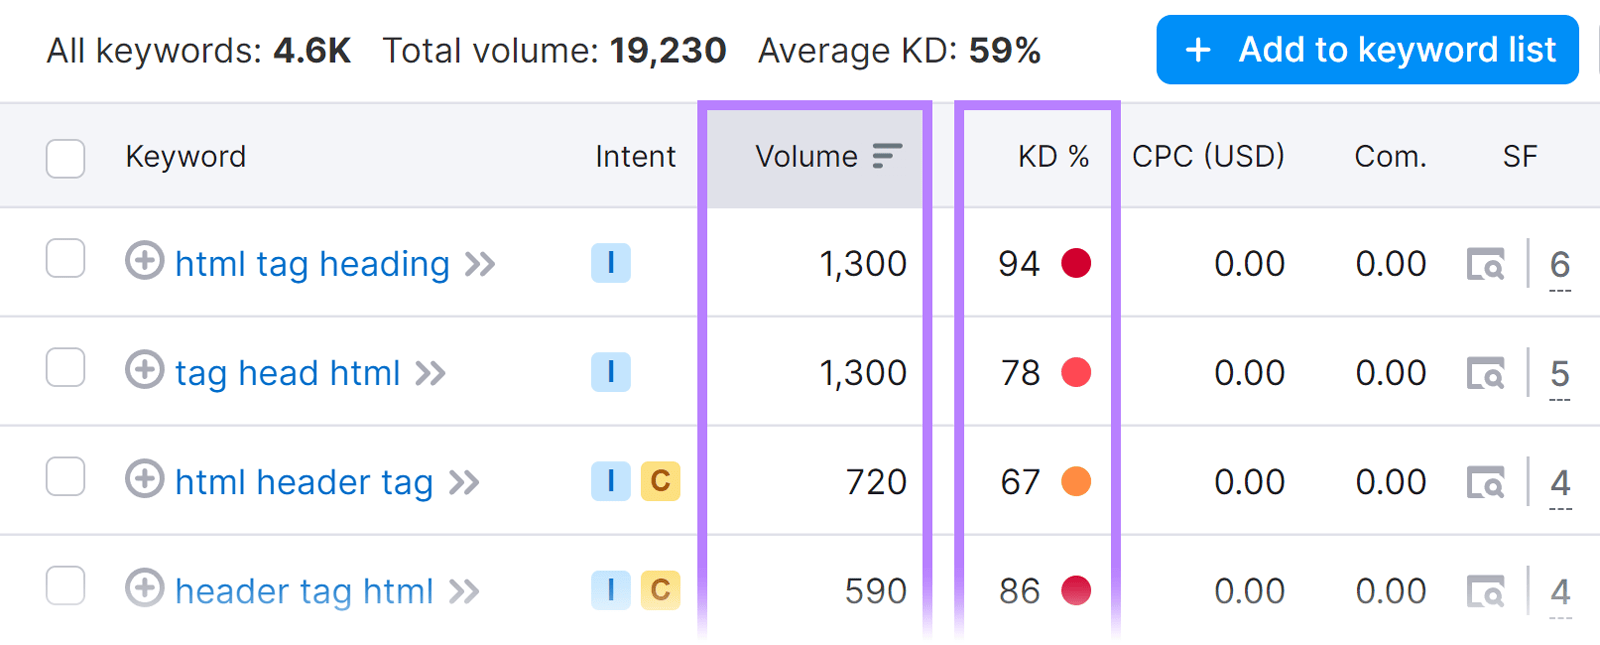
The tool will generate a list of secondary keywords. Further refine your results by using metrics like search volume and keyword difficulty (KD%) to identify the most relevant secondary keywords for your heading tags and content.
Ensure Your HTML Tag Headings Satisfy Search Intent
In the latest Search Quality Evaluator Guidelines, Google explained how search intent, also called user intent, plays a vital role in its ranking system.
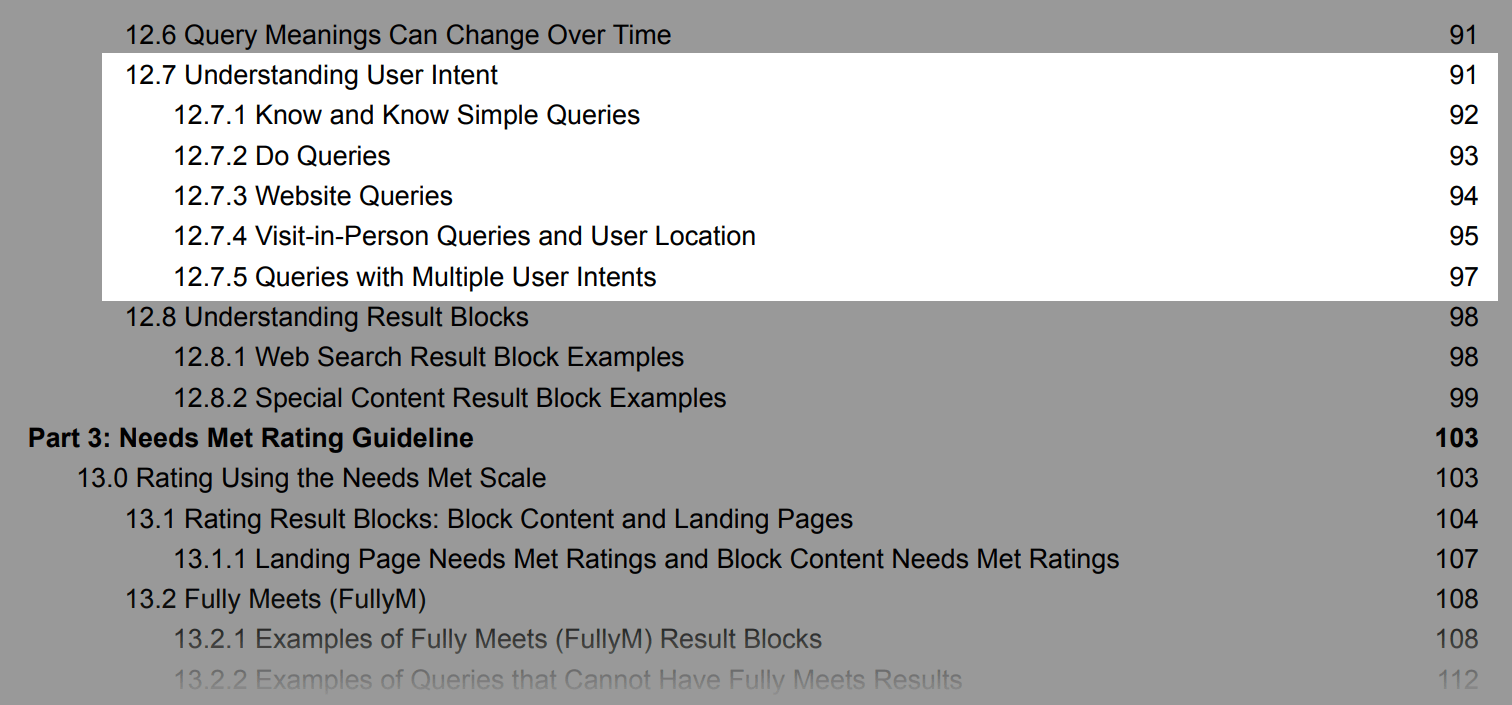
Your heading tags from H1 to H6 should be a walkthrough to satisfy the user’s search query. However, you can only do this by understanding the search intent of your primary keyword.
The Keyword Overview tool helps here. This software shows the search intent of any keyword in seconds.
Enter your primary keyword into the search bar and click “Search.”
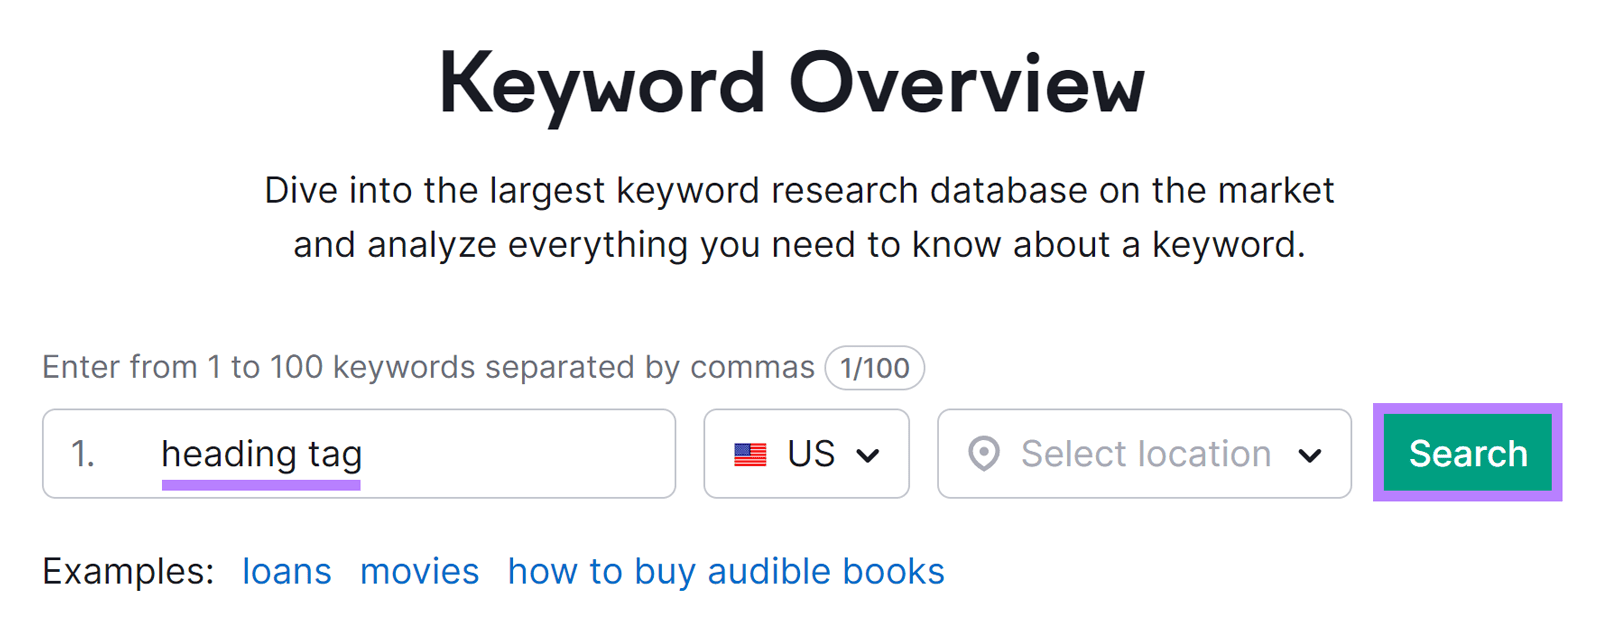
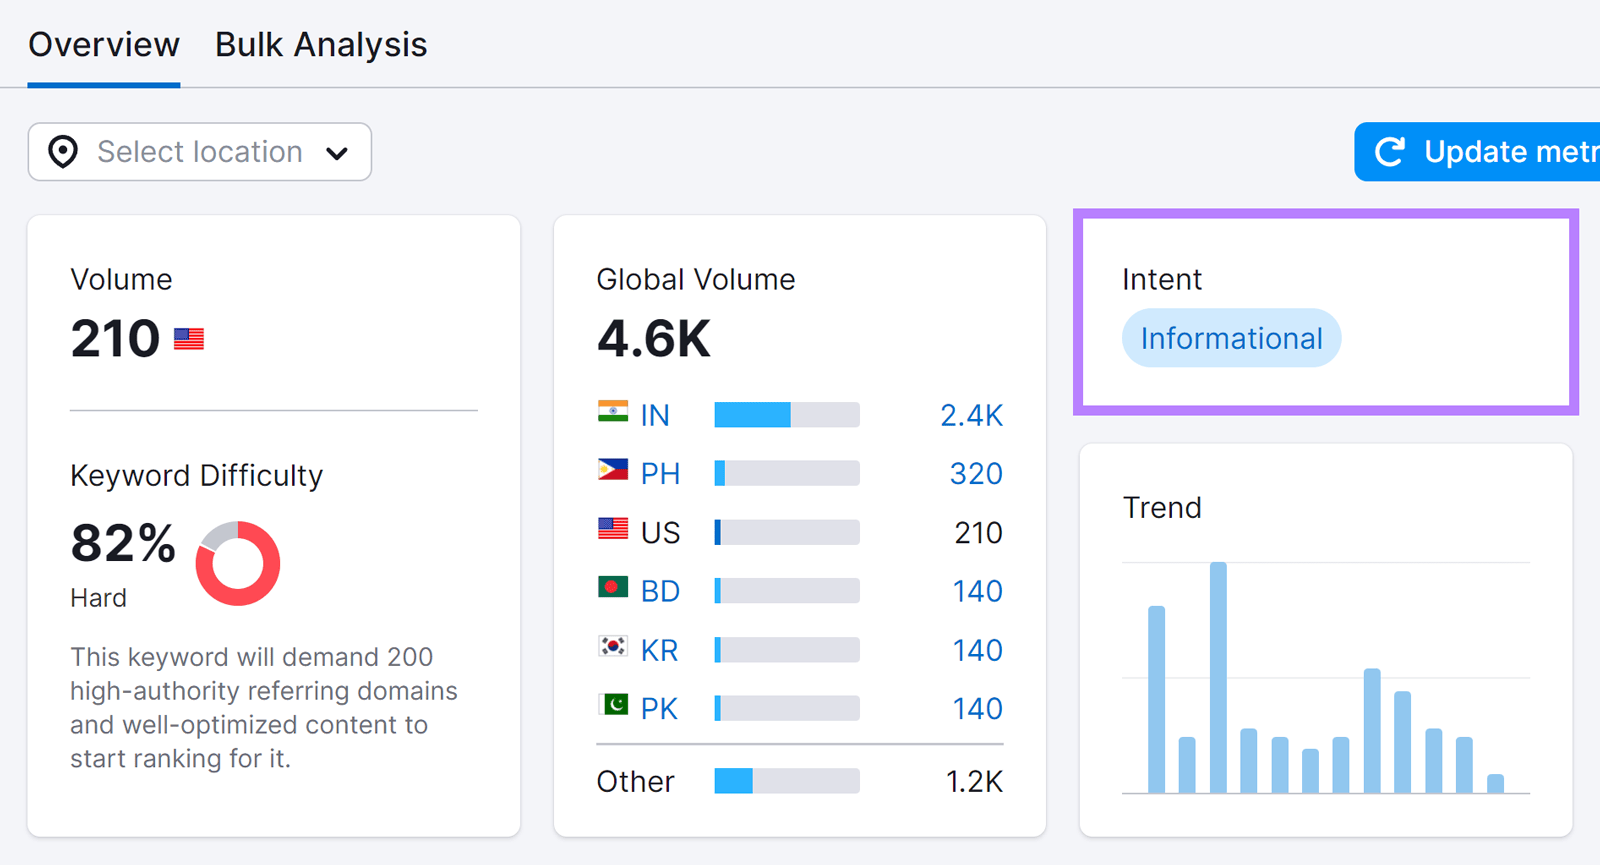
The tool displays the keyword overview, including the search intent for the keyword.
You can also analyze your target keyword’s search engine results pages (SERP) results to understand your keyword search intent and the H1 your top competitors used.
You can do that right from the Keyword Overview dashboard. Scroll down the “Overview” page to the “SERP Analysis” section.
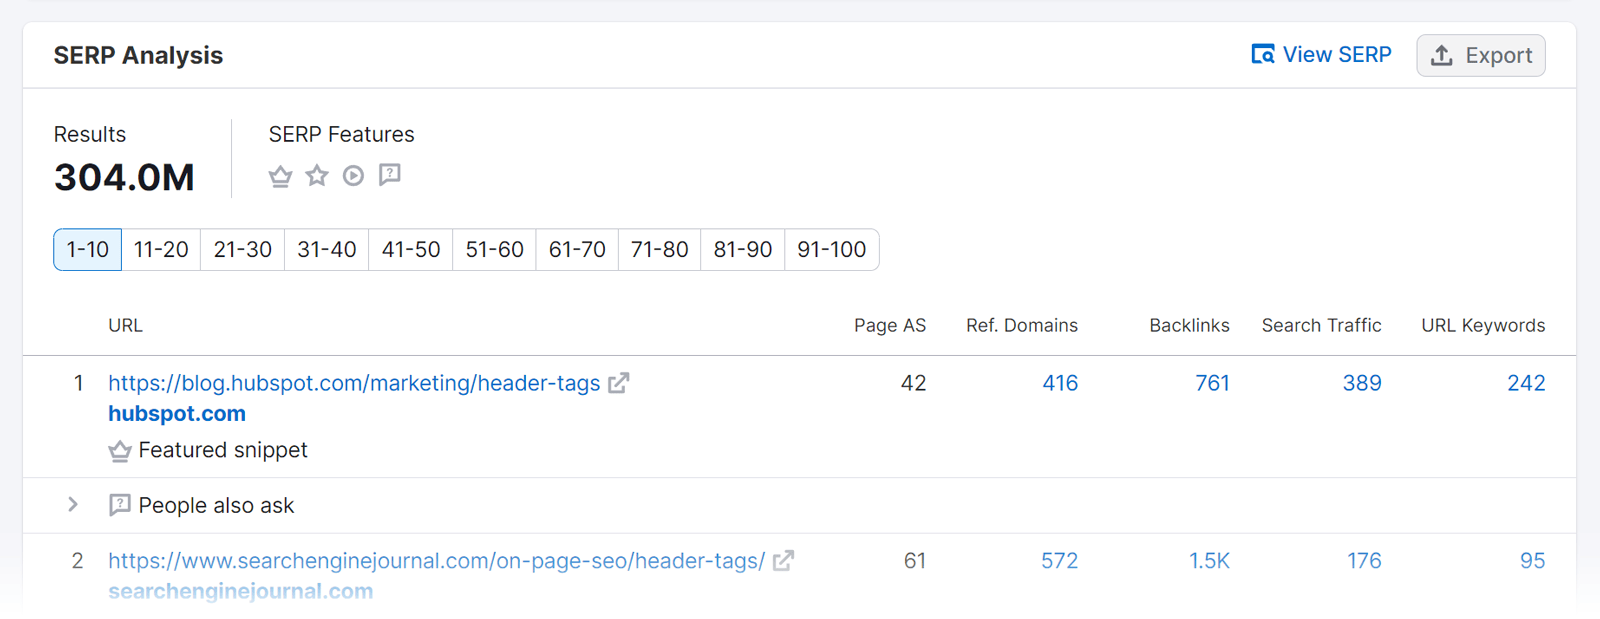
The tool provides Google’s up-to-**** cache of the search results. Proceed from there and find out:
- The featured snippet appearing at the top of the SERP
- The types of content that appear in the SERP, such as articles, product listings, videos, and local listings. The presence of certain types of content can provide clues about the search intent.
- How your competitors use the target keyword in their titles
- Possible related terms your competitors used in the titles and meta descriptions
Optimize Heading Tags for Featured Snippets
Organizing your articles with clear subheadings allows Google to readily translate them into bulleted or numbered lists for featured snippets.
For paragraph featured snippets, we recommend that you:
- Optimize your heading tag (H2) to mirror a long-tail voice search term
- Directly address the user’s question within the paragraph
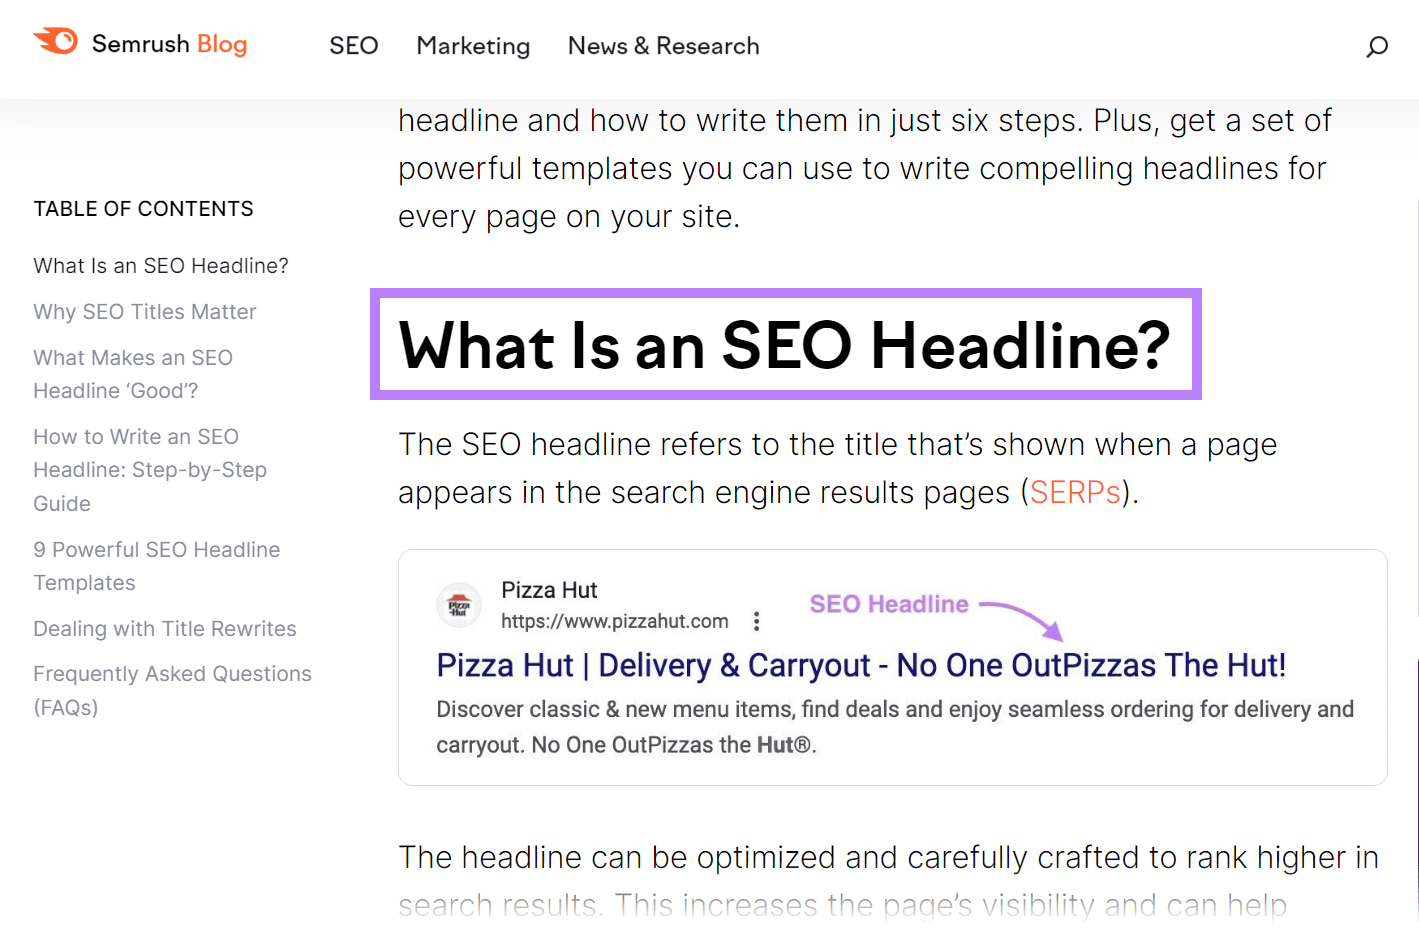
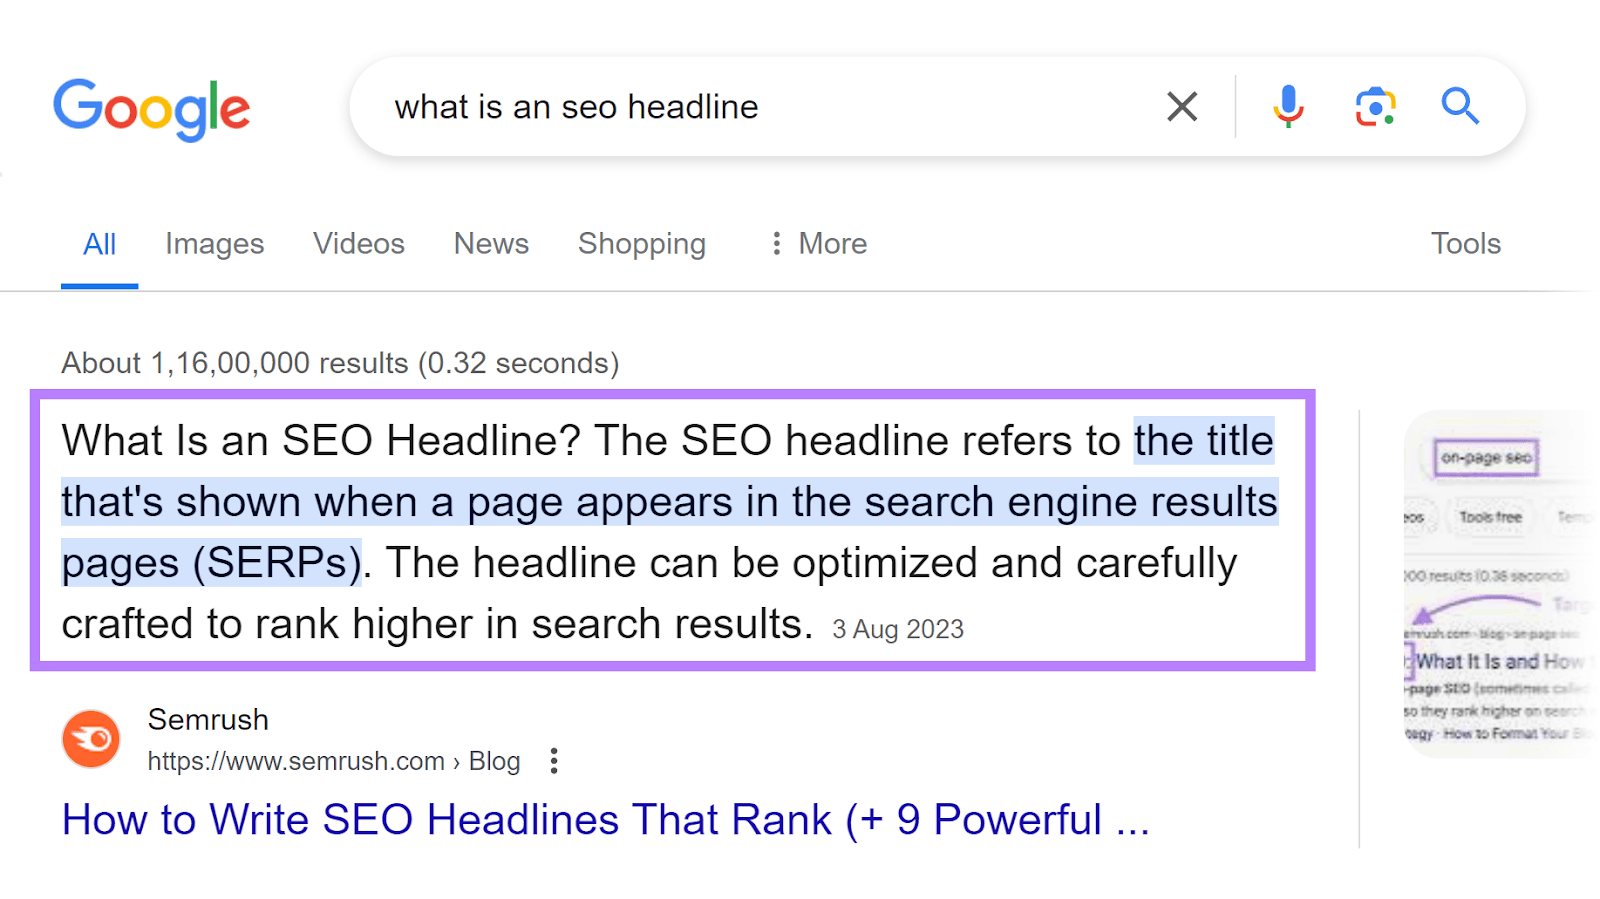
For instance, we earned the featured snippet for an H2 in our blog post on how to write SEO headlines.
Don’t Use the H1 Tag More Than Once
Using only one H1 tag per page ensures that your readers clearly understand the page’s main topic and allows search engine algorithms to interpret the page’s content and relevance correctly.
Although Google doesn’t penalize sites with multiple H1 headings, this strategy can affect your page’s user experience.
Think about it as a user.
Imagine you click a page, and three to four subheadings have the same font size as the title. It becomes difficult to understand the subsections in the content.
John Mueller, Senior Search analyst at Google, mentioned in an episode of Ask Google Webmasters that user experience should be the primary factor for choosing the number of H1 tags on a page. “In short, SEOs shouldn’t be your primary objective when thinking about this topic. Instead, think about your users.”
Use Concise and Descriptive Headings
Aim for a concise sentence or phrase that accurately captures the main idea. However, it is ideal to keep your heading tag text short, clear, and concise.
For instance, we recommend that your H1 tags are under 60 characters for optimal display.
Why?
Because shorter headings are easier to read and comprehend, especially on mobile devices with limited space.
Also, Google recommends that the H1 tag be the same as the title tag. If the H1 tag is too long, Google truncates (or cuts it short and adds ellipses to) it in the SERP. Potentially affecting the page’s visibility and click-through rate.
Here’s an example:

So, instead of:
- H1: Advanced Techniques and Strategies for Comprehensive Rank Tracking and Analysis Across Search Engines and Other Platforms
- H2: The Role of Rank Tracking in SEO Campaigns: Best Practices for Tracking Keyword Rankings and Analyzing Performance Metrics
Use:
- H1: Expert Guide to Tracking Keyword Rankings
- H2: Rank Tracking Best Practices for SEO Success
Here are some common pitfalls in HTML heading tag optimization that can negatively impact your site’s SEO performance:
- Using headings for styling only. Heading tags shouldn’t be used for styling purposes, such as making text larger or bold. They should accurately represent the structure and organization of your content.
- Skipping heading levels. Don’t jump heading levels. HTML heading tags go in order (e.g., H2 to H3, not from H2 to H4).
- Using heading tags as links. Don’t use heading tags as links. Headings tell you what’s coming, not where to go.
- Creating heading tags with no associated content. Make sure you don’t leave empty headings. Your headings should serve a purpose, introducing and guiding readers to the following content.
- Not including keywords. Ensure that your heading tags contain relevant keywords related to the section’s topic. But avoid keyword stuffing.
How to Run an HTML Heading Tag Audit
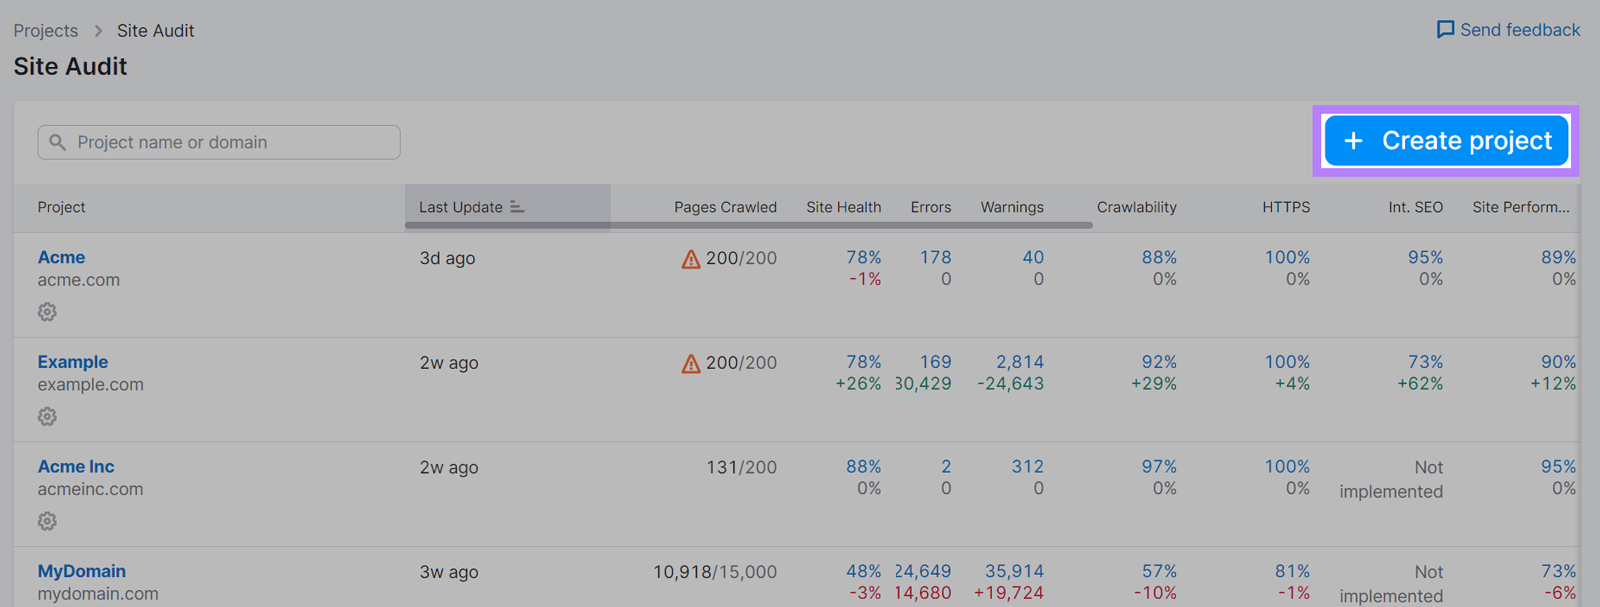
First, launch Semrush’s Site Audit tool and click the “+ Create project” button.
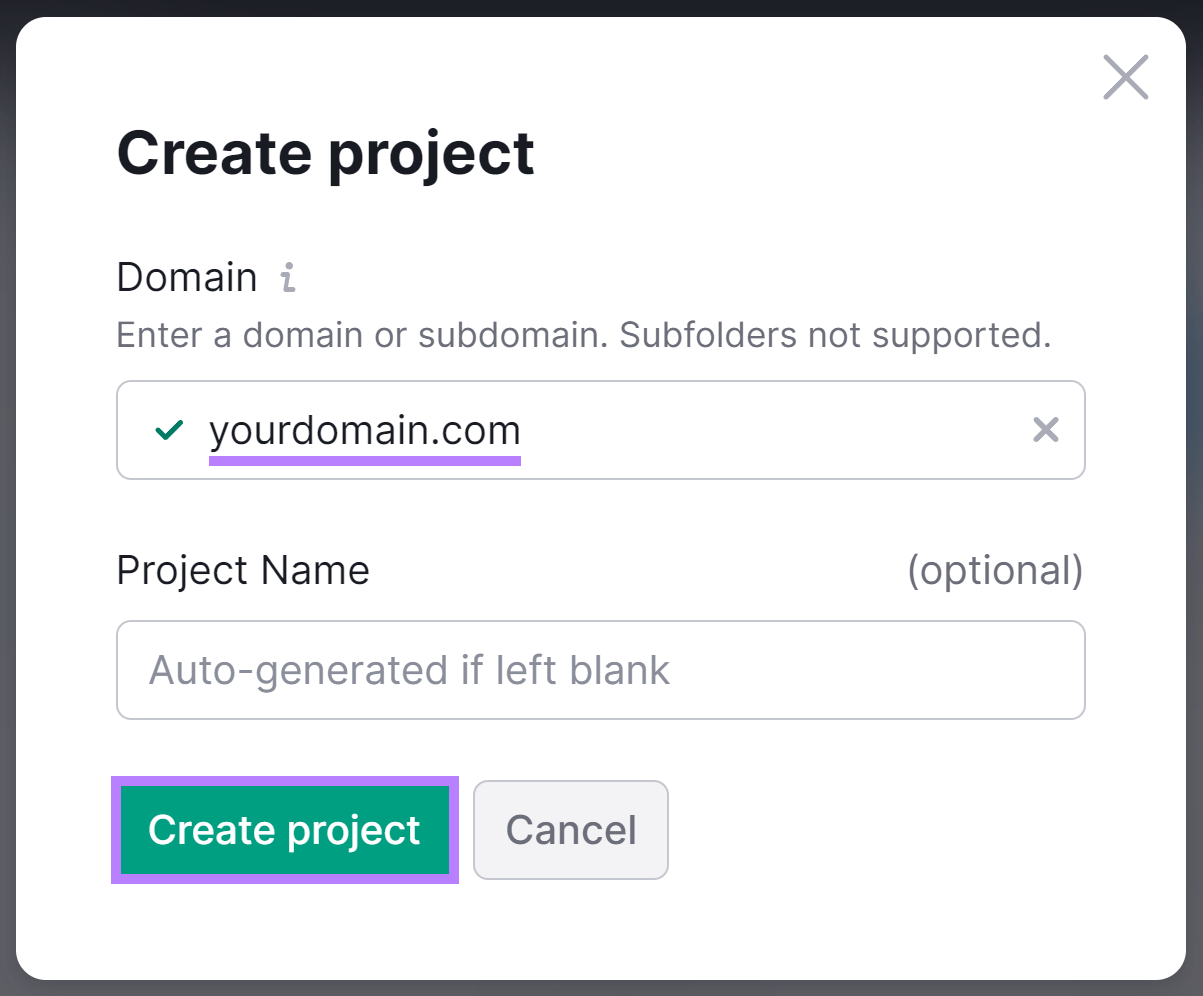
Next, enter your domain and click “Create project.”
The next page contains a list of options to configure your audit. Review the options and adjust the settings according to your preferences.
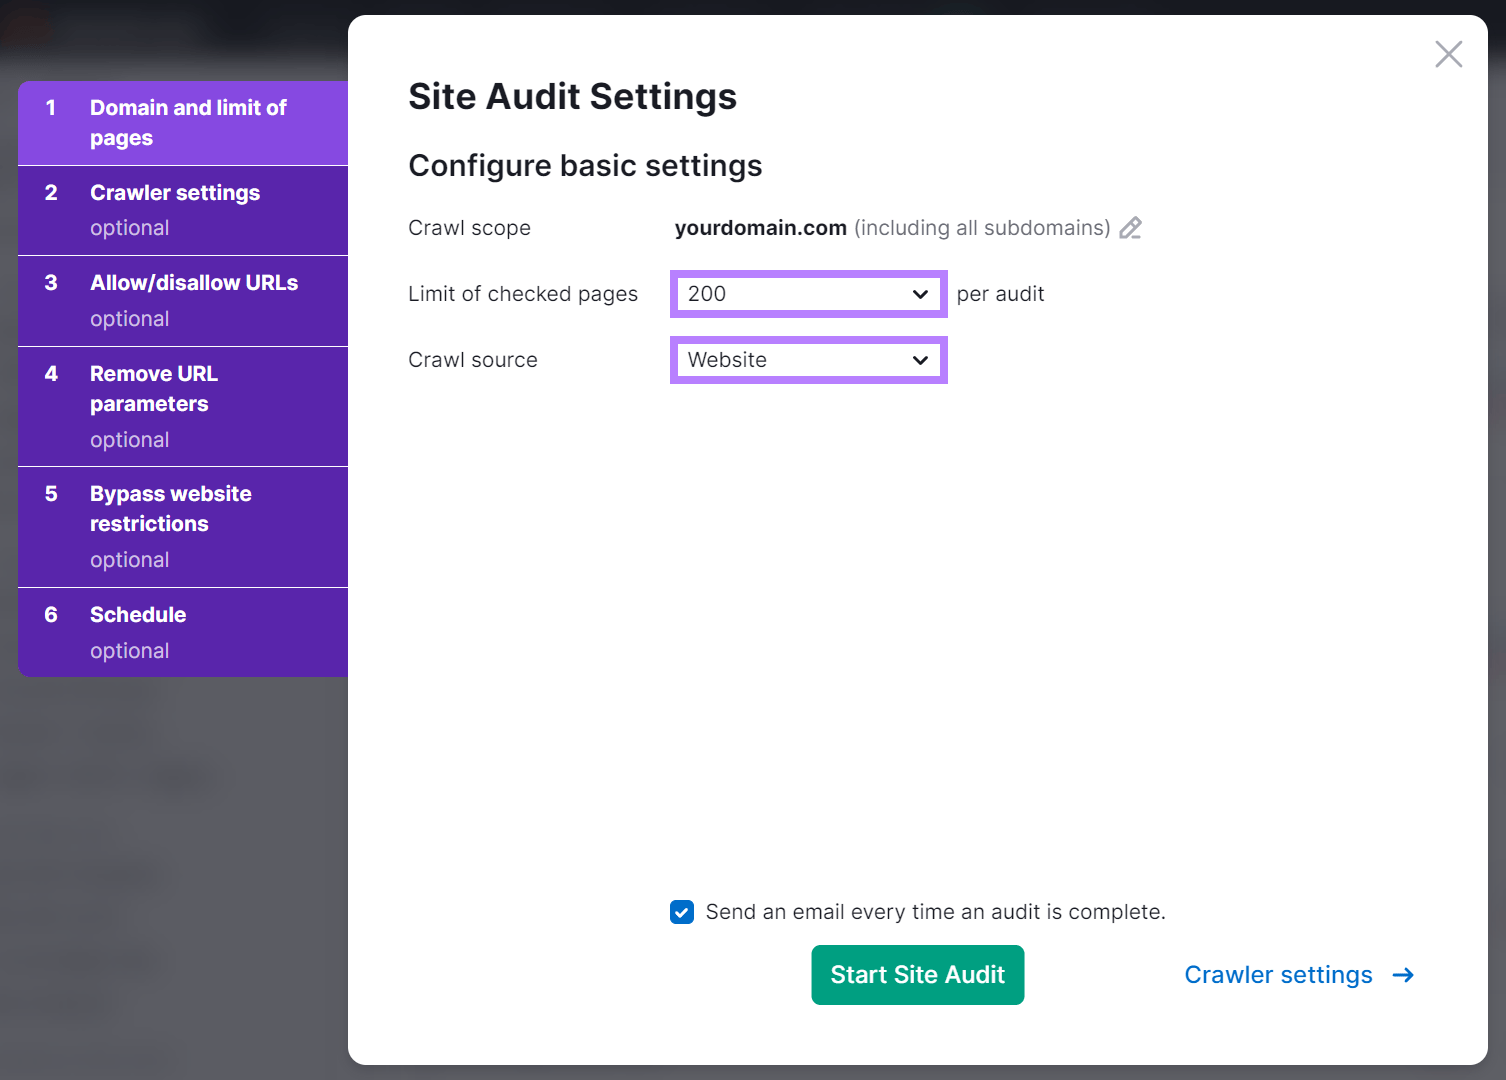
Click the box at the bottom of the dashboard if you want an email every time an audit is complete, and click “Start Site Audit” to continue.
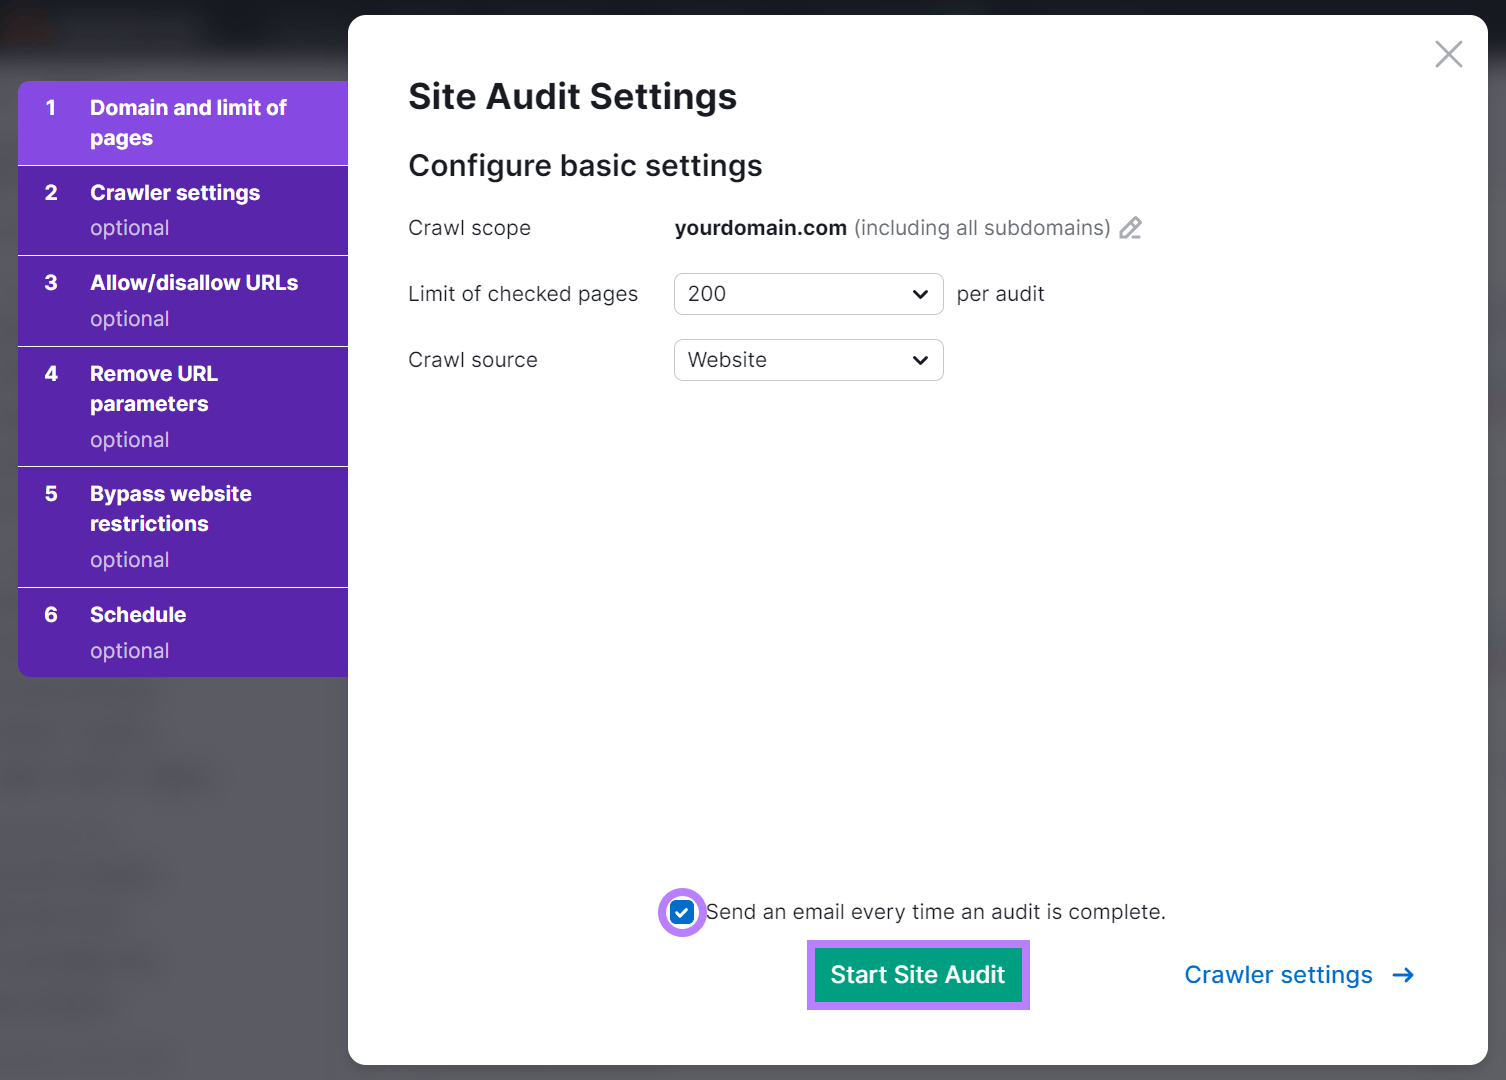
Once the audit is complete, the tool will show a dashboard that provides an overview of your site’s health. Click the “Issues” tab to find and fix heading tag errors.
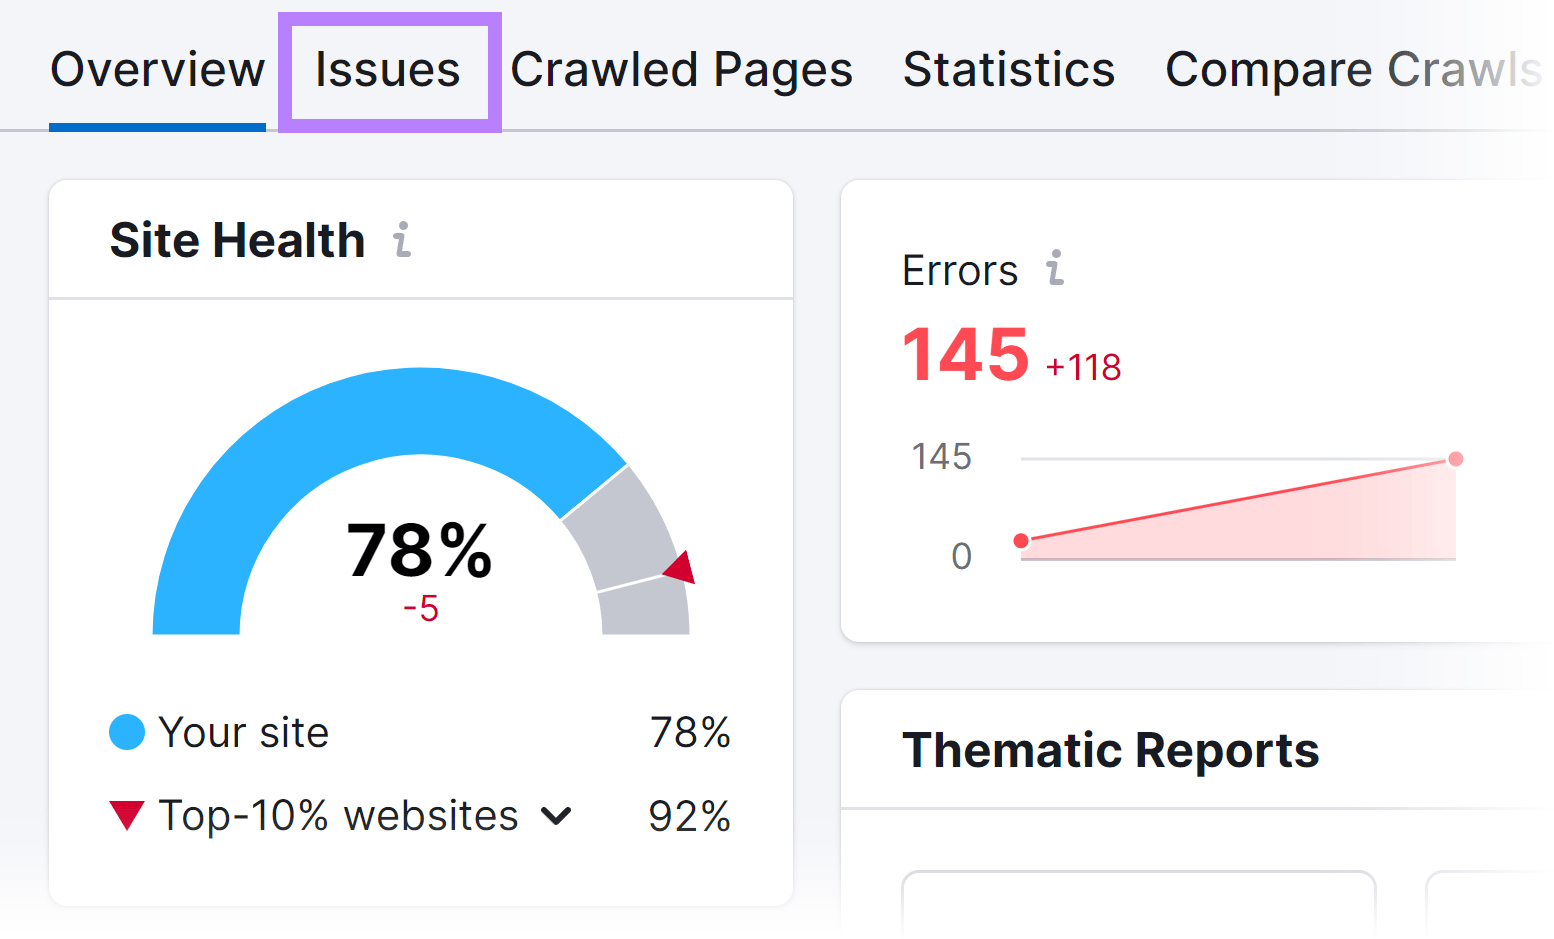
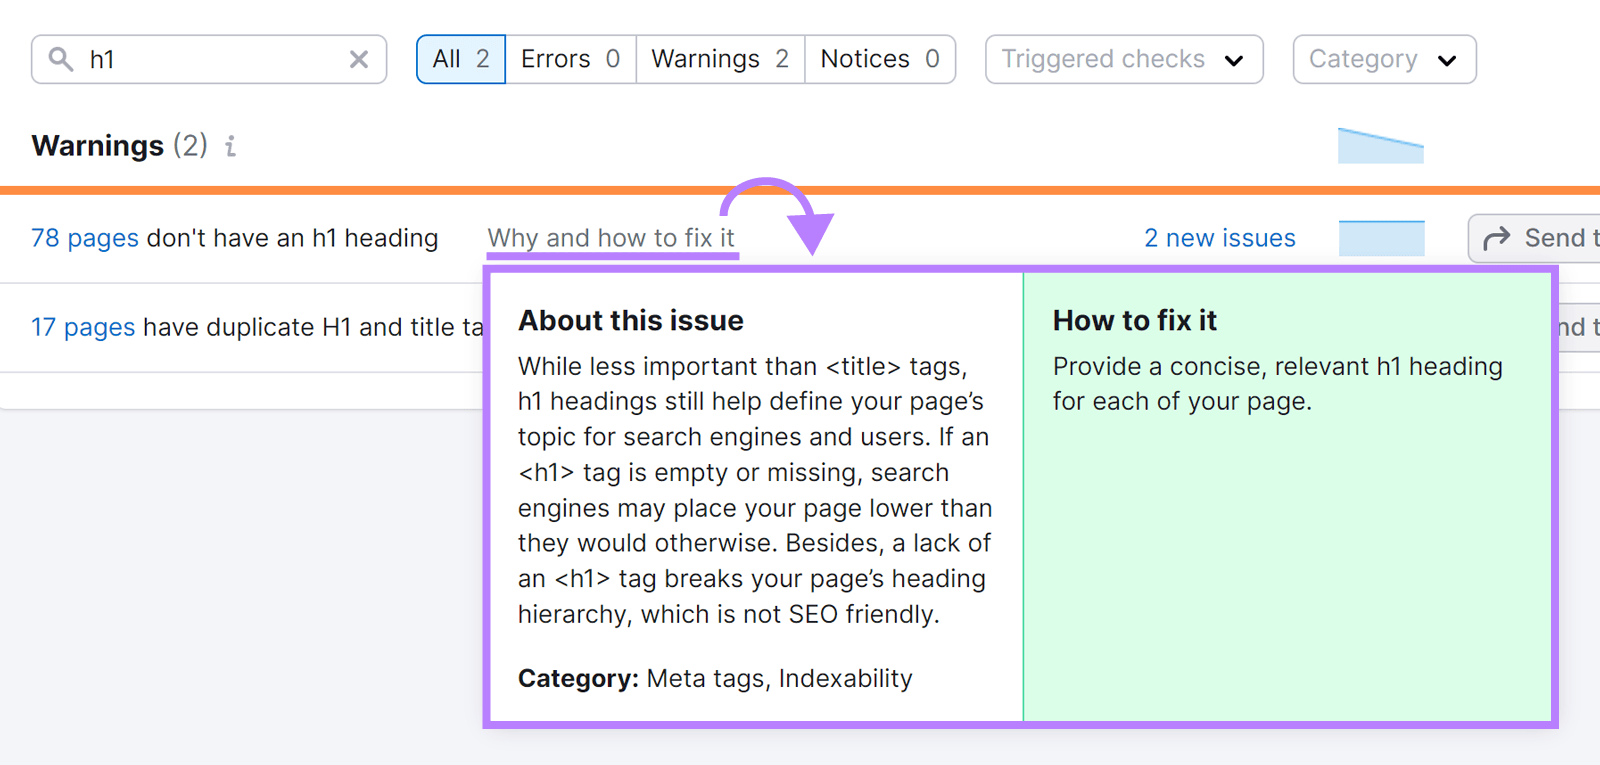
Use the search bar to analyze related errors. For instance, if you type H1 in the search bar, the tool automatically generates a list of errors related to the H1 tag.
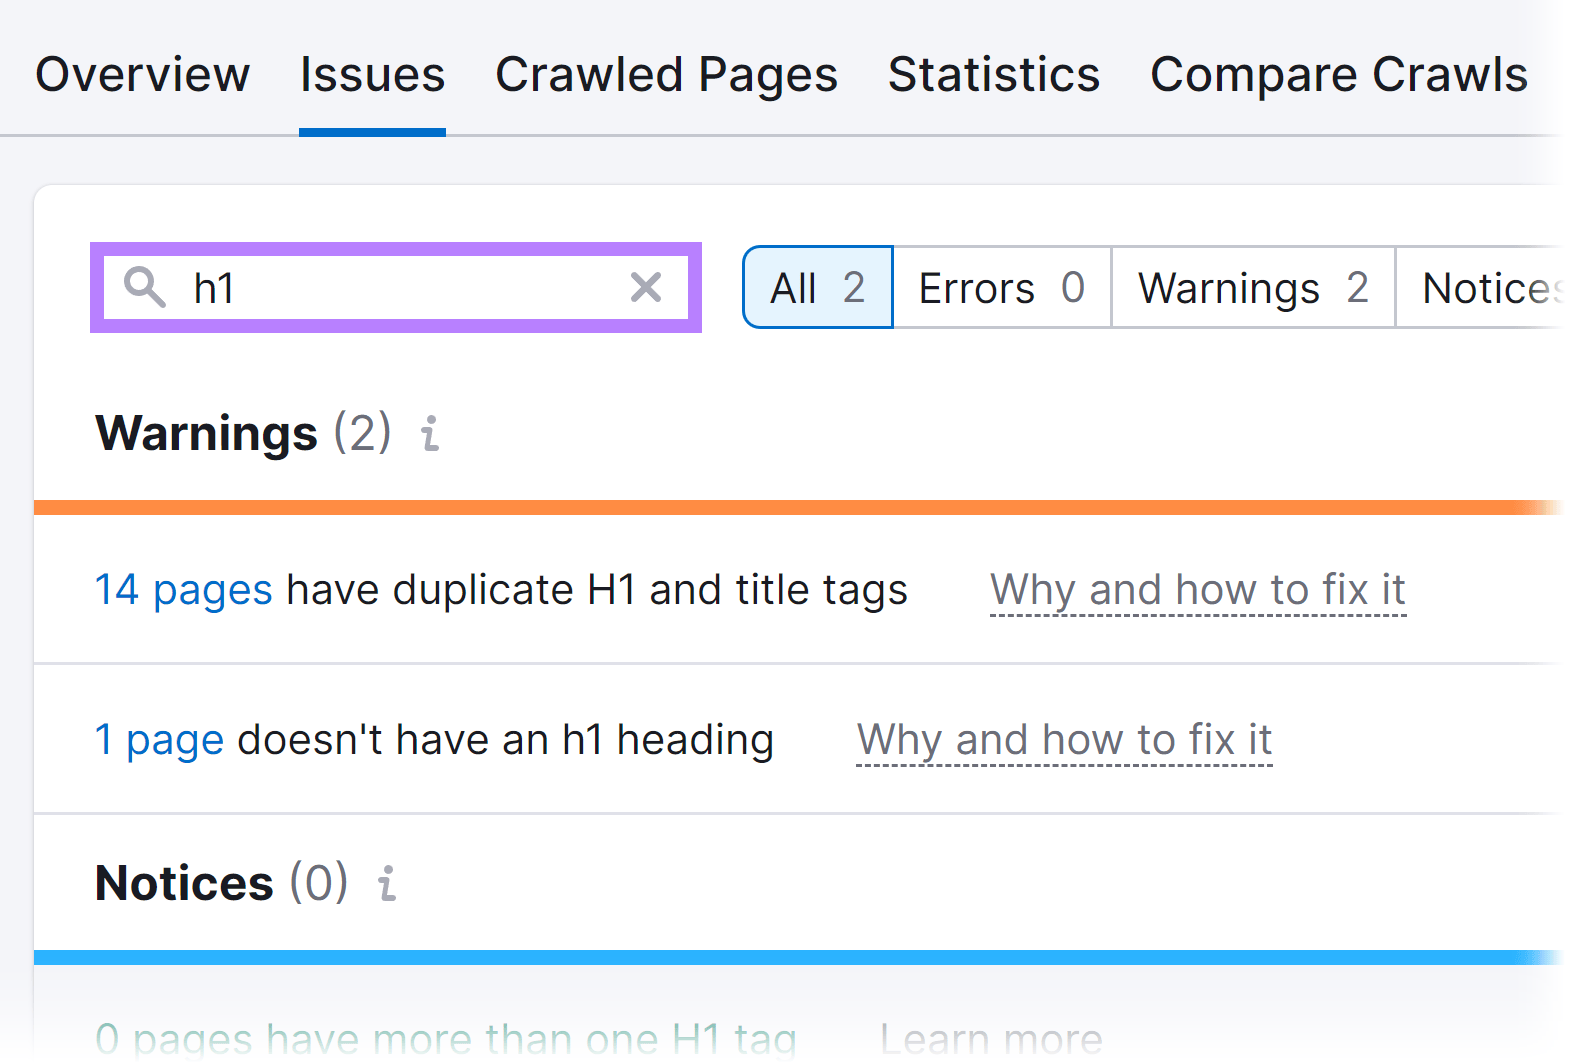
Click “Why and how to fix it” located beside the error, and you will see an automatic drop-down explaining the causes of the issue and what you can do to correct it.
Understanding heading tags doesn’t have to be difficult. With the expert tips provided in this guide, you’ll be equipped to implement heading tags effectively on your web pages, improving SEO performance and enhancing user experience.
So, what’s next?
First, use the Site Audit tool to identify HTML heading tag errors in your site. Then, use the Keyword Magic Tool to discover new secondary keywords and implement them in your headings.
Get started by signing up for your free Semrush account today!
Source link : Semrush.com
