You’ve put a lot of time and effort into developing a website. And you want more people to see it.
That’s what search engine optimization (SEO) is for.
In this article, we’ll discuss SEO for web developers and what best practices you should follow.
But let’s start with the basics.
SEO Fundamentals for Developers
SEO helps improve your website’s visibility on search engine result pages (SERPs).
It involves optimizing on-page elements (like content and HTML tags), building off-page signals (like social media mentions and backlinks from other websites), and improving technical aspects (like site structure and performance).
While writers and marketers handle on-page SEO and off-page SEO, developers usually take care of technical SEO. Which mainly focuses on making it easier for search engines to crawl (discover pages) and index (store) your content.
So, working on technical improvements ensures search engines better understand your website.
Why Developers Should Care About SEO
When your website gets good SEO results, it ultimately drives growth and helps your company achieve its business goals.
How?
The code you write and the technical decisions you make directly impact how your site appears in search engines. And also affects the user experience (UX).
This can lead to:
Those together contribute to greater revenue.
10 SEO Best Practices for Developers
Here are our recommended SEO guidelines for website development:
1. Create a Clear Website Structure
Creating an SEO-friendly website structure means organizing your site in a way that’s easy to understand for both users and search engines.
It should reflect your website’s hierarchy and clearly indicate the relationship between pages. Which is also reflected in your URLs.
For example, a URL like “yourwebsite.com/products/kitchen/blenders” shows that “blenders” is part of the “kitchen” category. And that they both fall under the “products” section on your site.
Here’s how a logical website architecture should look:
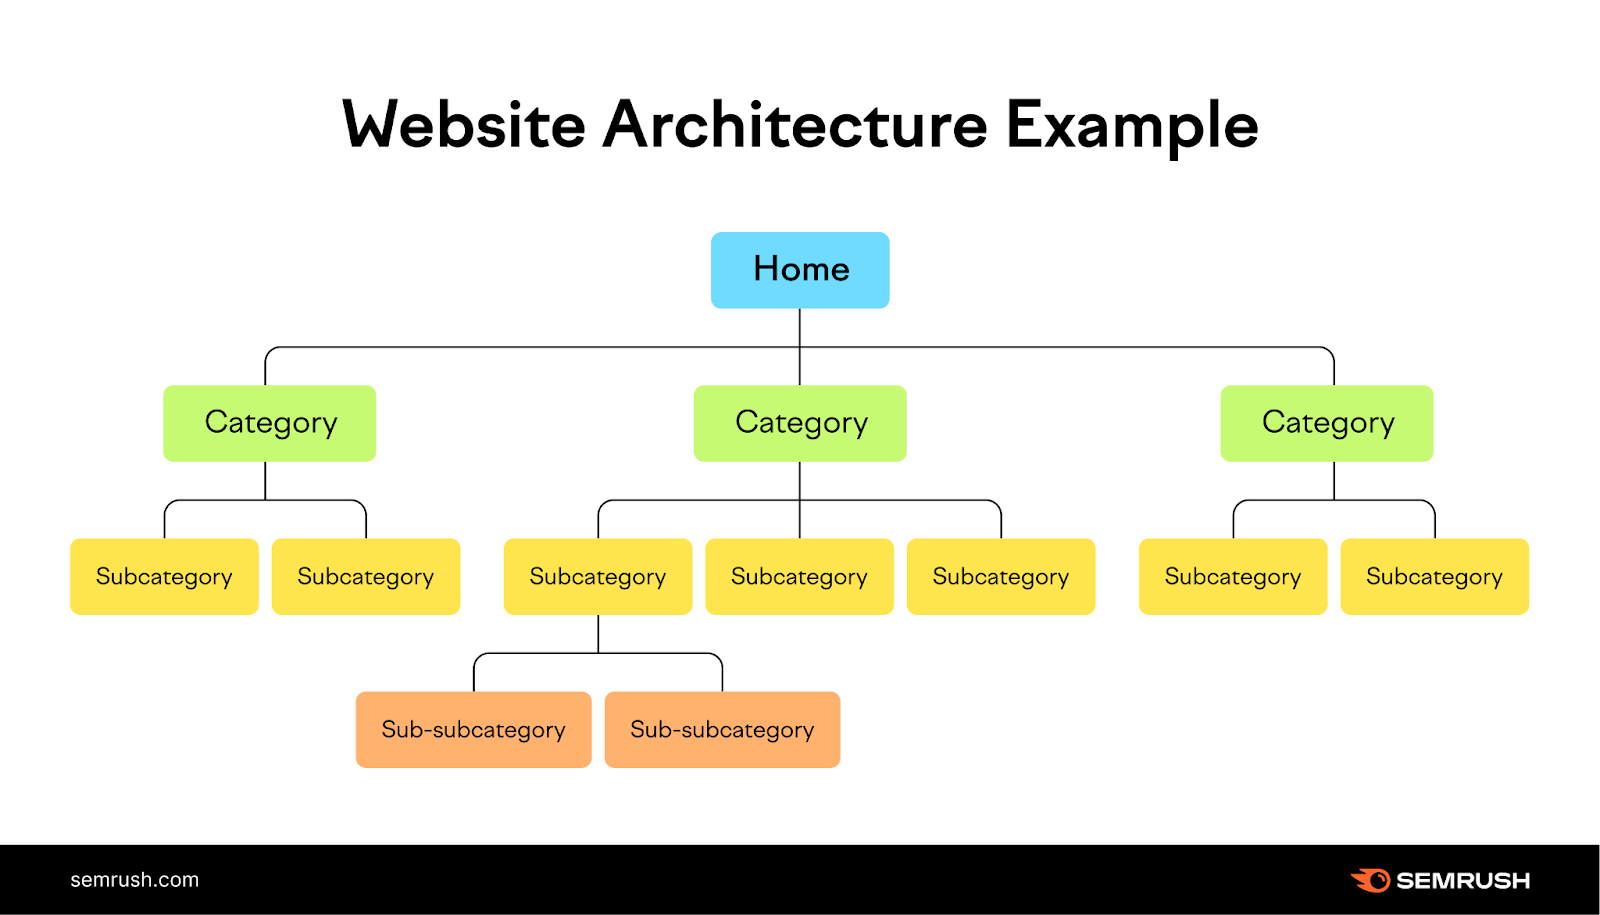
Use internal links (links on your site that go to other pages on your site) to reinforce this structure. And help users and search engines navigate your site more easily.
This way of grouping and organizing content simplifies navigation and helps search engines crawl and index your pages more effectively.
2. Manage Your Redirects Carefully
Redirects send users and search engines from one URL to another. They’re important when you delete pages, change your site structure, or migrate your site to a new domain.
Properly managing your redirects preserves your site’s link equity (ranking power) and user experience. And prevents users and search engines from encountering issues like broken links, 404 errors (which indicate the resource couldn’t be found), and redirect loops that never lead to a final destination.
To avoid these issues:
- Use 301 redirects for permanent URL changes to help pass link equity to the new URL
- Use 302 redirects only for temporary URL changes. Like when you’re redesigning your website and will eventually reinstate the original URLs. They don’t pass link equity in the same way.
- Always redirect to your intended final destination. So you don’t end up creating chains or loops that harm the user experience and your SEO performance.
Check for redirect chains and loops using Site Audit.
Follow the Site Audit configuration instructions to set up your project.
Once configured, go to the “Issues” tab and search “redirect chain” or “redirect loop.”
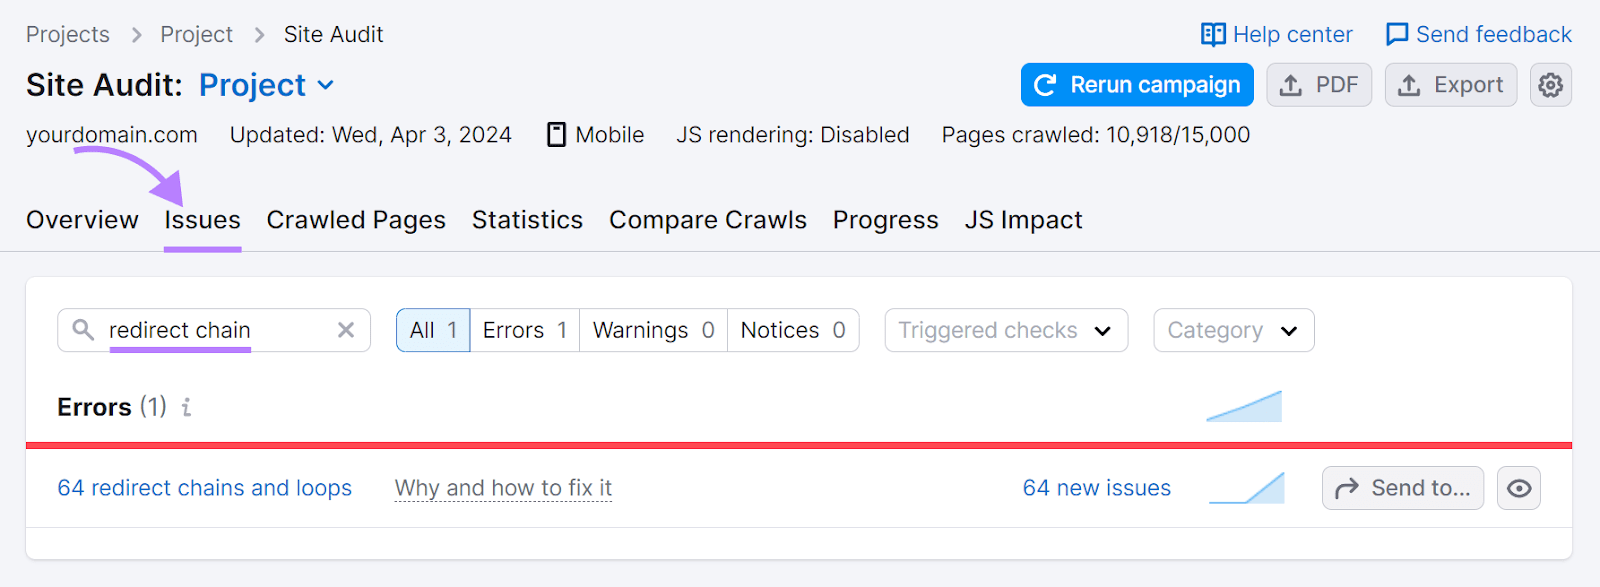
Click on “# redirect chains and loops.”

You’ll then be able to see the affected pages.
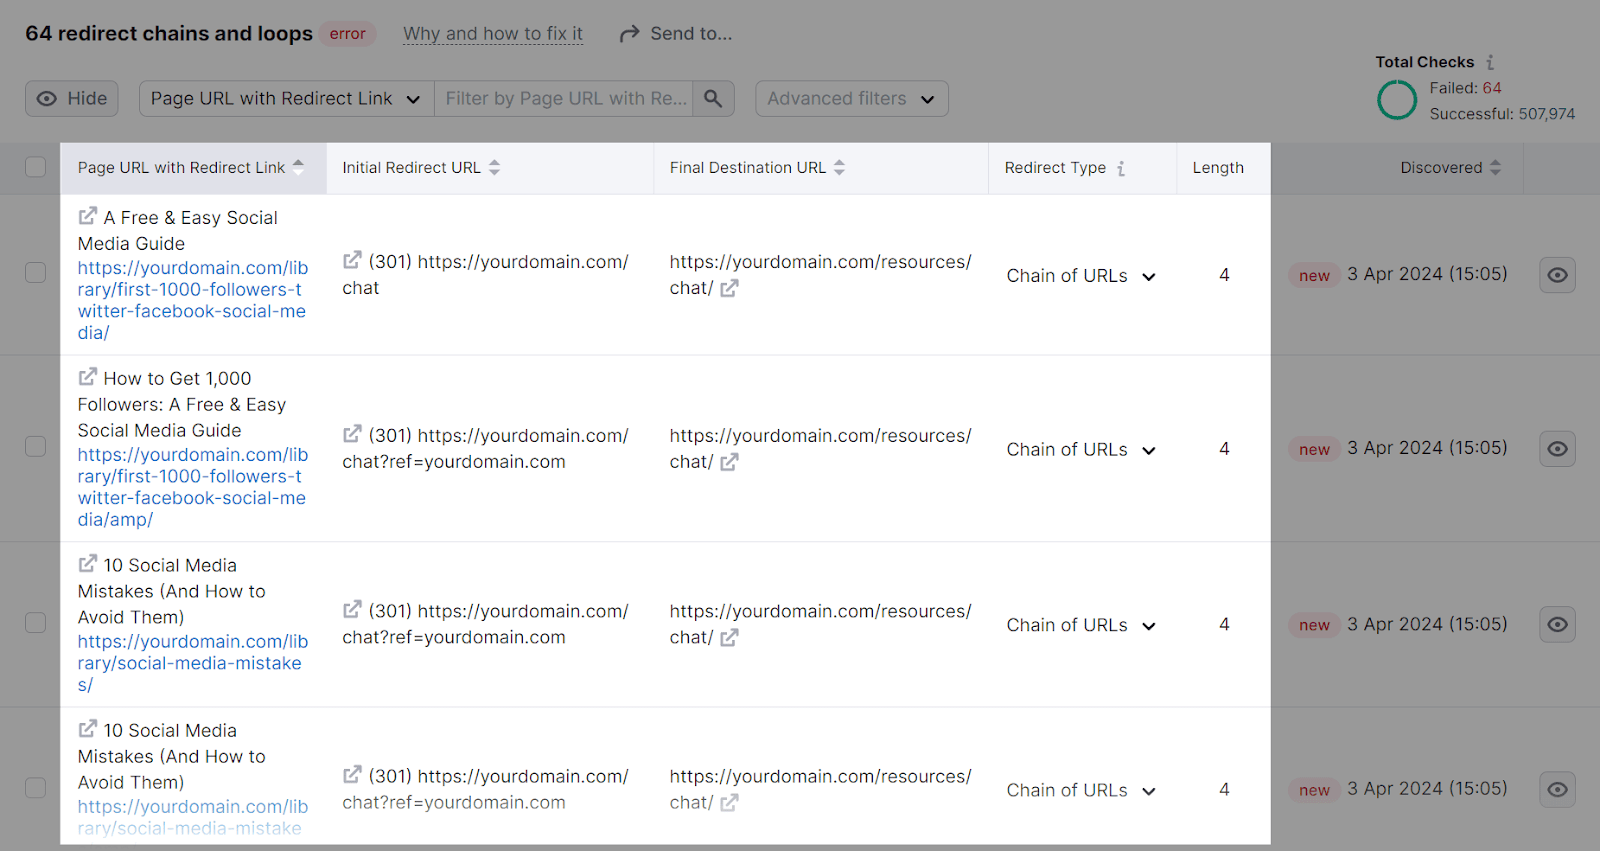
To fix chains, redirect each URL in the chain to your intended destination page.
To fix loops, you’ll need to change one of the redirects to point to the proper final destination. So it doesn’t go back to the previous URL.
3. Secure Your Website with HTTPS
Hypertext transfer protocol secure (HTTPS) encrypts the data exchanged between a visitor’s browser and your website. To keep sensitive information like login details and personal information safe.
HTTPS is a ranking factor. So, securing your website with HTTPS can boost your search engine rankings. And it also builds trust with your visitors.
To switch to HTTPS:
- Get a secure sockets layer/transport layer security (SSL/TLS) certificate from your web hosting provider (like Bluehost). Many hosts include these certificates for free or as an add-on.
- Activate the certificate by following your host’s or certificate provider’s instructions. They’ll typically guide you through the process.
- Update your website’s settings to use HTTPS instead of HTTP. Your host may have a simple option for this. Or, you might need to modify your site’s configuration files to force HTTPS connections.
- Set up 301 redirects from HTTP to HTTPS for your entire site. This tells search engines and visitors to use the secure version—even if they try to access the non-secure one.
Refer to our guide on How to Redirect HTTP to HTTPS (+ Best Practices) for step-by-step help.
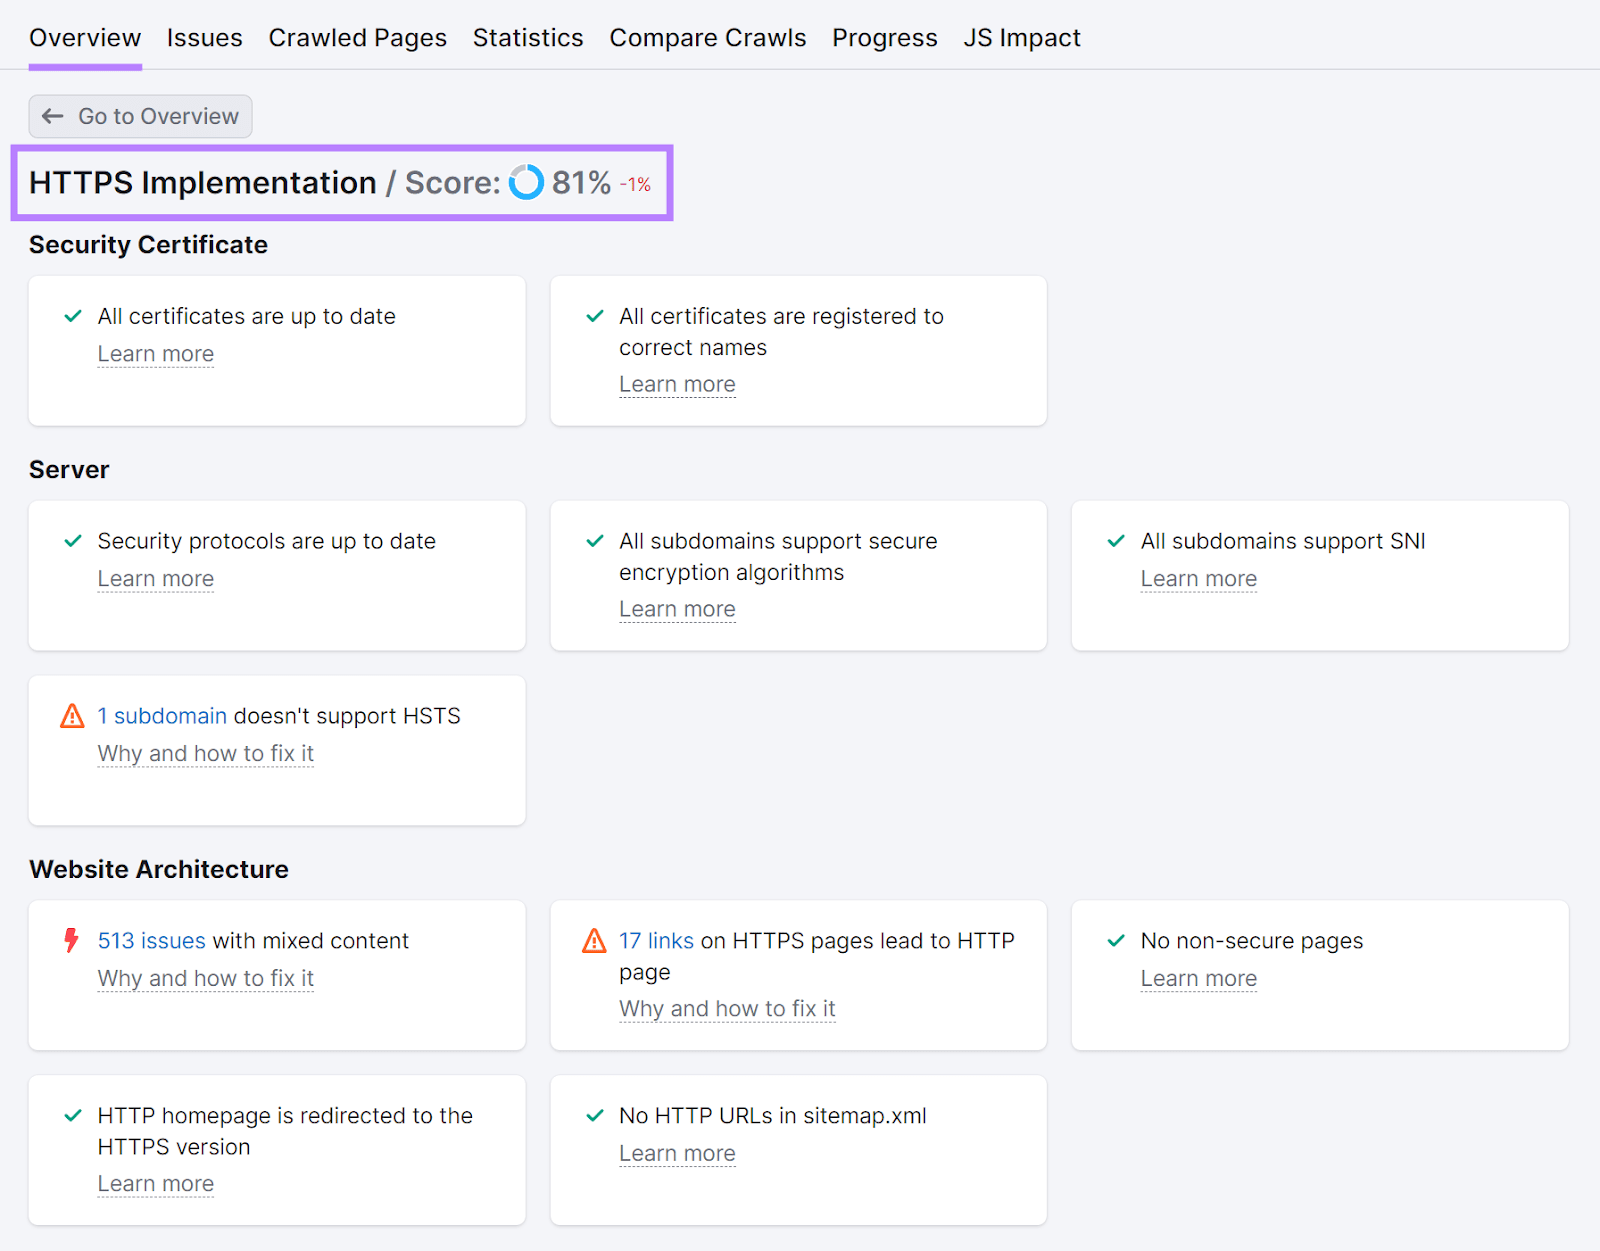
To check whether there are any problems with your HTTPS implementation, use Site Audit.
Click “View details” in the “HTTPS” section.
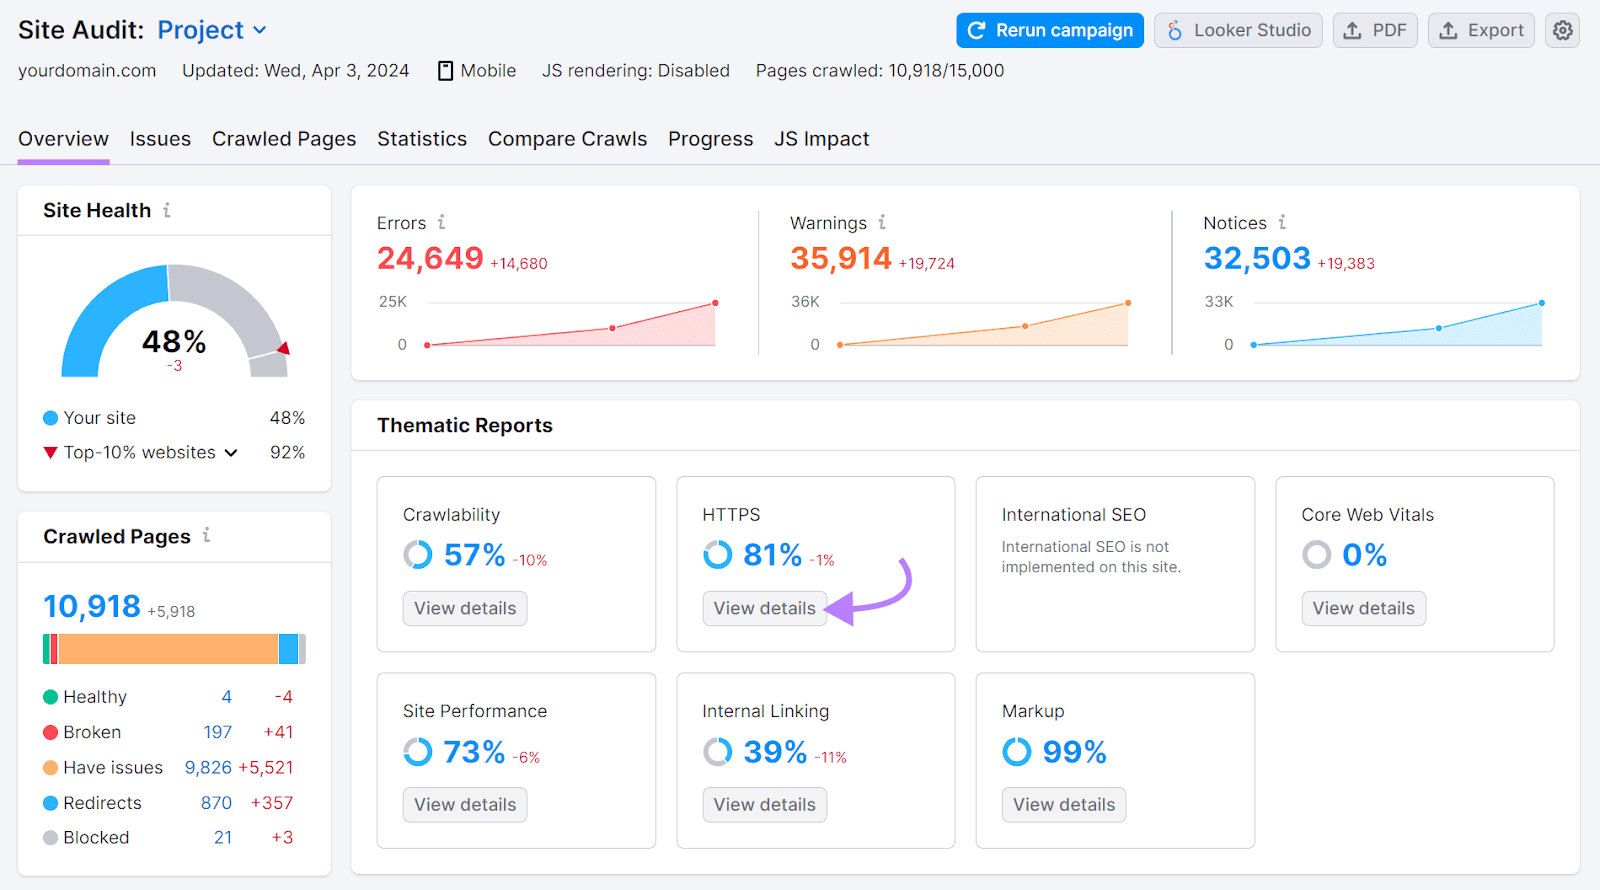
You’ll see an overall score and any issues that need to be addressed.
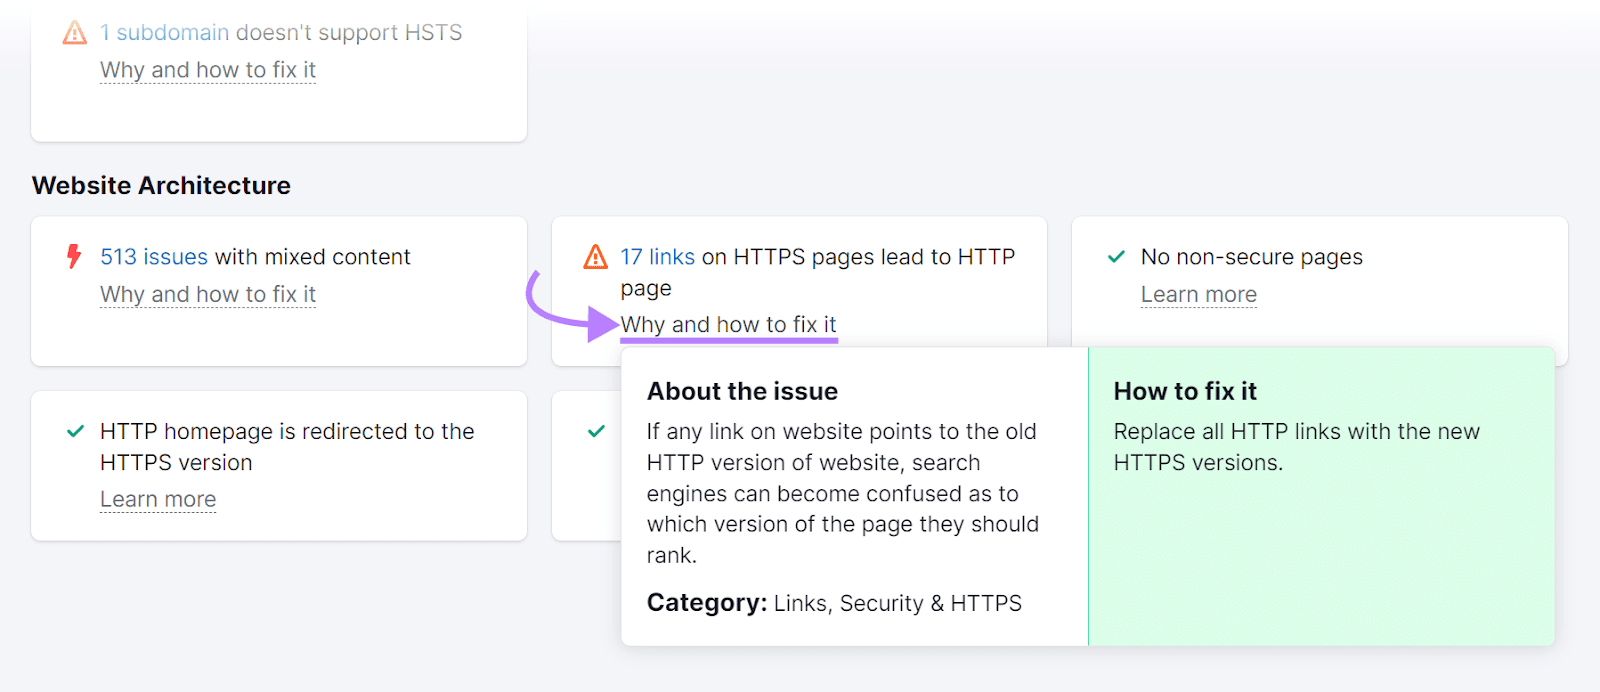
Click “Why and how to fix it” next to any problem that was flagged. To learn more about it and how to address it.
4. Make Your Site Mobile-Friendly
Your website must perform well on mobile devices to rank well in search results. Because Google prioritizes the mobile versions of websites for indexing and serving pages to users.
One of the best ways to ensure your site is mobile-friendly is by implementing a responsive design.
Responsive design uses HTML and CSS to automatically adjust your website’s layout to fit the user’s screen size. This makes your site easy to read and navigate on any device.
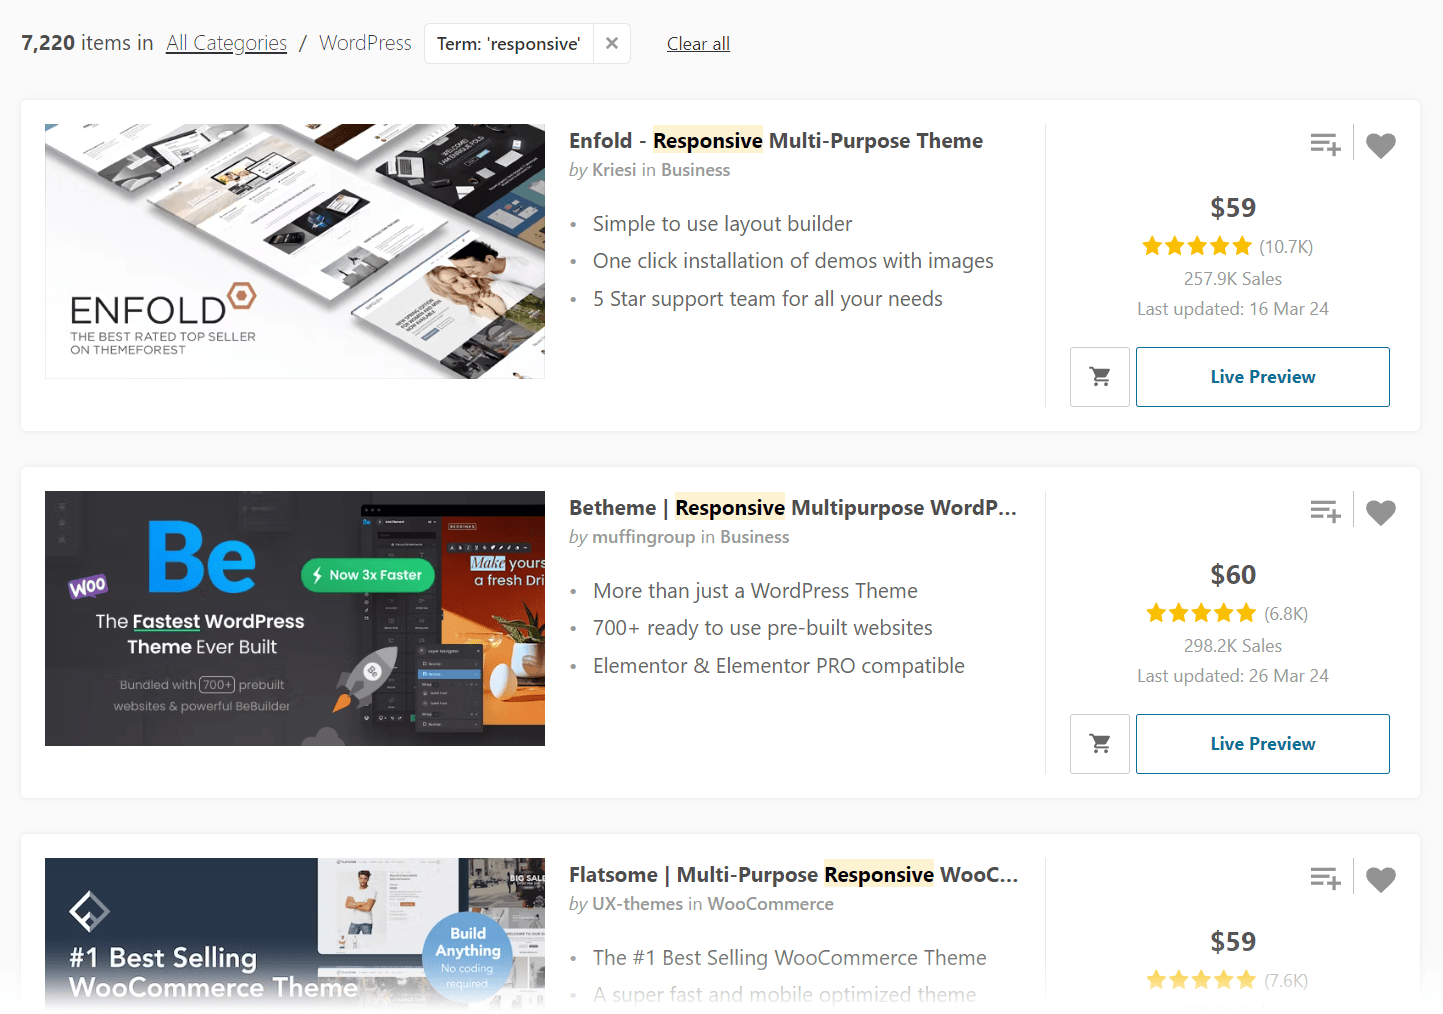
If you’re using a website builder or content management system (CMS), you can do this easily by choosing a responsive theme.
For example, you can find many responsive WordPress themes on marketplaces like Themeforest.
If you’ve coded your website yourself or need to make a non-responsive site responsive, use CSS media queries and flexible layouts.
These techniques allow you to adjust for different screen sizes. And automatically resize or hide elements as needed.
In addition to using responsive design, prioritize the mobile experience during the development stage by:
- Simplifying menus
- Increasing button sizes
- Ensuring touch-friendly navigation
- Using legible font sizes
- Incorporating white space
- Minimizing pop-ups
To review your site for any mobile-related issues, use Site Audit.
During setup, ensure the crawler is set to “SiteAuditBot-Mobile.” Which mimics the way Google crawls your site. And click “Start Site Audit.”
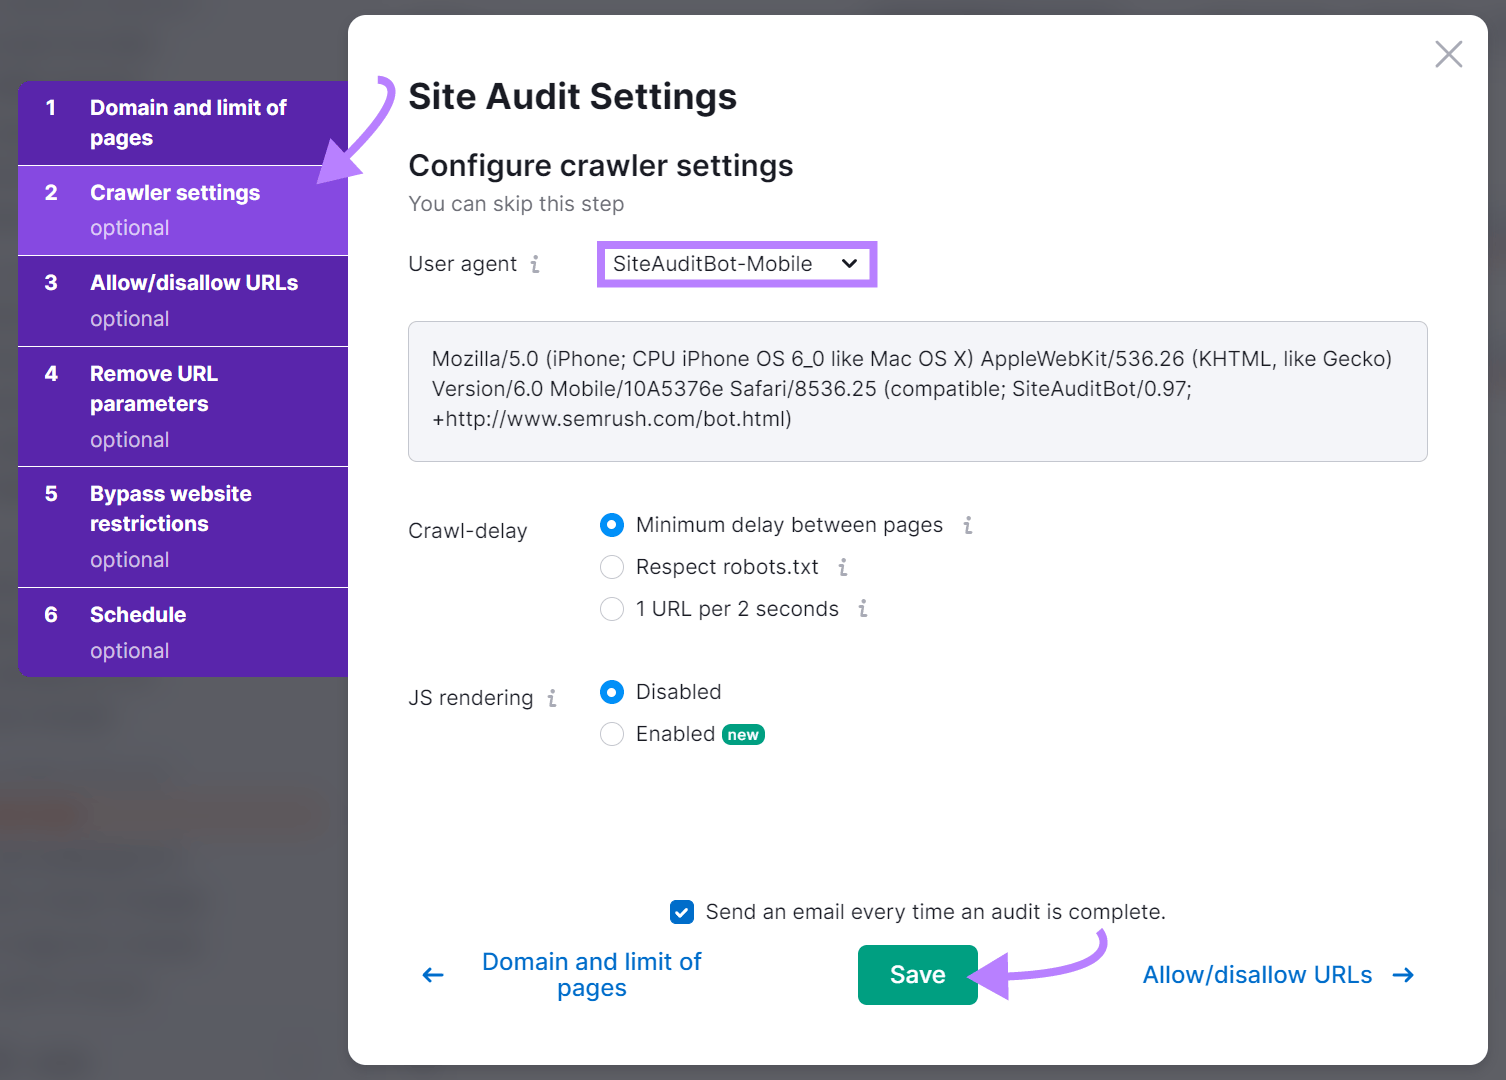
Once the audit is done, go to the “Issues” tab from your report dashboard. And search “mobile” to focus on mobile-specific issues.
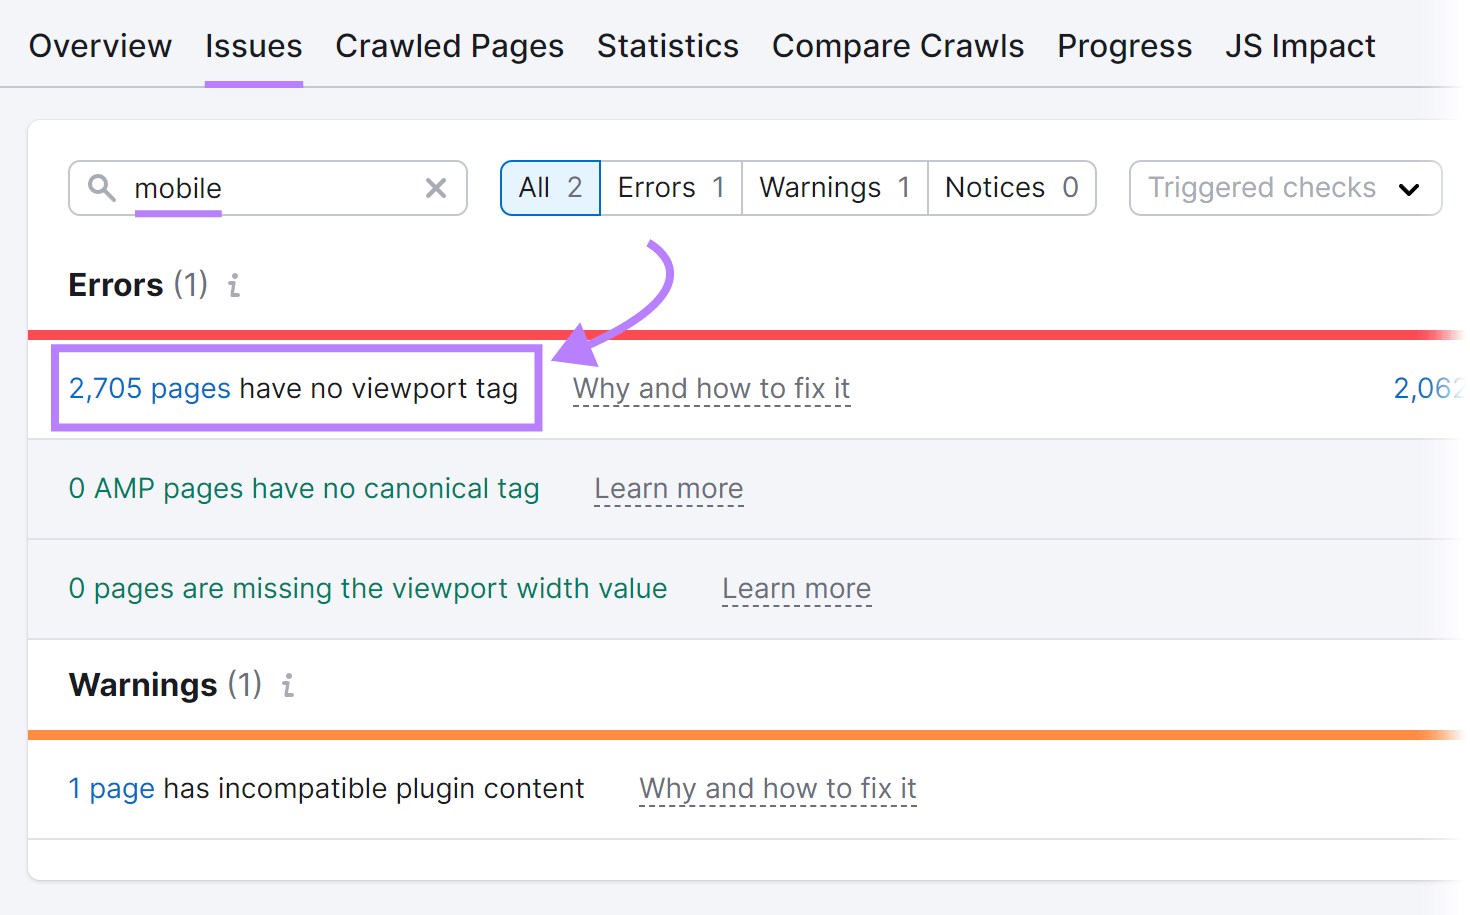
Address the issues and rerun the audit to ensure they’re resolved.
Further reading: The Complete Guide to Mobile SEO: 8 Tips & Best Practices
5. Speed Up Your Website
Ensuring your website loads quickly has a direct impact on your search engine rankings. It also improves the user experience.
So, take proactive steps to make your website load as quickly as possible. This is one of the most important SEO tips for web developers.
Use Google’s PageSpeed Insights to see how specific pages on your site are performing in terms of speed on mobile and desktop.
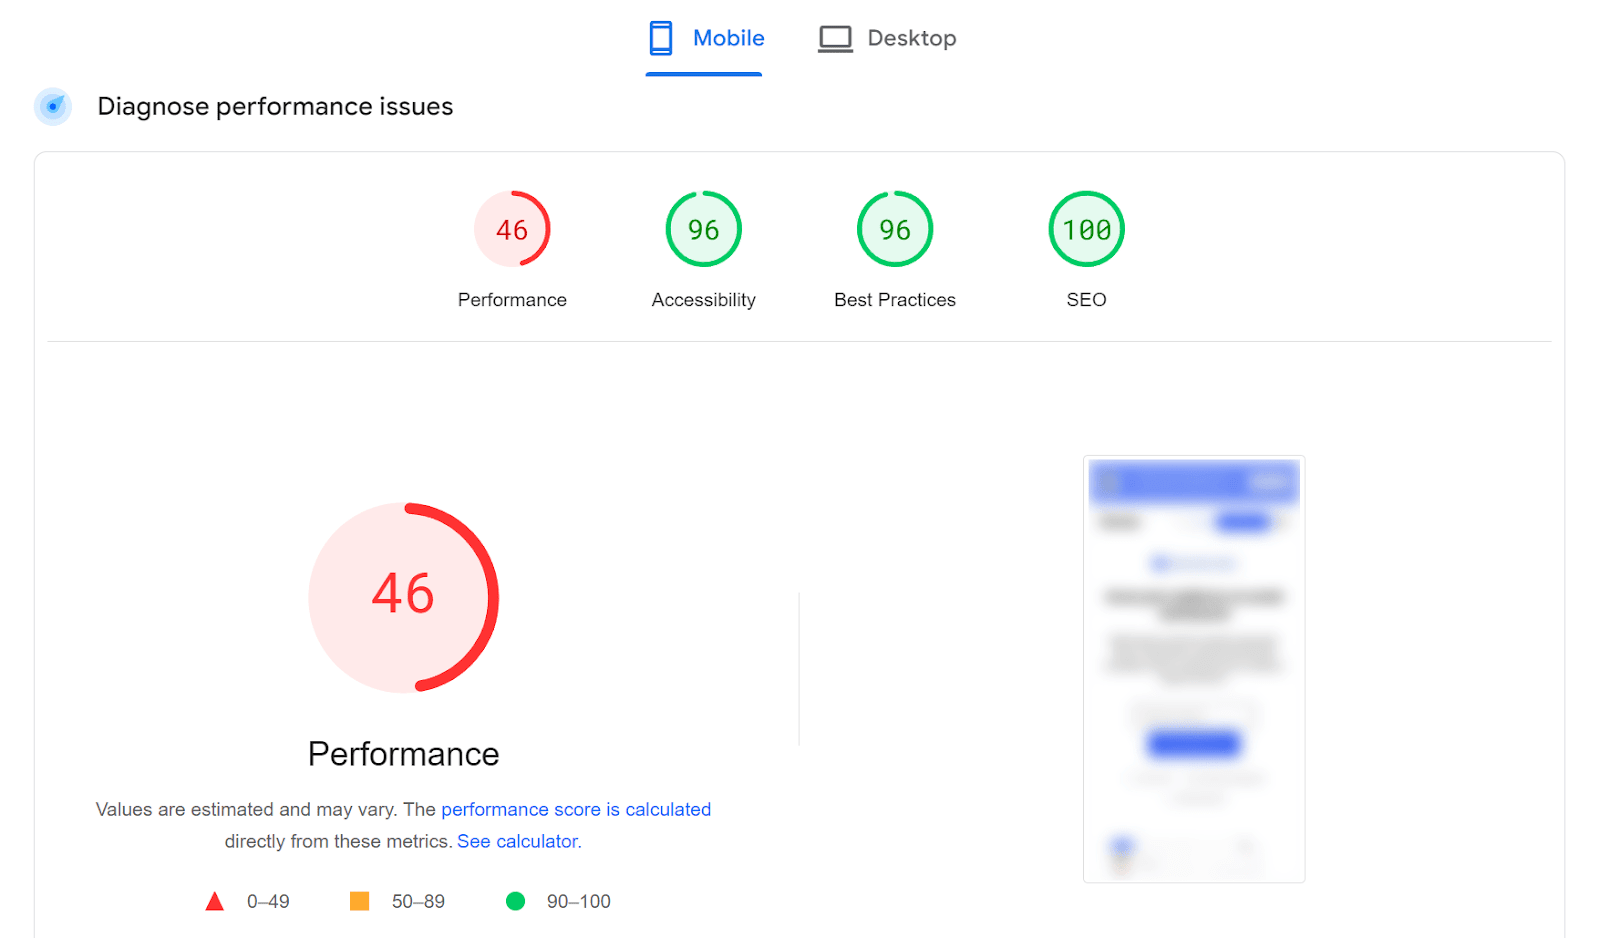
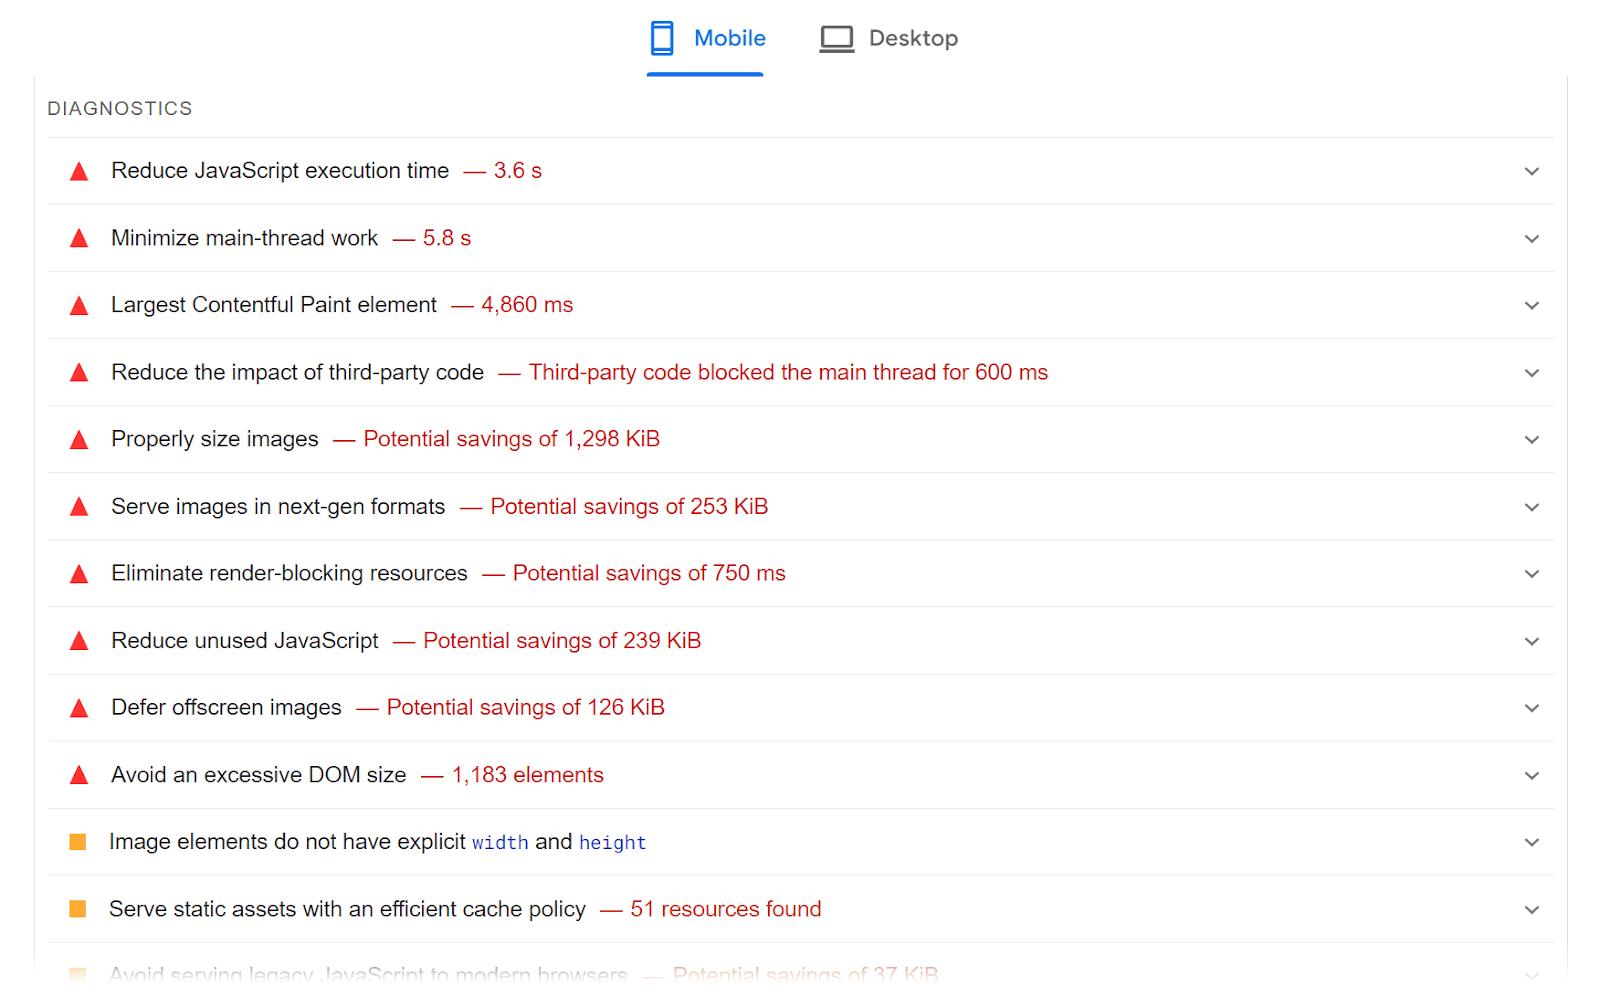
Scroll down to check the diagnostics. Based on that, take steps to improve your page’s speed.
To evaluate speed across your entire site, use Site Audit.
Go to your overview report. And click “View details” in the “Site Performance” section.
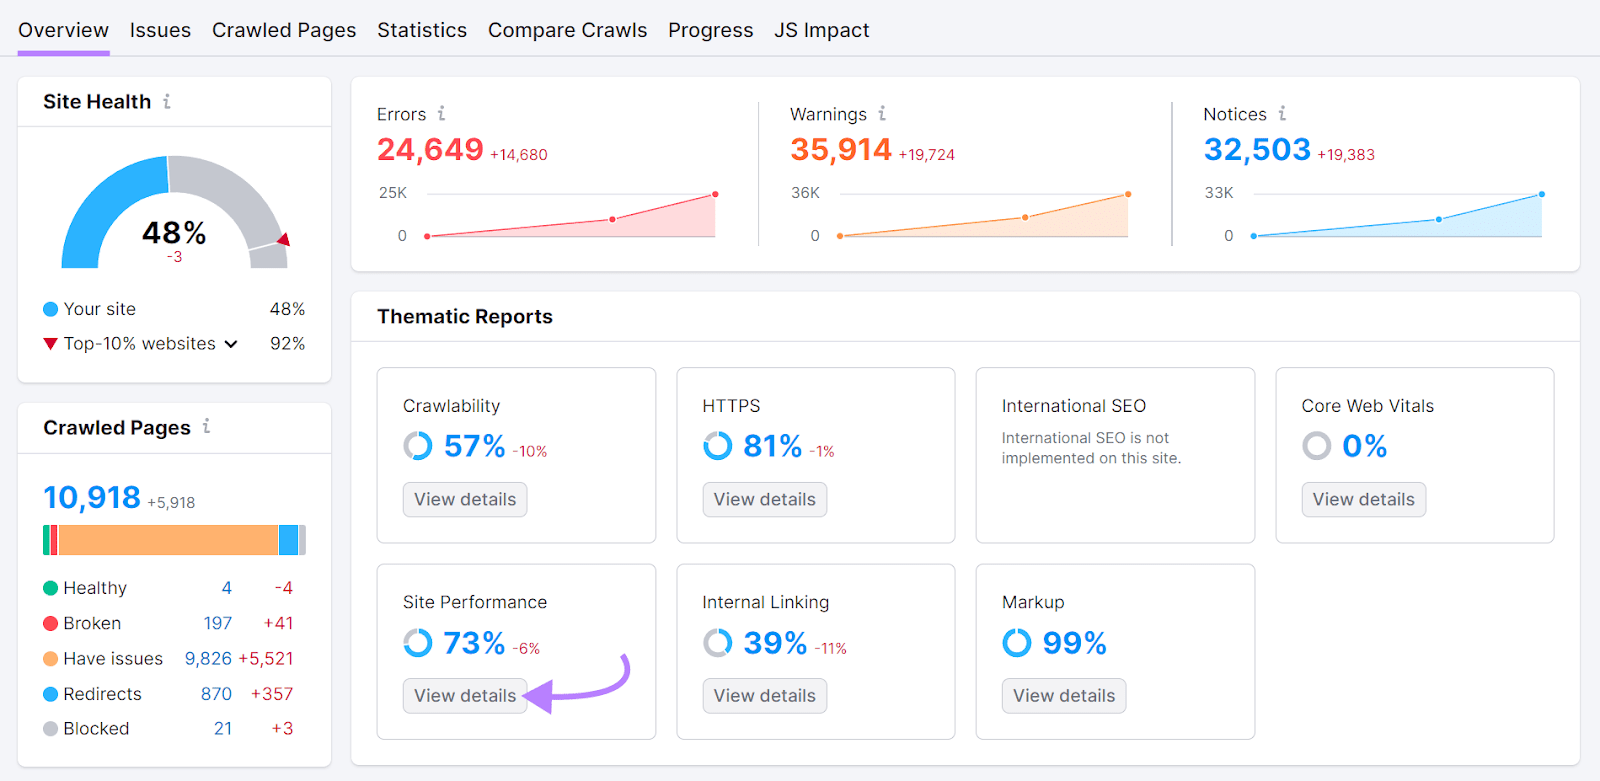
You’ll see an overall score. And issues related to your website’s speed and performance.
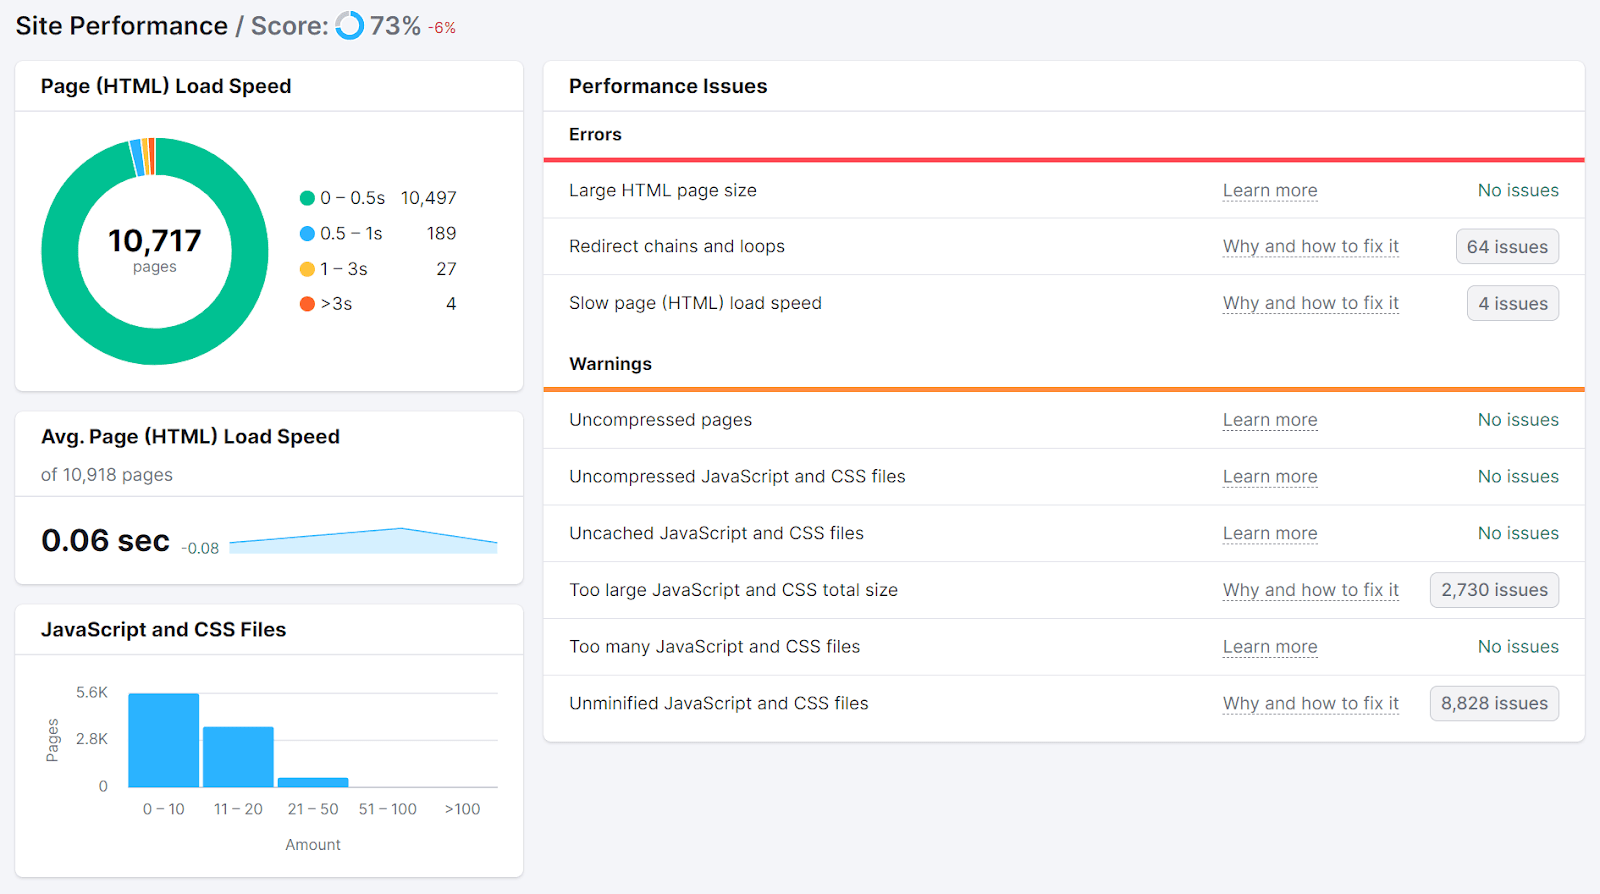
Typically, you’ll find large images slowing your site’s load speed.
So, ask your marketing team to use free tools like TinyPNG to reduce image file sizes. And to choose modern formats like JPEG, PNG, and WebP.
And know that code with unnecessary characters, white spaces, and redundant lines also slows down your site. So, minify your code using Google’s recommended minification tools.
Further reading: What Is Page Speed & How to Improve It
6. Implement Structured Data
Structured data (also called schema markup) is code that provides additional information (e.g., product prices) to help search engines better understand your site’s content. Which can enhance your visibility in search results and increase organic traffic.
How?
By making your content eligible for rich snippets that display extra details directly in search results. Like this:
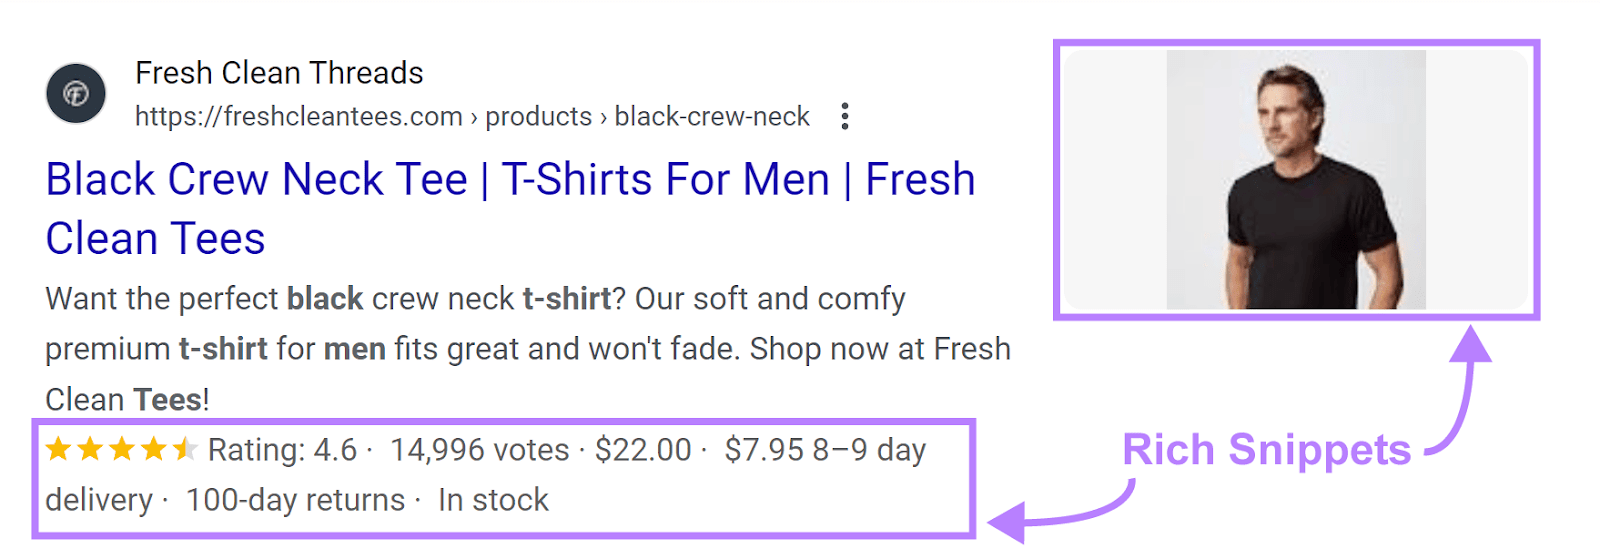
To implement structured data:
- Work with your SEO or marketing team to identify content that could benefit from structured data. Common types of schemas include products, articles, recipes, events, and reviews.
- Refer to Google’s documentation on structured data for developers to find the appropriate schema for your content type
- Add the schema markup to your website’s HTML code—JSON-LD is recommended
(For the complete process, check out our step-by-step guide to implementing schema markup.)
Once you’ve added structured data to your website, use the Site Audit tool to see if there are any issues with it.
In the “Overview” tab, click “View details” in the “Markup” section.
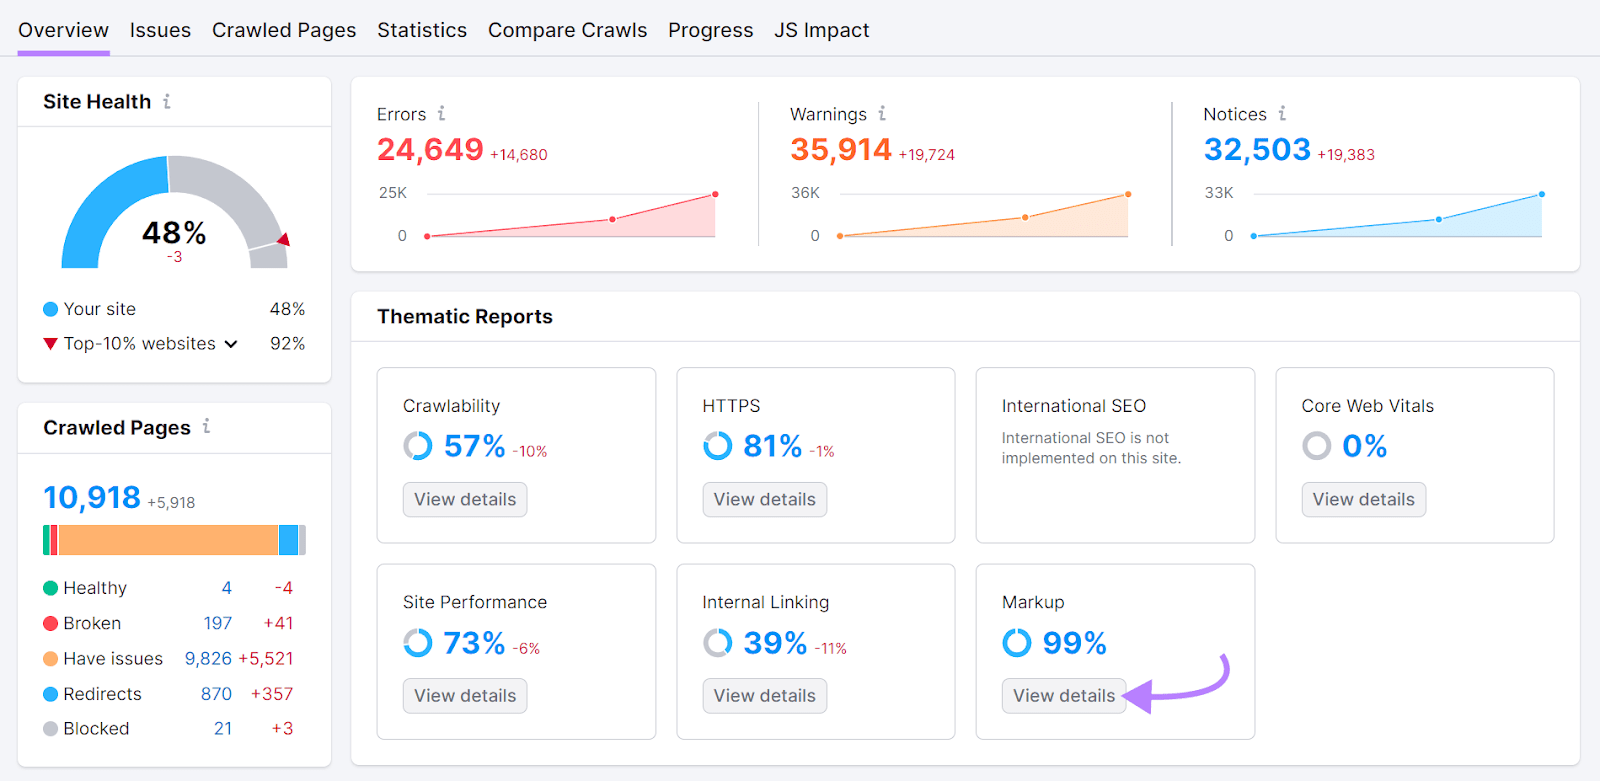
There’s a score that indicates how much of your schema is valid compared to how much is invalid.
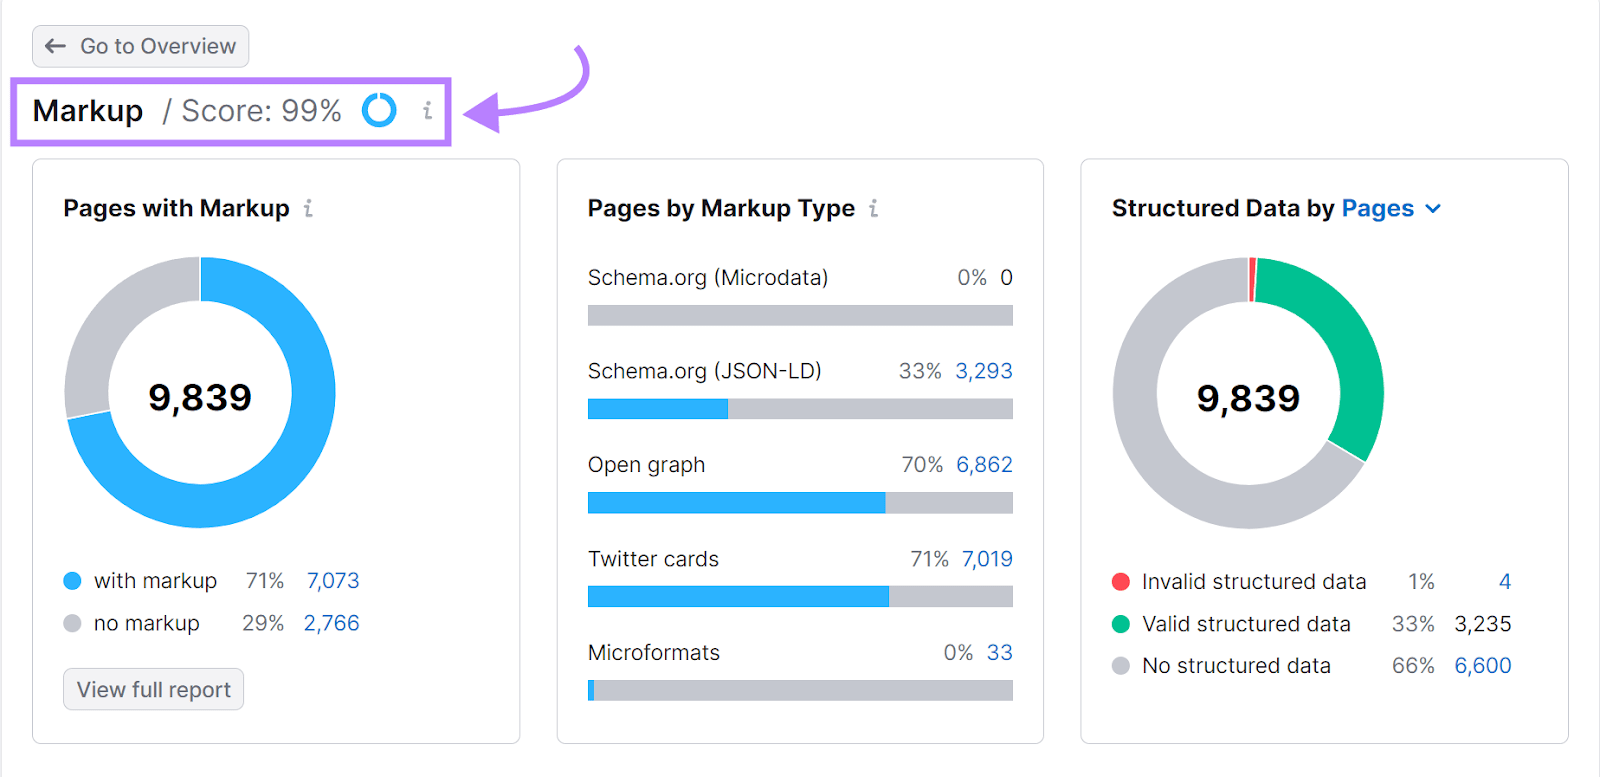
Scroll down to the “Structured Data Items” section. And click “View all invalid items” to see the full list of errors.
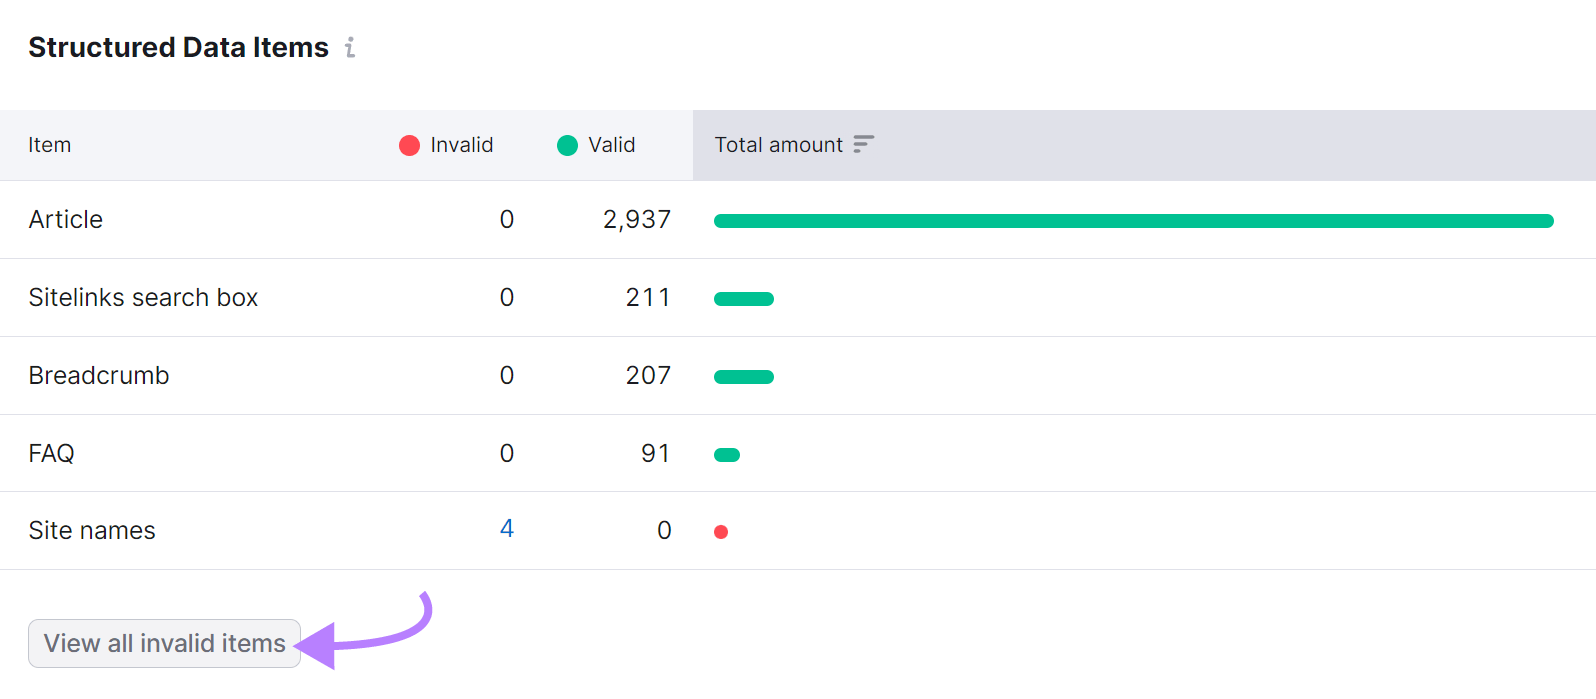
Modify your markup code as needed to fix the problems.
7. Generate and Submit an XML Sitemap
An XML sitemap lists all your important pages to help search engines find and (hopefully) index them.
Here’s what the file looks like:
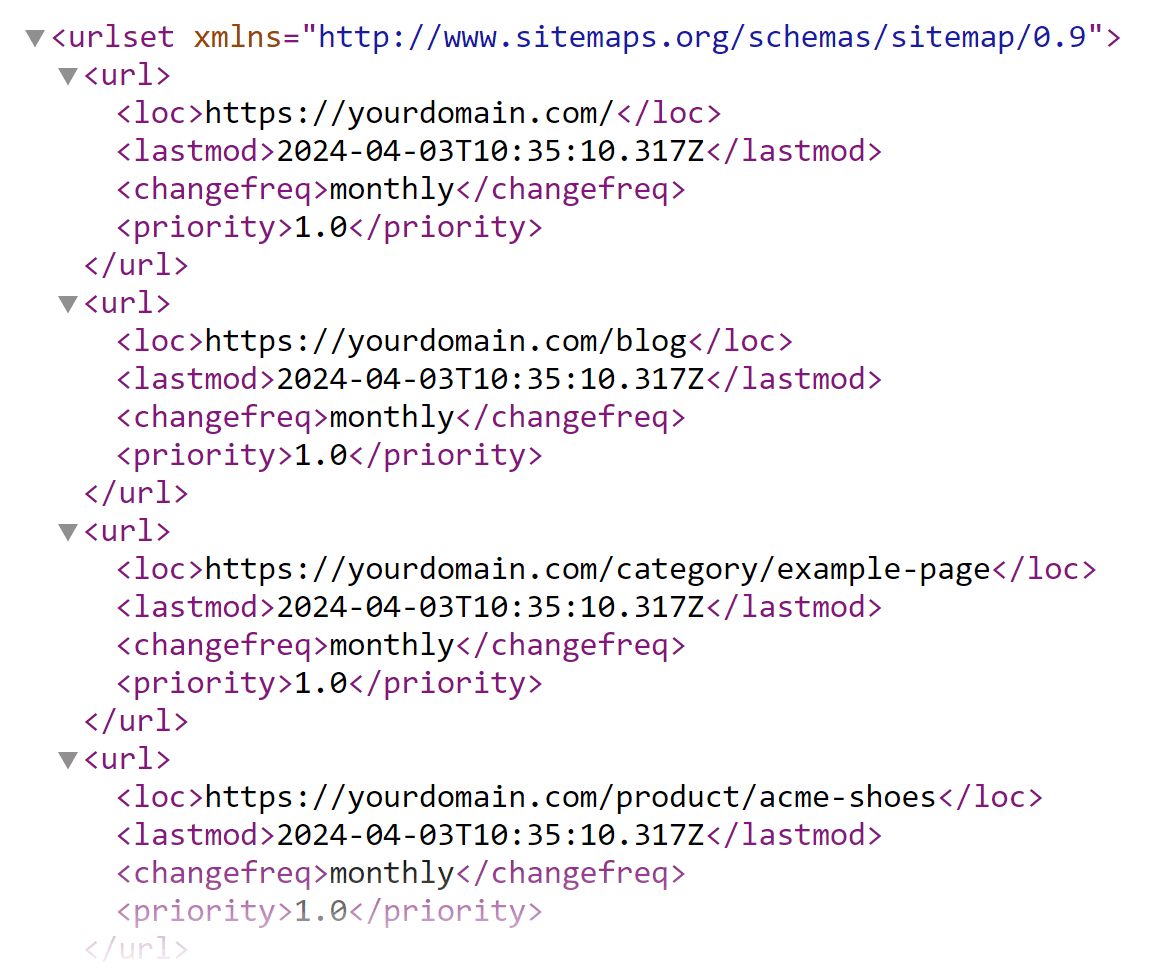
To create an XML sitemap, work with your SEO or content team to identify the most important pages to include in your sitemap.
Then, generate the sitemap using your preferred method. Such as coding it manually or using a plugin or online generator.
Some platforms (like WordPress, Shopify, and Wix) generate XML sitemaps automatically. In that case, you just need to retrieve it.
If you’ve created your own sitemap, upload it to your website’s server.
Typically, you’ll place it in your website’s root directory. So, if your website is “www.example.com,” you would place your sitemap at “www.example.com/sitemap.xml.”
After uploading your sitemap, run the Site Audit tool to check if it’s formatted correctly.
Go to the “Issues” tab and search “sitemap” to see if there are any issues related to your sitemap.xml file.
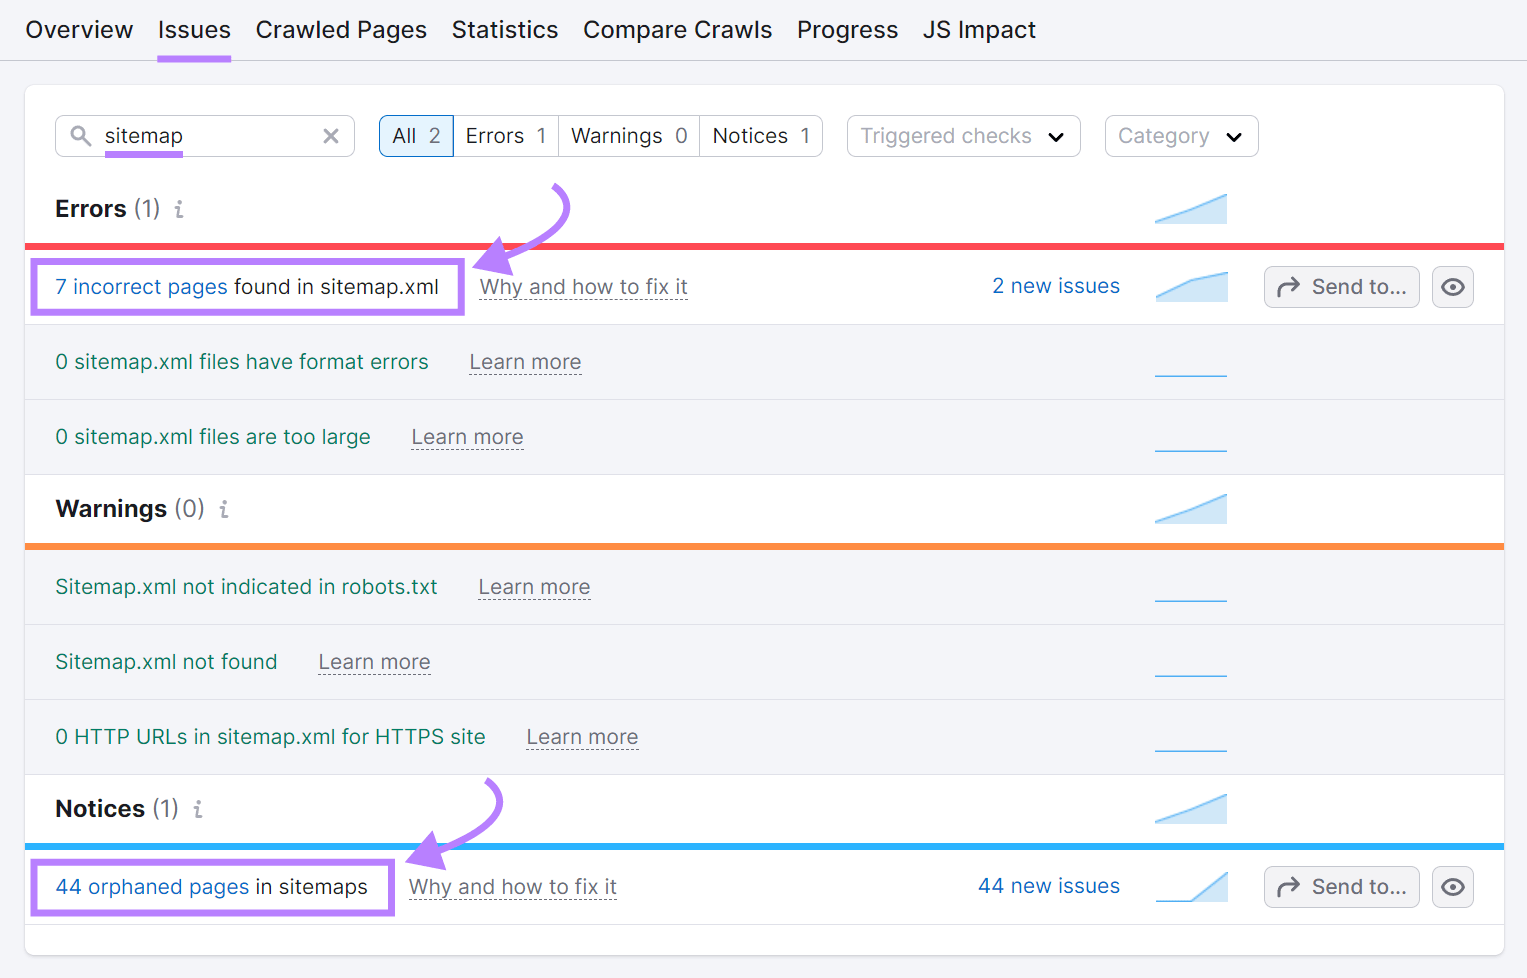
Address any issues the tool flags.
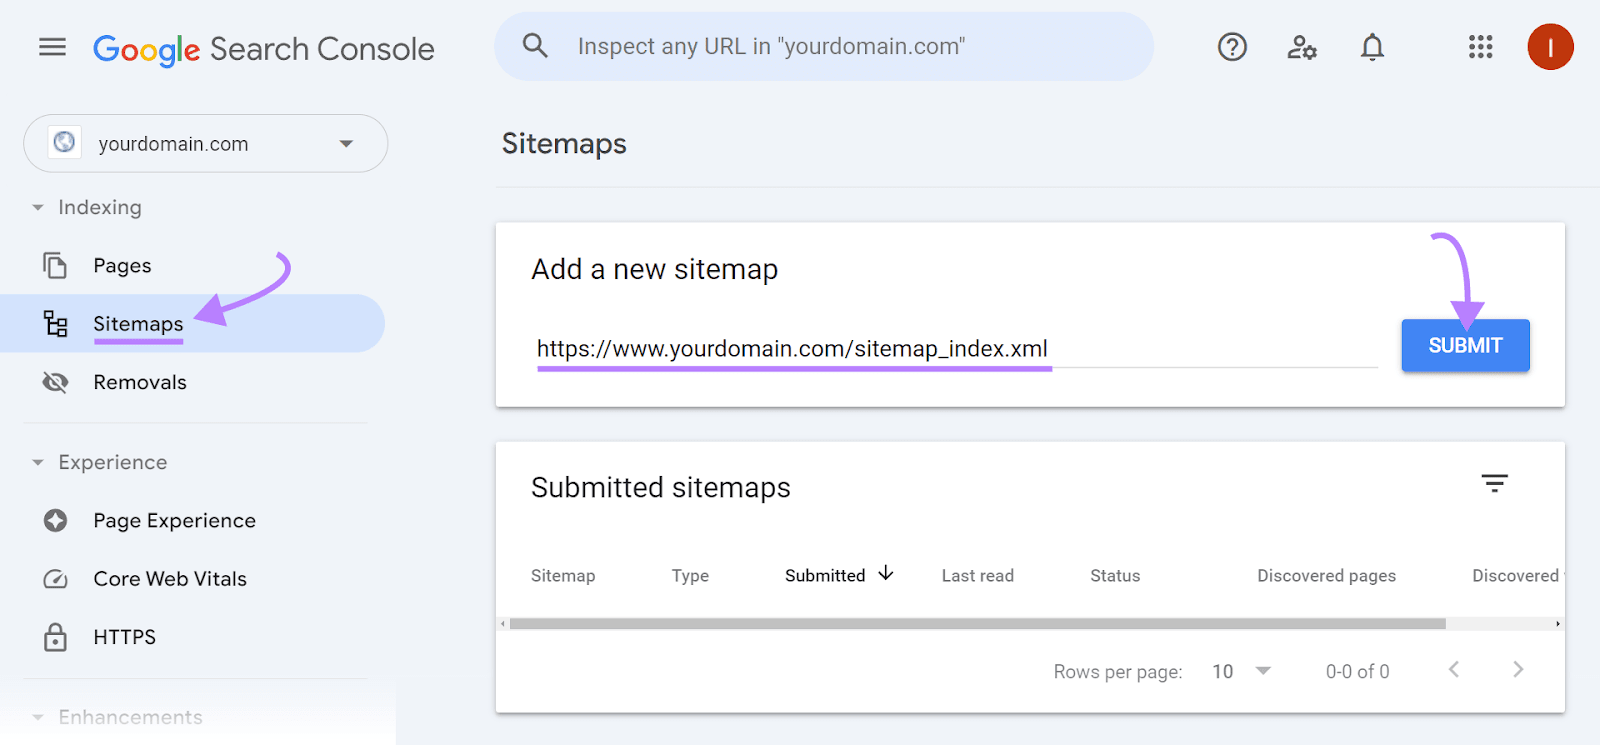
Once you’ve ensured your sitemap is error-free, submit it to Google via Google Search Console (GSC).
Log in to your GSC account and navigate to “Indexing” > “Sitemaps.”
Paste your sitemap URL in the space provided and click “Submit.”
If you use a CMS that creates this file on its own, your sitemap will automatically get updated every time you add new content to your site or update old pages.
But if you manually maintain your sitemap or use a custom setup that doesn’t automatically update it, remember to refresh it when you add new pages or update existing content.
8. Implement Canonical Tags
Canonical tags indicate which version of a page is the primary one when it has multiple versions. To ensure search engines know which version you’d prefer to show in search results.
Without them, search engines have trouble understanding which page to focus on. And may not show any of your pages in search results.
Canonical tags are added in the <head> section of a webpage. Like this:
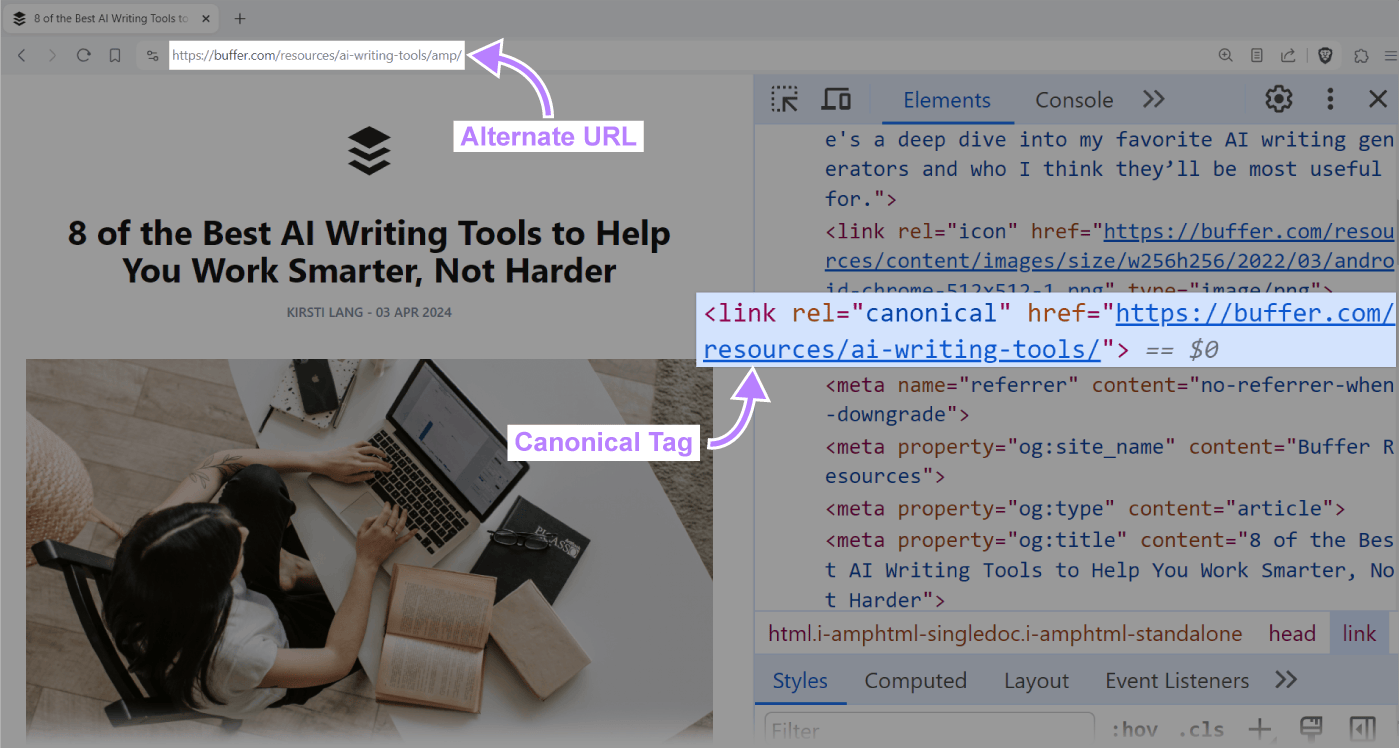
Work with your SEO or marketing team to identify pages that need canonical tags.
They can use Site Audit to find duplicate content issues across your website. By going to the “Issues” tab and searching “duplicate content.”
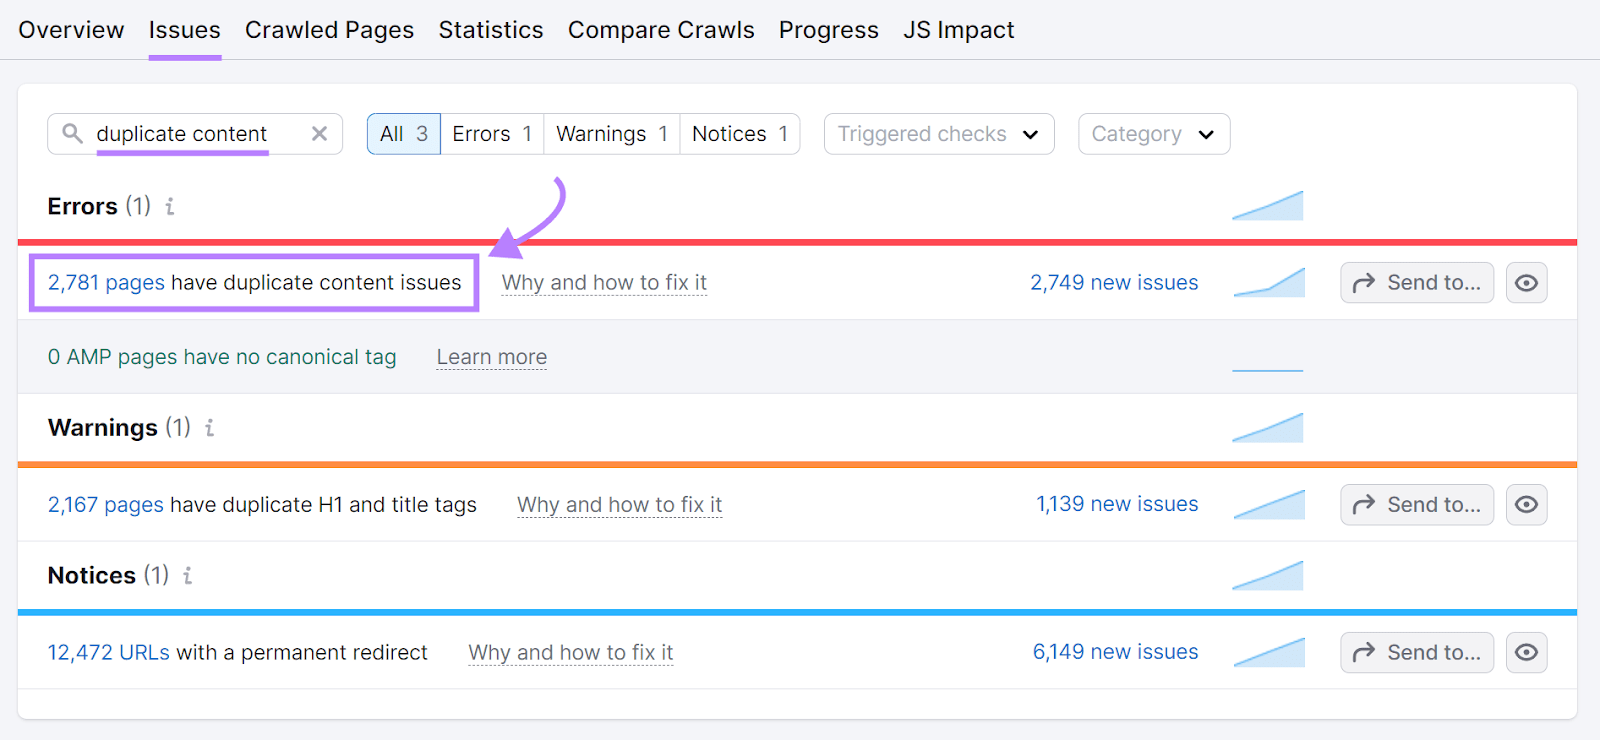
Once they’ve identified the main page for each group of duplicates, you can implement canonical tags.
Just add the following line in the <head> section of the duplicate pages:
<link rel="canonical" href="http://www.yourwebsite.com/main-product-page">
9. Configure Your Robots.txt File Correctly
A robots.txt file tells search engine crawlers which parts of your website to access and which to ignore. Which helps hide pages you don’t want to be indexed and ensures more of your important pages can be found.
Here’s an example of a robots.txt file:
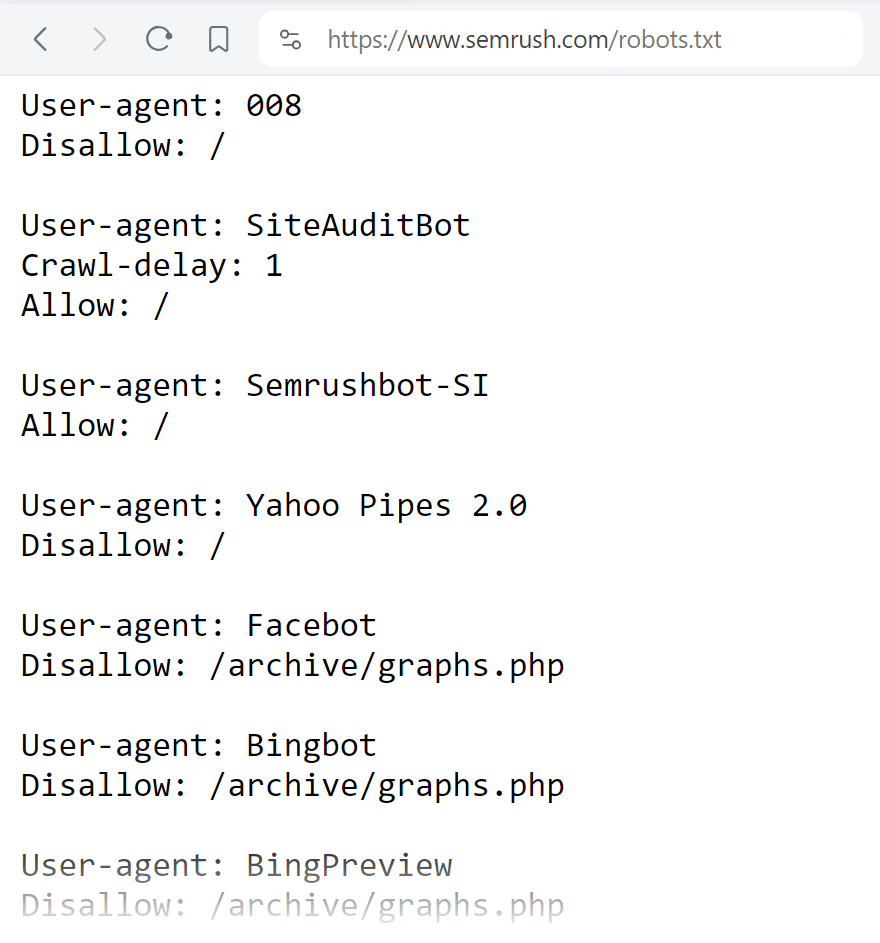
In your robots.txt file, you can use the “disallow” directive to block search engines from indexing specific pages, directories, or entire sections of your site.
The example below shows how to block the entire “private” directory and a specific page:
Disallow: /private/
Disallow: /page.html
You can also use the “allow” directive to make exceptions for specific pages or directories within a blocked section.
Here’s how you would block search engines from the entire “private” directory but allow a specific page within that directory:
User-agent: *
Disallow: /private/
Allow: /private/public-page.html
And you can specify search engine bots using the “user-agent” directive.
For example, this is how you would block Google from crawling your entire site:
User-agent: Googlebot
Disallow: /
To make your own, start by creating a file using a text editor (like Notepad). And include all the appropriate directives (you may have to work with your marketing and SEO teams for this).
When you’re done, upload this robots.txt file to the root directory of your website.
Finally, ensure your robots.txt file has no issues.
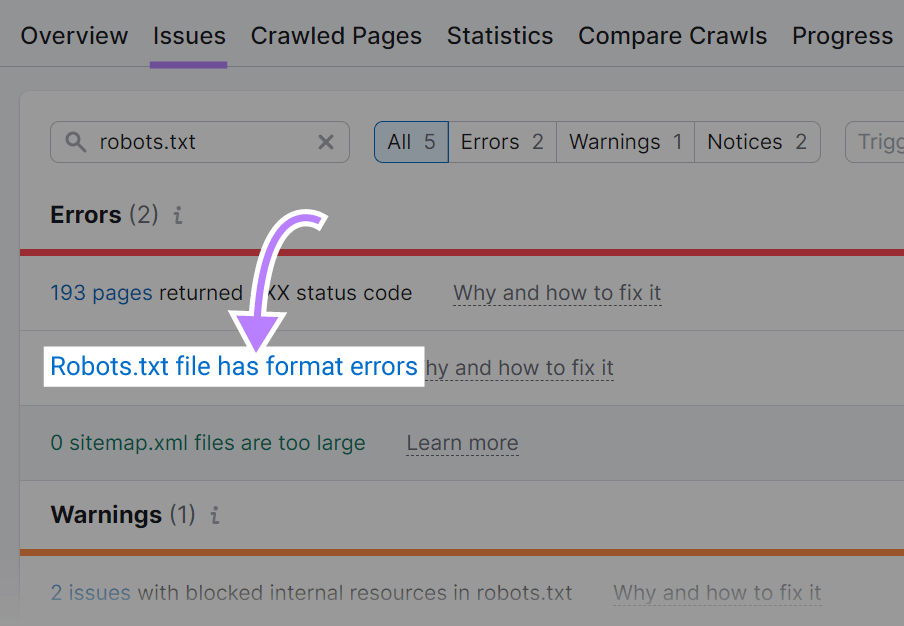
Run a Site Audit and go to the “Issues” tab. And search “robots.txt.”
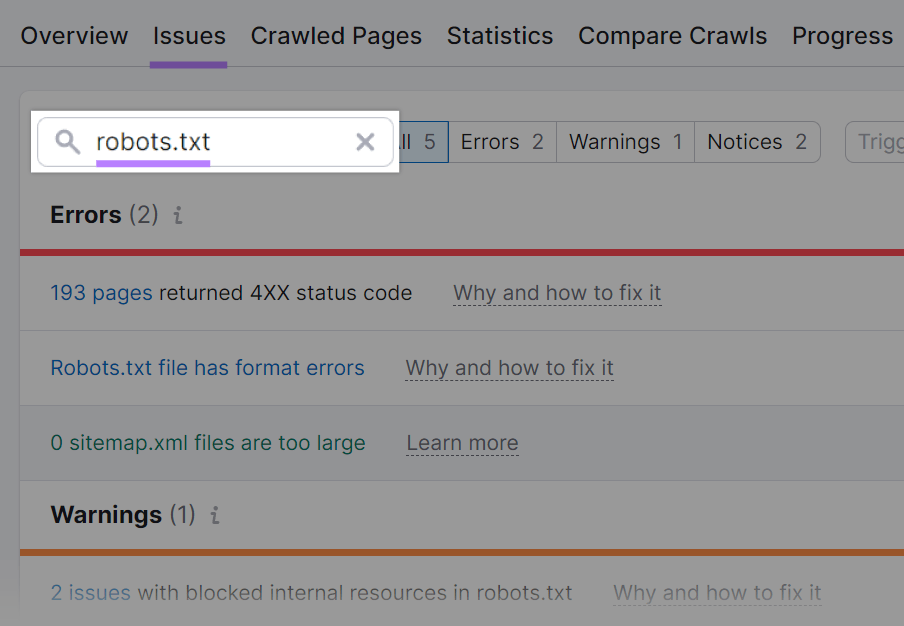
If there are format errors, click “Robots.txt file has format errors” to see a list of invalid lines that need to be fixed.
10. Make Your Website Accessible
Ensuring your website is accessible to everyone—including users with disabilities—creates an inclusive environment and broadens your audience reach. This boosts your site’s UX, which indirectly impacts SEO.
One of the best ways to prioritize accessibility is to use semantic HTML. Which conveys the meaning and structure of your content to help users with visual impairments who rely on screen readers and search engines to understand what’s on the page.
There are two main types of HTML tags:
- Structure tags: These define the overall structure of the page (e.g., <header> for introductory page information and <nav> for navigation links)
- Text formatting tags: These indicate the type of text (e.g., <p> for paragraphs and <a> for links)

To ensure the rest of your team uses these tag types correctly, create replicable templates that include semantic HTML tags.
And know that many CMSs used for creating blog posts provide user-friendly editors that allow content creators to apply these elements without writing code directly.
You can further enhance accessibility by making your site keyboard-navigable. So, ensure all interactive elements (like links, buttons, and form controls) are reachable and operable with a keyboard.
And aim for sufficient contrast between text and background colors to improve readability for users with visual impairments.
Use Semrush’s Accessibility Scan & Monitor app to check your site’s accessibility compliance.
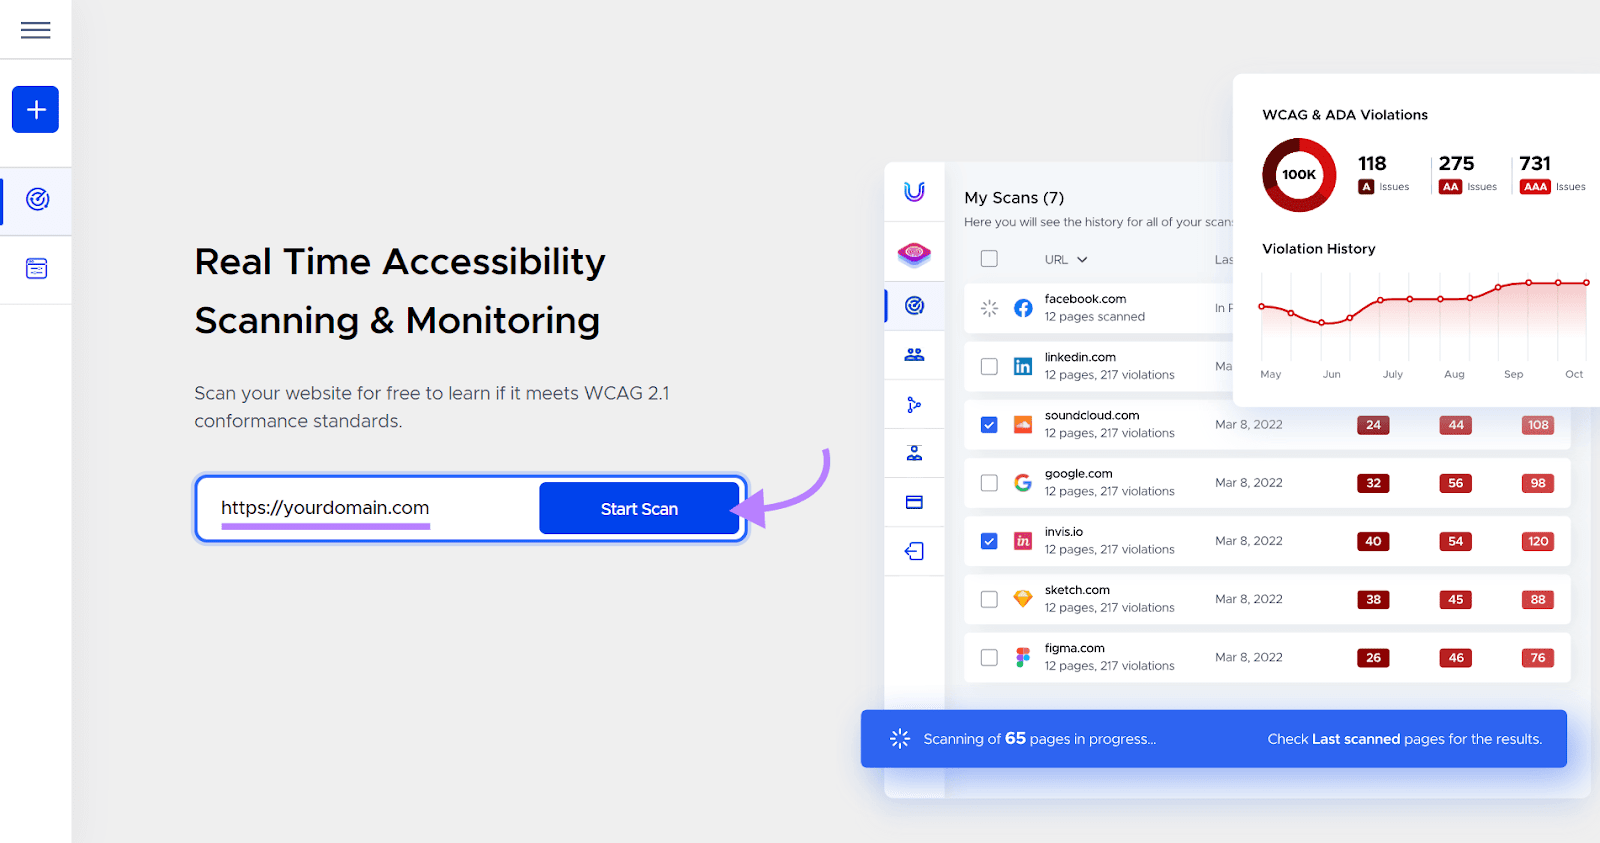
Open the tool, enter your domain, and click “Start Scan.”
Select the URLs you want to evaluate from the list and click “Scan # pages.”
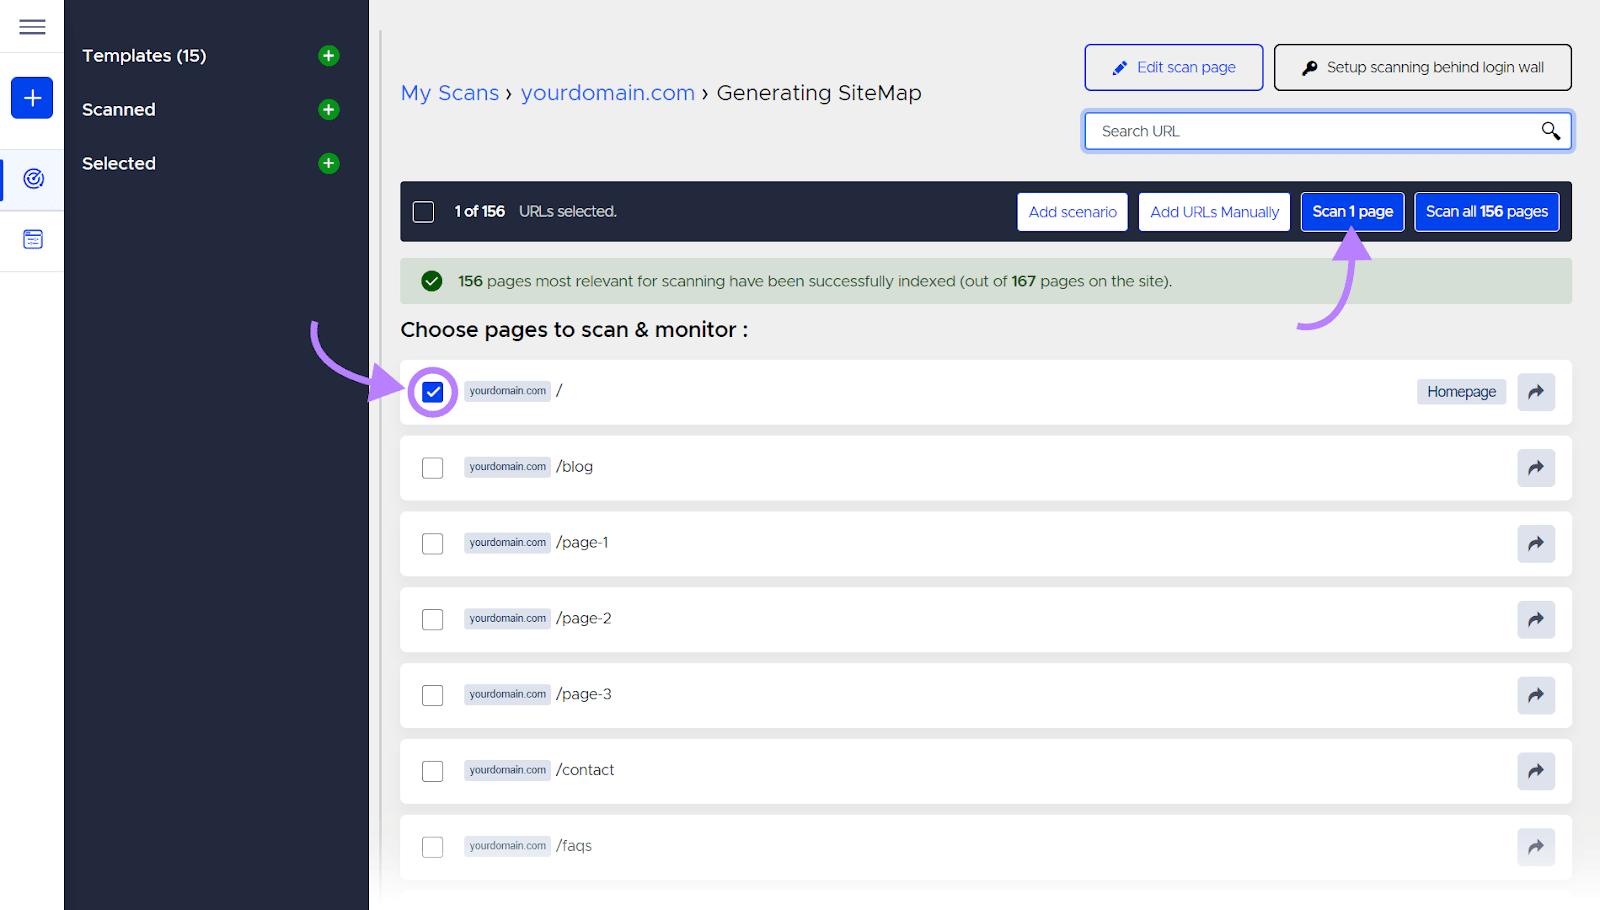
The tool uses AI to scan your site for issues (on desktop and mobile). And helps you identify website elements and lines of code leading to violations.
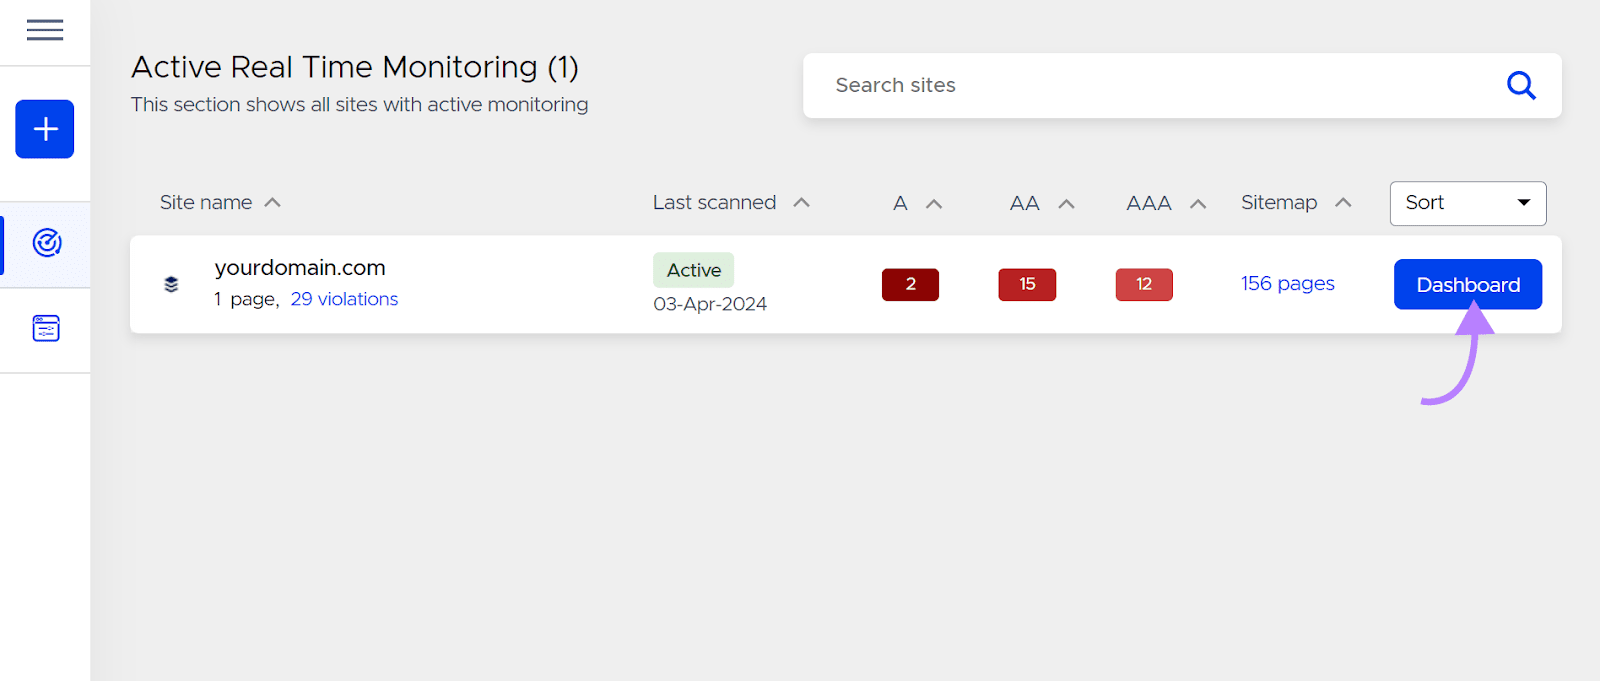
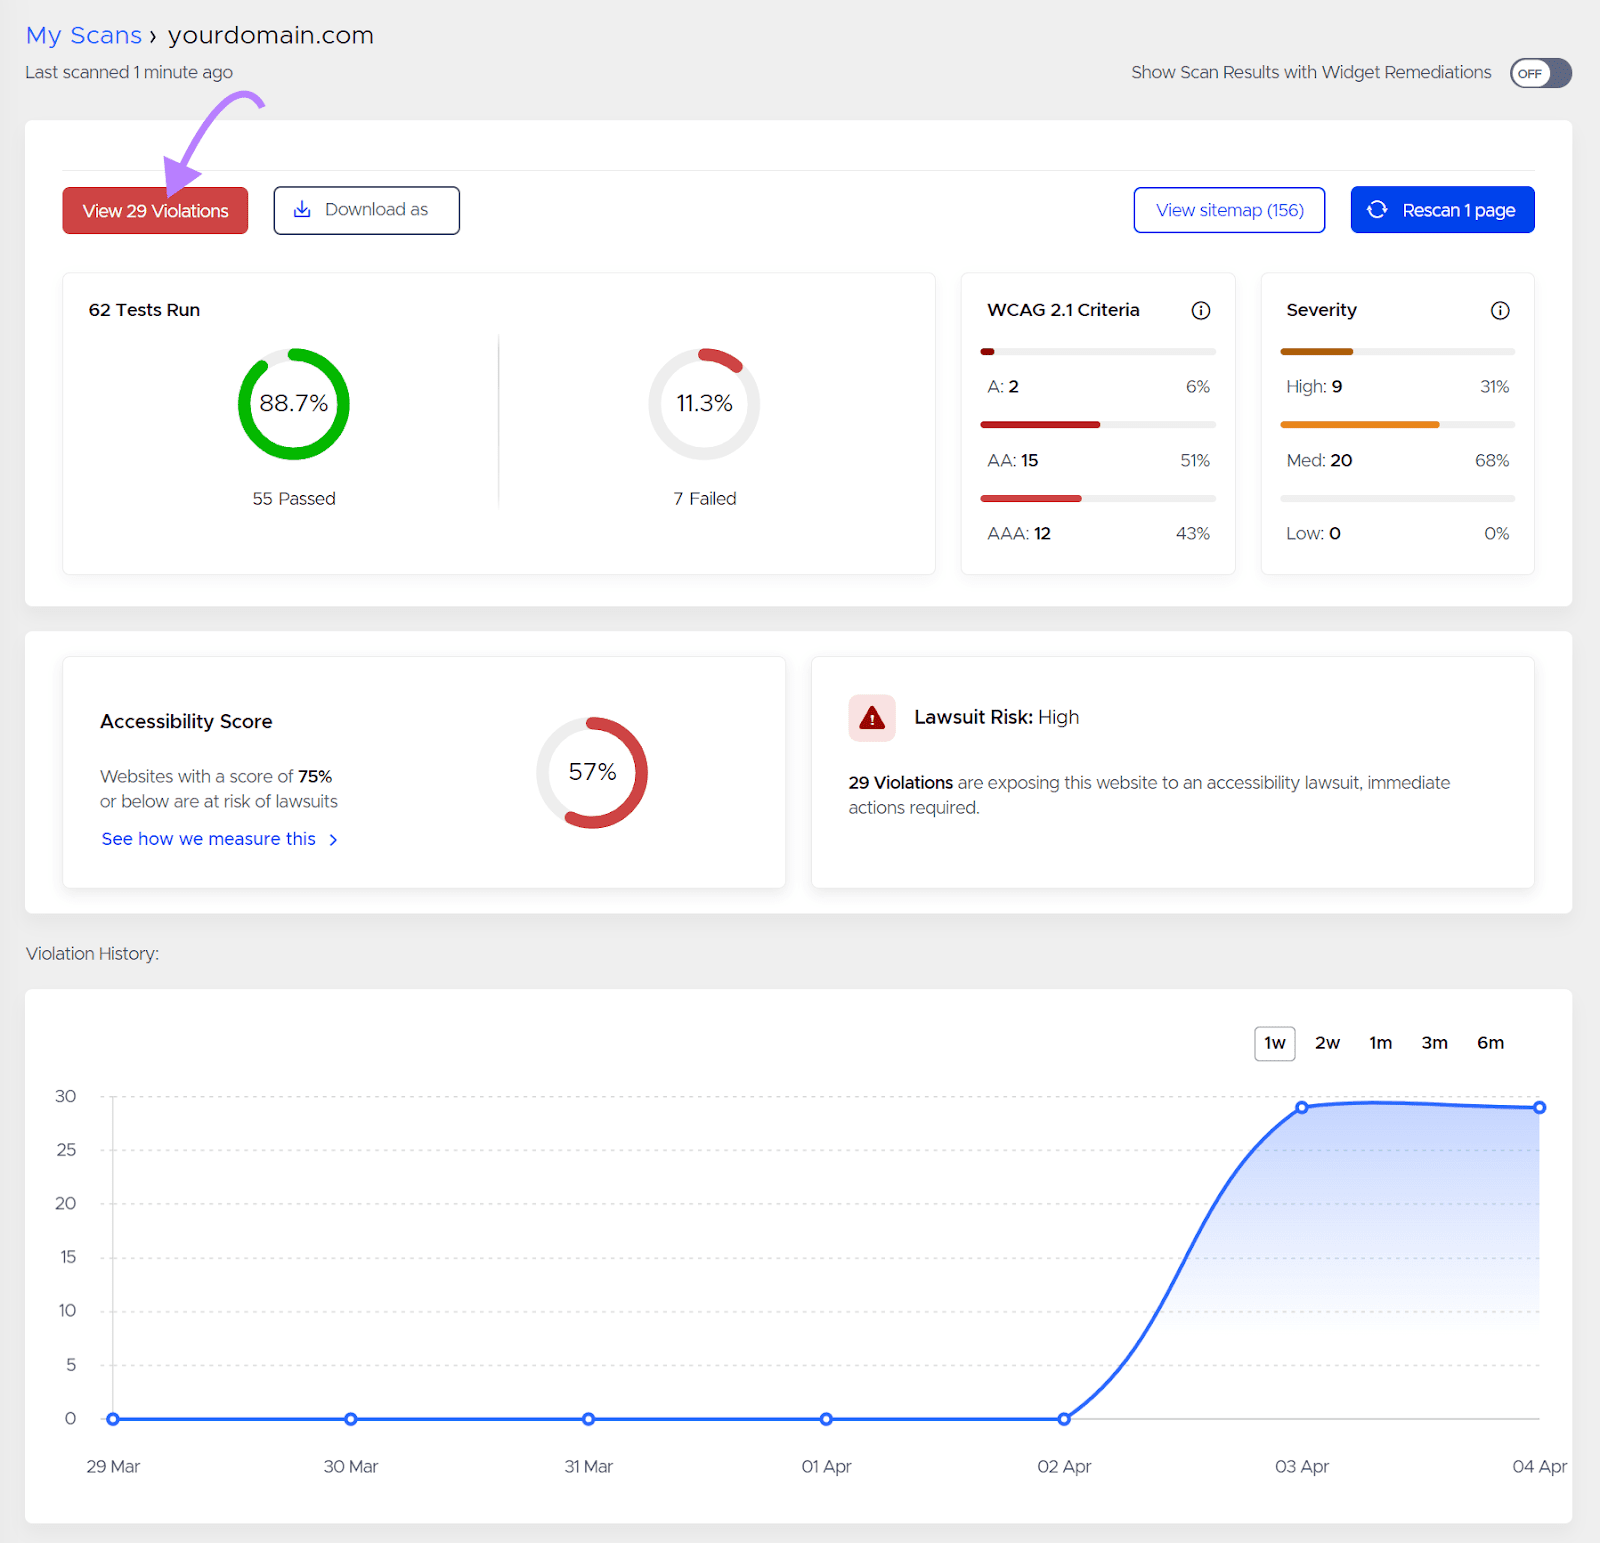
Click the “Dashboard” button to be taken to a report scoring your accessibility compliance and listing all the violations.
To learn more about the violations, click the “View # Violations” button.
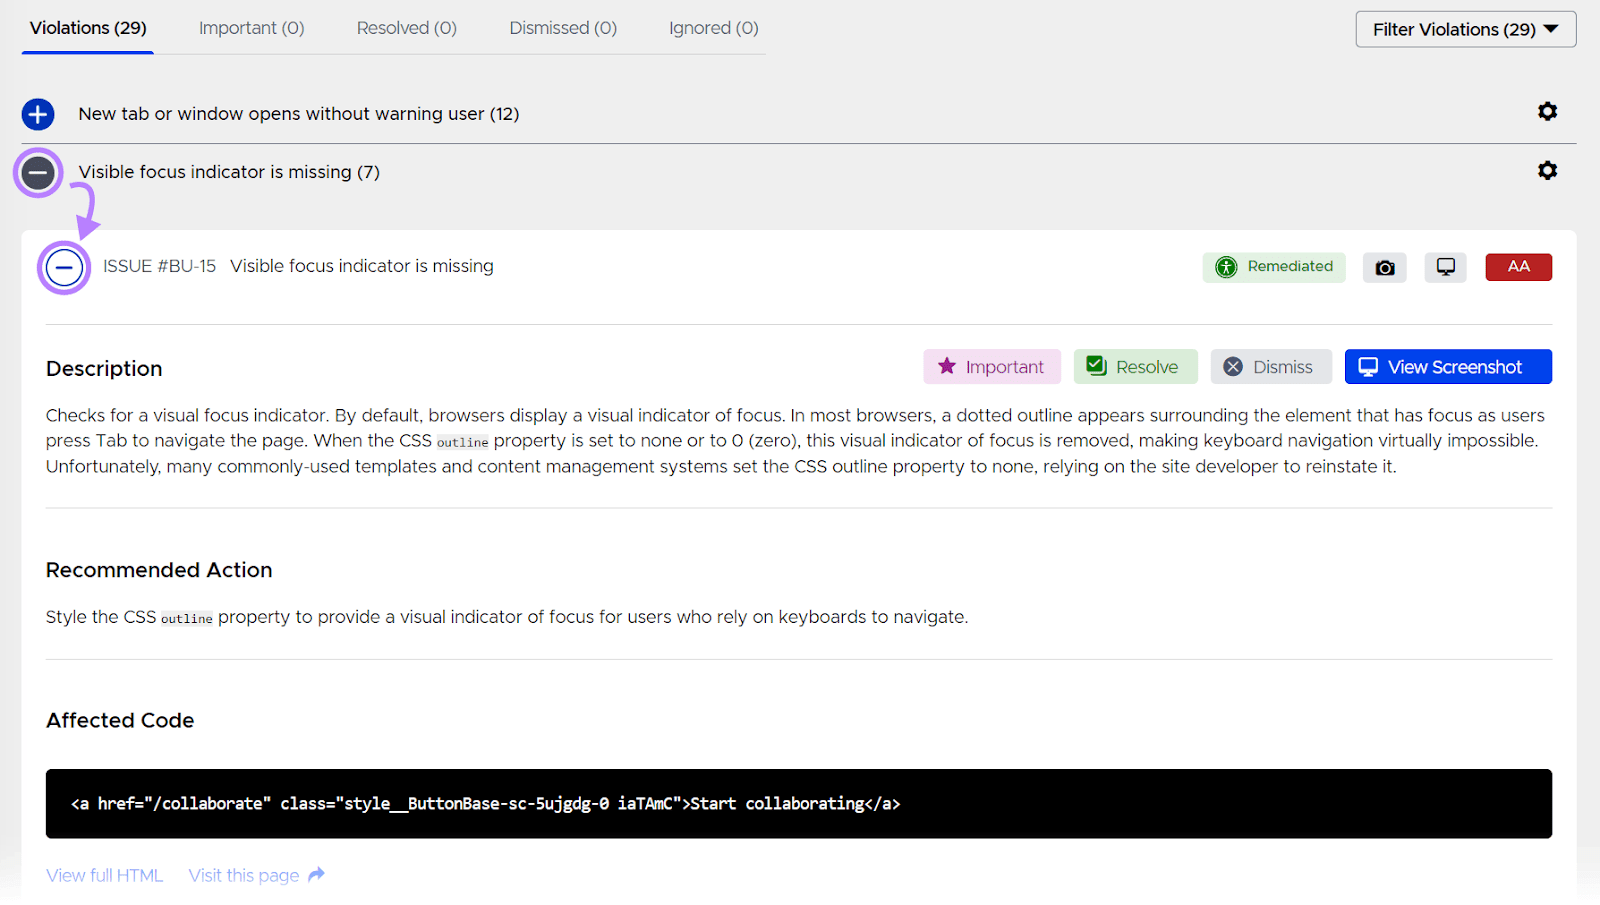
Expand an issue by clicking the “+” icon.
You’ll find a description of the violation, recommended action, and the affected code.
Many of these changes will be relevant to those who work on content at your company, so it’s best to share these issues with them. And you can work through them together.
Improve Your Website’s SEO
Helping your company achieve its goals depends in part on succeeding with SEO. For developers, that means ensuring a strong technical foundation that’s primed for search engines.
Get started with Semrush’s Site Audit tool.
Audit your website, identify technical SEO issues, and fix them.
You can even try it for free.
Source link : Semrush.com
