What Is Noindex?
Noindex is a rule that tells search engines like Google not to index a given webpage—to prevent it from being stored in a database that’s drawn from to show search results.
This means that when you noindex a page, search engines won’t save that page. And it won’t show up in search results when people look for information online.
You might noindex pages you don’t want the public to see. Like private content or PDF pages on your site.
In this post, we’ll cover everything you need to know about using the noindex rule effectively.
But first, let’s go over why you should care about the noindex directive in the first place.
Why Is Noindexing Important in SEO?
The noindex rule helps you control which pages are indexed by search engines. And that allows you to impact your site’s search engine optimization (SEO) performance.
For example, let’s say you have thin pages (those that offer little value) that you’re unable to remove for one reason or another.
Using noindex rules on these low-quality pages can prevent them from negatively impacting your site’s SEO performance. And instead focus search engines’ attention on other, more important pages.
That said, you don’t want to accidentally noindex any important pages on your site. If you do, they won’t rank in search results. Harming your visibility and traffic.
So, always double-check your noindex implementation.
When to Use the Noindex Directive
Various types of content are prime candidates for using the noindex rule. These include:
- Thin pages: These pages don’t offer much value to users, so they can harm your SEO performance
- Pages in a staging environment: These pages aren’t meant for the public to see or use. They’re meant for your team to make updates and check things.
- Internal admin pages: These pages are meant for you and your team. So, you don’t want them to appear in search results.
- Thank you pages: These pages are displayed to users after they’ve completed an action like downloading something or making a purchase. You don’t want people finding these pages directly from search results because it might confuse them.
- Downloadable content: These pages are resources that users are meant to access by filling out a form. So, you don’t want potential prospects finding them without having to provide their contact information.
How to Noindex a Page
Now that you know which pages need to be noindexed, it’s time to get to the actual implementation.
There are two ways to implement the noindex rule:
- As an X-Robots-Tag in the HTTP response header, which is useful for non-HTML files like PDFs, images, and videos
- As a meta tag in your HTML, which is useful for most webpages
Implementing a noindex rule via the HTTP header method is quite technical and requires server-level changes.
Basically, you need to add a line of code to one of your server configuration files (usually .htaccess).
For Apache servers (one of the most widely used web servers), the code looks like this if you want to noindex all PDF files across your entire website.
<Files ~ "\.pdf$">
Header set X-Robots-Tag "noindex"
</Files>
Given the complexity and potential risks involved, we recommend seeking help from a developer. Because even a small syntax error can break your website.
As for the meta tag noindex method, it’s relatively simpler and can be implemented directly in your pages’ HTML.
The tag goes in the <head> section and looks like this:
<meta name="robots" content="noindex">
If you’re using a content management system (CMS) like WordPress, you can often use SEO plugins to implement noindex meta tags without directly editing code.
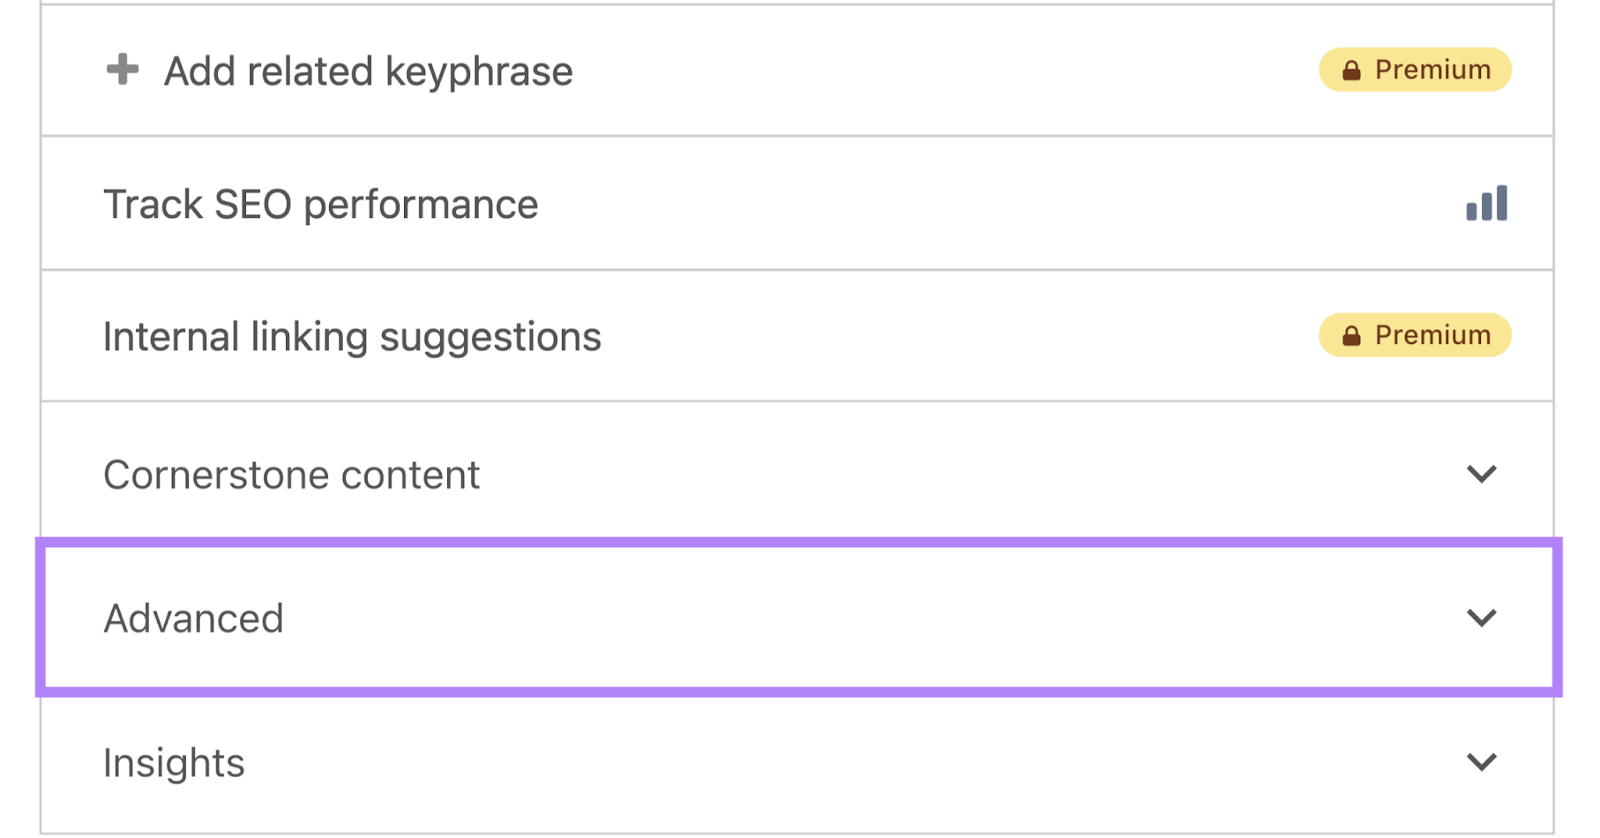
To do that using the Yoast SEO plugin, open the page you want to noindex in the editor, scroll down to the Yoast SEO section, and click the “Advanced” tab.
Under “Allow search engines to show this content in search results?,” select “No” from the drop-down.
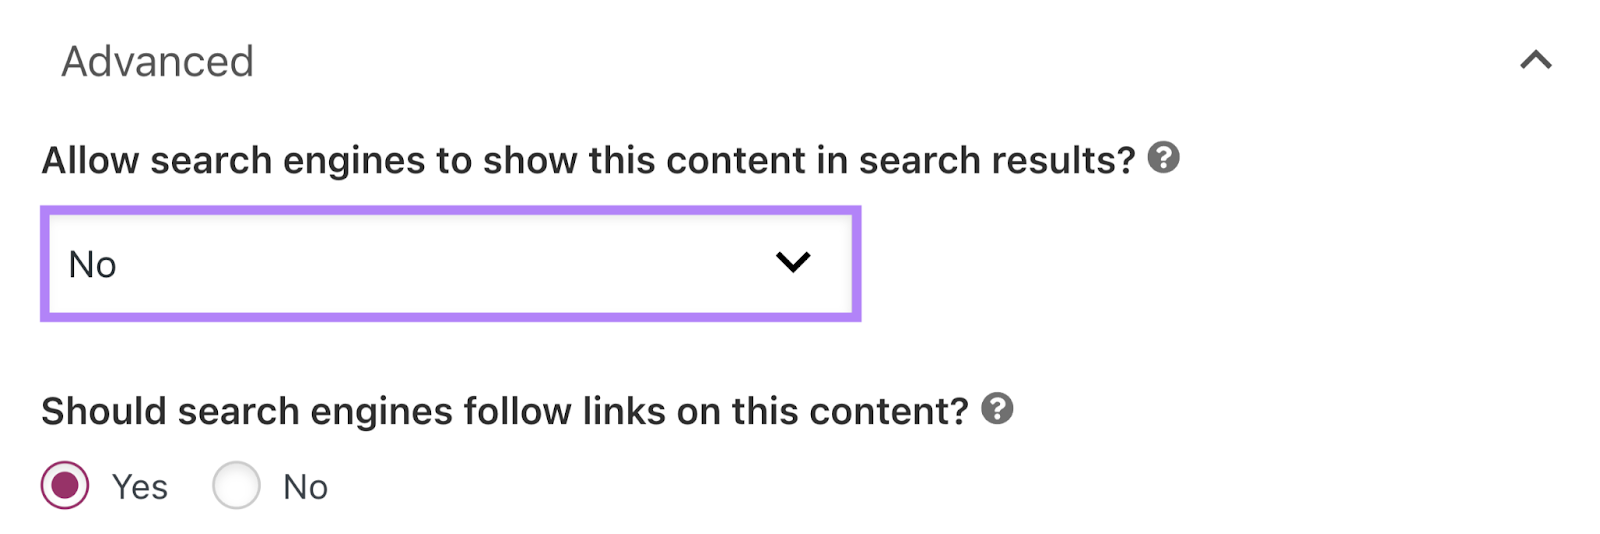
Then, save the post.
To use the Rank Math SEO plugin, open the page you want to modify in the editor, go to the Rank Math SEO section, and click the “Advanced” tab.
Under “Robots Meta,” uncheck the box next to “Index” and check the one next to “No Index” instead.
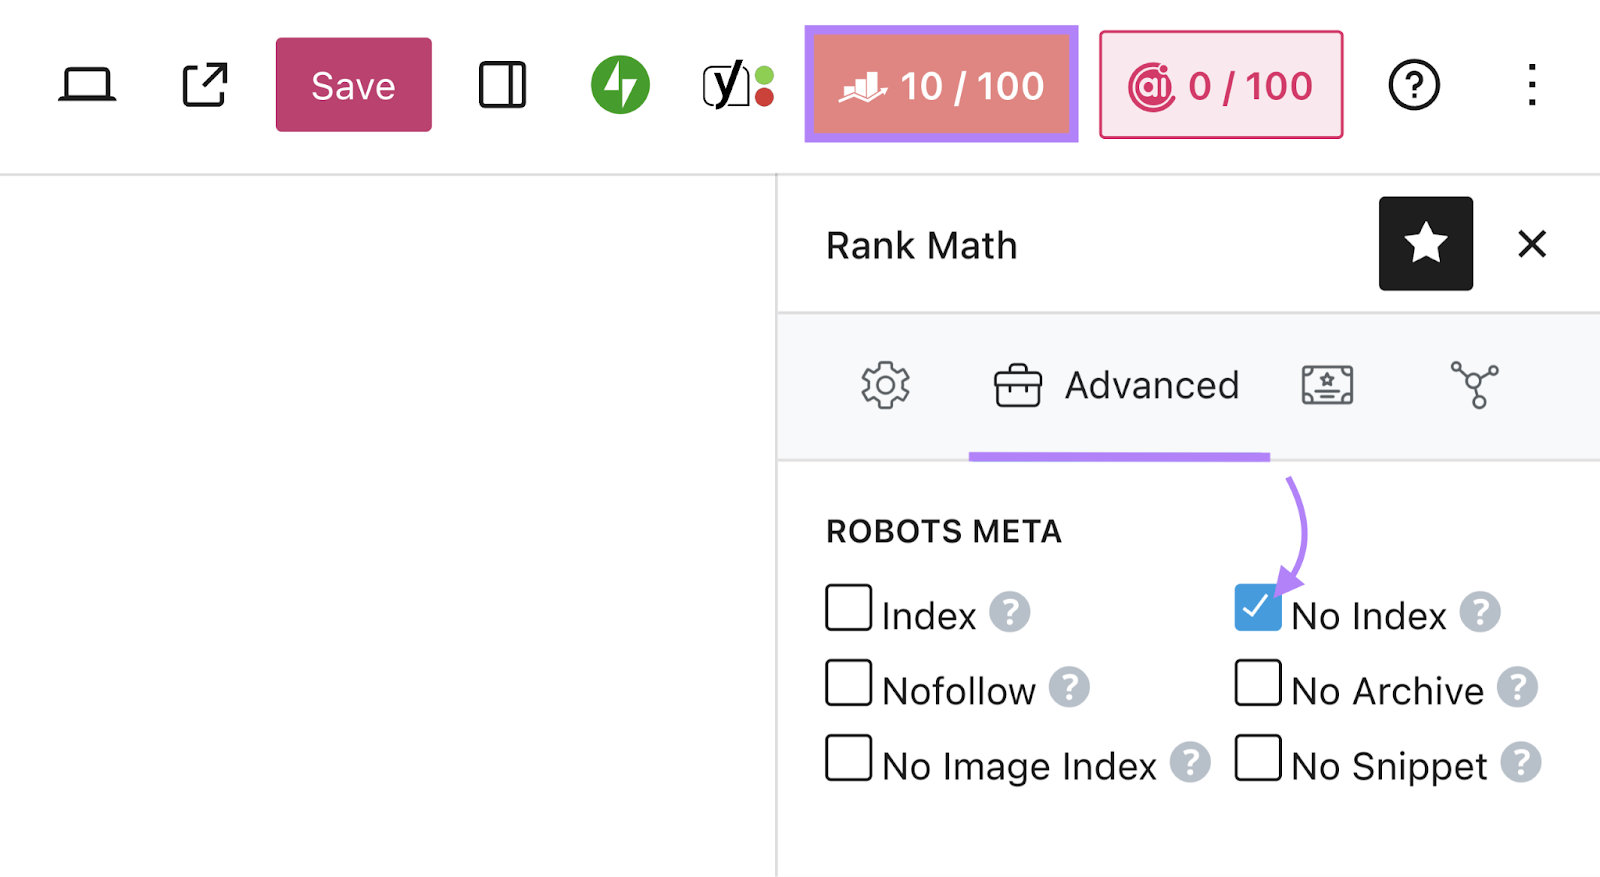
Save the post to update your settings.
Best Practices for Using Noindex Rules
Here are some best practices to keep in mind while you’re working with noindex directives.
1. Don’t Noindex Pages You Want to Appear in Search Results
The noindex rule prevents a page from getting indexed and shown in search results. So, if you want a page to be found through search, don’t noindex it.
Use Semrush’s Site Audit tool to make sure you haven’t accidentally noindexed important pages.
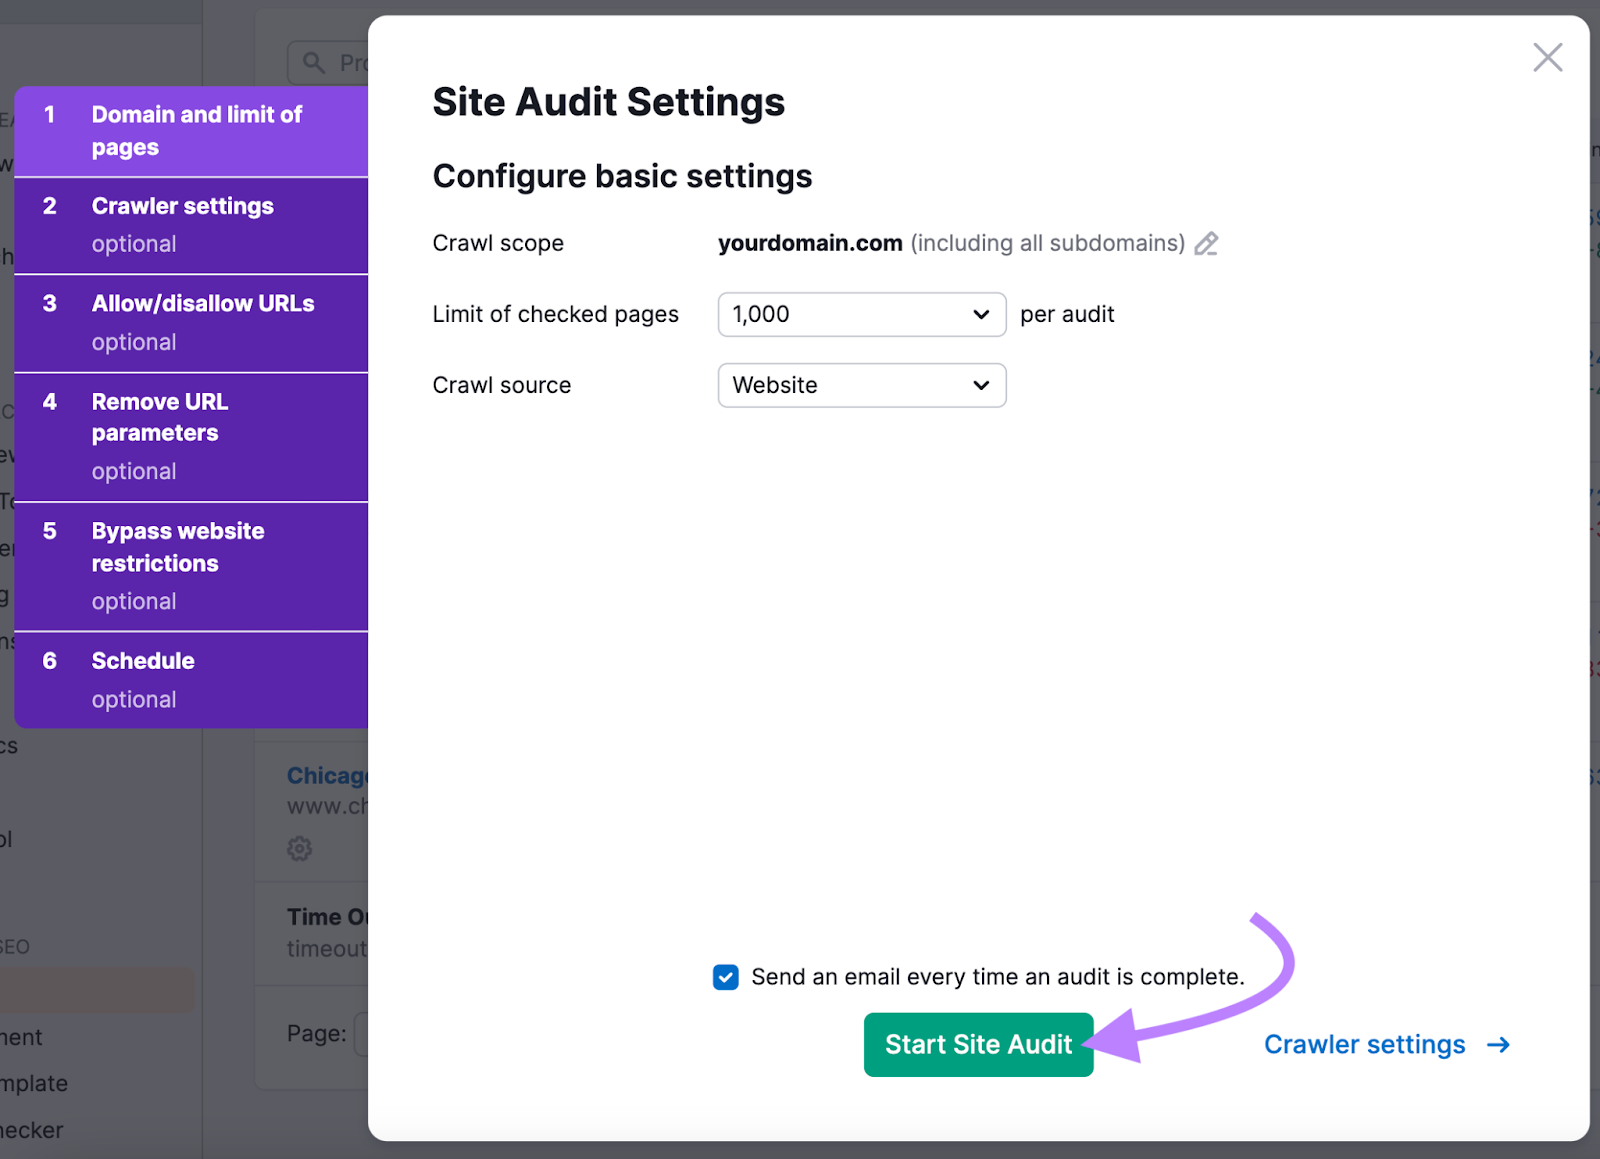
Open the tool, enter your domain name, and click “Start Audit.”

Follow the prompts to configure your settings.
When you’re done, click “Start Site Audit.”
After the audit is complete, head to the “Issues” tab. And use the search bar to enter “noindex.”
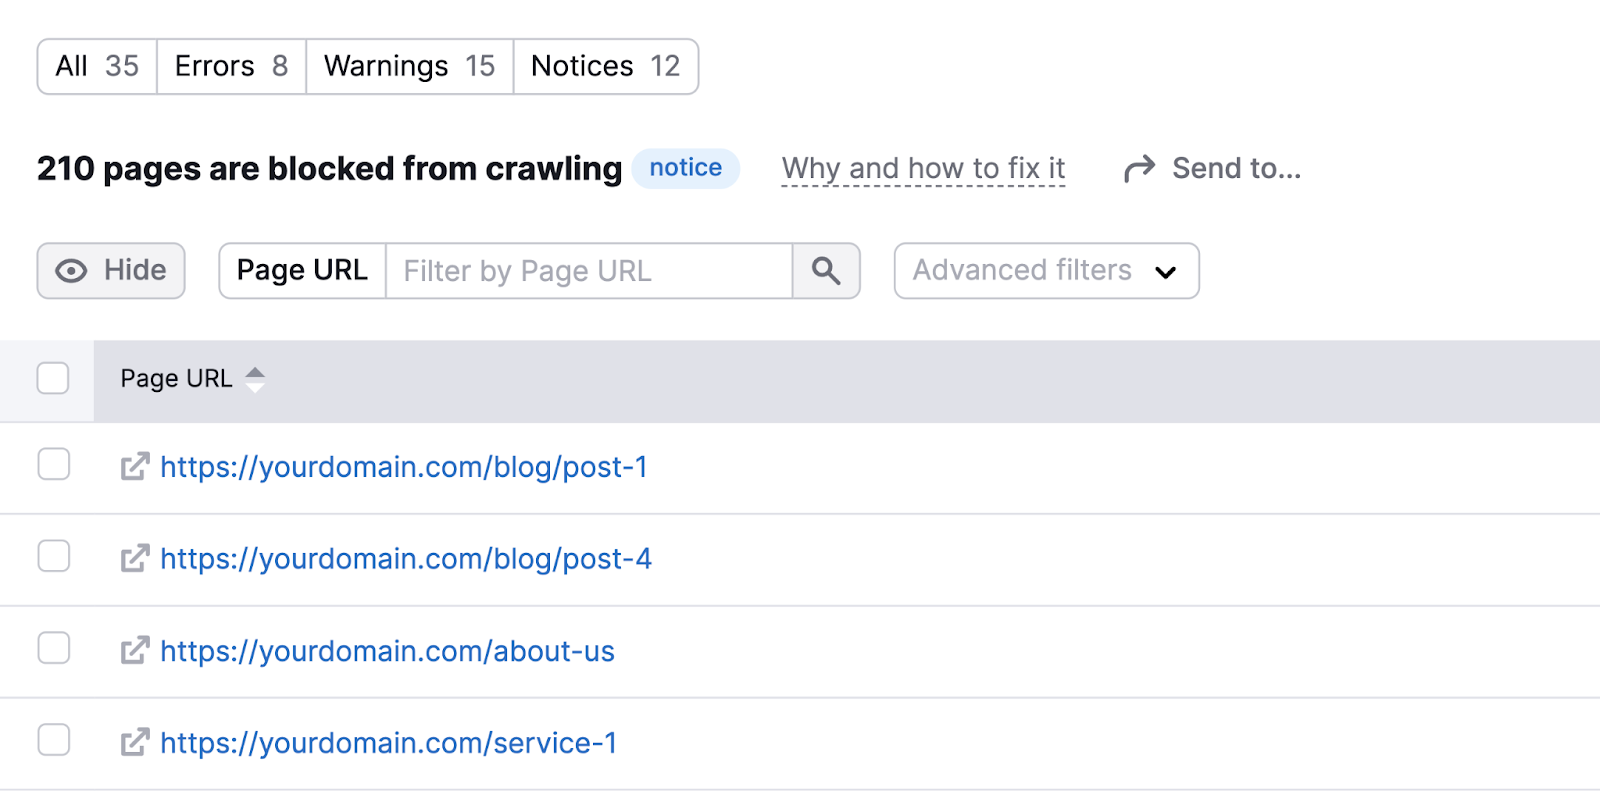
You’ll see the number of pages blocked by noindex tags or robots.txt (this file tells search engines which pages should and shouldn’t be crawled). You’ll also see whether any pages are noindexed using the X-Robots-Tag method.
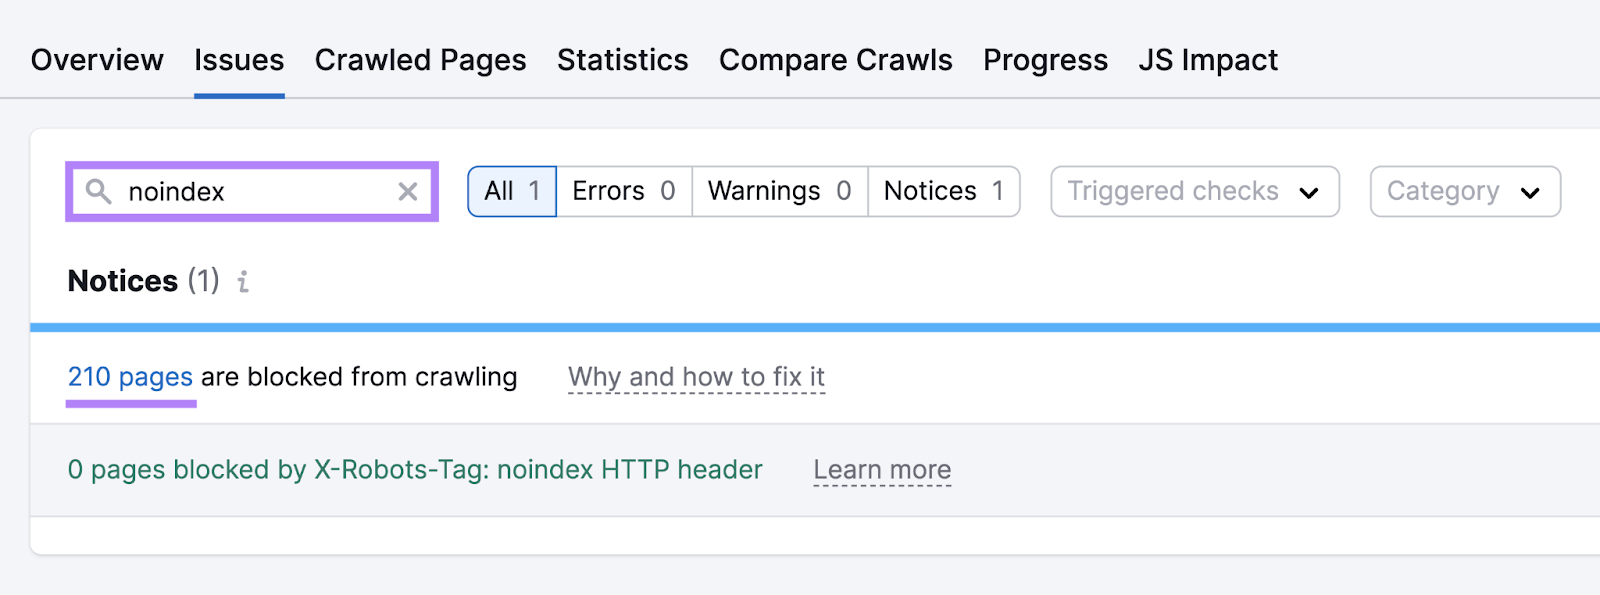
Click the blue number in either issue to view the list of affected pages. And verify that none of those pages have accidentally been noindexed.
2. Don’t Try to Prevent Indexing Using Your Robots.txt File
The robots.txt file tells search engines which pages to crawl—not which pages to index.
Even if you block a page in robots.txt, search engines might still index it if they find links to it from other pages.
Plus, you actually need search engines to be able to crawl your pages for them to see the noindex tag.
Check your robots.txt file to make sure it’s not blocking pages you want to noindex.
You can do this by visiting “[yourdomain.com]/robots.txt.”
Look for the “Disallow” directives in your robots.txt file.
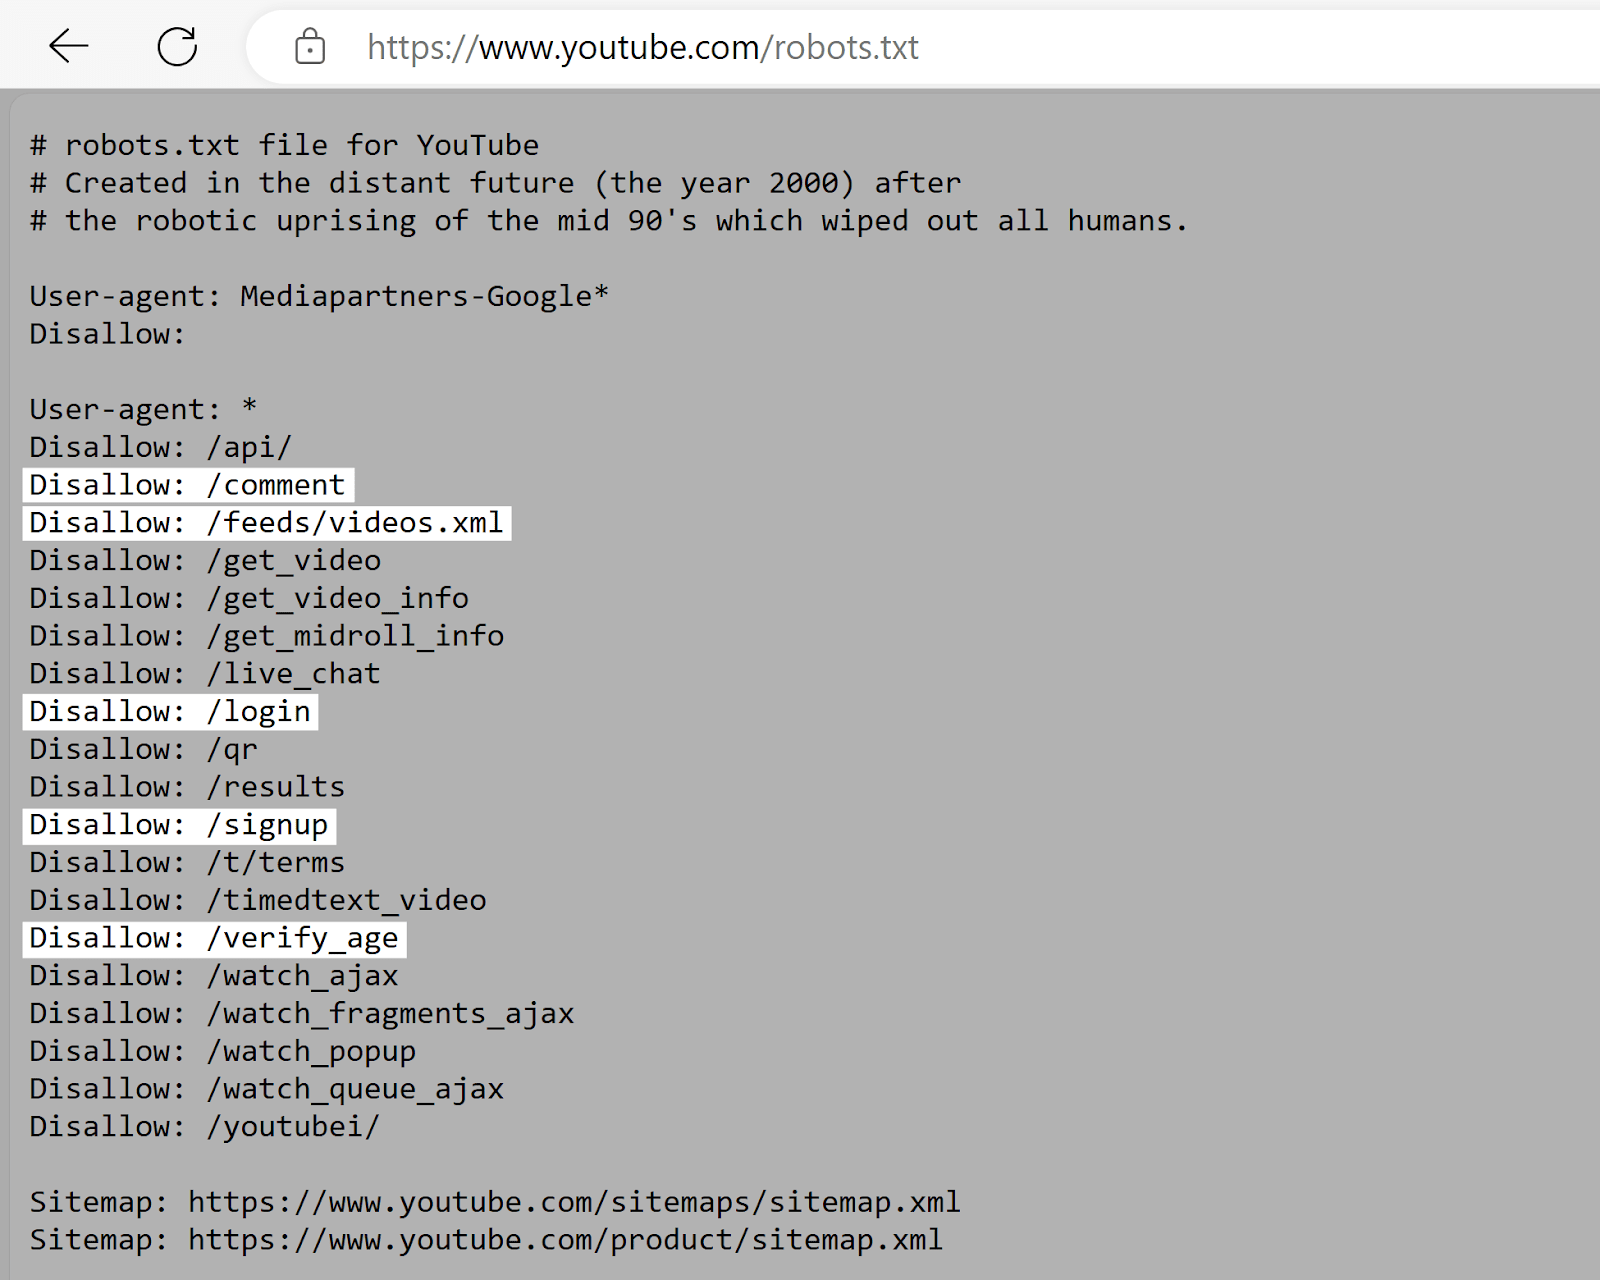
These tell search engines which pages or directories they shouldn’t access. So, make sure the pages you want to noindex aren’t listed here.
3. Take Steps to Address Nofollow Issues That Might Arise
Noindexing can harm your SEO if the webpages you’re blocking from appearing in search results are among the only links pointing to some of your other pages.
How?
Search engines will only follow links on a noindexed page for a while. And eventually treat those links as nofollow (i.e., that they shouldn’t be followed or pass ranking strength).
If there are other pages on your site with few internal links and some of those links are from your noindexed content, it can become more difficult for search engines to find those other pages.
So, they may not appear in search results. Even if you want them to.
Use Site Audit to look for the “# pages have only one incoming internal link” notice and click the blue number.
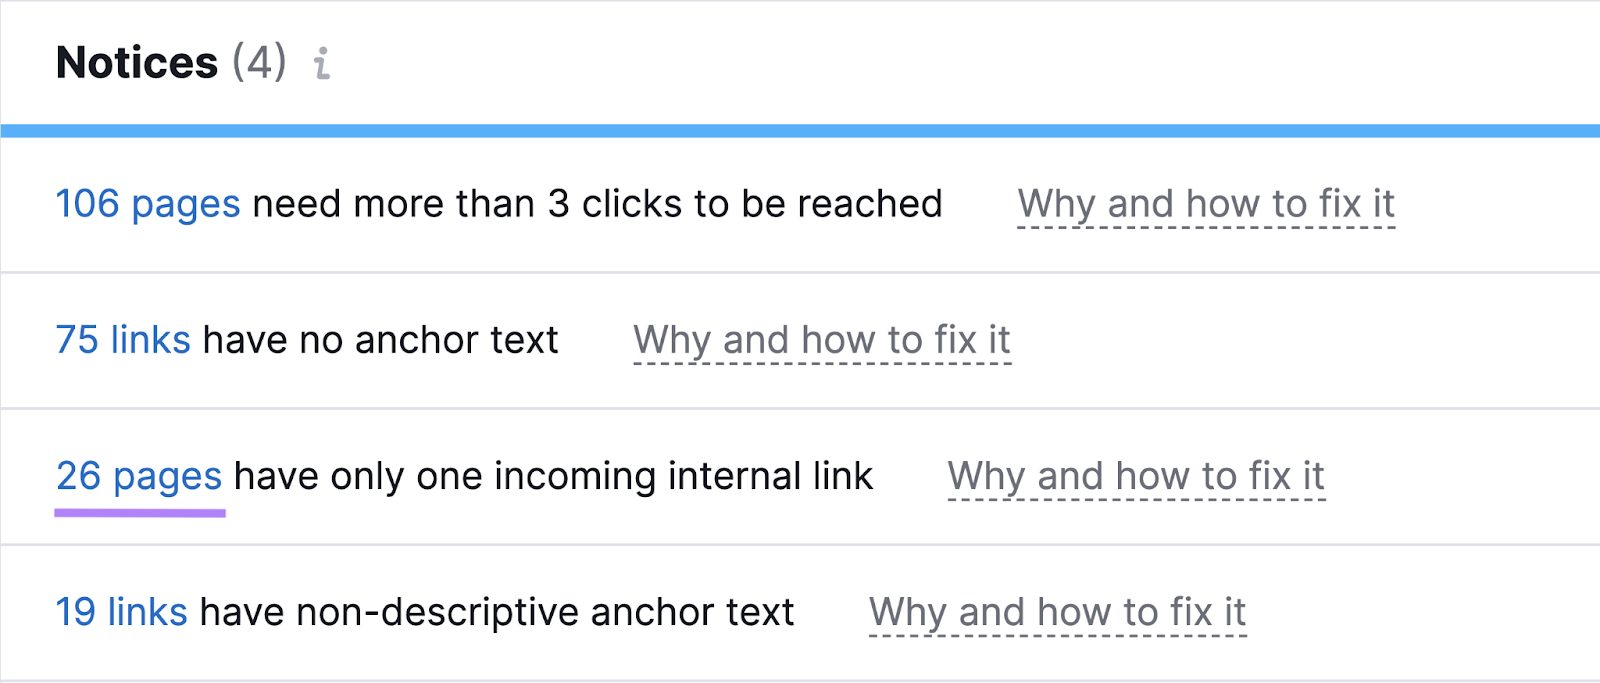
You’ll then see the affected pages.
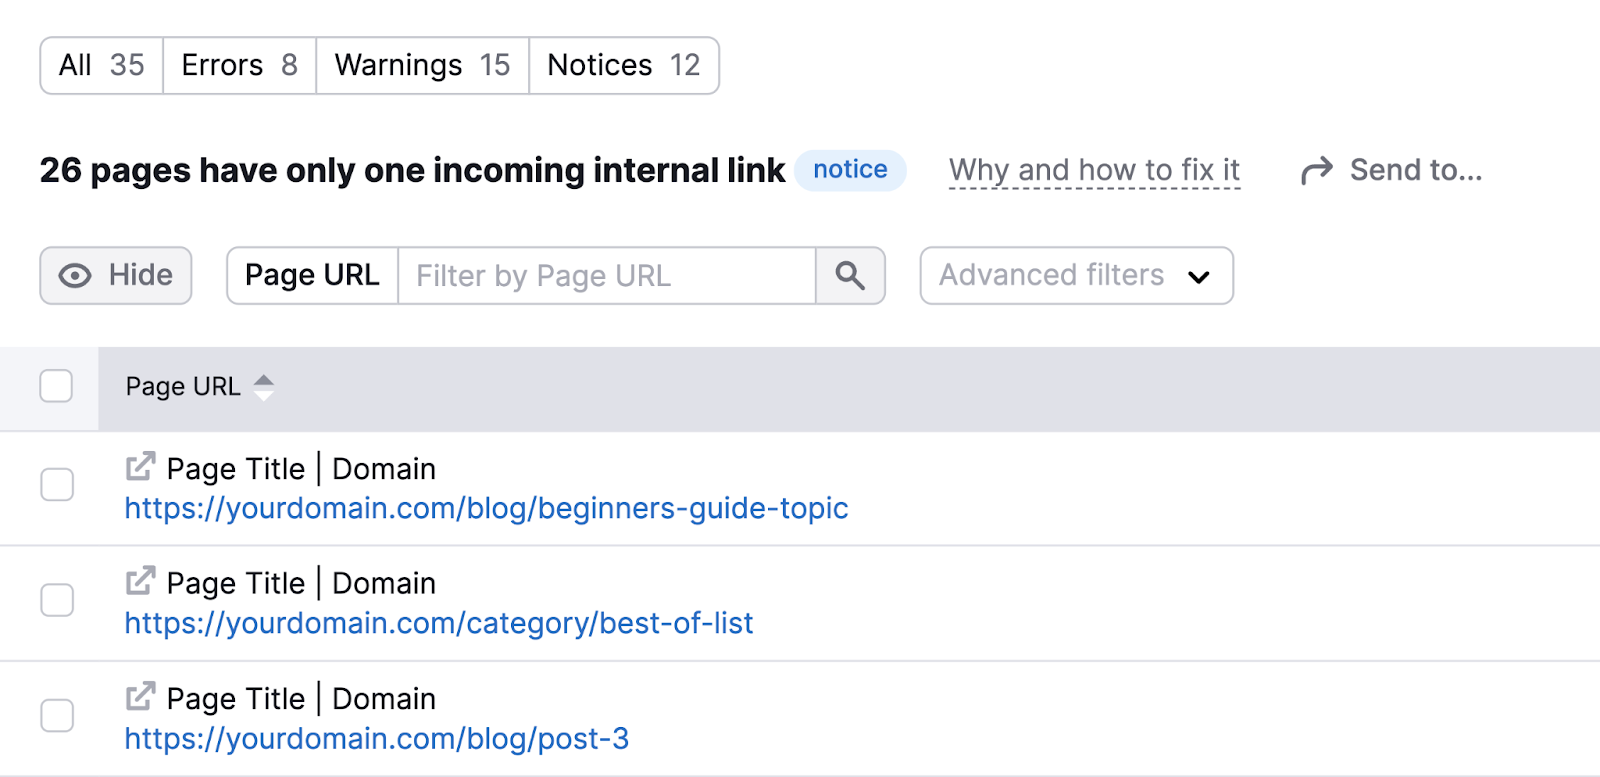
Work to incorporate more links to these pages across your site.
This is a good idea even if the only incoming internal link isn’t from a noindexed page.
4. Don’t Use a Noindex Directive for Duplicate Content
Duplicate content is when you have two or more pages that have exactly the same or very similar content. Which makes it hard for search engines to decide which version to index and rank in search results.
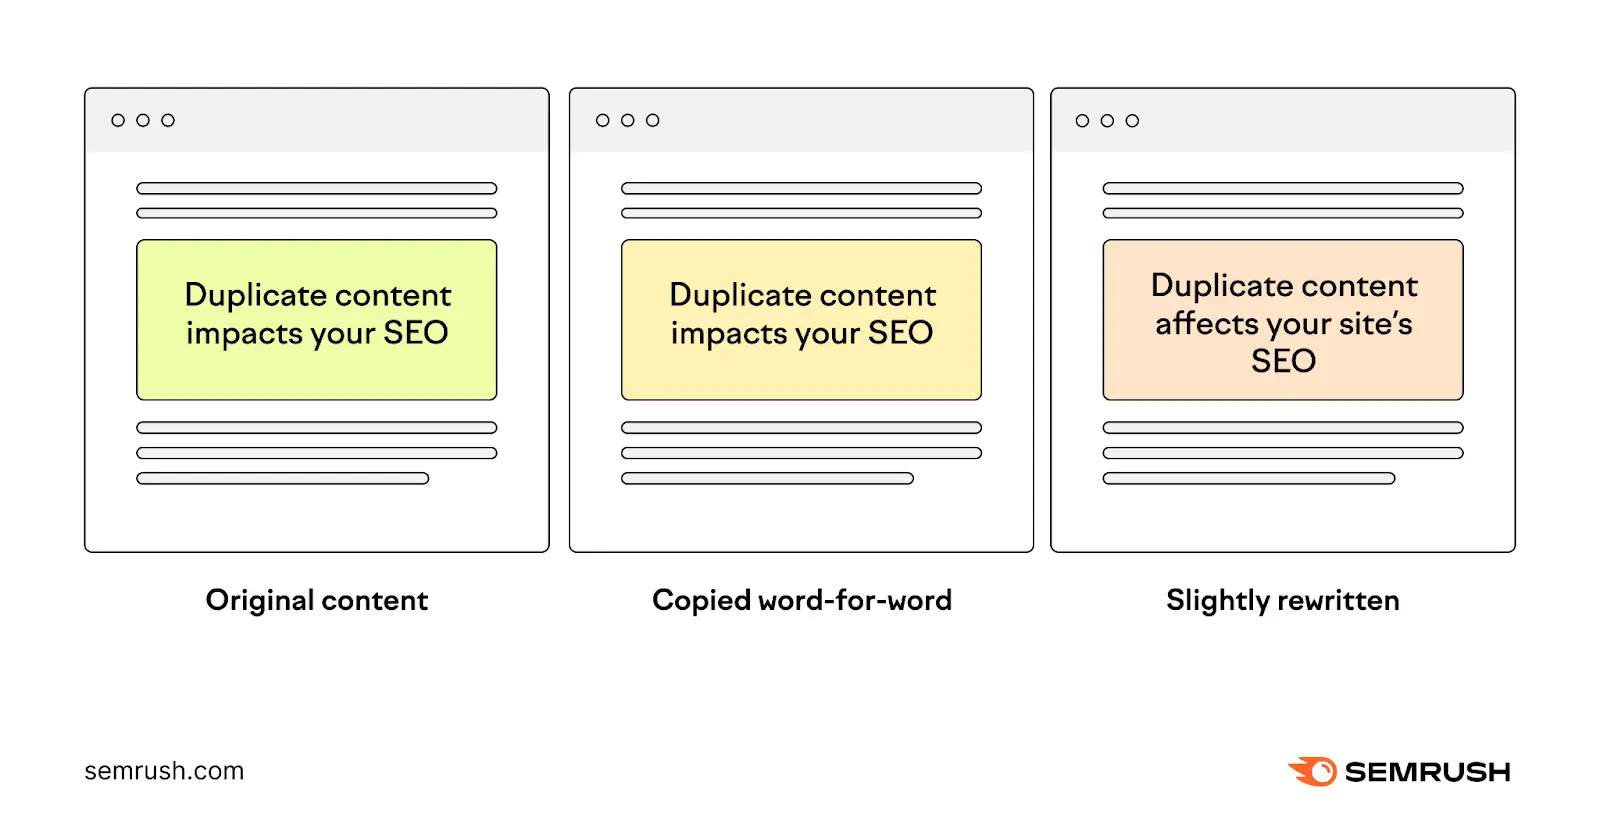
It might seem like using noindex tags on duplicate pages is a good option, but this isn’t the best solution.
Instead, consider using canonical tags.
They tell search engines which version of a page is the main one and should be indexed. Most importantly, they also consolidate ranking strength from all versions to the main page.
5. Request a Recrawl if Noindexed Pages Still Appear in Search Results
Noindexed pages might still appear in search results if Google hasn’t recrawled the page since you added the noindex tag. But you can speed up the process by manually requesting a recrawl.
To do this, use Google Search Console (GSC).
Log in to GSC and click “URL inspection” in the left-hand menu.
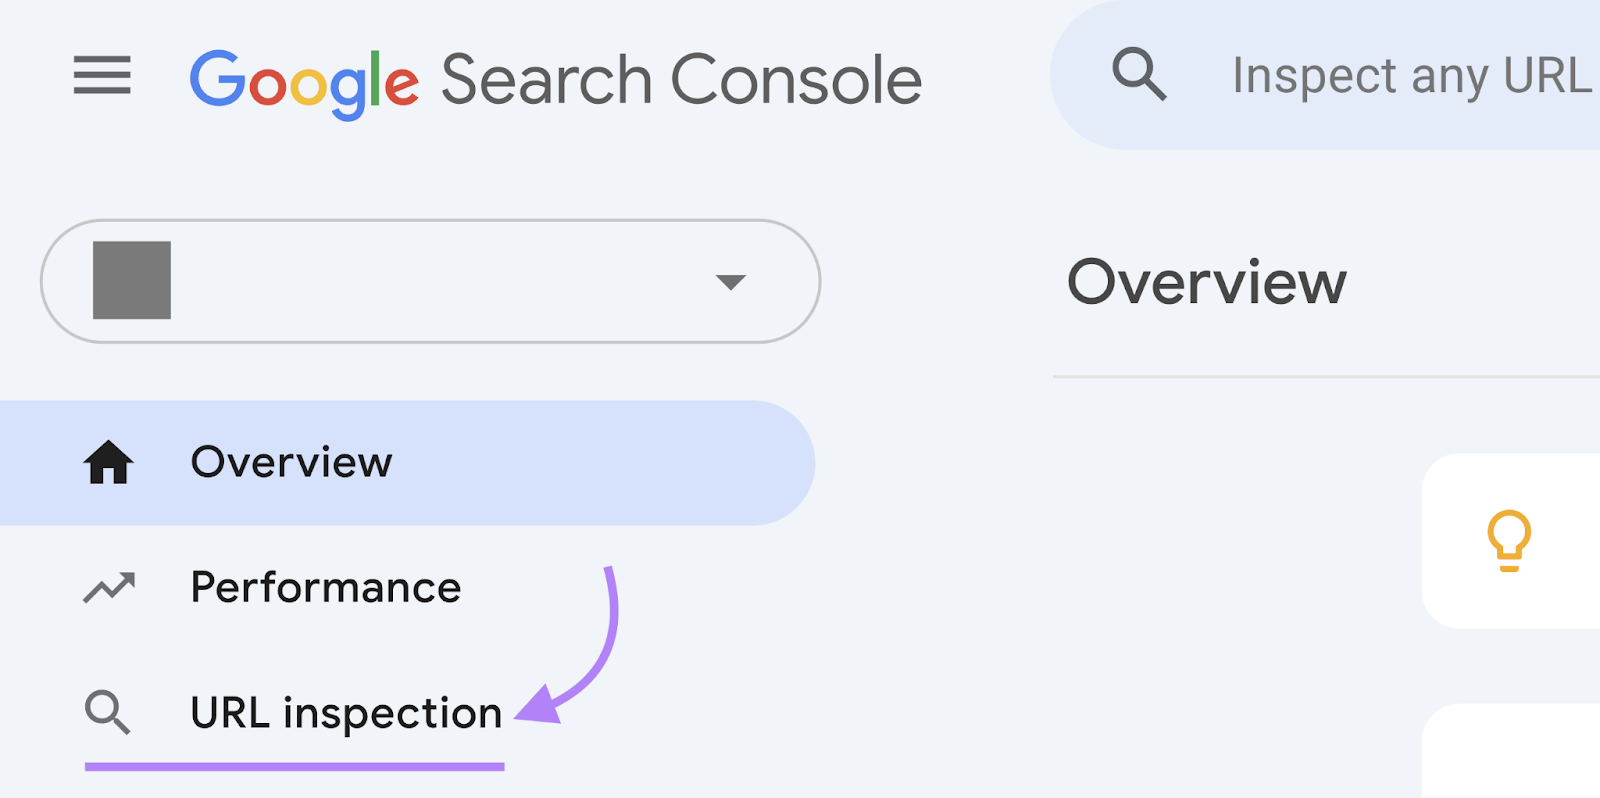
Now, paste the URL of the page you want Google to recrawl. And hit return.

And click “Request Indexing.”
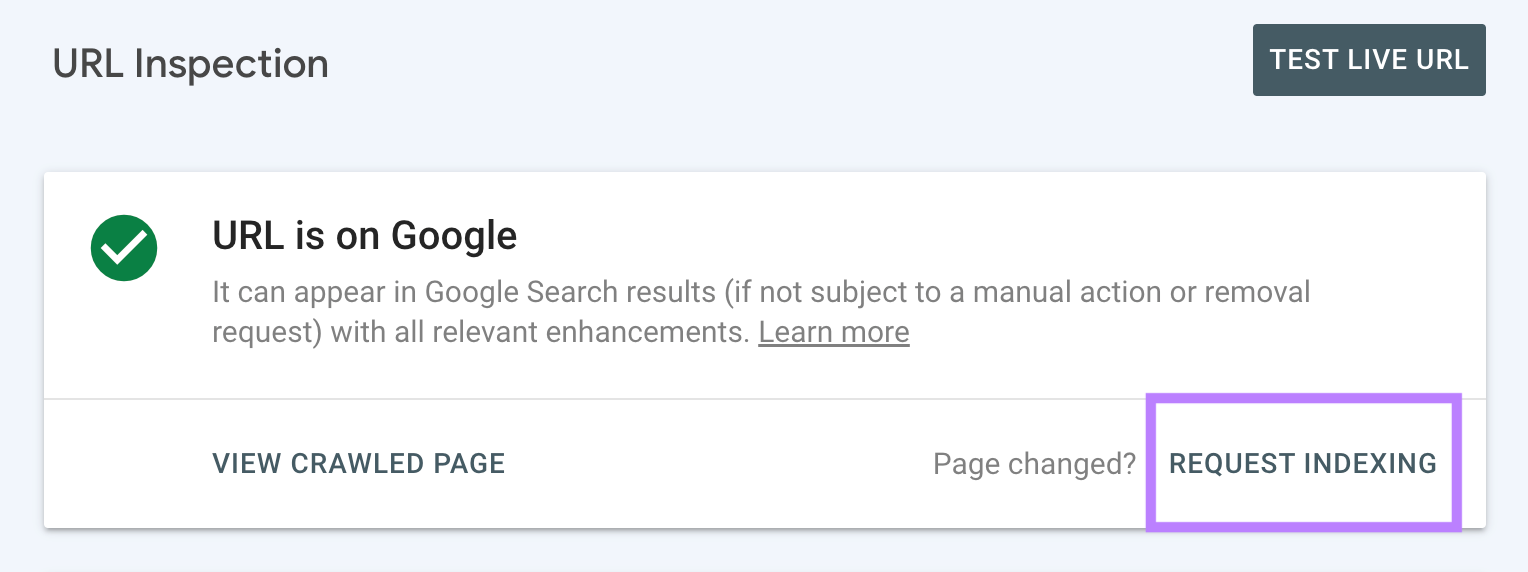
Google will then recrawl this page.
6. Regularly Review Your Noindexed Pages
It’s important to check your noindexed pages from time to time. Because mistakes can happen without you noticing. Like if someone on your team accidentally noindexed a page.
By monitoring your noindexed pages regularly, you can find and fix these mistakes quickly. So you don’t see a dip in performance.
Keep track of your noindexed pages using the Site Audit tool.
To make things even easier, schedule regular scans.
Just go to the “Schedule” tab during setup. And select the option to monitor your website on a weekly basis before clicking “Start Site Audit.”
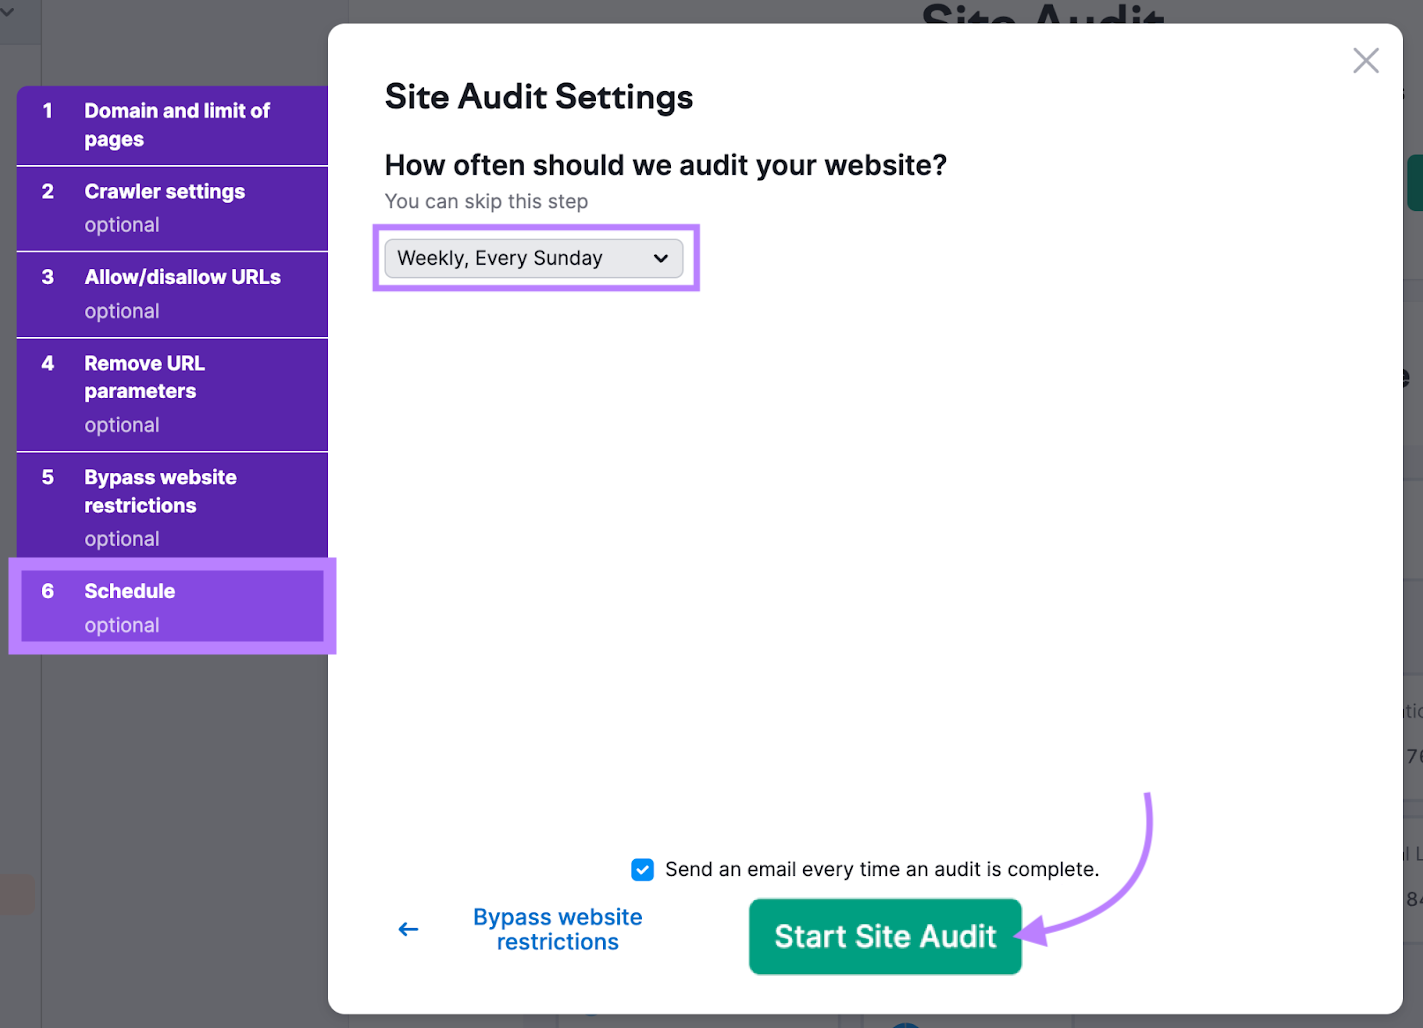
This audit will run on a weekly basis. So you can stay on top of any issues that might crop up in the future.
Source link : Semrush.com
